Looking at outdated fireplace tiles every day?
You’re not alone.
Many homeowners feel stuck with their old fireplace tiles, thinking a complete replacement is the only solution.
The good news?
Revive your fireplace’s look easily without messy and costly tile replacement.
With the right materials and preparation, you can paint your fireplace tiles for a fresh appearance.
This method has worked well for countless home projects, creating lasting results that stand up to daily use.
Even in homes with children who place toys on the fireplace ledge, a well-executed paint job maintains its appearance.
In this guide, you’ll learn:
- The exact supplies you need for successful tile painting
- A straightforward preparation process that ensures paint adhesion
- Step-by-step painting instructions anyone can follow
- Tips to make your painted tiles last longer
Let’s start with the basics and work through each step to help you create the fireplace look you want. Remember, the key to success lies in the preparation – a lesson that will become clear as we move forward.
What You’ll Need
| S No. | Item |
|---|---|
| 1 | Cleaning supplies |
| 2 | Sanding materials |
| 3 | Bonding primer |
| 4 | Paint selection |
| 5 | Application tools |
| 6 | Safety equipment |
Steps to Paint Your Fireplace Tile
Step 1- Clean the Surface
- Start with a thorough cleaning of the tile surface
- Use bathroom tile cleaner or an abrasive cleaner like CLR or Bar Keepers Friend
- Work with the textured side of a cleaning sponge
- Remove all dirt, soot, and residue from the surface
- Pay extra attention to the grout lines and corners
- Let the surface dry completely before moving to the next step
Step 2 – Sand the Tile
- Use 100-grit or higher sandpaper
- The goal is to remove the glossy finish from the tiles
- Don’t worry if you can’t see visible scratches – the sanding is still working
- Sand in consistent, circular motions across all tile surfaces
- This step creates a surface the primer can bond to effectively
- Don’t skip this step – it’s crucial for long-term paint adhesion
Step 3 – Clean Again
- Remove all dust from sanding
- Wipe down with a clean, damp cloth
- Make sure no sanding residue remains
- Allow the surface to dry completely
- Check for any spots you might have missed
- This second cleaning ensures the best possible surface for primer
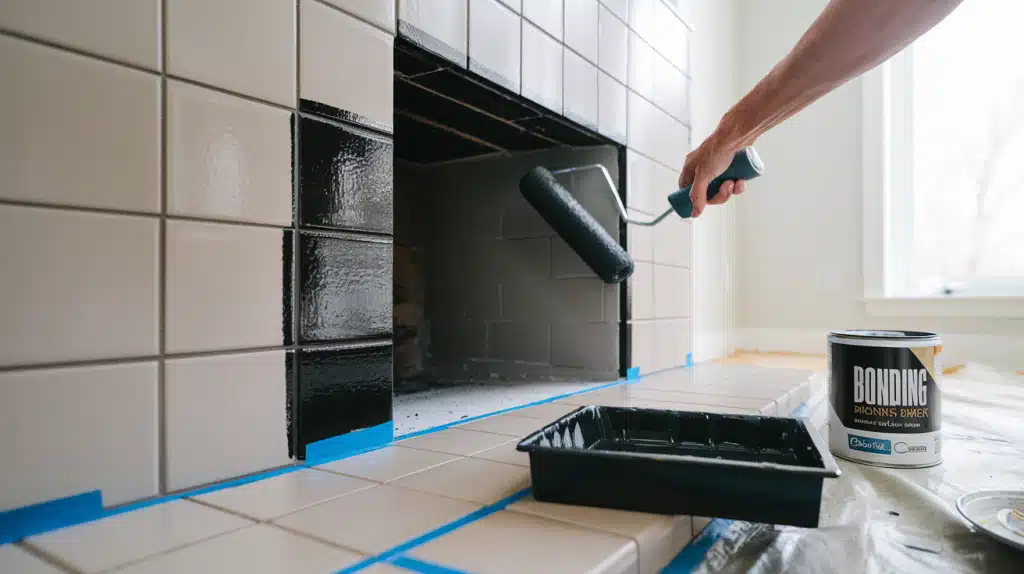
Step 4 – Apply Bonding Primer
- Use a high-quality bonding primer specifically made for tile
- Apply with a foam roller for smooth surfaces
- Use an angled brush for corners and edges
- Allow 24 hours between primer coats
- Apply two coats of primer for best results
- Ensure even coverage across all tiles
Step 5 – Paint Application
- Choose a high-quality paint for your final color
- Use a foam roller to prevent brush marks
- Keep brush strokes in the same direction
- Start from the top and work down
- Apply thin, even coats
- Multiple thin coats work better than one thick coat
Step 6 – Drying and Curing
- Allow 24 hours between paint coats
- Apply a second coat if needed
- Let the final coat dry for at least 48 hours
- Avoid touching or placing items on the surface
- Give adequate time for full curing
- The longer you can wait before regular use, the better
Video Tutorial
The below-attached video is by Kelly Concepts to get a better understanding of how to paint your fireplace tile:
Important Considerations while Painting Fireplace Tile
Avoid These Areas
The painting method we’ve discussed isn’t suitable for all tile surfaces in your home. Specifically, stay away from:
- Bathroom shower tiles
- Bathtub surrounds
- Kitchen backsplashes
- Floor tiles in high-traffic areas
- Areas exposed to constant water
These locations need specialized products like epoxy-based paints or professional tile glazing kits.
Regular exposure to water, cleaning chemicals, and physical contact would quickly damage standard paint, leading to peeling and chipping.
Maintenance Requirements
To keep your painted tiles looking fresh:
- Clean with soft clothes only
- Use mild cleaning solutions
- Avoid abrasive cleaners
- Address any chips or scratches promptly
- Keep heavy objects away from painted surfaces
- Regular light dusting prevents buildup
Cost Benefits
Consider the financial aspects:
- Paint supplies cost significantly less than tile replacement
- The project requires basic tools most homeowners already own
- One weekend of work saves hundreds in contractor fees
- Touch-ups are simple and affordable
- The transformation provides excellent value for the investment
Tips for Success
1. Choosing the Right Paint System
Select proper materials for your project.
Begin with a quality bonding primer for tile surfaces.
For the final coat, use high-end paint brands like Valspar or Sherwin-Williams.
For fireplace tiles, choose paint suitable for mild temperature changes.
Consider the sheen; matte finishes conceal flaws better than glossy finishes.
2. Master the Cleaning Process
A spotless surface ensures that the paint sticks properly.
First, use a basic tile cleaner with a textured sponge to remove surface dirt.
For stubborn spots, products like CLR or Bar Keepers Friend work well.
After sanding, wipe everything down again to remove dust.
Let each cleaning stage dry fully before moving forward.
Remember, leftover residue can prevent paint from sticking properly.
3. Perfect Your Sanding Technique
Use 100-grit or higher sandpaper on all tile surfaces.
Work in small circles to create an even surface.
While you might not see obvious scratches, the process removes gloss and creates tiny grooves for paint to grip.
Pay extra attention to tile edges and corners.
Don’t rush this step – proper sanding prevents future paint peeling.
4. Follow the Right Paint Steps
Apply primer in thin, even coats using a foam roller.
Let each coat dry for 24 hours.
For corners and edges, use an angled brush, keeping strokes in one direction.
When applying color coats, maintain a wet edge to prevent lap marks.
Two thin coats usually work better than one thick layer.
Always check your work under good lighting to spot any missed spots.
5. Handle the Curing Period
The paint might feel dry, but proper curing takes time.
Wait 48 hours after the final coat before placing any items on the surface.
Keep children and pets away during this time.
The longer you can wait before regular use, the stronger the paint bond.
Watch for potential wear spots in the first few weeks to catch any issues early.
Final Thoughts
Painting your fireplace tiles offers a budget-friendly way to update your home’s look.
You can create a lasting finish for daily use with proper preparation and the right materials.
The key steps – cleaning, sanding, priming, and painting – work together to ensure your paint job stays beautiful.
Ready to start your fireplace makeover?
Gather all your supplies first and set aside a full weekend for the project.
Take your time with each step, especially the surface preparation.
Your patience will pay off with professional-looking results.
Want more home improvement tips?
Let’s make your fireplace the centerpiece it deserves to be.