Want to bring your plain candles to life with color? Store-bought candles can look flat and boring. But with just a few basic tools, you can turn them into personal art pieces that light up your home.
Paint can add charm to any candle shape or size. This simple craft doesn’t need fancy tools or years of art training. Even beginners can create beautiful results on their first try.
In this blog, I’ll show you how to paint candles step by step. You’ll learn which paints work best on wax surfaces, how to fix common mistakes without starting over, and get simple design ideas for your first projects.
Let’s start making your candles look as good as they smell! With these tips, you’ll soon have custom candles that friends will ask about.
Why Paint Candles?
Painting candles lets you match them to your home decor without spending lots of money. You can update old candles instead of buying new ones, saving cash while being kind to the planet.
Painted candles make thoughtful gifts that friends will love. A candle with hand-painted flowers or stars shows you cared enough to make something by hand.
This craft is also perfect for beginners. Unlike other art forms, candle painting is forgiving. If you make a mistake, you can often wipe it away before the paint dries.
How to Paint Your Candles: Step-By-Step Guide
Candle painting is simple when you follow these steps. The key is working with dry brushes and having patience between layers.
Materials You’ll Need:
Before you start, gather these basic supplies:
| Materials | Why You Need It |
|---|---|
| Plain candles (taper, pillar, or any shape) | Your blank canvas |
| Water-based, non-toxic acrylic paint | Sticks well to wax without water |
| Small dry paintbrushes | For fine details and control |
| Paper towels or wipes | To clean up any mistakes |
| Reference images | For design ideas |
| Optional: Candle adhesive | Helps candles stand securely while painting |
| Optional: Air-dry clay | To make custom candle holders |
Step 1: Set Up Your Workspace
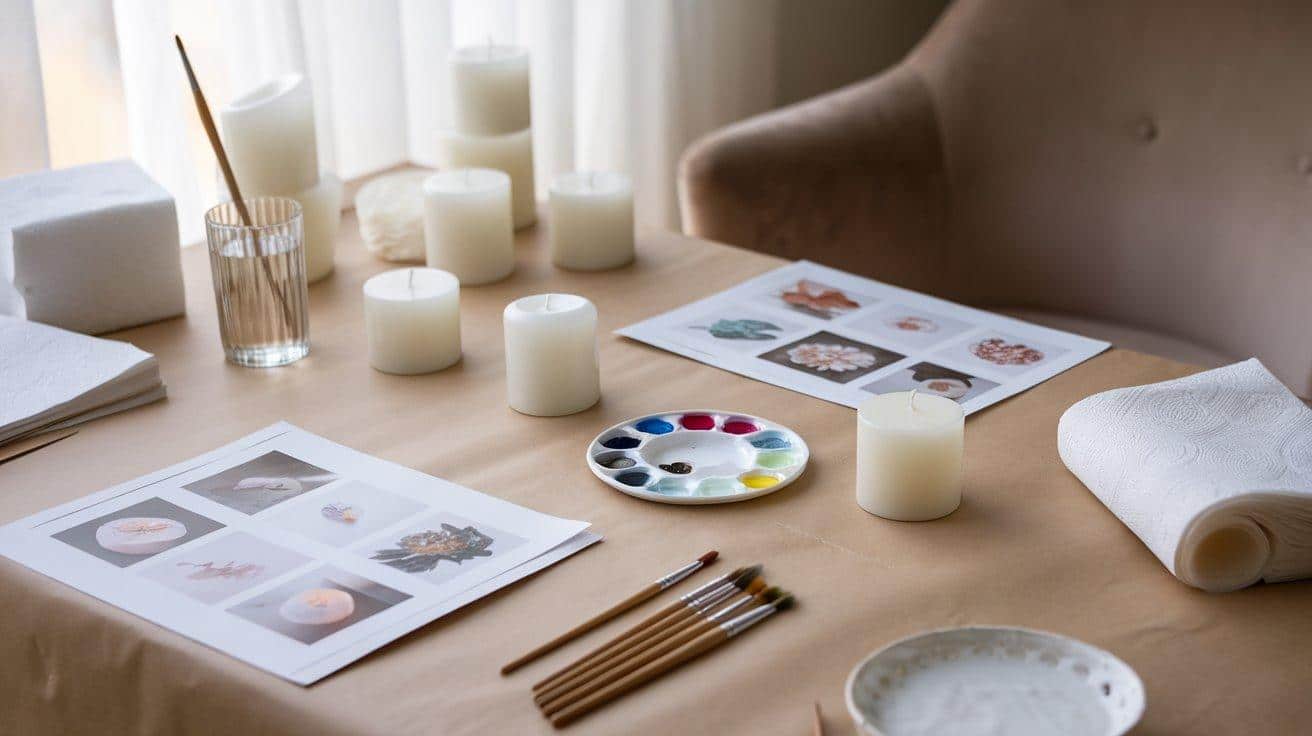
Cover your table with paper or plastic to catch paint drips. Keep your brushes, paints, and other tools within reach before you start. Good lighting helps you see details as you work.
Step 2: Plan Your Design
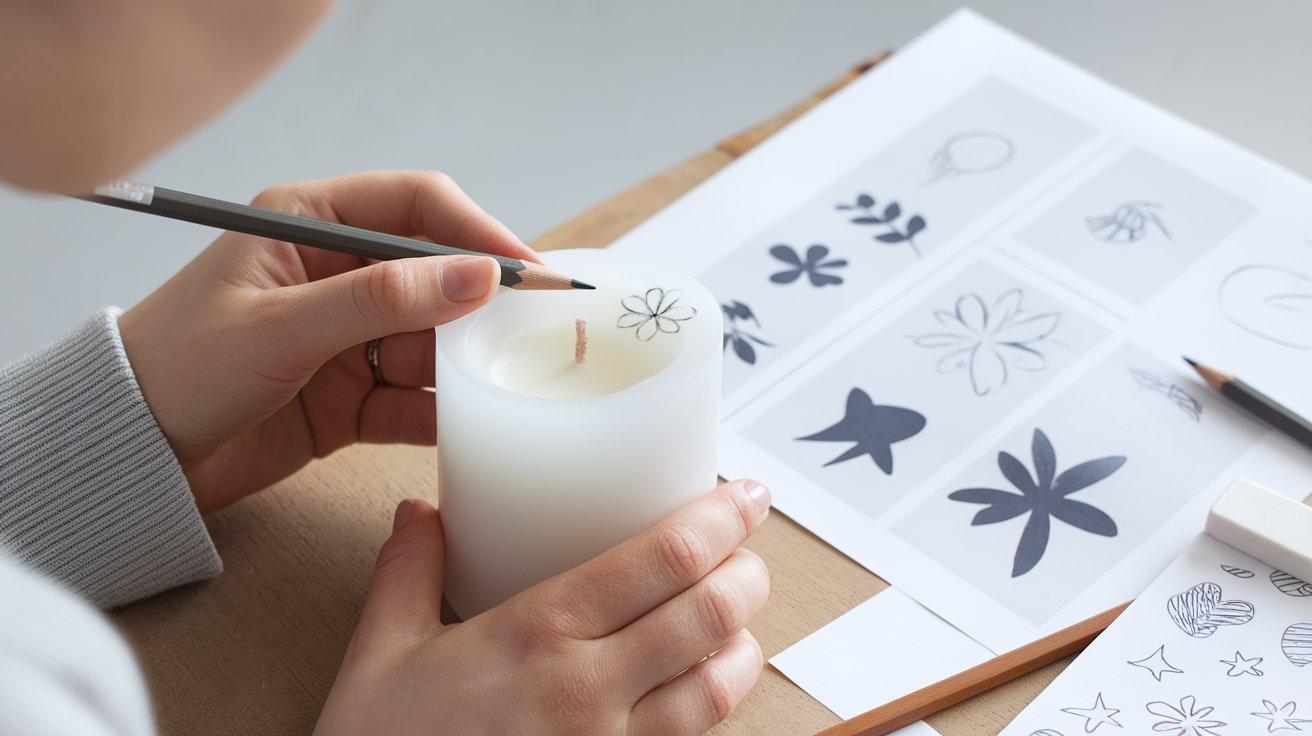
Think about what you want to paint on your candle. For beginners, simple shapes work best. You might choose flowers, stars, or basic patterns. You can sketch your design lightly on the candle or work freehand if you feel sure.
Step 3: Use a Dry Brush
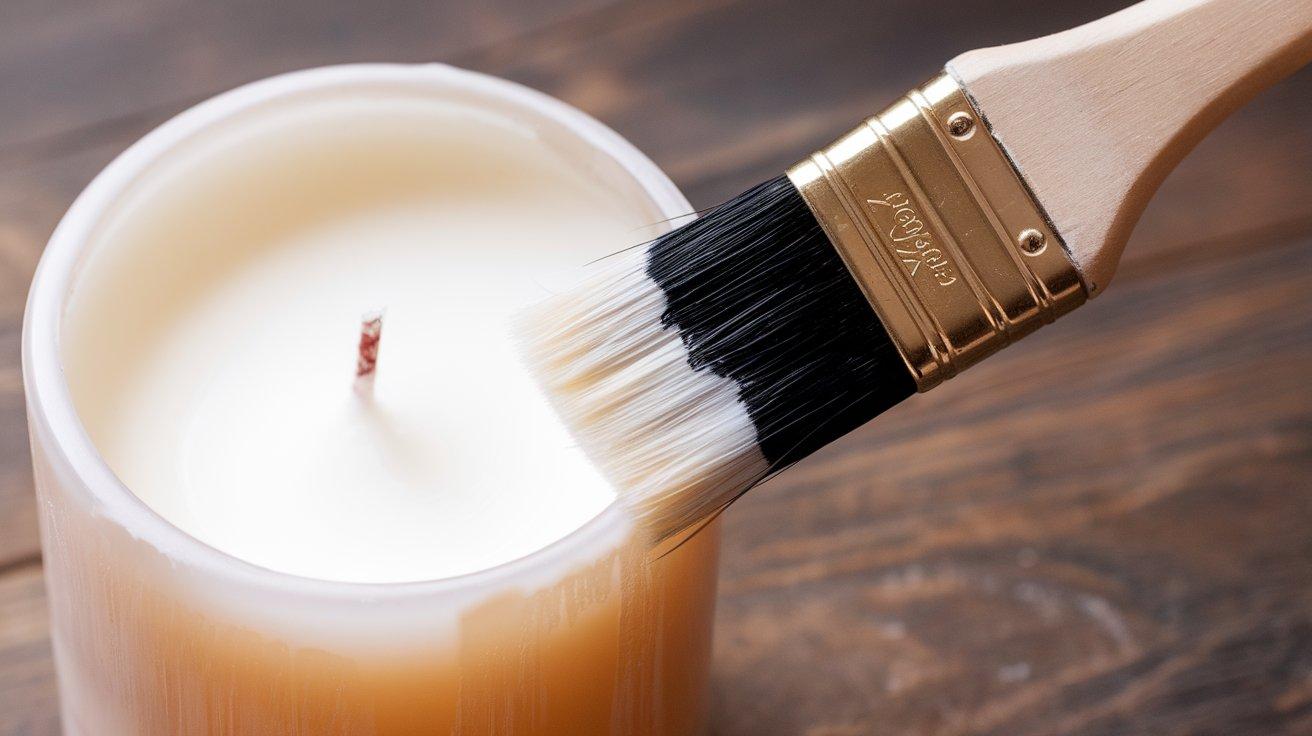
This step is so important! Dip your brush in paint, but don’t add water. Water and wax don’t mix, so wet paint won’t stick to your candle. Start with light strokes and thin lines.
Paint tips:
- Use very little paint on your brush
- Build up color slowly with multiple thin layers
- Let each layer dry before adding more
Step 4: Paint the Base Design

Start with the main parts of your design, like stems, if you’re painting flowers. If you make a mistake, quickly wipe it off with a paper towel before the paint dries.
Drying time:
- Let the first layer dry fully (about 30 minutes)
- Check by gently touching a painted area
- If any paint comes off on your finger, it needs more time
Step 5: Add Details and Color
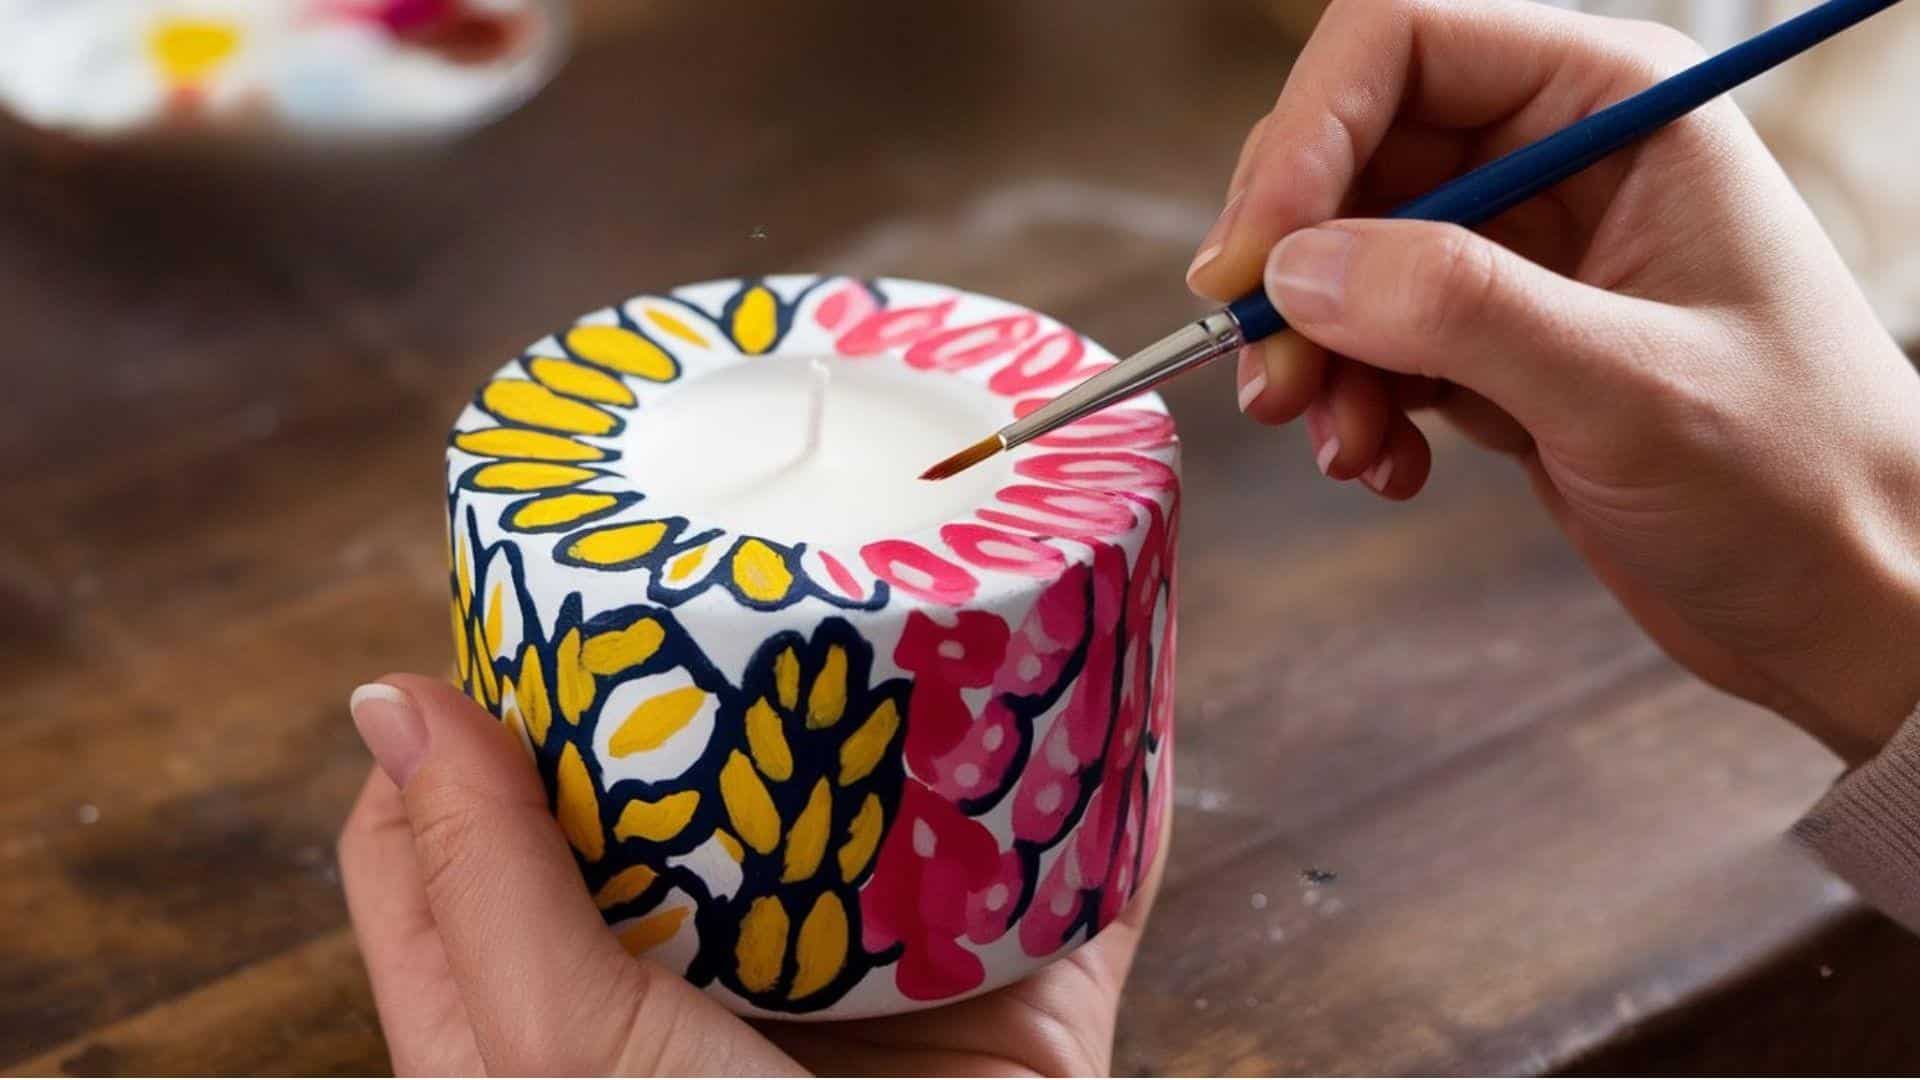
Now add smaller details that bring your design to life. For flowers, add petals, centers, or leaves. Use bright colors to make your artwork stand out against the candle.
Detail tips:
- Use a smaller brush for tiny features
- Add white highlights to make colors pop
- Keep your hand steady by resting your wrist on the table
Video Tutorial
I’d like to acknowledge Y Street Studio for the insightful video, which was a key reference in putting this guide together.
Tips to Keep Your Painted Candles Long-Lasting
- Store in cool, dry places away from sunlight to prevent color fading
- Use a soft brush or cloth for gentle dusting – never use water or cleaners
- Trim wicks to 1/4 inch before each lighting for a cleaner burn
- Don’t burn painted candles for more than 4 hours at once
- Keep away from heat sources when not in use
- Use glass hurricane covers to protect from dust while on display
- Handle carefully to avoid scratching or smudging the paint
- Place tissue paper between candles if you need to stack them
Design Ideas to Try
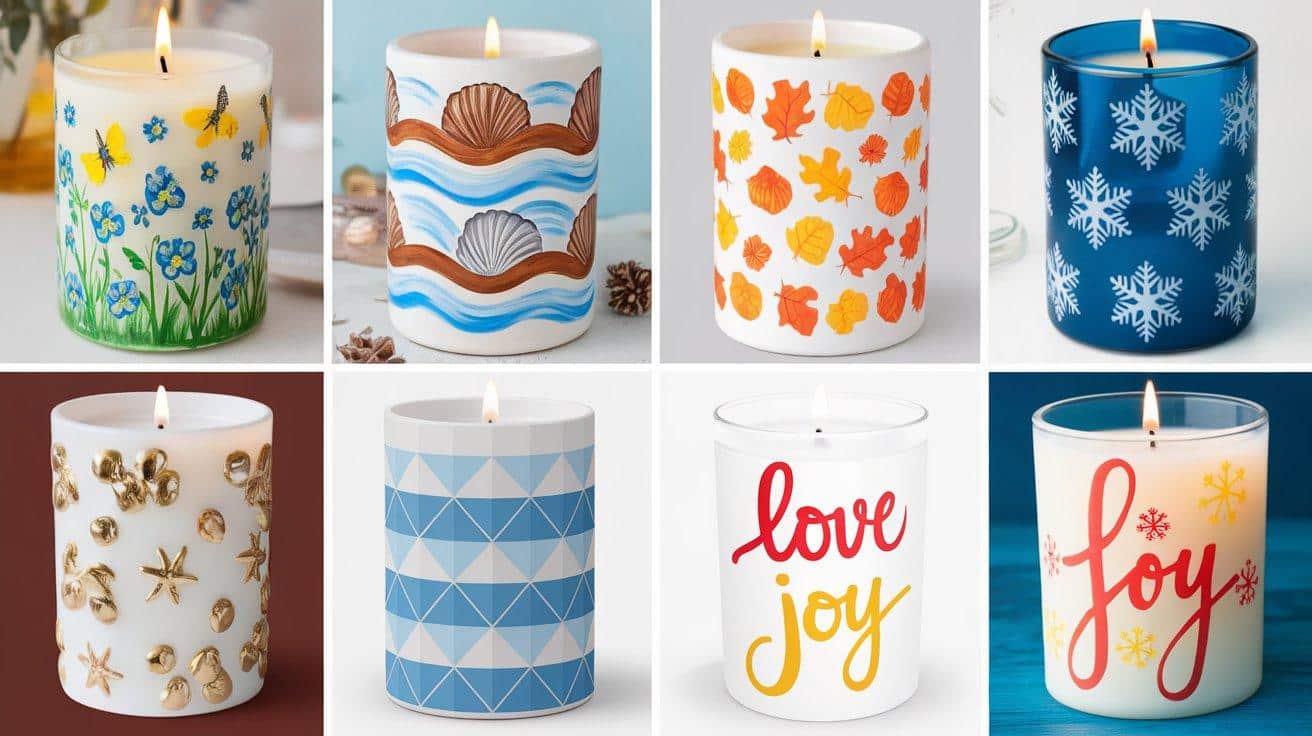
1. Seasonal Themes: Seasonal candle designs can reflect the time of year.
- Spring: daisies, tulips, or butterflies.
- Summer: beach themes like waves and shells.
- Fall: leaf shapes or pumpkins.
- Winter: snowflakes, stars, or holly berries.
2. Geometric Patterns: Geometric patterns can make stylish candle decorations. Start with evenly spaced dots, lines, crosses, or triangles. Use a ruler for straight lines and even spacing, but avoid pressing too hard on the wax.
3. Text and Words: Words like “Peace,” “Joy,” or “Love” add a personal touch to candles. Use a thin brush and take your time. If needed, mark letter positions with pencil dots before painting.
Troubleshooting Common Problems
This section helps identify and resolve frequent issues, offering practical solutions to ensure smoother operations and better performance.
1. Fixing Paint Mistakes: If you make a mistake with wet paint, quickly wipe it with a dry paper towel. For dried paint, you have two options:
- Cover it with a matching background color, then try again once dry
- Change your design to include the mistake—a dot could become a flower center!
2. Paint Not Sticking: If your paint beads up on the candle, your candle may have a waxy finish that’s too slick. Try these fixes:
- Gently rub the area with a paper towel to remove excess wax
- Use less paint on your brush—too much can make it slide
- Try a different brand of acrylic paint made for slick surfaces
3. Keeping Colors Bright: Some paints look dull on candles. To make them brighter:
- Start with a white candle if possible
- Apply two thin coats instead of one thick coat
- Add white highlights to make colors pop
Where Can You Use Painted Candles?
For Home Displays: Group painted candles of different heights for a table centerpiece. Place them on mirrors to reflect the light. Use them in bathrooms, on coffee tables, or bookshelves.
For safety, keep painted candles away from curtains, paper, or anything that could catch fire. Always place them on a heat-safe surface.
Perfect for Personal Gifts: Painted candles make wonderful gifts for:
- Birthdays
- Holidays
- Housewarming parties
- Thank-you gifts
- Mother’s Day or Father’s Day
Pair your painted candle with a small candle holder or a box of matches for a complete gift.
Conclusion
Painting candles is a fun, low-cost way to add color to your home. With some acrylic paint and a few dry brushes, you can change plain candles into something special.
The key points to remember are: use dry brushes, start with simple designs, and let each layer of paint dry fully. These tips will help you create beautiful candles every time.
Why not try this project this weekend? Pick up some plain candles and basic acrylic paints, and see what you can create. Your home will thank you for the warm, handmade touch.
Let us know in the comments if you’ve tried painting candles and how they turned out!
Frequently Asked Questions
Will Painting Affect How My Candle Burns?
If you keep paint away from the wick area, your candle should burn normally. Painting on the outer areas won’t affect the burn path or scent release.
Can I Use Regular Craft Paint Instead of Acrylic Paint?
Acrylic works best on wax. Regular craft paints may peel or not stick properly. Oil-based paints should be avoided as they can be flammable.
How Long Does the Paint Take to Fully Cure on Candles?
Most acrylic paint dries to the touch in 20-30 minutes, but allow 24 hours for it to fully cure before handling, wrapping, or burning your painted candle.