Have you ever noticed how Polaroid photos have distinctive white borders? Many people struggle to get the exact measurements when framing or scanning these unique snapshots.
Knowing the correct dimensions of your Polaroid pictures helps you prepare proper storage solutions, create fitting digital copies, and design suitable frames that highlight your memories.
With the right measuring approach, you’ll save time and money on frames that fit perfectly. You’ll also prevent damage to your photos and keep your precious moments looking their best for years to come.
Read on to learn the step-by-step process for measuring different Polaroid formats, including classic vintage models and modern Instax variations. This simple guide will make your photo projects much easier.
Standard Polaroid Picture Sizes
When discussing Polaroid photos, it’s helpful to know that they come in several standard sizes. Each type has specific measurements for both the image area and the full print, including the white border.
1. Original Polaroid SX-70 and 600 Film
- Full photo dimensions: 3.1 × 3.1 inches (79 × 79 mm)
- Image area only: 3.1 × 3.1 inches (79 × 79 mm)
- White border included in total size
2. Polaroid Spectra/Image Film
- Full photo dimensions: 3.6 × 2.9 inches (92 × 73 mm)
- Image area: slightly smaller with white borders on all sides
- It has a wider format than standard square Polaroids
3. Polaroid i-Type and OneStep Film
- Same dimensions as the SX-70 and 600 film
- Full photo: 3.1 × 3.1 inches
- The modern version of the classic square format
4. Fujifilm Instax Mini
- Full photo size: 3.4 × 2.1 inches (86 × 54 mm)
- Image area only: 2.4 × 1.8 inches (62 × 46 mm)
- Credit card sized format
5. Fujifilm Instax Square
- Full photo size: 3.4 × 2.8 inches (86 × 72 mm)
- Image area: 2.4 × 2.4 inches (62 × 62 mm)
- Modern take on the classic Polaroid square
6. Fujifilm Instax Wide
- Full photo size: 3.9 × 2.4 inches (99 × 62 mm)
- Image area: 3.9 × 2.4 inches (99 × 62 mm)
- Largest instant photo format currently available
Knowing these standard sizes helps when buying frames, albums, or planning how to display your instant photos.
Tools Needed for Measuring Polaroid Picture
| Tool | Purpose |
|---|---|
| Ruler | Measures width, height, and borders. |
| Measuring Tape | Useful for flexible or curved measurements. |
| Digital Caliper | Provides precise thickness measurements. |
| Flat Surface | Ensures accuracy while measuring. |
| Good Lighting | Helps in reading measurements correctly. |
Step-By-Step Process on How to Measure Polaroid Picture
Step 1: Gather Your Tools

You’ll need some basic items to accurately measure your Polaroid photos. Find a ruler or measuring tape that shows both inches and millimeters.
A digital caliper is helpful but not required if you want to be extra precise about thickness. Choose a completely flat table or desk for your work area, and make sure you have good lighting so you can clearly see all edges of the photo.
Step 2: Prepare the Polaroid for Measurement

Place your Polaroid photo on a completely flat surface to ensure you get the correct measurements. Check that the photo isn’t bent or curved, as this will cause wrong readings.
If your photo has slight curling at the edges (common with older Polaroids), you can gently flatten it by placing a heavy book on top for a few minutes before measuring.
Step 3: Measure the Full Width and Height

Take your ruler and position it along the outer edge of the Polaroid. Measure the total width from the left edge to the right edge, making sure to include the white border. Write down this number.
Next, measure the total height from the top edge to the bottom edge. Note that some Polaroid formats have a thicker border at the bottom, so be sure to include the entire photo in your measurement.
Step 4: Measure the Image Area

Now focus on just the image part of your Polaroid. Place your ruler inside the white border and measure only the printed photo section. Measure the width first, going from one side of the actual image to the other.
Then measure the height of just the image area. Record both numbers separately from your full photo measurements. This helps when you need to know just the picture size without borders.
Step 5: Measure the Thickness of the Photo
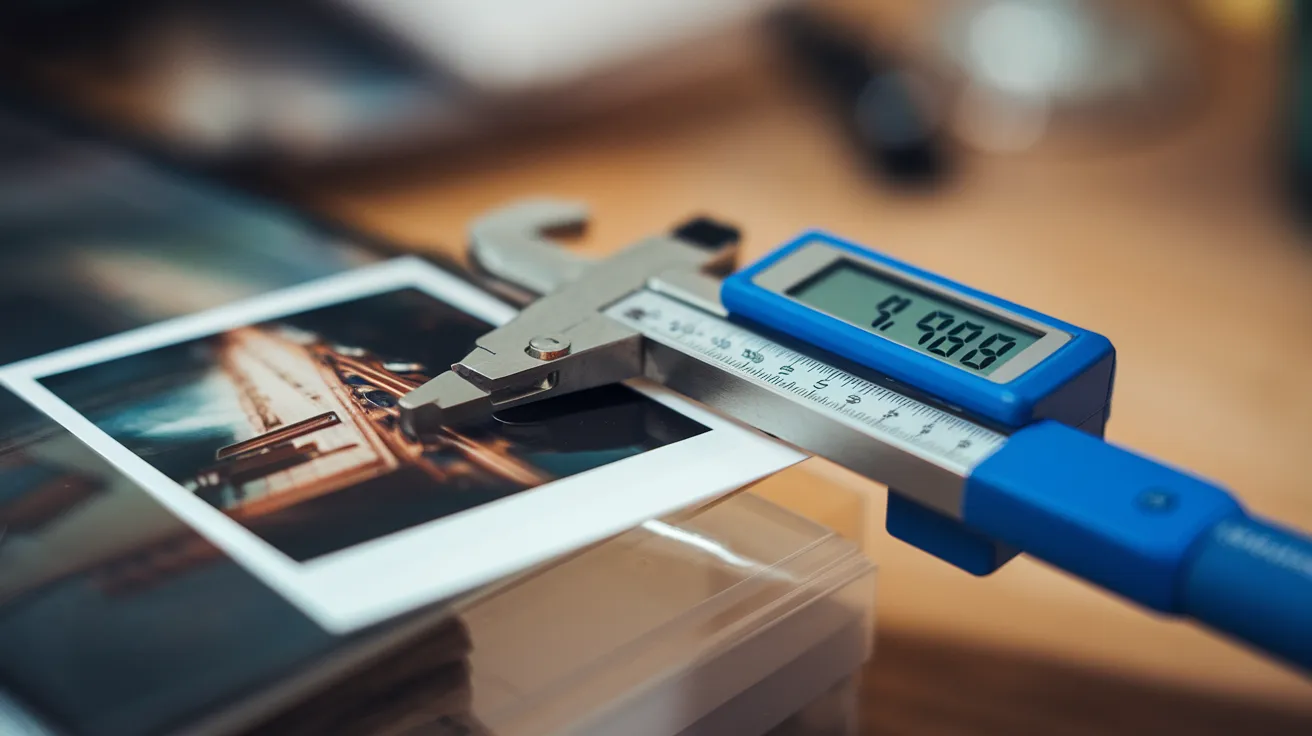
To determine how thick your Polaroid is, use a digital caliper if you have one. Simply place the photo between the caliper jaws and read the display.
If you don’t have a caliper, you can estimate the thickness by comparing it to common items of known thickness. Most Polaroid photos are between 0.23 and 0.30 millimeters thick, though this can vary depending on the film type and age.
Step 6: Double-check for Variations

Take a moment to check your measurements again for accuracy. Keep in mind that older Polaroid photos might have slightly different sizes due to age-related changes or warping.
Special edition Polaroid films sometimes have unique border designs that can change the overall dimensions. For the most reliable results, take multiple measurements and average them together.
Step 7: Compare Your Measurements with Standard Sizes

Now that you have your measurements compare them to the standard sizes for different Polaroid formats. The following table provides a quick reference for the most common Polaroid sizes:
| Polaroid Type | Full Dimensions (Including Border) | Image Area (Excluding Border) |
|---|---|---|
| Polaroid 600 & i-Type | 4.2 × 3.5 inches (107 × 88 mm) | 3.1 × 3.1 inches (79 × 79 mm) |
| Polaroid SX-70 | 3.5 × 4.2 inches (88 × 107 mm) | 3.1 × 3.1 inches (79 × 79 mm) |
| Polaroid Go | 2.1 × 3.3 inches (53.9 × 83.9 mm) | 1.85 × 1.8 inches (47 × 46 mm) |
By matching your measurements to this table, you can easily identify which type of Polaroid you have. This is especially helpful if you’re working with older or unmarked Polaroid photos and need to know their format.
Step 8: Record and Use the Measurements

Write down all your measurements in a notebook or digital document for future reference. Include both the full photo size and the image-only area.
These notes will be very helpful when you need to buy frames, scans, or create digital copies of your photos. Having exact measurements when planning to frame or display your Polaroids saves you time and helps you avoid buying frames that don’t fit properly.
Common Uses for Knowing Polaroid Dimensions
- Printing and Framing: Knowing the exact size of your Polaroid photos helps you select the right frame size. Standard frames often don’t match Polaroid dimensions, so you might need custom framing or photo mats to properly display your instant photos without cropping important parts of the image.
- Crafting and Scrapbooking: When creating memory books or craft projects, having precise measurements allows you to plan layouts more effectively. You can cut pockets, slots, or backing papers to the correct size to showcase your Polaroids properly without damaging the edges.
- Digital Scanning and Resizing: Understanding the exact dimensions helps when scanning Polaroids for digital backup. You can set the correct dimensions in your scanning software to capture the full photo at the proper resolution, making sure nothing gets cut off during the process.
- Photo Album Organization: With accurate measurements, you can select or create photo albums with pockets that properly fit your specific Polaroid format. This prevents photos from sliding around, getting bent corners, or becoming damaged due to improper storage solutions.
- Creating Display Templates: If you’re making a photo wall, gallery display, or custom photo holder, knowing the dimensions allows you to build templates with the right spacing and proportions. This ensures a clean, professional look and proper alignment for multiple photos.
- Selling or Appraising Vintage Polaroids: For collectors or sellers of vintage Polaroid photos, dimensions help identify the specific camera and film type used. This information can affect the value of historic or collectible photos, especially for limited edition or discontinued Polaroid formats.
Conclusion
Getting the right measurements for your Polaroid photos might seem like a small detail, but it makes a big difference.
Throughout this guide, we’ve walked through how to measure different types of instant photos correctly, from the full outer edges to just the image part.
When you know the exact size of your Polaroids, you can find perfect frames, make better scans, create more organized photo albums, and even spot which camera took your favorite shots.
This small bit of knowledge helps keep your memories safe and looking their best.
Next time you hold a Polaroid in your hands, take a moment to notice its unique size and shape – these physical traits are part of what makes instant photos so special and worth keeping.