Are you looking to add some green to your walls but don’t want the upkeep of live plants? I know the feeling. Getting fresh plants to stay alive on walls can be tough and time-consuming.
I’ve found a perfect fix – making moss wall art. These natural-looking pieces need no water or care, yet they bring a lovely outdoor feel inside your home.
In this guide, I’ll show you my tested method to create moss wall art. You’ll learn which materials work best, how to plan your design, and the steps to put it all together.
Plus, I’ll share some helpful tips I picked up while making these pieces for my own home.
An Overview of Moss Wall Art
I first learned about moss wall art when I was searching for ways to decorate my small apartment. These wall pieces use preserved moss to create natural-looking artwork that fits any space.
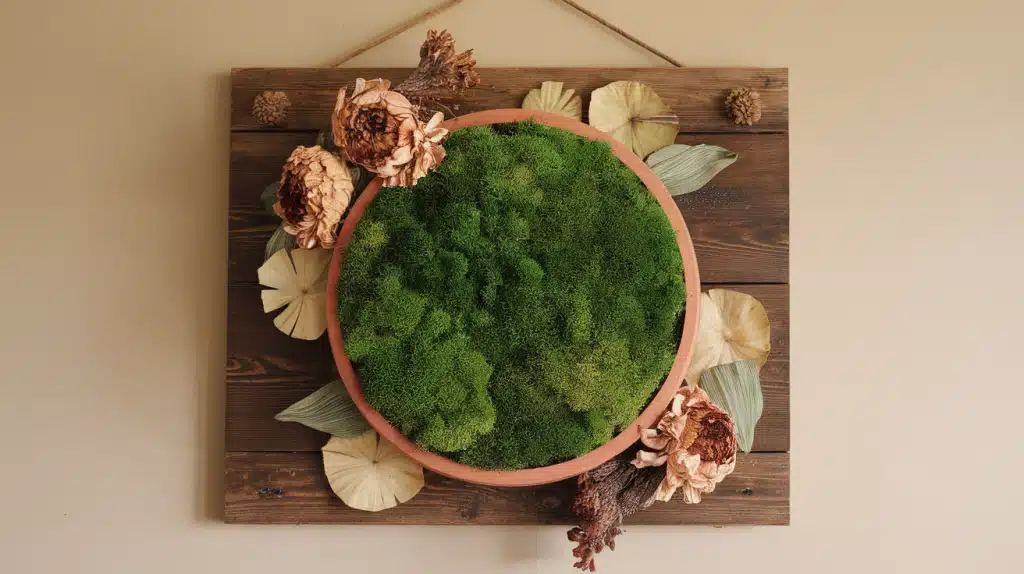
The beauty of moss art lies in its simplicity. Think of it as painting with nature – except instead of paint, you’re using soft, dried moss. The moss keeps its green color and fluffy texture, but it won’t grow or need any care.
What makes moss art special? I can tell you from my own pieces – they add texture and life to plain walls. Unlike framed pictures, moss art creates a 3D effect that catches your eye.
Best of all, these pieces work well in any room, from living spaces to offices.
The real win? You don’t need gardening skills. If you can glue things together, you can make moss art. I’ve made several pieces now, and each one turns out different and special.
How to Choose the Right Moss for Your Project
When I first started making moss wall art, I learned that picking the right moss makes a big difference. Let me share what I found works best.
Types of Preserved Moss You Can Use
- Sheet Moss: I love using this as my base layer. It’s flat and comes in big pieces, making it easy to cover large areas. The moss feels like a soft, green carpet and sticks well to boards.
- Reindeer Moss: This is my go-to for adding height and texture. It looks like tiny branches clumped together. I often use it to create raised areas or borders in my designs.
- Pillow Moss: This type has a round, puffy look. I add it when I want some spots to stand out. It’s thicker than sheet moss but not as tall as reindeer moss.
Tips for Picking Quality Moss
- Touch the moss before buying – it should feel dry but not brittle
- Look for bright, even colors throughout the pieces
- Check that pieces hold together when you handle them
- Buy a bit extra – I always get 20% more than I think I’ll need
What to Avoid
- Skip moss that feels damp or smells musty
- Don’t use moss with brown or yellow spots
- Stay away from pieces that crumble easily
Step-by-Step Process for Creating Moss Wall Art
Tools & Materials Required
- 24×48 inch clear acrylic glass sheet (1/4 inch thick)
- Step drill bit
- 6 standoff screws
- Protective gloves
- Hot glue gun or Mod Podge
- Cardboard (for design template)
- Drill
- Dish soap
- Water spray bottle
- 4 different colors of preserved moss
- Plate or bowl (if using Mod Podge)
Step-by-Step Process of Making It
1. Planning and Setup
- Keep the cardboard from the acrylic sheet packaging for templates
- Mark screw hole positions 2 inches from the edges on cardboard
- Draw your design pattern on a separate cardboard piece
- Label moss color placement in each section of your design
2. Drilling the Holes
- Place glass over the marked cardboard template
- Put a tiny amount of dish soap on the drill bit
- Spray a little water on drilling spots
- Carefully drill holes where marked
3. Attaching the Moss If using Mod Podge
- Pour some Mod Podge into a plate
- Dip moss pieces into the glue
- Press onto the glass following your design
If using hot glue:
- Apply hot glue directly on the glass
- Press moss pieces into place
- Follow your design pattern
4. Finishing Up
- Let the piece dry for about an hour
- Take it outside and gently shake off loose pieces
- Carefully dust off the edges
- Install standoff screws in the wall
- Hang your finished moss art
The whole process takes about 2-3 hours, plus drying time.
An Approximate Cost Analysis for Creating
An Approximate Cost Analysis for Creating Moss Wall Art (24×48 inches)
| Category | Item | Cost Range ($) |
|---|---|---|
| Basic Materials | Clear acrylic sheet (24×48″) | 40-50 |
| Preserved moss (4 colors) | 25-35 per bag | |
| Standoff screws (set of 6) | 15-20 | |
| Step drill bit | 10-15 | |
| Adhesive Options | Mod Podge | 8-10 |
| Hot glue gun + sticks | 12-15 | |
| Safety Items | Work gloves | 5-8 |
| Total Cost Range | Low end | ~130 |
| Mid-range | ~160 | |
| High end | ~190 |
Money-Saving Tips from My Experience
- Buy moss in bulk if you plan to make multiple pieces
- Look for acrylic sheet sales at craft stores
- Save the drill bit for future projects
- Keep leftover moss for touch-ups or small projects
Worth noting: The size of your piece greatly affects the cost. I started with a smaller 12×24-inch piece for about half this price.
Compare this to store-bought moss art, which often costs $300-500 for the same size, and you’ll save quite a bit by making it yourself.
How to Plan Your Moss Wall Art
1. Setting Up Your Design Space
First, find a clean, flat workspace to spread your materials. I like covering my table with old newspaper to catch any falling moss pieces.
Make sure you have good lighting since you’ll be working with different shades of green.
2. Creating Your Design Template
Take the cardboard from your acrylic sheet package and lay it flat. This becomes your planning board. I found that drawing a full-size outline of your acrylic sheet on the cardboard helps you see the true scale of your project.
Use a pencil so you can make changes easily.
3. Design Pattern Ideas
Simple shapes work well for first-time projects. I suggest starting with:
- Geometric patterns like squares and triangles
- Flowing curves that mimic nature
- Stripes of different widths
- A single large shape in the middle
- Mountain-like shapes
4. Color Planning
Take your moss colors and lay them out on the cardboard template. I suggest:
- Using lighter moss colors in the center of your design
- Placing darker shades around the edges
- Testing different color combinations before gluing
- Make small marks on your template to note which color goes where
5. Practical Layout Tips
Mark where your hanging hardware will go before you start the design. I always measure twice:
- Note screw locations on your template
- Leave space around screw points moss-free
- Check that your design balances across the whole piece
- Make sure patterns line up with your room’s style
Benefits of Moss Wall Art
| Category | Key Benefits |
|---|---|
| For Your Space | No sunlight or watering is needed; it fits any room, and the 3D effect makes spaces feel larger. |
| For Your Well-being | It is allergy-friendly, reduces noise, and adds calming natural textures without pollen. |
| For Your Lifestyle | It is low-maintenance, bug-free, long-lasting, easy to clean, and free of mess or spills. |
| For Your Wallet | One-time cost, no replacements needed, saves on upkeep and water bills. |
| For Your Skills | Encourages creativity, makes easy DIY projects, builds confidence, and allows future changes. |
Best Installation & Display Techniques You Can Check Out
1. Finding the Perfect Spot
Set your moss art where people can see its details well. I put mine 5-6 feet up on the wall, just at eye level. Test the look by holding the piece in different spots before making holes.
2. Checking Wall Type and Support
Solid walls need different tools than drywall:
- For drywall: Use wall anchors with your screws
- For concrete: Get special masonry screws
- For wood: Standard screws work fine
3. Light Placement Tips
The right lighting makes moss art look better:
- Put a small light above the piece
- Keep lights 2-3 feet away from the surface
- Use soft white bulbs instead of yellow ones
- Try battery-operated spotlights if you can’t add wiring
4. Installing Steps I Follow
- Mark your wall with a pencil where the screws will go
- Use a level to make sure marks line up
- Drill pilot holes at each mark
- Put in wall anchors if needed
- Screw in the standoff mounts
- Test each mount by pulling gently
- Clean any wall dust
- Place your moss art carefully on mounts
5. Space Planning
- Leave 6-8 inches of wall space around your piece
- Check that the furniture won’t bump the art
- Make sure doors won’t hit it when they open
- Keep it away from air vents
4 Troubleshooting Common Issues

- Loose moss pieces falling off? Let the glue dry fully (24 hours) before hanging – I rushed once and had to redo sections.
- Acrylic sheet looking cloudy? Clean both sides with a microfiber cloth and glass cleaner before starting your project.
- Uneven gaps in your design? Fill small spaces with bits of moss you saved from trimming other sections.
- Standoff screws not lining up? Double-check your measurements and use a paper template to mark holes perfectly.
Conclusion
Making moss wall art opened up a whole new way for me to bring nature into my home.
The best part? Anyone can create these green masterpieces with basic tools and some patience.
This project means more than just wall decor – it’s a chance to make something unique with your own hands. Each piece tells its own story and adds life to any room without the fuss of plant care.
Ready to start your own moss art? Grab your materials and follow the steps I shared. Don’t worry if your first try isn’t perfect – mine wasn’t either!
I’d love to see what you create, so leave a comment below with questions or share pictures of your finished piece.
Let’s fill our spaces with these beautiful green designs together!
Frequently Asked Questions
What Type of Glue Should I Use for Moss?
I’ve tested both Mod Podge and hot glue on moss art. Mod Podge works best for big areas and dries clear. Hot glue gives quick hold but can be lumpy under thin moss.
How Long Does Preserved Moss Art Last?
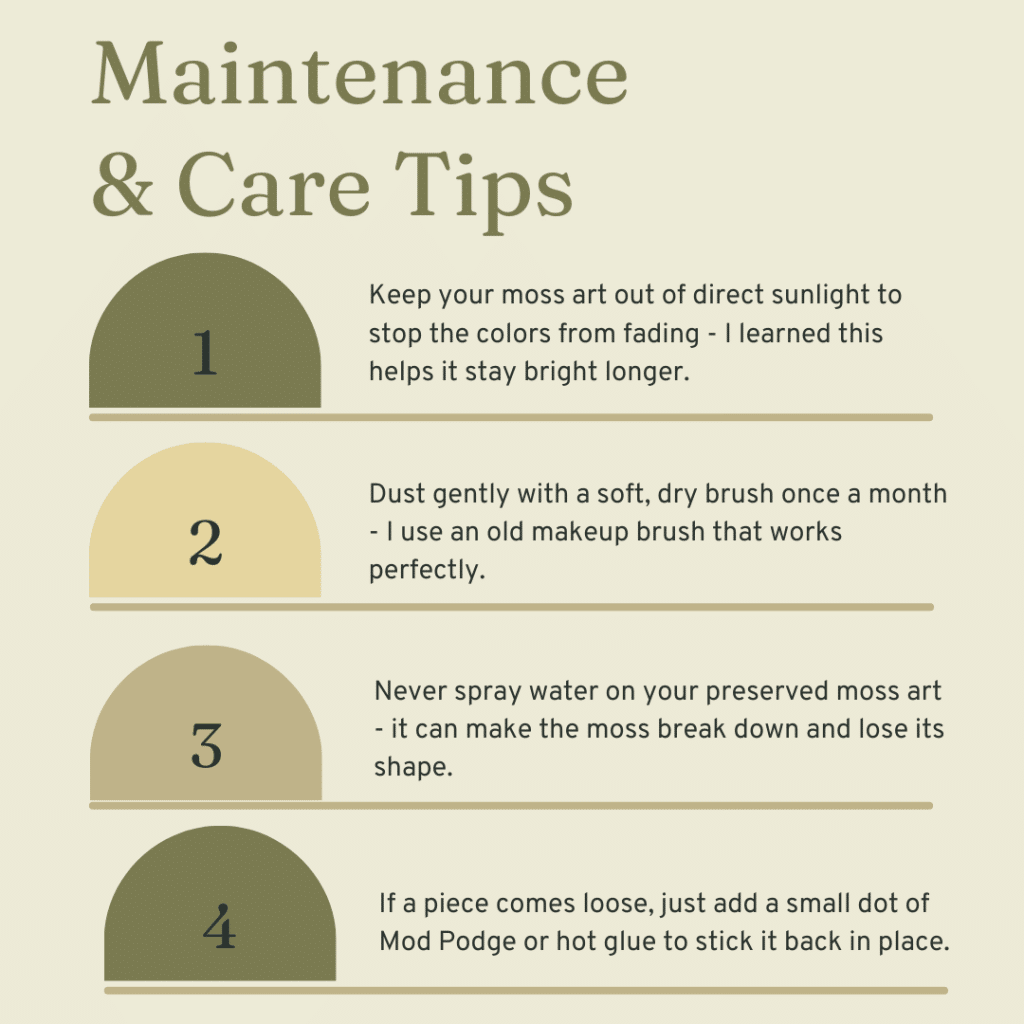
My preserved moss pieces have kept their look for years when kept indoors. With good care – no water, no direct sun, and gentle dusting – your moss art can stay fresh-looking for 5-7 years.
How Do I Preserve Real Moss for Wall Art?
I don’t suggest using real moss for wall art. Fresh moss needs water to live and will turn brown when it dries. Instead, buy pre-preserved moss – it’s ready to use and lasts longer.

