Do store-bought shelf brackets keep letting you down with their high prices and limited options?
Making your own floating shelf brackets isn’t just a smart choice – it’s easier than you might think.
With simple tools and materials from your local hardware store, you can create brackets that perfectly fit your space and support your shelves with impressive strength.
All you need is threaded rods, basic tools, and some know-how.
This guide will show you the steps to make strong, reliable floating shelf brackets that cost less than store-bought options.
Ready to build brackets that will support your shelves exactly how you want them?
Let’s get started with the tools you’ll need.
Why Make Your Own Floating Shelf Brackets?
Building your own floating shelf brackets makes sense for several key reasons:
1. Money-Smart Choice: Store-bought brackets often come with steep price tags.
Making your brackets using threaded rods costs about $17 for materials, saving you money for other home projects.
2. Perfect Fit Every Time: Commercial brackets come in sizes that might not suit your specific needs.
When you make your brackets, you can adjust the size and placement to match your exact shelf measurements and wall space.
3. Proven Strength: When properly installed into wall studs, eight-millimeter threaded rods provide remarkable support.
These DIY brackets can hold substantial weight, making them reliable for everything from books to pantry items.
4. Basic Tools Work Fine: You don’t need fancy equipment.
A drill, measuring tools, and basic hardware store items are enough to create these brackets.
If you have an angle grinder, that’s helpful – but even a simple hacksaw will work for cutting the rods.
Required Materials and Tools
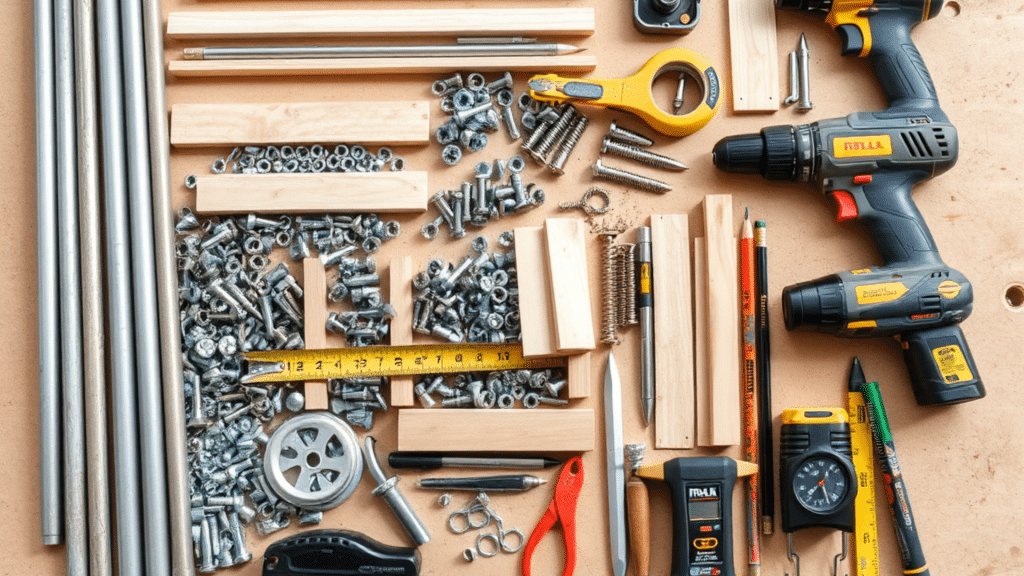
Materials Required
| Detail | Information |
|---|---|
| Threaded Rods | Main support system (8mm thickness) |
| Mounting Nuts | Secure rods firmly |
| Wall Anchors | Extra support needed |
| Wood for Template | Guide perfect holes |
| Wall Paint | Match existing color |
| Wood for Shelves | Your chosen display |
Tools Required
| Detail | Information |
|---|---|
| Power Drill | Makes clean holes |
| 13mm Socket | Fits mounting nuts |
| Measuring Tape | Ensures exact fit |
| Speed Square | Marks straight lines |
| Stud Detector | Finds wall supports |
| Angle Grinder/Hacksaw | Cuts metal rods |
| Rubber Hammer | Gentle mounting tool |
| Level | Keeps things straight |
| Pencil | Marks measurements clearly |
Note: Remember to check you have all the items before starting your project – it saves extra trips to the store.
Step-By-Step Installation Guide
Step 1 – Finding And Marking Wall Studs
Start by using your stud detector to find the wall supports.
Run it across your wall until it signals green, then make a light pencil mark. These marks will guide your shelf placement, so accuracy matters.
Use your level to draw straight lines between the stud marks. Next, measure and mark your desired shelf height on the wall.
Put small dots where the threaded rods will go in. These marks should line up perfectly with your stud locations.
Use your level one final time to ensure all marks are even – this prevents crooked shelves later.
Keep your pencil marks light since you’ll paint over them after installation.
Step 2 – Preparing the Brackets
Cut threaded rods to size, adding 2-3 inches for shelf depth. Use an angle grinder or a hacksaw for quick cuts.
Clean rough edges for smooth installation. Make a simple drill template with a small wood piece, marking two points about two centimeters apart.
Drill 6mm and 8mm holes for the guide. This template ensures straight holes and tests bracket strength before installation.
Create a practice mount with spare wood and clamps.
Lock two nuts on the rod and drill with a socket to screw into the test piece. This shows the bracket function and allows practice.
Step 3 – Drilling Process
Start with the wall holes. Use your stud marks to drill pilot holes slightly smaller than your threaded rods for a tight fit that strengthens your mounting.
Keep the drill straight and level; marking your desired depth on the drill bit with tape helps.
Next, prepare your shelf. Mark the center of the back edge: for an 18mm thick shelf, the center is 9mm.
Use a template to drill 8mm holes that align with the threaded rods.
Test your shelf before final mounting; a tight fit ensures stability. Use a rubber hammer if needed to secure the shelf on the rods.
This friction prevents unwanted movement.
Lastly, check with a level before securing everything. Adjust as necessary and keep wall paint handy for touch-ups around the installation area.
Video Tutorial
Below is the tutorial video by Hallbeam Designabout making DIY floating shelf brackets.
Common Mistakes To Avoid
1. Wrong Rod Selection: Using rods that are too thin can make your shelves unstable.
Always use 8mm threaded rods for standard shelves.
For heavier loads, increase size rather than risk a weak mount.
2. Missing the Stud: Double-check your stud detector readings before drilling.
One wrong hole not hitting the stud means redoing the work and patching walls.
Take time to mark and verify each stud location carefully.
3. Poor Measurements: A shelf’s back edge needs precise center marking.
When working with 18mm shelves, measure exactly 9mm for your center point.
Off-center holes mean uneven pressure on your brackets and possible shelf tilt.
4. Rushing the Installation: Taking shortcuts during rod installation can lead to tilted shelves or wall damage.
Always drill straight, use your template, and test the fit before final mounting.
5. Skipping the Test Fit: Not testing your shelf on the rods before the final installation can lead to problems.
Do a test fit to check alignment and ensure your holes match up perfectly with wall mounts.
Tips for Long-Term Durability
1. Weight Distribution Guidelines: Spread items evenly across your shelf rather than putting all weight on one side.
Place heavier items closer to the wall where the brackets provide the most support.
Stay within reasonable weight limits – even strong brackets have their limits.
2. Regular Checks and Maintenance: Check your shelves every few months by gently testing their stability.
Check for signs of shelves pulling from the wall. Early detection prevents major problems.
Regularly clean shelves to identify potential issues.
3. Wall Care Matters: Keep an eye on the wall around your brackets.
Small cracks might appear over time – this is normal but needs attention.
Keep spare wall paint for touch-ups, and quickly fix any wall damage to prevent it from worsening.
4. Safety First: Test stability before loading heavy items.
Remove items and check the mounting if you notice any movement or hear unusual sounds.
When in doubt, reinstall the bracket rather than risk damage or accidents.
5. Smart Storage Habits: Rotate items occasionally to prevent constant pressure in one spot.
Avoid dragging items across the shelf – this can loosen the mount over time.
Consider using shelf liners for extra protection against scratches and movement.
Conclusion
Crafting your floating shelf brackets is a fantastic way to save a little money and lets you design something that truly complements your unique space.
By following these easy steps and using just a few basic tools, you can create brackets that stand the test of time!
Feel free to take your time with the measurements! It’s important to properly mount the studs to ensure you get the best results possible. You’ve got this!
Ready to start your project?
It’s great to have all your materials ready before you explore!