
Creating a worn, vintage look on furniture and crafts can be costly if you buy commercial crackle medium. I faced this problem when working on my small house project and ran out of store-bought crackle medium.
The good news?
You can make crackle paint with items from your home. Regular school glue and paint create the perfect crackle effect.
This method works because the glue and paint dry at different rates, splitting the top layer and showing the base color through cracks.
In this guide, I’ll show you six simple steps to create this aged effect. You’ll learn how to get both fine cracks for small crafts and bold cracks for larger pieces, all without spending extra money.
What is Crackle Paint and How Does It Work?
Crackle paint makes new items look old and worn on purpose. The paint forms small cracks that show the color underneath. It works great on furniture, frames, and small craft projects.
This method is much faster than waiting for real aging to happen and can be made at home without buying special products. Using regular school glue saves money compared to store-bought crackle medium.
How It Works
- Uses two layers that dry at different speeds
- The bottom layer stays in place while the top layer shrinks
- School glue between paint layers creates the cracking effect
- As the top paint dries, it pulls apart, showing cracks
- Thick glue makes big cracks; thin glue makes small cracks
- The base coat color shows through the cracks in the top layer
Step-by-Step Guide to Make Crackle Paint
Using regular household items, create aged, crackled surfaces in six simple steps. Follow these instructions to apply base coat, glue, and top color for perfect antique-looking crafts.
Tools and Materials:
| Tool | Purpose |
|---|---|
| Paint brushes | Used for applying both the base coat and top coat of paint |
| Container for paint | To hold the paint while you work, keeping it easy to dip brushes into |
| Timer (optional) | To track the drying time between coats to ensure the correct wait time |
| Flat work surface | A flat, stable area to paint your project pieces and avoid spills or accidents |
| Material | Purpose |
|---|---|
| White school glue (PVA glue) | Acts as a crackle medium that causes the top layer of paint to crack when dry |
| Black gesso or dark-colored paint | Used as the base coat, typically a dark color, to help the cracks show up better |
| Acrylic paint or chalk paint | Applied as the top coat, which will crack to reveal the base coat underneath |
| Project pieces to paint | The objects (like wood) that you will apply the crackle paint technique to |
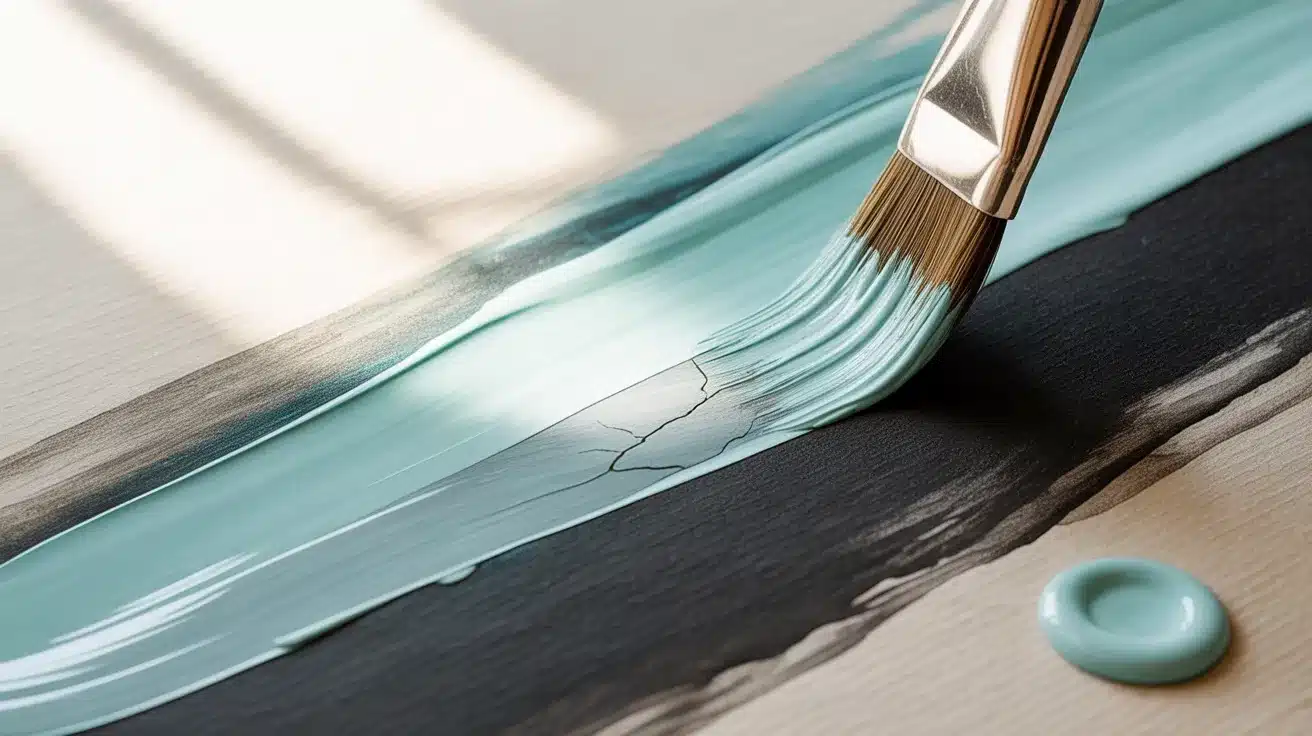
Step 1: Apply the Base Coat
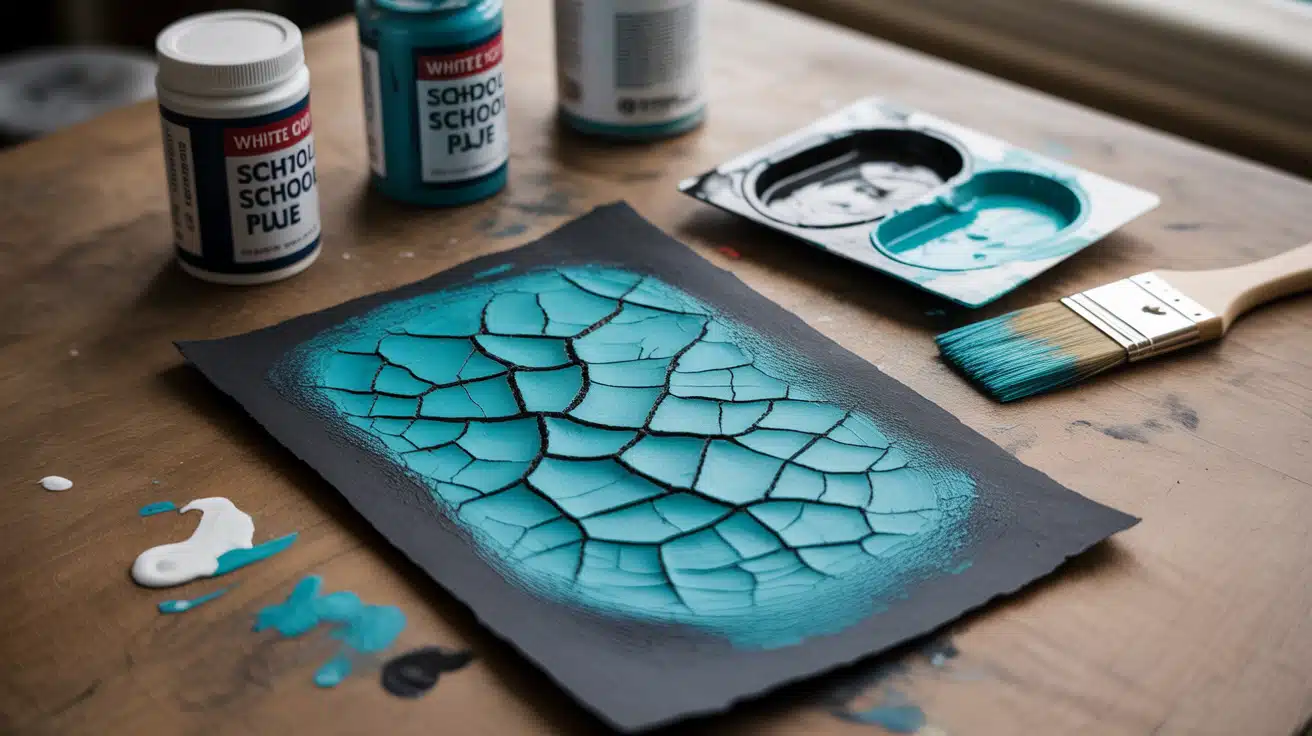
Start with a base coat in a color that will show through the cracks. Black works well for most projects and makes the cracks stand out clearly. Paint your entire piece with black gesso or flat black primer.
The base color needs to be in high contrast with your top color so the cracks will be visible. Let this layer dry fully before moving to the next step.
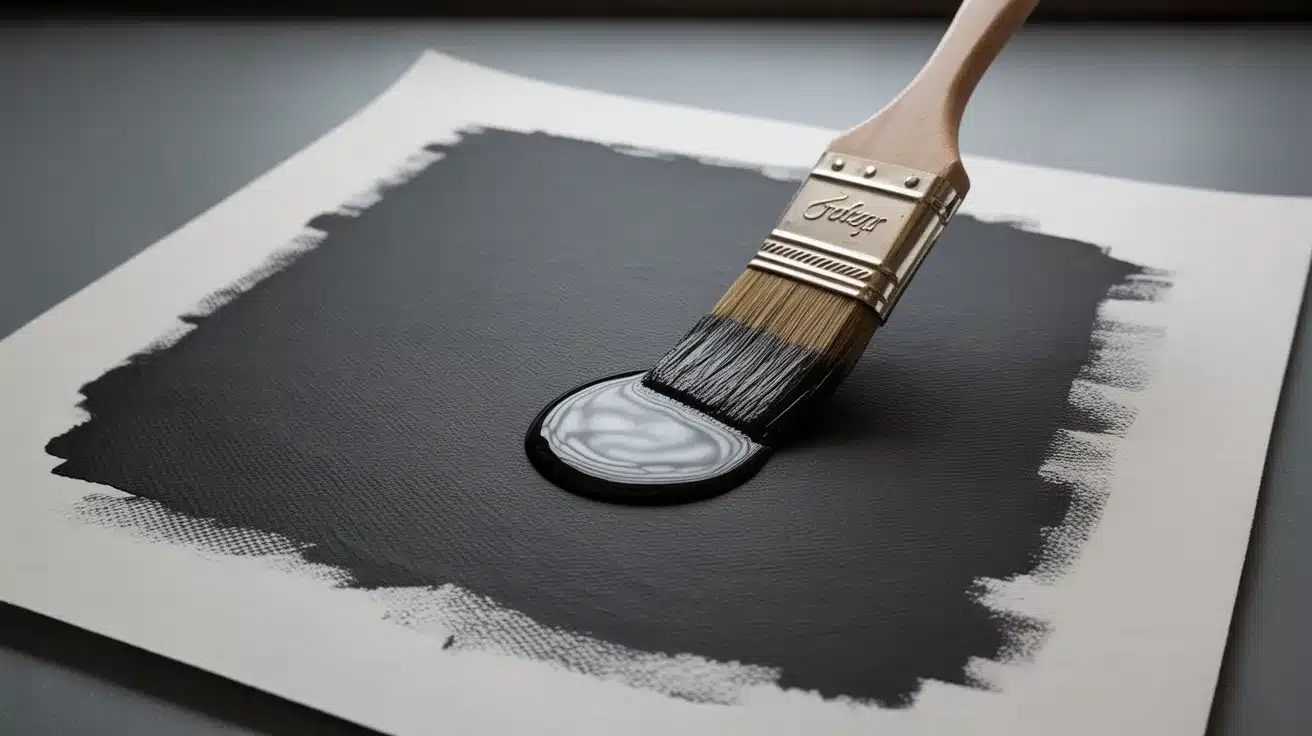
Step 2: Add the Glue Layer
Paint a thin layer of regular white school glue over your dry base coat. The thickness of the glue layer controls the size of your cracks – thinner layers create smaller, more subtle cracks, while thicker layers make larger cracks.
Paint in the same direction you want your cracks to form. For items like house siding, use horizontal strokes for a more realistic effect.
Step 3: Allow Partial Drying
This step is key to getting good results. Wait about 10 minutes until the glue is partly dry. You’ll know it’s ready when thinner spots look somewhat clear, but the glue isn’t completely dry.
If you paint over glue that’s too wet, you’ll get streaks instead of cracks. If you wait until it’s too dry, you won’t get enough crackling effect.
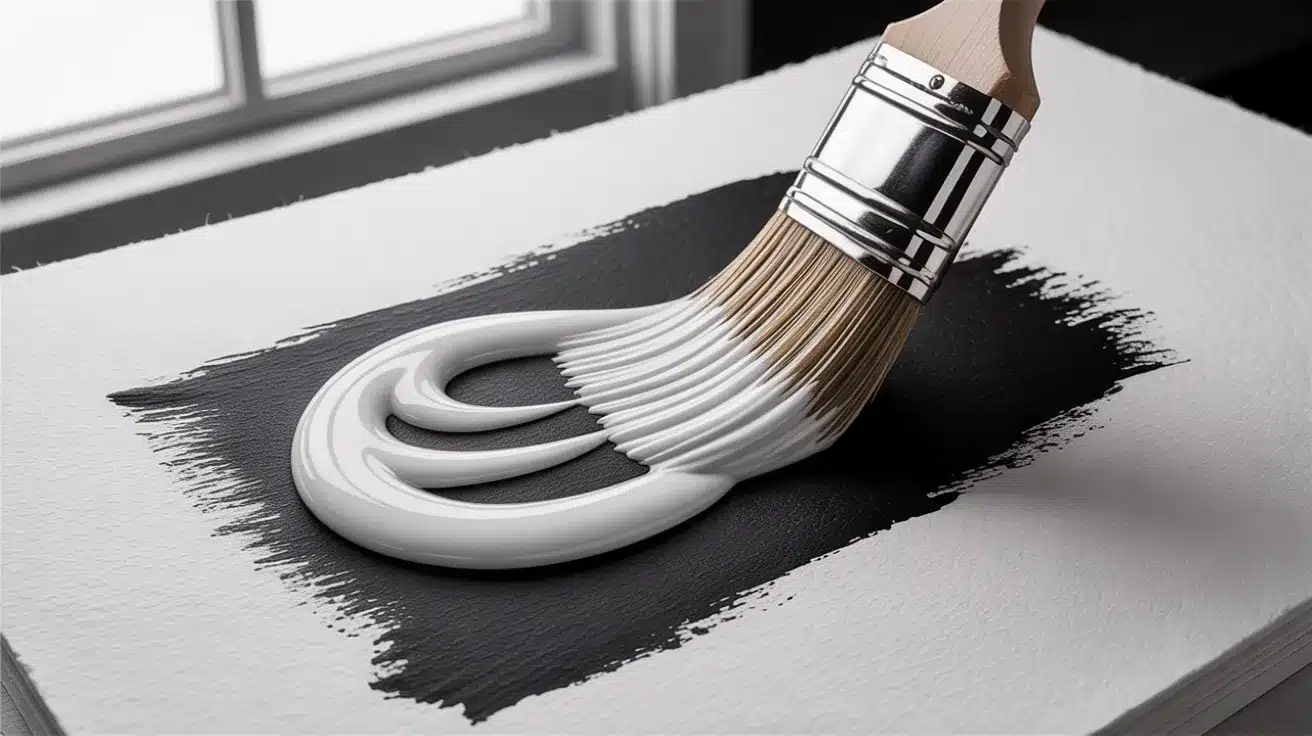
Step 4: Apply the Top Color Coat
Once the glue has reached the correct partial dryness, paint your chosen color over the glue layer. Use gentle strokes in the same direction as the glue to avoid disrupting the crackling process.
Don’t overwork the paint or go back over areas multiple times. Apply a single coat with even pressure. As you paint, you might start to see tiny cracks forming.
Step 5: Let the Magic Happen
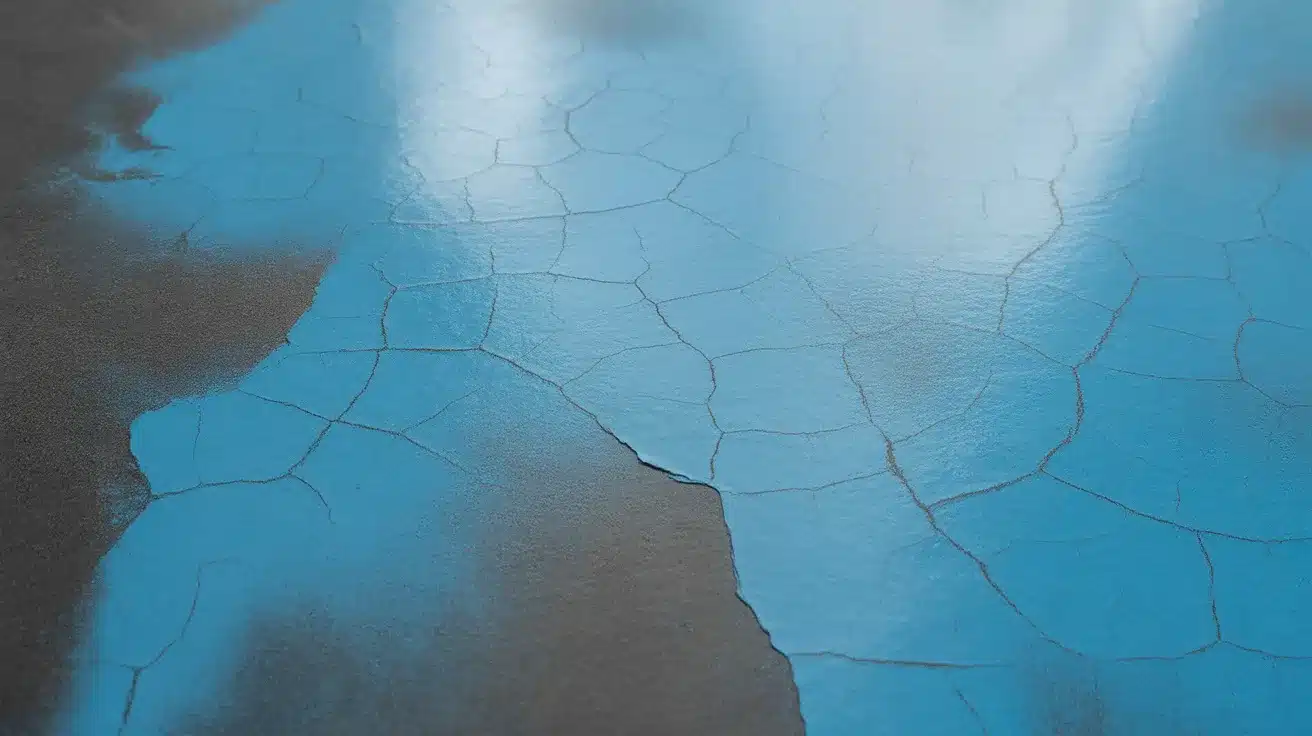
Leave your project alone to dry naturally, which takes about 15-20 minutes. As the paint and glue dry together, the crackling effect will develop. Small cracks will form first in the thinner areas and then spread throughout the painted surface.
The drying process creates tension that pulls the top layer apart, showing the base color through the cracks.
Step 6: Observe and Complete the Project
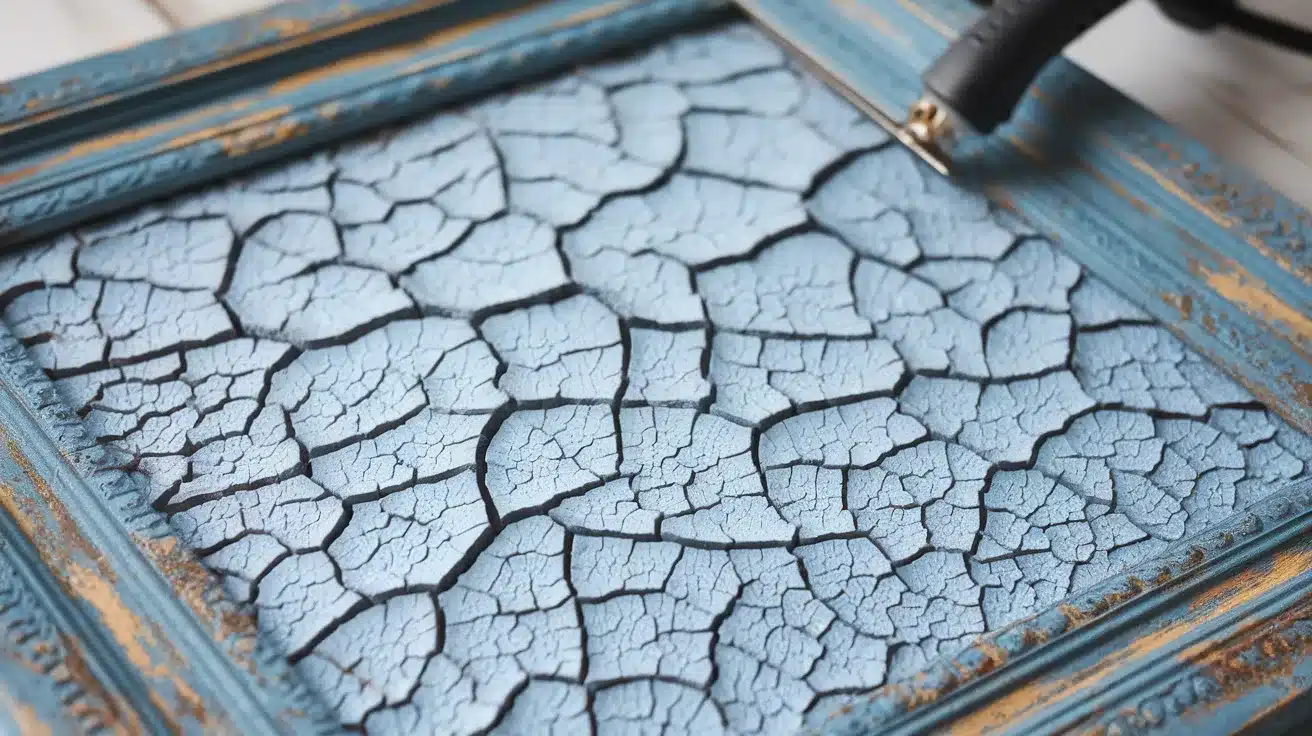
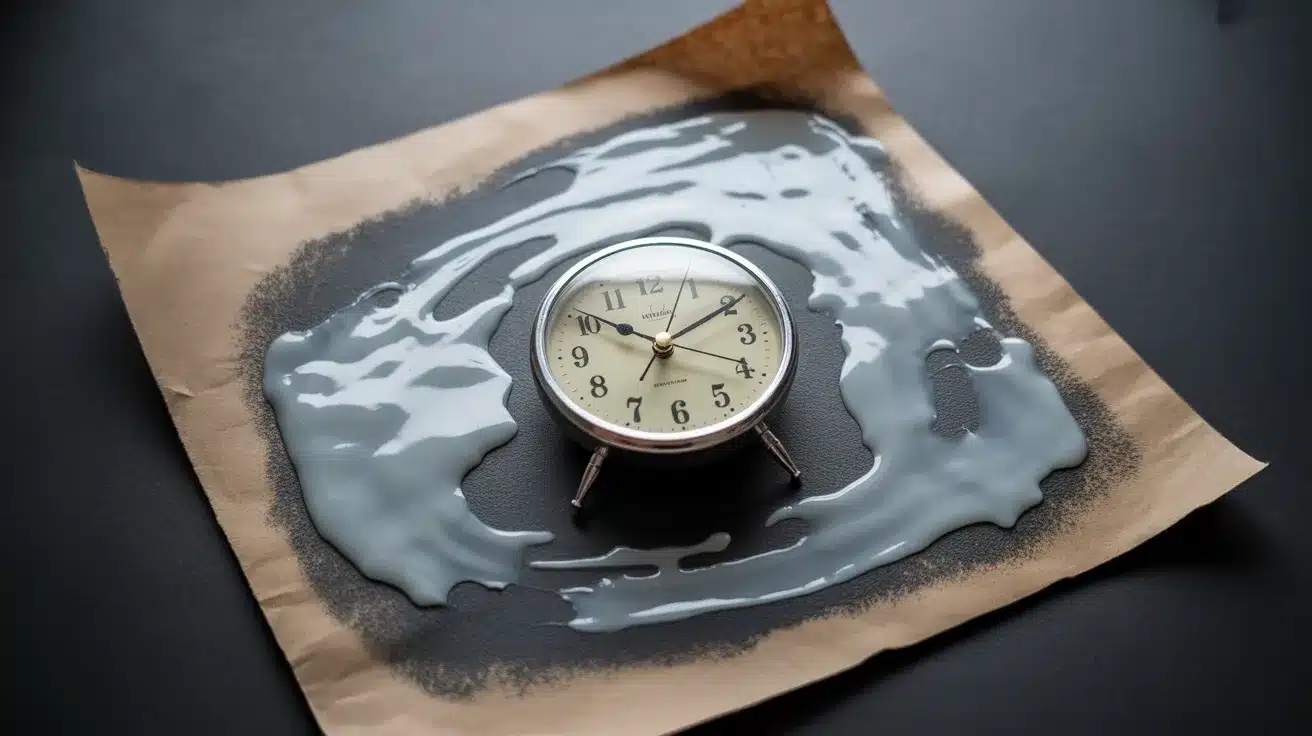
Watch as your paint continues to crack and dry fully. For smaller crackles (best for miniature projects), let it dry naturally without adding heat. For larger, more dramatic cracks, you could use a heat tool, but this isn’t needed for most projects.
Once completely dry, your crackle-painted surface is ready to use in your craft project, giving it an aged, worn look.
Crackle Paint Effects: “Small vs. Large Cracks”
This table compares the factors that create small, fine cracks versus large, bold cracks in crackle painting, helping you achieve your desired effect.
| Factor | Small, Fine Cracks | Large, Bold Cracks |
|---|---|---|
| Glue Thickness | Thin layer of glue | A thick layer of glue |
| Drying Time | Short drying time (5-10 minutes) | Longer drying time (15-20 minutes) |
| Brush Strokes | Light, single-direction strokes | Firm, deliberate, multi-directional strokes |
| Room Temperature | Warmer room for faster drying | Cooler room for slower drying |
| Paint Type | Thin, water-based top coat | Thick, acrylic top coat |
| Effect | Subtle, aged look, shows less base color | Dramatic, bold cracks show more base color |
| Best For | Small craft projects, miniatures | Furniture, large pieces |
Picking the Right Paint for Good Crackle Effects
1. Base Coat
Darker base coats, like black or deep brown, enhance the visibility of cracks by providing a strong contrast to the top coat. Acrylic paint or gesso works well for a smooth, even surface that allows the crackle medium to work effectively.
2. Top Coat
The top coat determines the final appearance of the cracks. Lighter top coats, like pastels, create subtle cracks, while darker or bolder colors emphasize the cracks. Both acrylic and chalk paints are ideal for achieving the crackle effect.
3. Crackle Medium
The crackle medium, such as white school glue or a specialized product, creates the cracking effect by shrinking as it dries, pulling the top coat apart. Test your medium with your chosen paints to ensure a good reaction.
4. Surface Considerations
Different surfaces absorb paint differently, affecting the crackling process. Wood often gives the best results, while metal and ceramic may need specific preparation, such as priming, to ensure even crackling and paint adhesion.
Conclusion
Creating homemade crackle paint turns plain surfaces into items with character without spending money on special products. The simple mix of glue and paint gives an aged charm that’s perfect for any craft project.
Remember that the timing between layers makes all the difference – wait until the glue is partly dry but still tacky before adding your top coat. The contrast between your base and top colors determines how visible your cracks will appear.
Next time you want to add character to a frame, furniture piece, or craft project, try this easy technique with items already in your home. Why not try different colors and glue thicknesses to create your own unique crackle effects?
Share your crackle paint creations in the comments! Have you tried this technique before? What surfaces worked best for you?
Frequently Asked Questions
How to Use Crackle Paste with Acrylic Paint?
Apply a base coat and let it dry. Spread crackle paste evenly and let it partially dry. Paint acrylic over the paste in one direction. The acrylic will crack as it dries, showing the base color underneath.
Does Heat Make Paint Crack?
Yes, heat can cause paint to crack by speeding up the drying process. Using a hair dryer on a low setting creates faster, smaller cracks in crackle paint techniques.
Can You Use Tacky Glue to Crackle Paint?
Yes, tacky glue works for crackle paint. Apply a thin layer between the base and top coats. It dries slower than regular white glue, giving you more working time.