
Installing laminate flooring over concrete can seem challenging for most homeowners. You want a beautiful, durable floor that won’t buckle or warp from moisture damage.
The good news is that with proper preparation and the right materials, you can achieve professional results on your own.
This comprehensive guide will walk you through every step of the process, from preparing your concrete subfloor to laying the final plank.
You’ll learn about moisture barriers, underlayment selection, and proper installation techniques that ensure your new floor lasts for years to come.
By following these proven methods, you’ll save money on professional installation while gaining the satisfaction of completing this home improvement project yourself.
Why Choose Laminate Flooring for Concrete Subfloors?
Laminate flooring offers several advantages when installed over concrete surfaces. Unlike hardwood, laminate resists moisture damage and temperature fluctuations common in concrete environments.
Modern laminate products feature realistic wood and stone textures that provide the look you want at a fraction of the cost. The click-lock installation system makes it perfect for DIY projects, as it requires no nails or glue.
Additionally, laminate flooring offers excellent durability and easy maintenance, making it an ideal choice for high-traffic areas.
The insulation properties also help reduce the cold feeling often associated with concrete floors.
Laminate Flooring on Concrete: Step-by-Step Guide
Change your concrete floors with this easy-to-follow, step-by-step guide to installing laminate flooring for a sleek, durable finish
Tools and Materials Needed
Tools:
| Tool | Purpose |
|---|---|
| Chop saw or circular saw | Cutting planks to size |
| Measuring tape | Measuring room dimensions |
| Chalk line | Marking straight lines |
| Pry bar | Removing old flooring |
| Hammer | General installation tasks |
| Spacers | Maintaining expansion gaps |
| Knee pads | Comfort during installation |
| Square | Checking angles and cuts |
Materials:
| Material | Purpose |
|---|---|
| 6-mil plastic sheeting | Moisture barrier |
| Packing tape | Sealing plastic joints |
| Fan-fold underlayment | Cushioning and insulation |
| Laminate planks | Main flooring material |
| Transition strips | Finishing edges |
| Quarter-round molding | Covering expansion gaps |
Step 1: Prepare the Concrete Surface
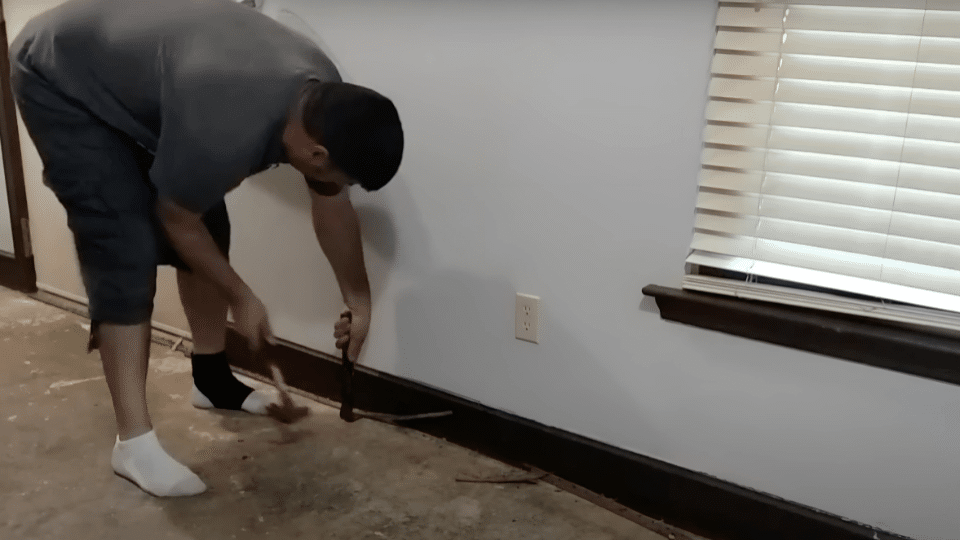
Begin by thoroughly cleaning your concrete subfloor and inspecting it for any cracks, holes, or uneven areas. Remove all debris, dust, and existing flooring materials completely.
The concrete must be level within 1/8 inch over a distance of 6 feet for proper laminate installation. Any high spots should be ground down, while low areas need to be filled with concrete leveling compound.
Allow the leveling compound to cure completely according to the manufacturer’s instructions before proceeding. Test the moisture level of your concrete using a moisture meter or a plastic sheet test.
Materials needed in this step:
- Concrete leveling compound
- Grinding tools or sandpaper
- Cleaning supplies
- Moisture meter
Instructions:
- Sweep and vacuum the entire concrete surface
- Fill any cracks or holes with appropriate concrete filler
- Sand or grind down any high spots
- Test for moisture and ensure the surface is completely dry
Step 2: Install Moisture Barrier
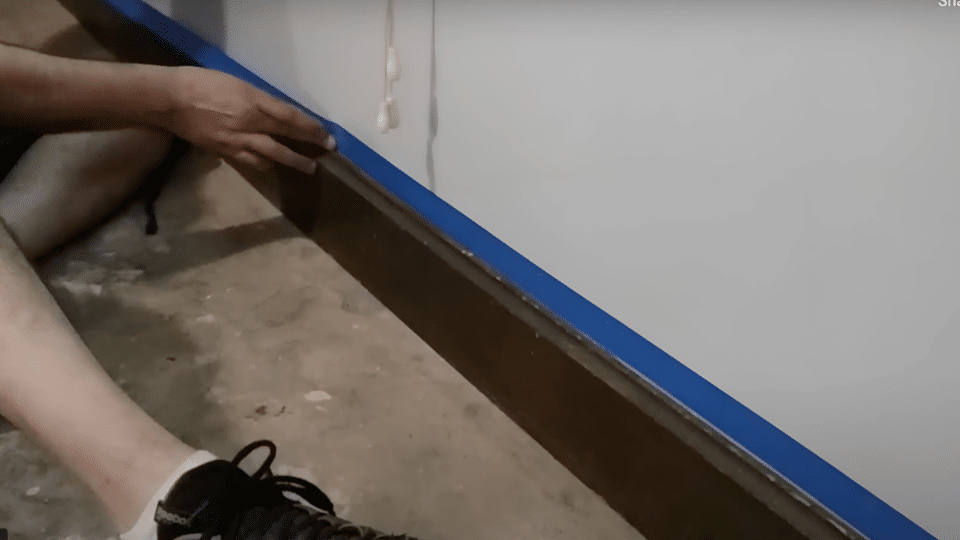
Lay down 6-mil plastic sheeting across the entire concrete surface, overlapping seams by at least 6 inches. This barrier prevents moisture from seeping through the concrete and damaging your laminate flooring.
Pay special attention to sealing all joints with packing tape to create a continuous moisture barrier. The plastic should extend up the walls by about 2 inches and will be trimmed later when you install baseboards.
Take your time with this step, as proper moisture protection is essential for long-term floor performance.
Materials needed in this step:
- 6-mil plastic sheeting
- Packing tape
- Utility knife
- Measuring tape
Instructions:
- Roll out plastic sheeting across the entire floor
- Overlap seams by 6 inches minimum
- Seal all joints with packing tape
- Allow plastic to run up the walls about 2 inches
Step 3: Install Underlayment

Place a fan-fold underlayment over the plastic moisture barrier, butting edges tightly together without overlapping. This cushioning layer provides comfort underfoot and helps reduce noise transmission.
The underlayment also helps smooth minor imperfections in the concrete surface.
Work systematically across the room, ensuring the underlayment lies flat without wrinkles or gaps. Some underlayments come with adhesive strips to secure the seams, while others butt up against each other.
Materials needed in this step:
- Fan-fold underlayment
- Utility knife
- Tape measure
Instructions:
- Roll out the underlayment across the moisture barrier
- Butt edges together tightly without overlapping
- Trim excess material at the walls
- Ensure the underlayment lies completely flat
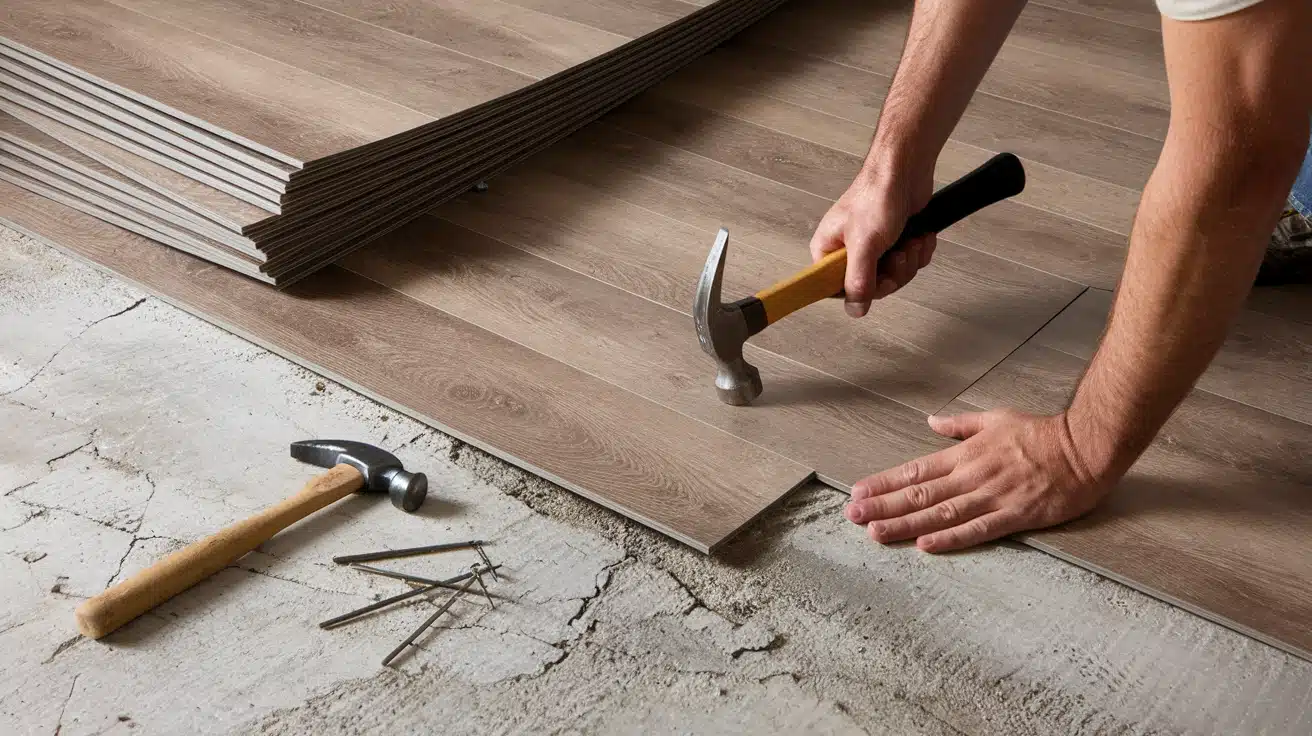
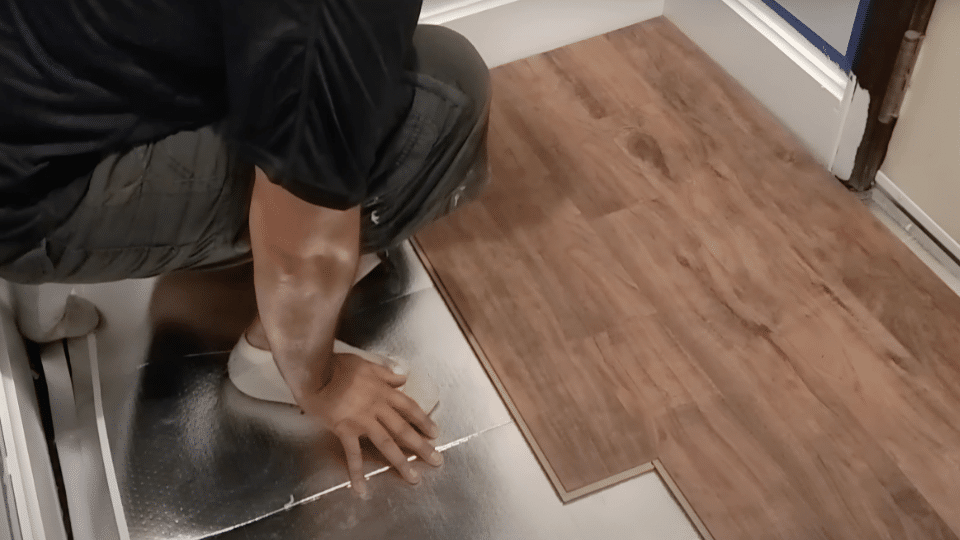
Step 4: Install First Rows
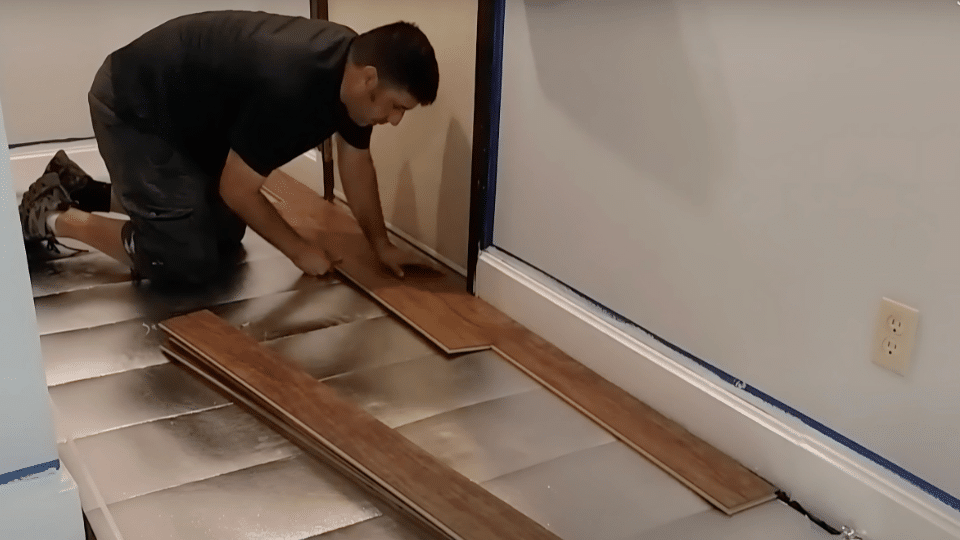
Begin installation by placing the first plank in the corner with the tongue side facing the wall. Use spacers to maintain a consistent 1/4-inch expansion gap.
Connect subsequent planks by angling them into the groove of the previous plank and lowering them into place. Complete the first row, then start the second row with the cut piece from the first row’s end plank.
This creates a staggered pattern that adds strength and visual appeal to your floor. Continue this pattern throughout the installation.
Materials needed in this step:
- Laminate planks
- Spacers
- Hammer
- Tapping block
Instructions:
- Place the first plank in the corner with the tongue toward the wall
- Connect planks by angling into the groove and lowering
- Start the second row with the cut piece from the first row
- Maintain consistent spacing throughout
Step 5: Complete Installation and Finishing
Continue installing rows, maintaining the staggered pattern, and regularly check for squareness. As you approach the far wall, you may need to rip the final row to fit properly while maintaining the expansion gap.
Use a table saw or circular saw for clean, straight cuts. After completing the flooring installation, remove all spacers and install baseboards or quarter-round molding to cover the expansion gaps. Trim excess moisture barrier and underlayment for a clean finish.
Materials needed in this step:
- Remaining laminate planks
- Transition strips
- Baseboards or quarter-round
- Finishing nails
- Wood filler
Instructions:
- Continue installation, maintaining the stagger pattern.
- Measure and cut the final row to fit
- Remove spacers and install trim
- Install transition strips at doorways
Video Tutorial
Special thanks to Ken Moon for providing valuable insights in their video, which I referenced while creating this guide.
Essential Tips for Proper Laminate Installation
Follow these key tips to ensure a smooth, durable, and professional-looking laminate floor installation, from preparation to finishing touches.
1. Moisture Control is Critical
Concrete naturally contains moisture that can damage laminate flooring over time. Always use a 6-mil plastic vapor barrier, even if your concrete appears dry.
Seal all seams with quality packing tape to prevent moisture infiltration. Consider using a dehumidifier in the room for 24 hours before installation to remove excess humidity.
Check manufacturer warranties, as most require proper moisture barriers for coverage.
2. Maintain Consistent Expansion Gaps
Laminate flooring expands and contracts in response to changes in temperature and humidity. Maintain a 1/4-inch gap around all walls, doorways, and fixed objects, such as cabinets.
Use spacers throughout the installation to ensure consistent gaps. Never attach laminate flooring directly to walls or subfloors, as this restricts natural movement and can cause buckling.
3. Ensure Proper Acclimatization
Allow laminate planks to acclimate in the installation room for at least 48 hours before beginning work. Store planks flat and unopened until you are ready to install them.
The room temperature should be between 60°F and 80°F, with humidity levels of 30-50%. This acclimatization prevents issues with expansion or contraction after installation.
4. Check for Squareness Regularly
Use a carpenter’s square to check your installation every few rows. Walls are rarely perfectly straight, so don’t rely on them as your only guide.
If you notice the floor going out of square, make minor adjustments over several rows rather than trying to correct everything at once. A slightly out-of-square installation is better than forcing planks into unnatural positions.
5. Plan Your Cuts Carefully
Measure twice and cut once applies especially to flooring installation. End joints should be staggered by at least 6 inches between adjacent rows.
Plan your cuts to avoid waste and ensure you have enough material to complete the project. Order 10% extra material to account for cuts and potential mistakes.
Avoid These Common Laminate Flooring Errors
| Mistake | Why It’s Wrong | Correct Approach |
|---|---|---|
| Skipping the moisture barrier | Leads to warping and mold | Always use 6-mil plastic sheeting |
| Inadequate expansion gaps | Causes buckling and damage | Maintain 1/4-inch gaps around the perimeter |
| Installing on uneven concrete | Creates squeaks and gaps | Level the concrete within 1/8 inch |
| Not acclimating to planks | Results in expansion problems | Allow 48 hours in the installation room |
| Forcing planks together | Damages to locking mechanisms | Use proper technique and tapping blocks |
| Ignoring the manufacturer’s instructions | Void warranty coverage | Follow all guidelines exactly |
| Installing without underlayment | Reduces comfort and durability | Use appropriate foam or cork underlayment |
| Poor cut planning | Creates narrow strips and waste | Plan the layout before starting the installation |
Laminate Flooring Care: Long-Term Maintenance
Ensure your laminate floors stay beautiful and durable with these essential long-term maintenance tips and care practices.
1. Regular Cleaning Routine
Keep your laminate flooring looking great with regular maintenance. Sweep or vacuum daily to remove dirt and debris that can scratch the surface.
Use a damp mop with laminate-specific cleaner once a week, avoiding excessive water that can seep into the joints. Clean spills immediately to prevent staining and moisture damage.
2. Protecting High-Traffic Areas
Place mats at entryways to reduce dirt and moisture tracked onto your floor. Use furniture pads under all chairs, tables, and heavy appliances to prevent scratches.
Rotate area rugs periodically to ensure even wear patterns on the rug. Consider using runners in hallways and other high-traffic zones.
3. Preventing Scratches and Damage
Trim pet nails regularly to prevent scratching. Use proper cleaning tools, such as microfiber mops, rather than abrasive scrubbers.
Avoid dragging heavy furniture across the floor; instead, use furniture sliders or lift it completely. Address any loose planks immediately to prevent further damage.
4. Seasonal Adjustments
Monitor humidity levels throughout the year, as extreme changes can cause expansion or contraction. Use a humidifier in winter when indoor air becomes dry, and ensure adequate ventilation in summer.
Small gaps between planks during dry seasons are normal and will close as humidity increases.
When to Call A Professional?
While laminate installation is generally a DIY-friendly project, some situations require professional assistance.
Extensive concrete repair, complex room layouts, or installations over radiant heating systems may need expert attention.
Major concrete issues, such as deep cracks or severe unevenness, should be addressed by qualified contractors before installation begins.
Complex room configurations with multiple angles or curved walls can pose a challenge even to experienced DIYers. Professional installers have specialized tools to handle these situations efficiently.
Consider professional help if you’re working with expensive, premium laminate products, as mistakes could be costly.
If you notice widespread buckling, significant gaps, or other installation issues, consult a flooring professional promptly.
Wrapping It Up
Installing laminate flooring over concrete is a rewarding DIY project that can change your space while saving money on professional installation.
The key to success lies in proper preparation, especially creating an effective moisture barrier and ensuring level surfaces.
By following these detailed steps and taking your time with each phase, you’ll achieve professional-looking results that last for years.
Remember that patience and attention to detail during installation prevent costly problems later. Your new laminate floor will provide beauty, durability, and comfort for your family to enjoy.
Take satisfaction in completing this project yourself, knowing you’ve gained valuable skills and created a beautiful living space through your hard work and dedication.
Ready for a refresh? Explore more home improvement ideas to upgrade your space.