Does that damp, musty smell from the basement sound familiar?
Most homeowners face moisture problems that can lead to mold growth, structural damage, and higher energy bills.
The good news is that a basement moisture barrier can solve these issues and protect home foundations for years to come.
This article will show exactly how to choose, install, and maintain a basement moisture barrier that keeps spaces dry and healthy. From visible water damage to preventing future problems, this comprehensive resource covers all the basics.
This article explains what a basement vapor barrier is, why homes need one, how to install it properly, and the common mistakes that can ruin the investment. Time to get basements dry and protected.
What is a Basement Moisture Barrier?
A basement moisture barrier is a protective material that blocks water and humidity from entering your basement space. This barrier acts as a shield between your basement walls or floors and the surrounding soil moisture.
The main work of a basement moisture barrier is simple: it stops water from seeping through concrete, stone, or other foundation materials. When moisture tries to move from wet soil into your dry basement, the barrier blocks this movement.
Think of it as a raincoat for your basement. Just like a raincoat keeps you dry in the rain, a moisture barrier keeps your basement dry when surrounded by wet soil.
You might hear people talk about vapor barriers and moisture barriers. Both terms get used, but they work differently:
Basement Moisture Barrier:
- Handles both liquid water and water vapor
- Provides broader protection against all moisture forms
- Typically thicker material (6-20 mil plastic)
- Designed for comprehensive moisture control
Basement Vapor Barrier:
- Blocks water vapor (humidity) from passing through surfaces
- Focuses on stopping invisible moisture in the air
- Usually thinner material (2-6 mil plastic)
- Designed for humidity control only
Importance of Moisture Barriers in Home Construction
A basement moisture barrier prevents all these problems by blocking water and humidity from entering your space. The barrier acts like a raincoat for your basement, keeping it dry when surrounded by wet soil.
| Problem | Warning Signs | Why It Matters |
|---|---|---|
| Mold Growth | Persistent musty odor that gets worse after rain and spreads to upper floors | Triggers allergies and asthma, especially dangerous for children and the elderly, professional removal costs thousands. |
| Structural Damage | Water stains on walls, white chalky deposits (efflorescence), peeling paint, foundation cracks (especially horizontal ones) | Weakens foundation over time, causes concrete to crack and metal to rust, foundation repairs cost $10,000+ |
| Poor Air Quality | Sticky or clammy feeling, humidity above 60%, condensation on pipes and windows | Affects whole house air quality, makes the basement unusable, and impacts family health |
| Energy Waste | High heating and cooling bills, unstable temperatures, and an HVAC system running constantly. | Increases energy costs by 15%+, makes the home uncomfortable, and overworks the heating and cooling system |
Installing a Basement Moisture Barrier: Step-by-Step Guide
Before starting your installation, gather the essential items.
Materials Needed
- Plastic sheeting (6-mil minimum thickness)
- Specialized sealing tape for moisture barriers
- Utility knife for cutting
- Measuring tape
- Safety equipment (gloves, eye protection)
Once you have your materials ready, follow these steps to install your basement moisture barrier:
Step 1: Start with the First Piece
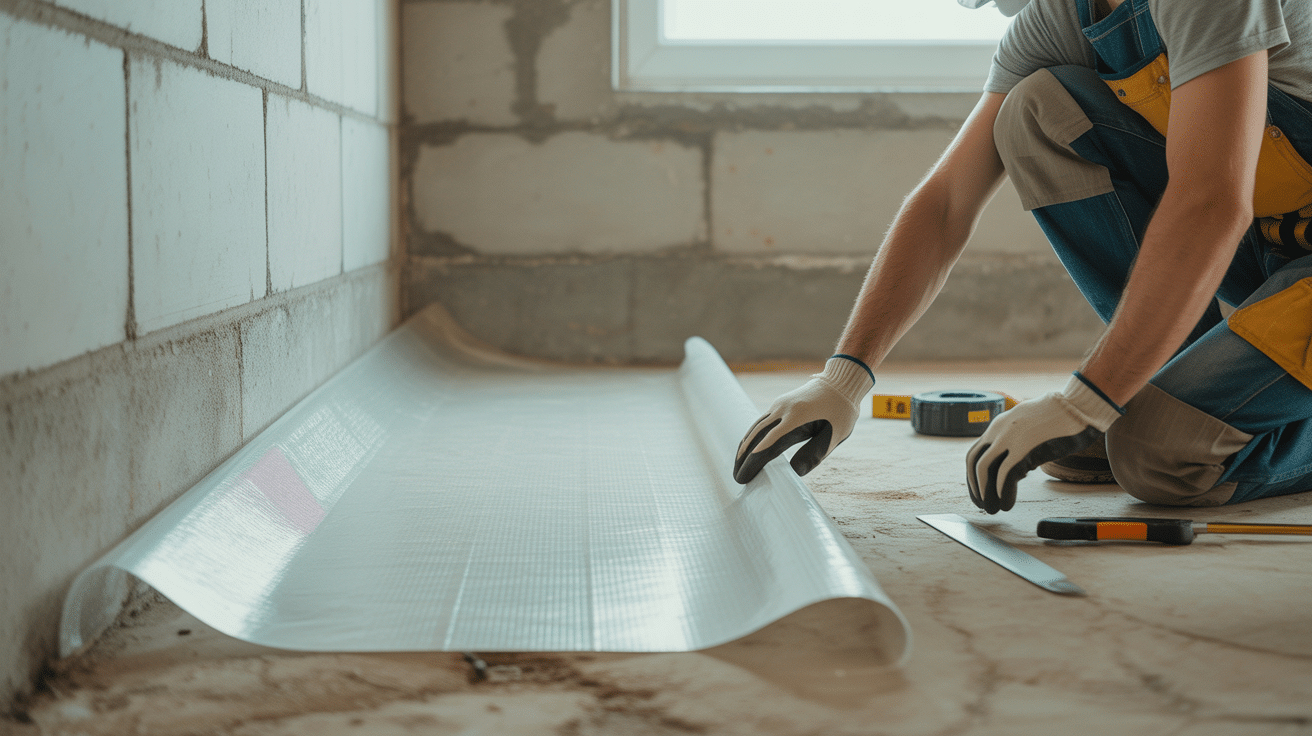
Roll out your first section of plastic sheeting across the floor, beginning at one corner of the basement. Measure and cut the plastic to fit the area, leaving extra material to run up the walls by at least 6 inches.
Make sure the plastic is long enough to cover the entire width or length of the section you’re working on. Unroll carefully to avoid tears, and position the plastic so it lies flat against the dirt floor.
Tip: Work during dry weather when humidity is low for better adhesion.
Step 2: Position and Smooth the Material
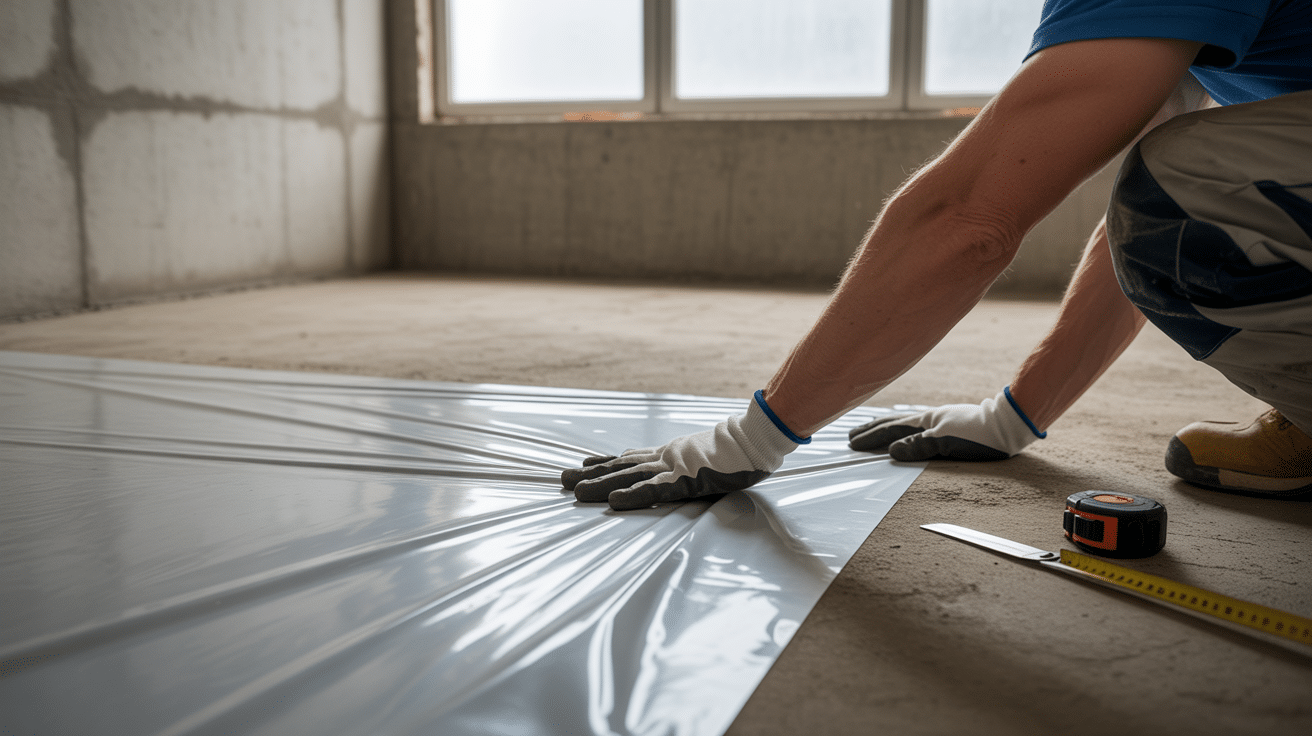
Carefully smooth out the plastic sheeting to eliminate all wrinkles and air bubbles. Start from the center and work your way outward, pressing down firmly with your hands.
Pay special attention to corners and edges where air can get trapped. Walk across the plastic carefully to ensure complete contact with the floor surface. Any air pockets or loose areas can allow moisture to collect underneath and compromise the barrier’s effectiveness.
Tip: Use your hands to press down firmly and check for any loose areas.
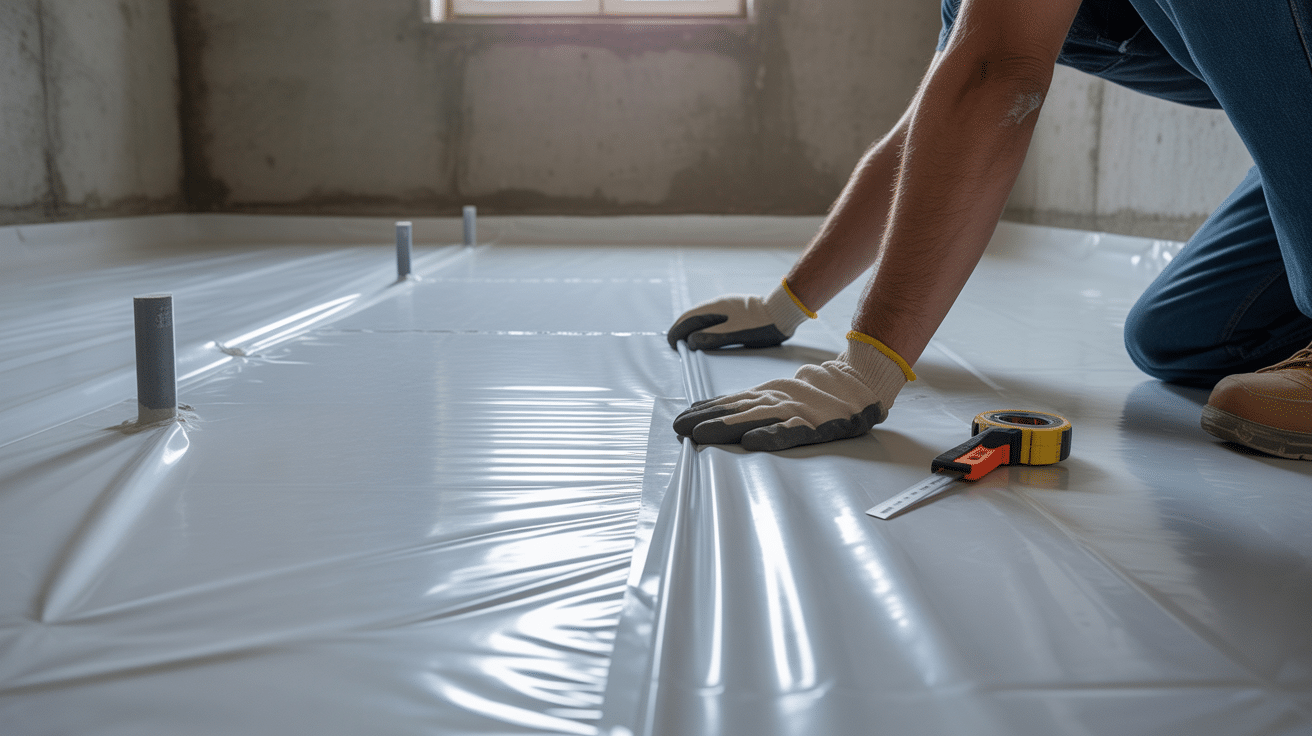
Step 3: Secure to Walls and Seal Seams
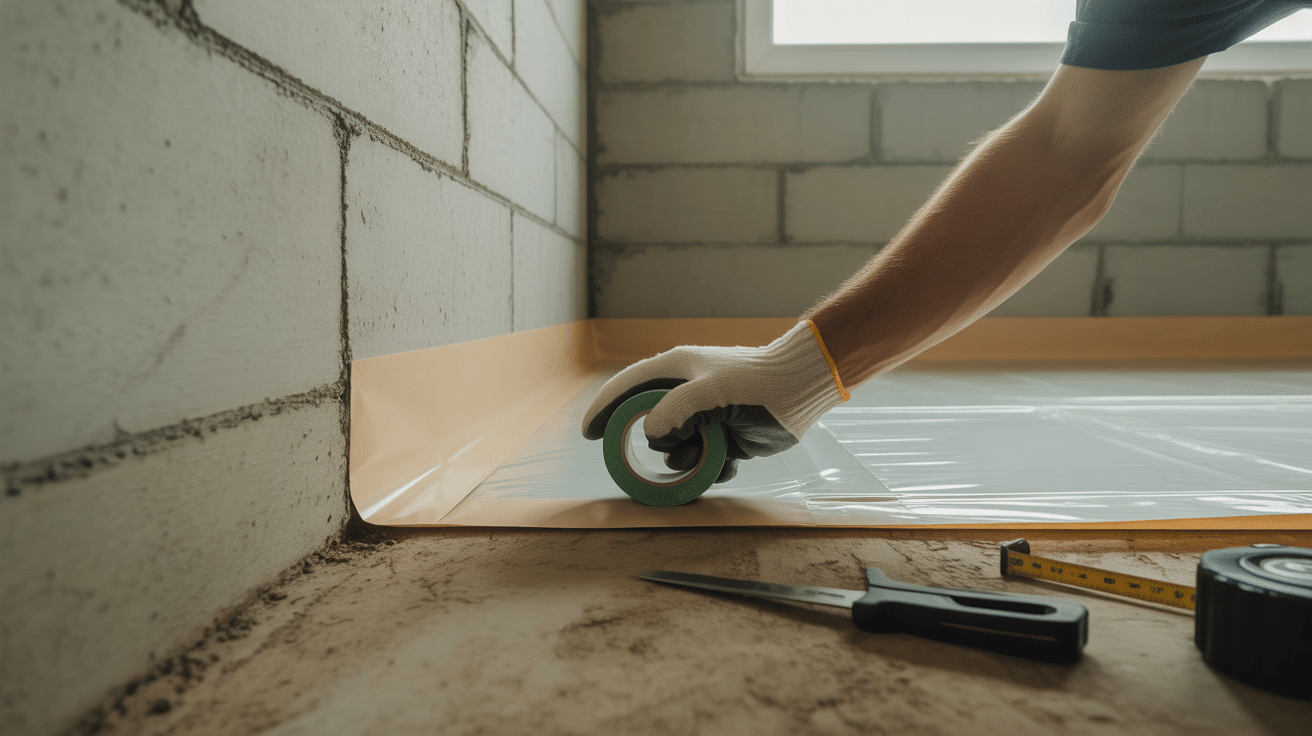
Attach the plastic sheeting to the foundation walls using specialized moisture barrier tape. Press the plastic firmly against the wall and apply tape along the entire edge where the plastic meets the wall.
When installing additional pieces, create 6-inch overlaps at all seams. Apply tape over these overlapping areas, pressing firmly to create a watertight seal. Make sure the tape extends beyond the edges of the overlap on both sides.
Tip: Plan for 6-inch overlaps at all seams for proper water protection.
Step 4: Install Remaining Pieces
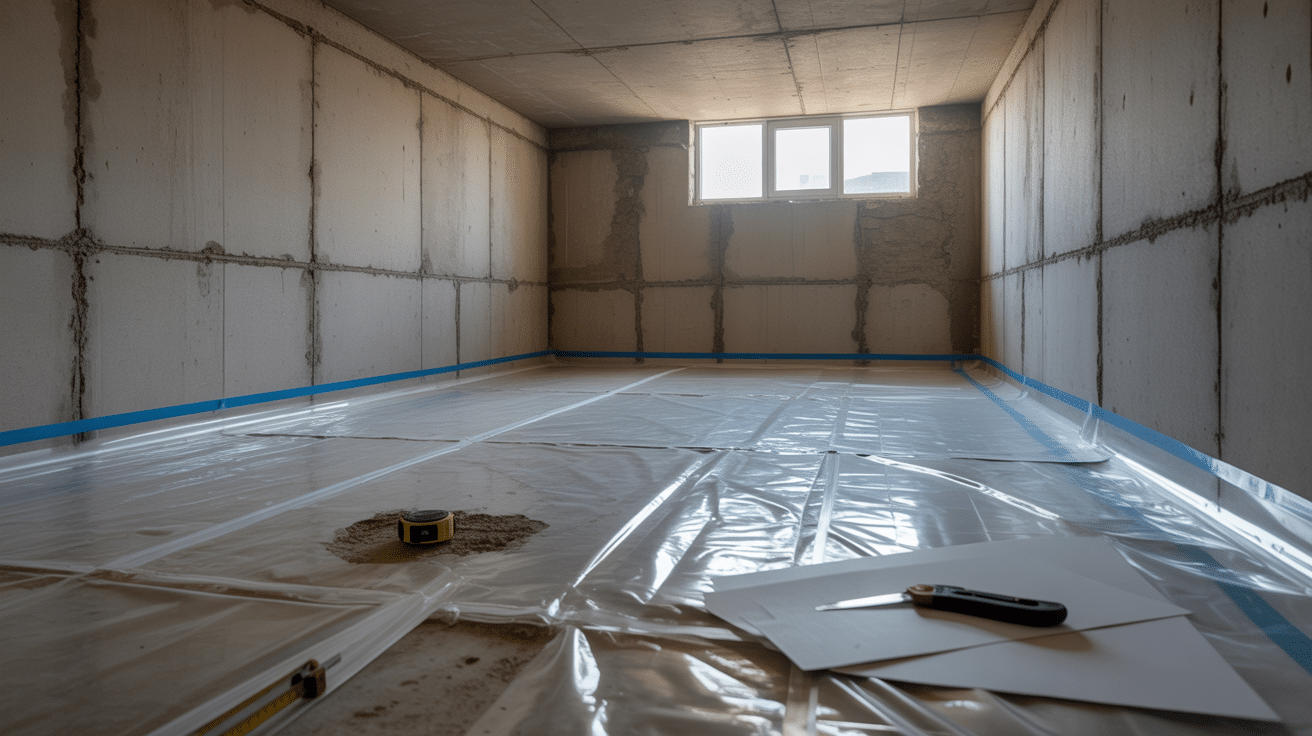
Continue the installation process with additional plastic sections, working systematically across the entire basement floor.
Each new piece should overlap the previous section by at least 6 inches. Cut pieces to size before positioning them, and always maintain the 6-inch wall run-up.
Take your time with each section to ensure proper positioning and sealing. Work in manageable sections rather than trying to handle large pieces that can be difficult to control.
Tip: Work in sections to ensure better control and fewer mistakes.
Step 5: Final Sealing
Complete the installation by sealing all remaining edges, corners, and penetrations. Apply tape around pipes, support posts, and any other objects that penetrate the barrier. Make sure every seam is completely sealed with no gaps where moisture could enter.
Go back and check your work by running your hands along all seams and edges. The plastic should be tight against all surfaces with no loose areas. Pay extra attention to corners where multiple pieces of plastic meet.
Tip: Check your work by pressing on installed sections to find any gaps that need attention.
Video Tutorial
I’d like to give credit to This Old House for their informative video, as a reference for this guide.
Common Mistakes to Avoid When Installing a Vapor Barrier
Even with the right materials and steps, installation problems can compromise your basement moisture barrier’s effectiveness. Avoiding these common mistakes ensures your barrier system works properly and lasts for decades:
- Incomplete seam sealing allows moisture to penetrate your barrier system
- Installing over wet surfaces prevents proper adhesion and traps moisture
- Ignoring foundation cracks allows water to bypass your barrier entirely
- Using too-thin plastic saves money upfront, but fails quickly under basement conditions
- Not sealing around penetrations like pipes creates weak points
- Picking a vapor barrier instead of a moisture barrier provides inadequate protection
Always use tape and adhesives specifically designed for basement vapor barrier applications. These products resist moisture and temperature changes better than general-purpose materials.
Budgeting Your Basement Moisture Barrier: Cost Breakdown
Understanding the costs helps you budget for your moisture control project and decide between DIY installation and hiring professionals. These price ranges will help you plan your basement moisture barrier investment:
| Item | Cost Range |
|---|---|
| 6-mil plastic | $0.10-$0.15 per sq ft |
| 10-mil plastic | $0.20-$0.30 per sq ft |
| 20-mil plastic | $0.40-$0.60 per sq ft |
| Additional materials | $40-$70 total |
| 500 sq ft (DIY) | $100-$200 |
| 1,000 sq ft (DIY) | $200-$400 |
| Professional installation | $2,200-$4,400 (1,000 sq ft) |
Installing a basement moisture barrier yourself saves 60-70% compared to professional installation. Save money by buying materials in bulk and shopping during off-season sales.
Essential Care for a Durable Basement Moisture Barrier
Regular maintenance keeps your basement’s moisture barrier working effectively for years. Proper care prevents small problems from becoming expensive repairs and significantly extends the life of your system.
- Do monthly visual checks for tears, gaps, or areas where the barrier has pulled away from surfaces.
- Check for moisture penetration signs like water stains or dampness after heavy rains.
- Address problems immediately since small tears grow larger if left untreated.
- Keep repair materials on hand and use the same type of tape and plastic for fixes.
- Monitor humidity levels with a hygrometer – keep below 50% consistently.
- Plan for barrier replacement every 15-20 years during dry seasons.
A well-maintained basement vapor barrier protects your investment and prevents costly moisture damage for decades.
Final Thoughts
A properly installed basement moisture barrier is one of the smartest investments a homeowner can make. It prevents costly mold remediation, protects structural integrity, and saves money on energy bills year after year.
The key to success lies in choosing the right materials and following proper installation techniques. Remember to use 6-mil plastic sheeting minimum, seal all seams completely, and address any existing moisture problems before installation.
Regular maintenance checks will keep the system working effectively for decades.
Don’t wait until moisture problems become expensive repairs. Start planning your basement moisture barrier project today.
A dry basement means a healthier home, lower utility costs, and peace of mind knowing your foundation is protected.