Older furniture pieces often show signs of wear but still hold sentimental value. Many homeowners face this exact problem with inherited or thrifted items. Finding ways to restore these pieces without spending too much can be challenging.
Good news – with basic supplies and some patience, you can turn worn-out furniture into beautiful home additions. This guide walks you through modifying French provincial end tables using simple techniques that work for many furniture styles.
In this post, I’ll cover everything from preparing your furniture surface to achieving a smooth finish, with practical tips for successful furniture painting.
The Beauty of French Provincial Style
French provincial furniture brings charm to any room with its curved legs and detailed woodwork. These pieces offer both function and style, making them perfect for modern homes. The tables in this makeover have a special story – they came from the writer’s childhood home, adding personal meaning to the project.
Even damaged pieces deserve a second chance. When full restoration isn’t possible due to missing veneer or surface damage, paint offers an excellent solution.
Choosing the right color can help these classic pieces fit with today’s home styles while honoring their traditional form.
Step-by-Step Guide to Refinishing End Tables
Tools and Materials Checklist for a DIY Painted End Table:
| Tool | Quantity | Purpose |
|---|---|---|
| 100-grit sandpaper | 1 sheet | For scuff sanding without damaging veneer |
| Screwdriver | 1 | For removing drawer pulls and hardware |
| Paint roller | 1 | For smooth surfaces with minimal brush marks |
| Paintbrush | 1 | For detailed areas and edges |
| Clean rags/paper towels | 2–3 | For cleaning and wiping surfaces |
| Ziplock bag | 1 | For keeping hardware organized |
| Material | Quantity | Purpose |
|---|---|---|
| Dawn dish soap & vinegar solution | 1 cup (50/50 mix) | Initial cleaning to remove grime |
| Mrs. Meyer’s cleaner | As needed | Secondary cleaning for thorough prep |
| Fusion mineral paint (Midnight Blue) | 1 container | Quality furniture paint with good coverage |
| Rub ‘n Buff (European Gold) | 1 tube | For refreshing metal hardware |
Step 1: Assess Your Furniture
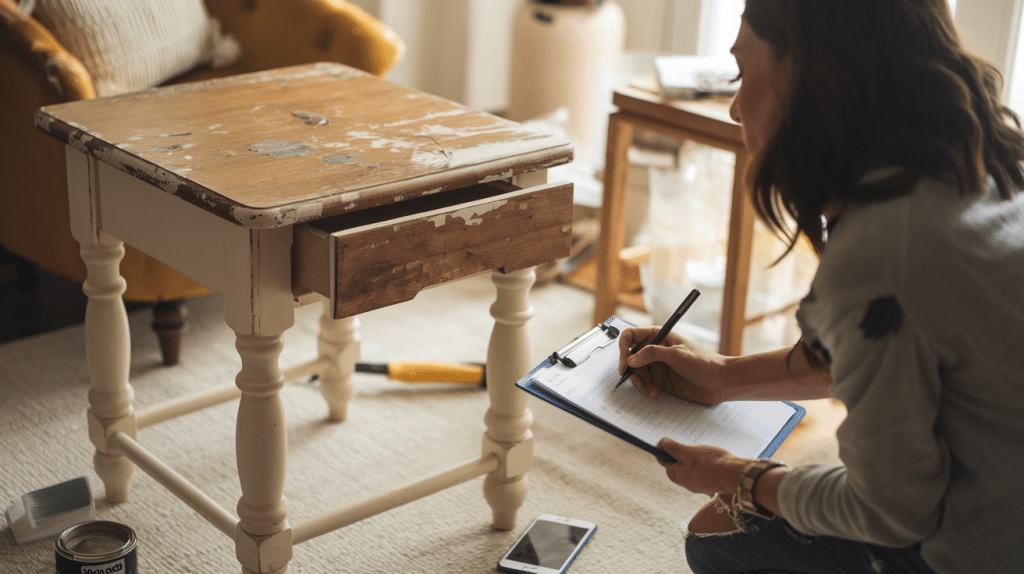
Examine your tables closely for damage and decide on your approach before starting any work. Take note of missing veneer, deep scratches, water rings, or stubborn stains that need special attention. Check the sturdiness of legs and joints to determine if any repairs are needed before painting.
Look at the overall condition to help set realistic expectations for your finished piece. Remember that paint can hide many flaws but structural issues should be addressed first.
Pro Tip: Take “before” photos from multiple angles to track your progress and remember how the hardware was positioned.
Step 2: Remove Hardware

Remove all drawer pulls, handles, and any other removable decorative elements using the appropriate screwdriver. Place smaller pieces in a labeled ziplock bag to prevent loss and keep everything organized.
Clean each piece of hardware separately to remove built-up grime before deciding whether to reuse or replace it.
Count all screws and fasteners to ensure you have everything you need for reassembly. Consider taking a photo of the back of the hardware to remember proper orientation during reinstallation.
Time Saver: If handles have multiple screws, tape each set together after removal to avoid confusion later.
Step 3: Sand Surfaces

Use 100-grit sandpaper to create a light scuff sanding across all surfaces that will receive paint. Work in the direction of the wood grain whenever possible to minimize visible scratches. Apply gentle pressure, especially on veneer surfaces, to avoid damaging the thin wood layer.
Focus extra attention on glossy or previously finished areas to ensure proper paint adhesion. Make sure to sand into corners and detailed regions where the paint needs to grip.
Safety Note: Always work in a well-ventilated area, wear a dust mask, and consider eye protection when sanding to prevent irritation.
Step 4: Clean Thoroughly

Wash all surfaces with a 50/50 solution of dish soap and vinegar to cut through years of built-up oils and dirt. Rinse with clean water and allow to dry completely. Follow with a household cleaner for a second cleaning to ensure all sanding dust and residue are removed.
Pay special attention to crevices, corners, and decorative details where dust can hide. Wipe down with a tack cloth or lint-free rag as a final step before painting to capture any remaining particles.
Expert Advice: Allow at least 24 hours of drying time in a low-humidity environment before applying paint to prevent future adhesion problems.
Step 5: Apply First Paint Coat

Begin with a thin first coat using light, even strokes to establish a base layer. Use a roller on flat surfaces like tops and drawer fronts to minimize visible brush marks. Work in sections, maintaining a wet edge to prevent lap marks where paint layers overlap.
Paint in one direction, following the natural lines of the furniture when possible. Focus on consistent coverage rather than hiding all flaws, as the second coat will build opacity.
Paint Tip: If using a brush, dip only one-third of the bristle length in paint and tap excess off before applying to prevent drips and heavy buildup.
Step 6: Add Second Coat

Apply a slightly thicker second coat once the first coat is completely dry to the touch, usually 2-4 hours, depending on humidity. Pay special attention to areas that appear thin or streaky after the first coat dries. Use the same application technique as the first coat for consistency in the finish.
Check edges and corners, where paint can sometimes pull away during drying. Allow this coat to dry fully, preferably overnight, before handling or reattaching hardware.
Quality Check: Examine your work in both natural and artificial light to catch any missed spots or inconsistencies in sheen before considering the job complete.
Step 7: Refresh Hardware

Clean the original hardware using an appropriate cleaner for the metal type. Ketchup works well for brass, but commercial cleaners may be necessary for stubborn tarnish. Consider enhancing hardware with metallic wax like Rub ‘n Buff to create an updated finish that complements your new paint color.
Apply sparingly with your finger or a soft cloth; buffing after a few minutes for best results. Protect the freshly painted surface when reinstalling hardware by using a thin card under screws to prevent scratches. Allow metal treatments to fully cure before handling them regularly.
Design Idea: If the original hardware doesn’t suit your new vision, replacing it offers an easy way to change the style of your piece completely with minimal effort.
Video Tutorial
I’d like to give credit to Our Contented Home for their informative video, which served as a reference for this guide.
5 Creative Ways to Change Your End Table with Paint
Give your end table a fresh look with these five creative painting ideas.
1. Chalk Paint Elegance

Chalk paint creates soft, matte finishes perfect for worn-in looks on end tables. It adheres well to most surfaces without extensive prep.
The technique suits country and farmhouse styles. Costs range from $20 to $ 35 per quart, which typically covers a small table. The finish needs sealing with wax or a topcoat for protection.
2. Geometric Patterns for a Modern Twist

Painter’s tape helps create clean lines and shapes on end tables. Try triangles, squares, or hexagons in contrasting colors that match your room.
This method works well for contemporary homes. The key is careful tape placement and allowing each section to dry fully before adding the next color.
3. Ombre Effect for a Stylish Gradient

This technique blends two colors smoothly from dark to light. The subtle shift works well on drawer fronts or tabletops.
You’ll need paint in your chosen colors plus a mixing medium. The method requires working quickly while the paint remains wet for the best blending results.
4. Metallic Accents for a Touch of Glam

Gold, silver, or copper details add richness to end tables. Try painting just the legs, edges, or hardware for subtle enhancement. These paints cost slightly more ($15-25 per small can) but use less. The shine brings warmth to dark woods and highlights carved details well.
5. Nature-Inspired Botanical Designs

Leaf patterns and flower motifs bring outdoor charm to indoor furniture. Use stencils for clean results or freehand for a more artistic look.
These designs work nicely on tabletops or drawer fronts. Water-based polyurethane helps protect the artwork from scratches and water rings.
Tips for Furniture Maintenance
1. Regular Dusting
Dust painted furniture weekly with a soft cloth to maintain its finish and appearance. This prevents buildup that can eventually harm the paint and make cleaning more difficult later.
Microfiber cloths work best as they trap dust instead of spreading it around on the surface. For carved details or hard-to-reach areas, use a small paintbrush or makeup brush to get into crevices. Make this part of your weekly cleaning routine to extend the life of your furniture.
2. Gentle Cleaning
Clean surfaces monthly with a damp cloth and mild soap if needed, as harsh chemicals can damage paint over time. Mix a few drops of dish soap in warm water for an effective yet gentle cleaner. Always test cleaners on an unseen spot first, such as the back or underside of the piece.
Dry immediately after cleaning to prevent water damage to the finish or seeping into joints. For stubborn marks, try a magic eraser used very gently on painted surfaces, being careful not to remove the paint itself.
3. Avoid Direct Sunlight
Position painted furniture away from direct sunlight when possible to preserve the color and finish. UV rays can fade paint colors over time, especially darker shades like navy blue or forest green. Consider window treatments such as sheer curtains or UV-filtering films to protect furniture that must be placed near windows.
Rotate decorative items occasionally to ensure even exposure across the surface. If you notice beginning signs of fading, consider rearranging your room layout to provide better protection.
4. Use Protective Pads
Place felt pads under lamps, vases, and other items that sit on painted surfaces to prevent scratches and ring marks. This simple step protects against damage when objects are moved during cleaning or redecorating. Replace pads when they become worn or compressed to maintain protection.
For heavier items, consider silicone or cork pads, which offer more cushioning and stability. Add protective pads to the bottoms of table legs to prevent floor scratches and reduce wear on the furniture itself. Keep a variety of pad sizes on hand for different objects and furniture pieces.
Things to Avoid When Refinishing Furniture
| Mistake | Consequence | Better Alternative |
|---|---|---|
| Skipping prep work | Paint peeling or poor adhesion | Take time to sand and clean properly |
| Using the wrong sandpaper | Damaged veneer or inadequate surface | Use 100-120 grit for most furniture |
| Heavy paint application | Drips and visible brush strokes | Apply multiple thin coats |
| Rushing between coats | Tacky finish or bubbling | Allow proper drying time per instructions |
| Painting in high humidity | Extended drying time, poor finish | Work in a climate-controlled environment |
| Over-sanding veneer | Exposed particle board or wood | Sand lightly, especially on table tops |
| Using incorrect paint | Chipping and poor durability | Use quality furniture-specific paint |
| Improper brush cleaning | Dried brushes, streaky application | Clean tools promptly after use |
Conclusion
Giving new life to old furniture connects us to family history while adding personal style to our homes. The process of transforming these French provincial tables shows how simple techniques can save items that might otherwise be discarded.
With basic tools, quality paint, and some patience, anyone can achieve professional-looking results. The navy blue color chosen for these tables works well in many settings and creates a fresh look while honoring the classic style.
Next time you see worn furniture, consider its potential rather than its flaws. Whether working with family heirlooms or thrift store finds, the satisfaction of creating something beautiful makes the effort worthwhile.
Your home deserves personal touches that tell your story.
Frequently Asked Questions
1. How to Decorate a Table for Everyday Use?
Place items of varying heights like a small lamp, stack of books, and a plant to create visual interest without cluttering the surface.
2. What Is the Formal Way to Set a Table?
Place forks on the left, knife and spoon on the right, with plates centered and glasses above the knife.
3. What Is a Table Arrangement Called?
A formal table setting with specific placement of dinnerware, glassware, and utensils is called a tablescape.