Do you often walk past oyster shells on the beach without a second thought? I did too, until I found out how these simple shells can be turned into stunning home items.
Making things with oyster shells lets you bring a bit of the sea into your home. These shells work well for many projects because of their smooth shape and white color.
In this blog, you’ll learn the step-by-step process for making pretty trinket dishes from oyster shells. You’ll also learn about cleaning, painting, and adding nice touches to create useful items for your home.
These crafts make perfect gifts or special additions to your own space. Ready to start this fun project?
Why Oyster Shells Make Perfect Crafting Material?
Oyster shells offer the ideal base for crafting due to their natural bowl shape. Their smooth inner surface and sturdy structure hold small items securely while looking good on any surface.
The white inside of oyster shells takes paint well and provides a blank canvas for your ideas. You can add colors, patterns, and textures that match your home style or mood.
Their varied sizes and shapes make each finished craft unique, giving you one-of-a-kind pieces that can’t be mass-produced. This natural quality adds value to your crafts and makes them special gifts.
Essential Materials You’ll Need
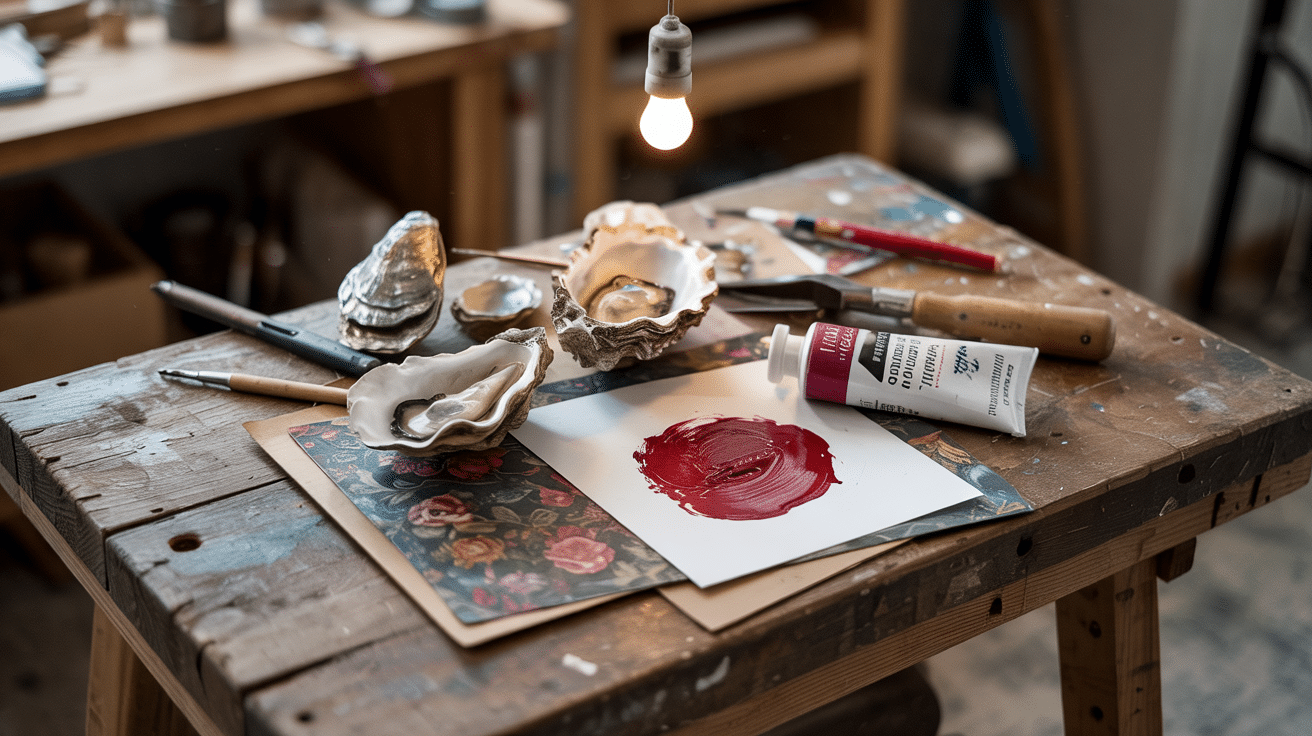
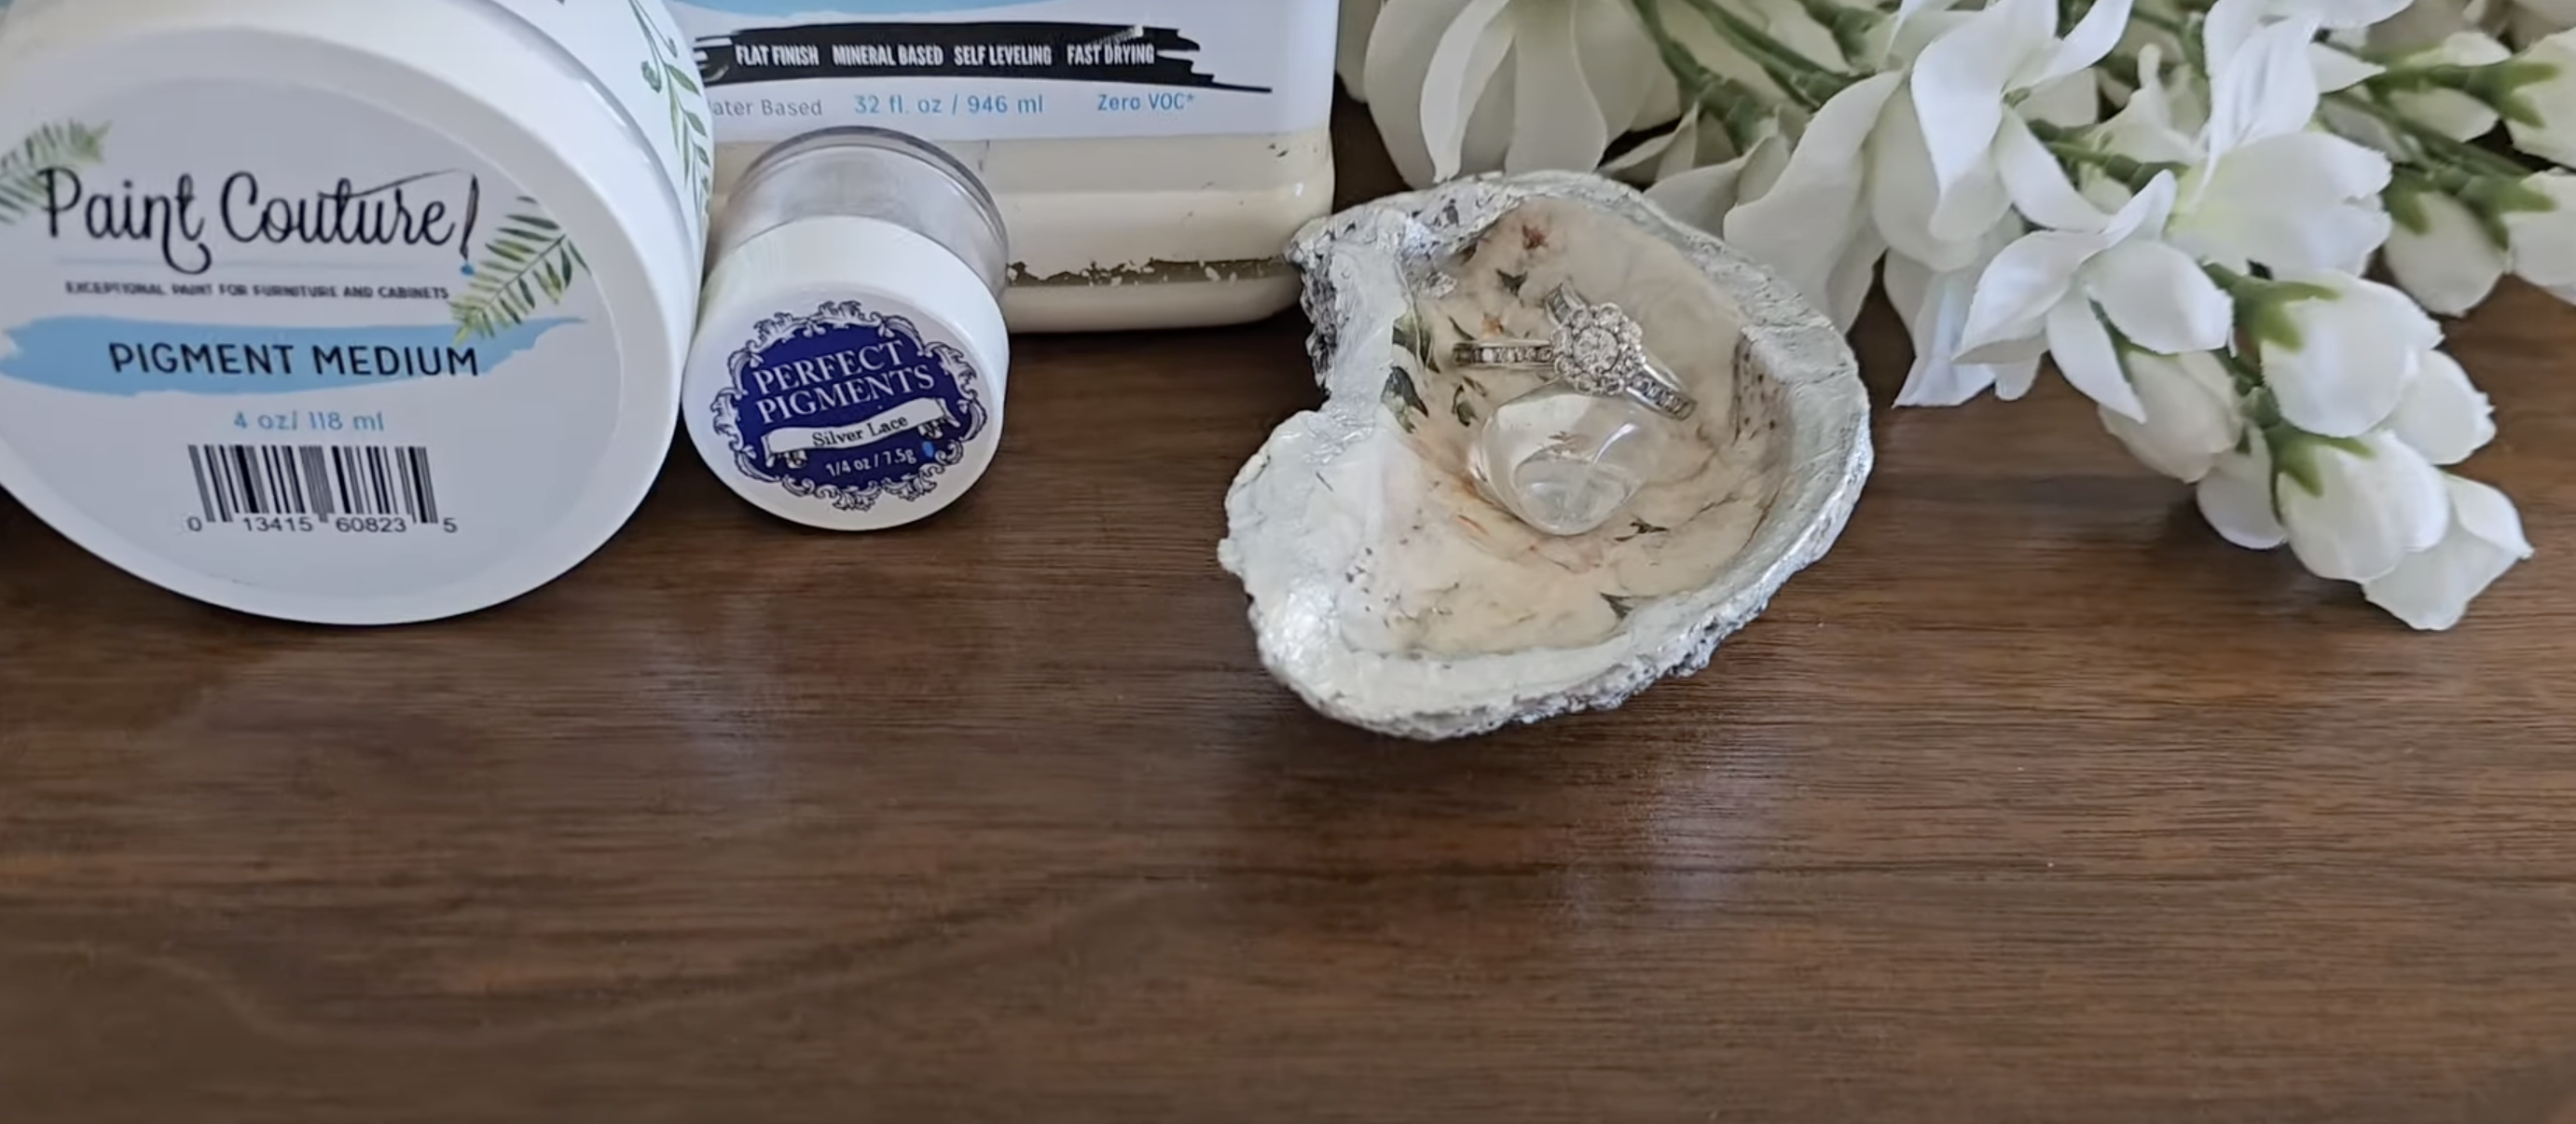
- Oyster Shells: Clean, dry oyster shells form the base of this project. Look for shells with a good cup shape and smooth inner surface. You can collect these from beaches or buy them from craft stores if you don’t live near the coast.
- Paint: You’ll need a light-colored paint for the base coat. A soft white or cream works well to cover any spots inside the shells. Water-based acrylic paint dries quickly and sticks well to the shell surface.
- Decoupage Materials: For decorating the shells, gather thin decorative paper with patterns you like. Rice paper works well because it’s thin and fits the curved surface. You’ll also need decoupage glue or medium to attach and seal the paper to the shell.
- Finishing Materials: To create fancy edges, collect metallic paint in gold or silver. A clear top coat or sealer protects your work and gives it a shiny finish that looks professional.
- Tools: Basic tools make the job easier, including small paintbrushes for detail work, scissors for cutting paper, sandpaper for smoothing edges, and a heat tool to speed up drying time between steps.
Steps to Make Oyster Shell Trinket Dishes
In these six simple steps, you’ll learn how to change plain oyster shells into beautiful, useful trinket dishes.
You’ll see how to prepare shells properly, add decorative elements, and finish with special touches that make these crafts look store-bought rather than homemade.
Step 1: Clean Your Oyster Shells
First, wash the oyster shells with warm, soapy water. Use an old toothbrush to clean off any sand, dirt, or bits stuck to the shell. Get into all the nooks of the shell.
Rinse the shells well after washing. Make sure all soap is gone. Then lay them out to dry fully. This might take a few hours or a full day.
The shells need to be fully dry for the paint to stick well. Most shells have dark spots or marks inside. Don’t worry about these, as they will be hidden by paint later. Clean shells are the base for good crafts. Take your time with this step for the best results.
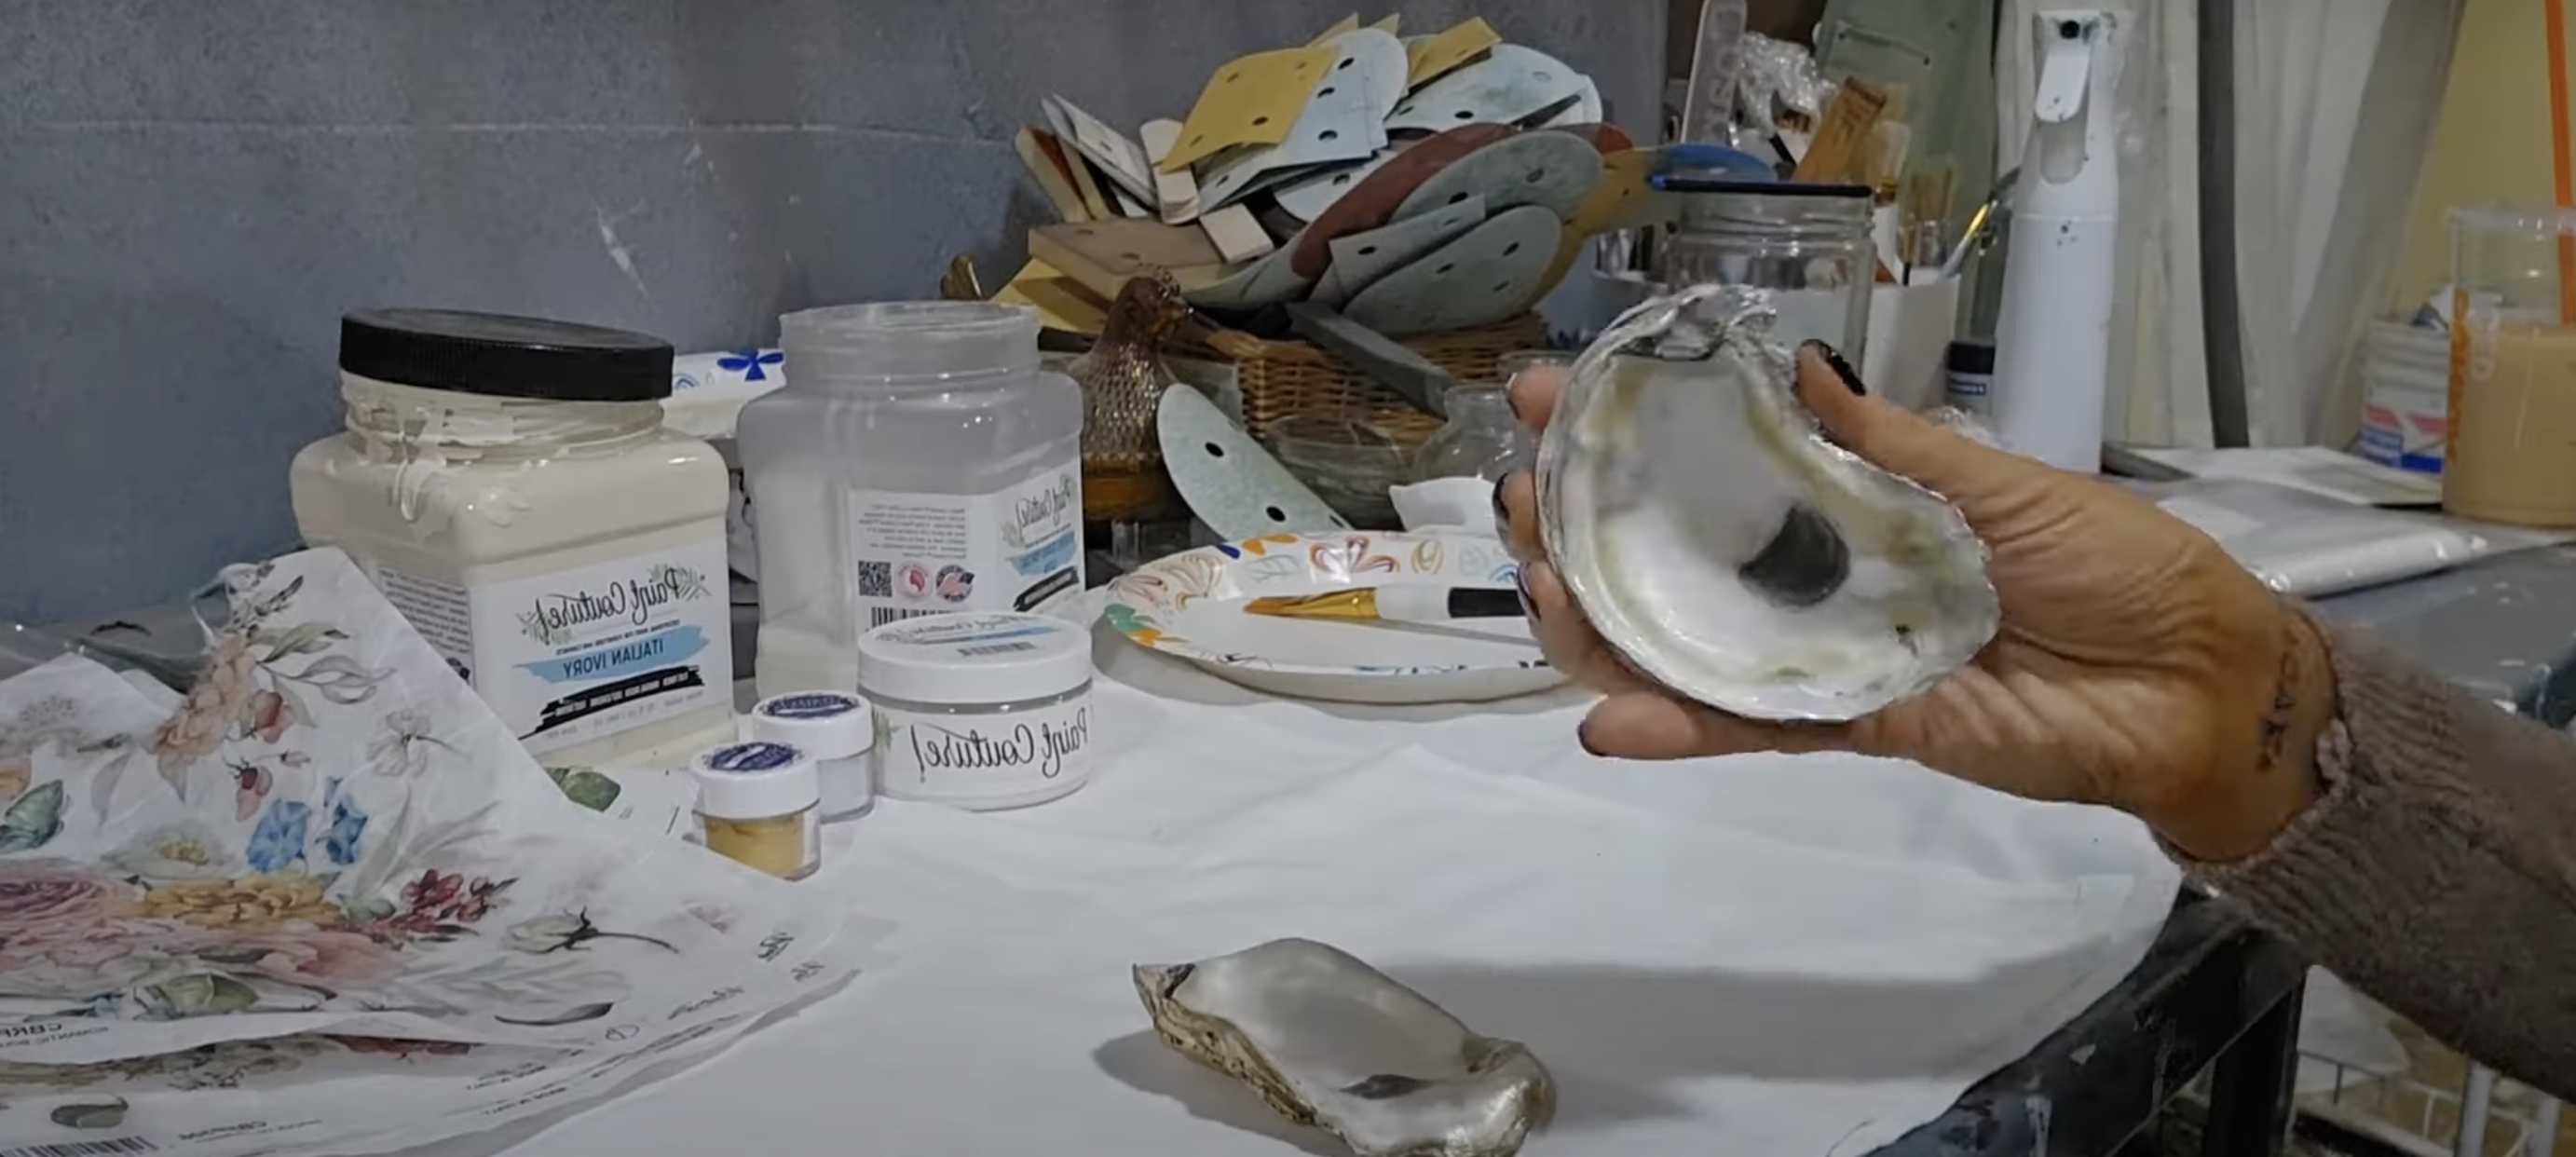
Step 2: Paint the Base Coat
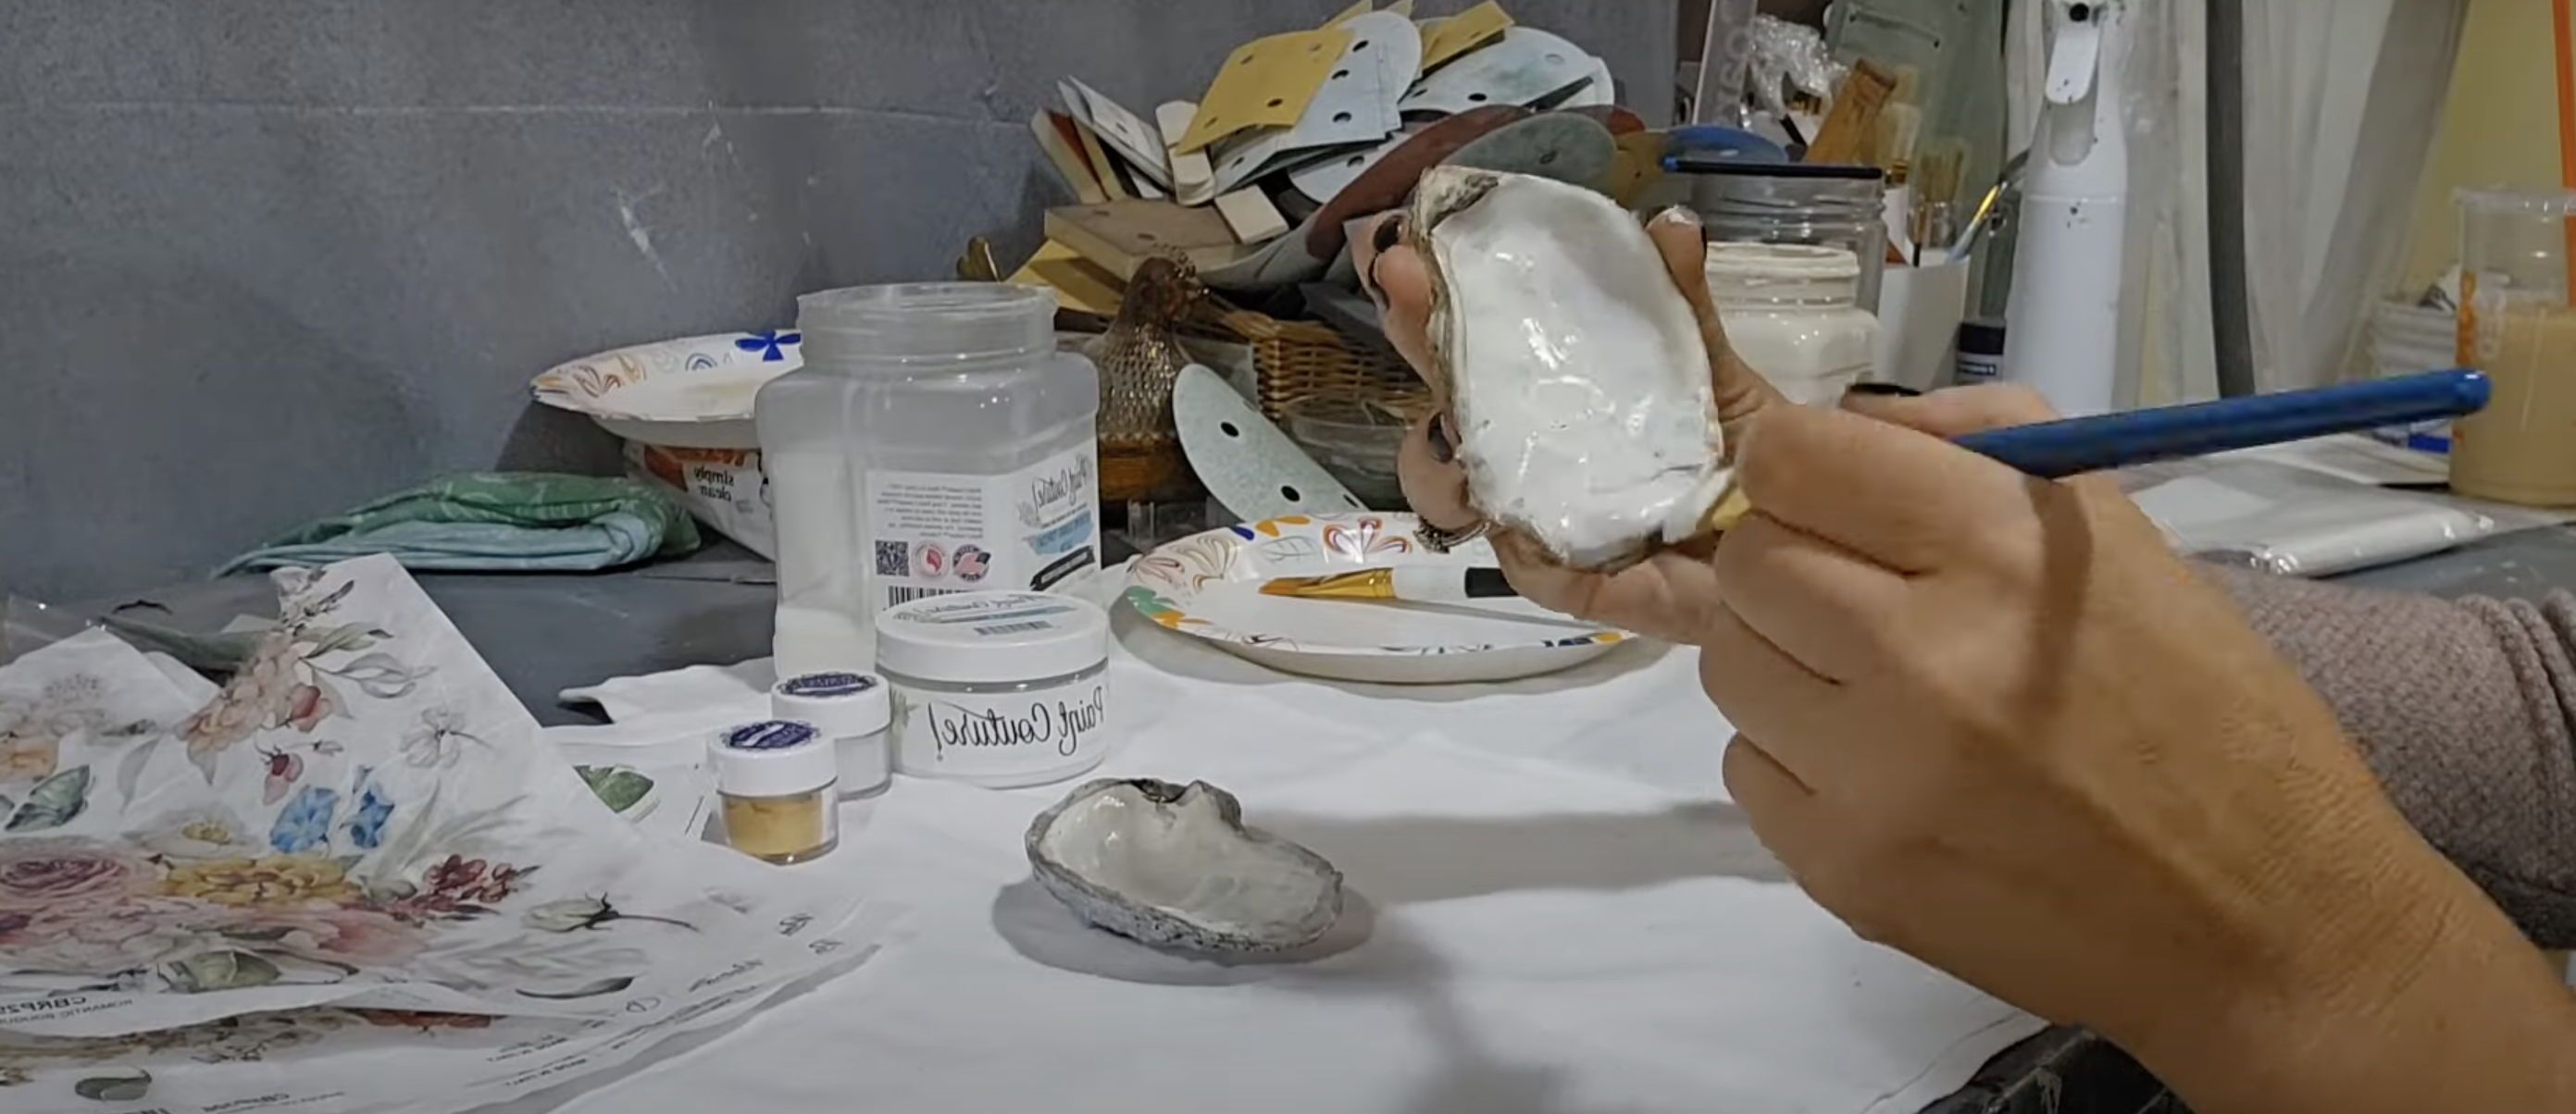
Start by adding a thin layer of light-colored paint to the inside of each shell. A color like Italian Ivory works well. Use a small brush to put on the paint. Focus on making the paint smooth over any dark areas. Be careful not to put the paint on too thick, as this can cause cracks. Let the first coat dry for about 30 minutes.
If you need to dry it fast, you can use a heat tool. Keep it about six inches away from the shell and move it gently till the paint feels dry. Once the first coat is dry, add a second thin coat. Two coats will give you better cover and a smooth base. Let the second coat dry fully before the next step.
Step 3: Add Your Design with Paper
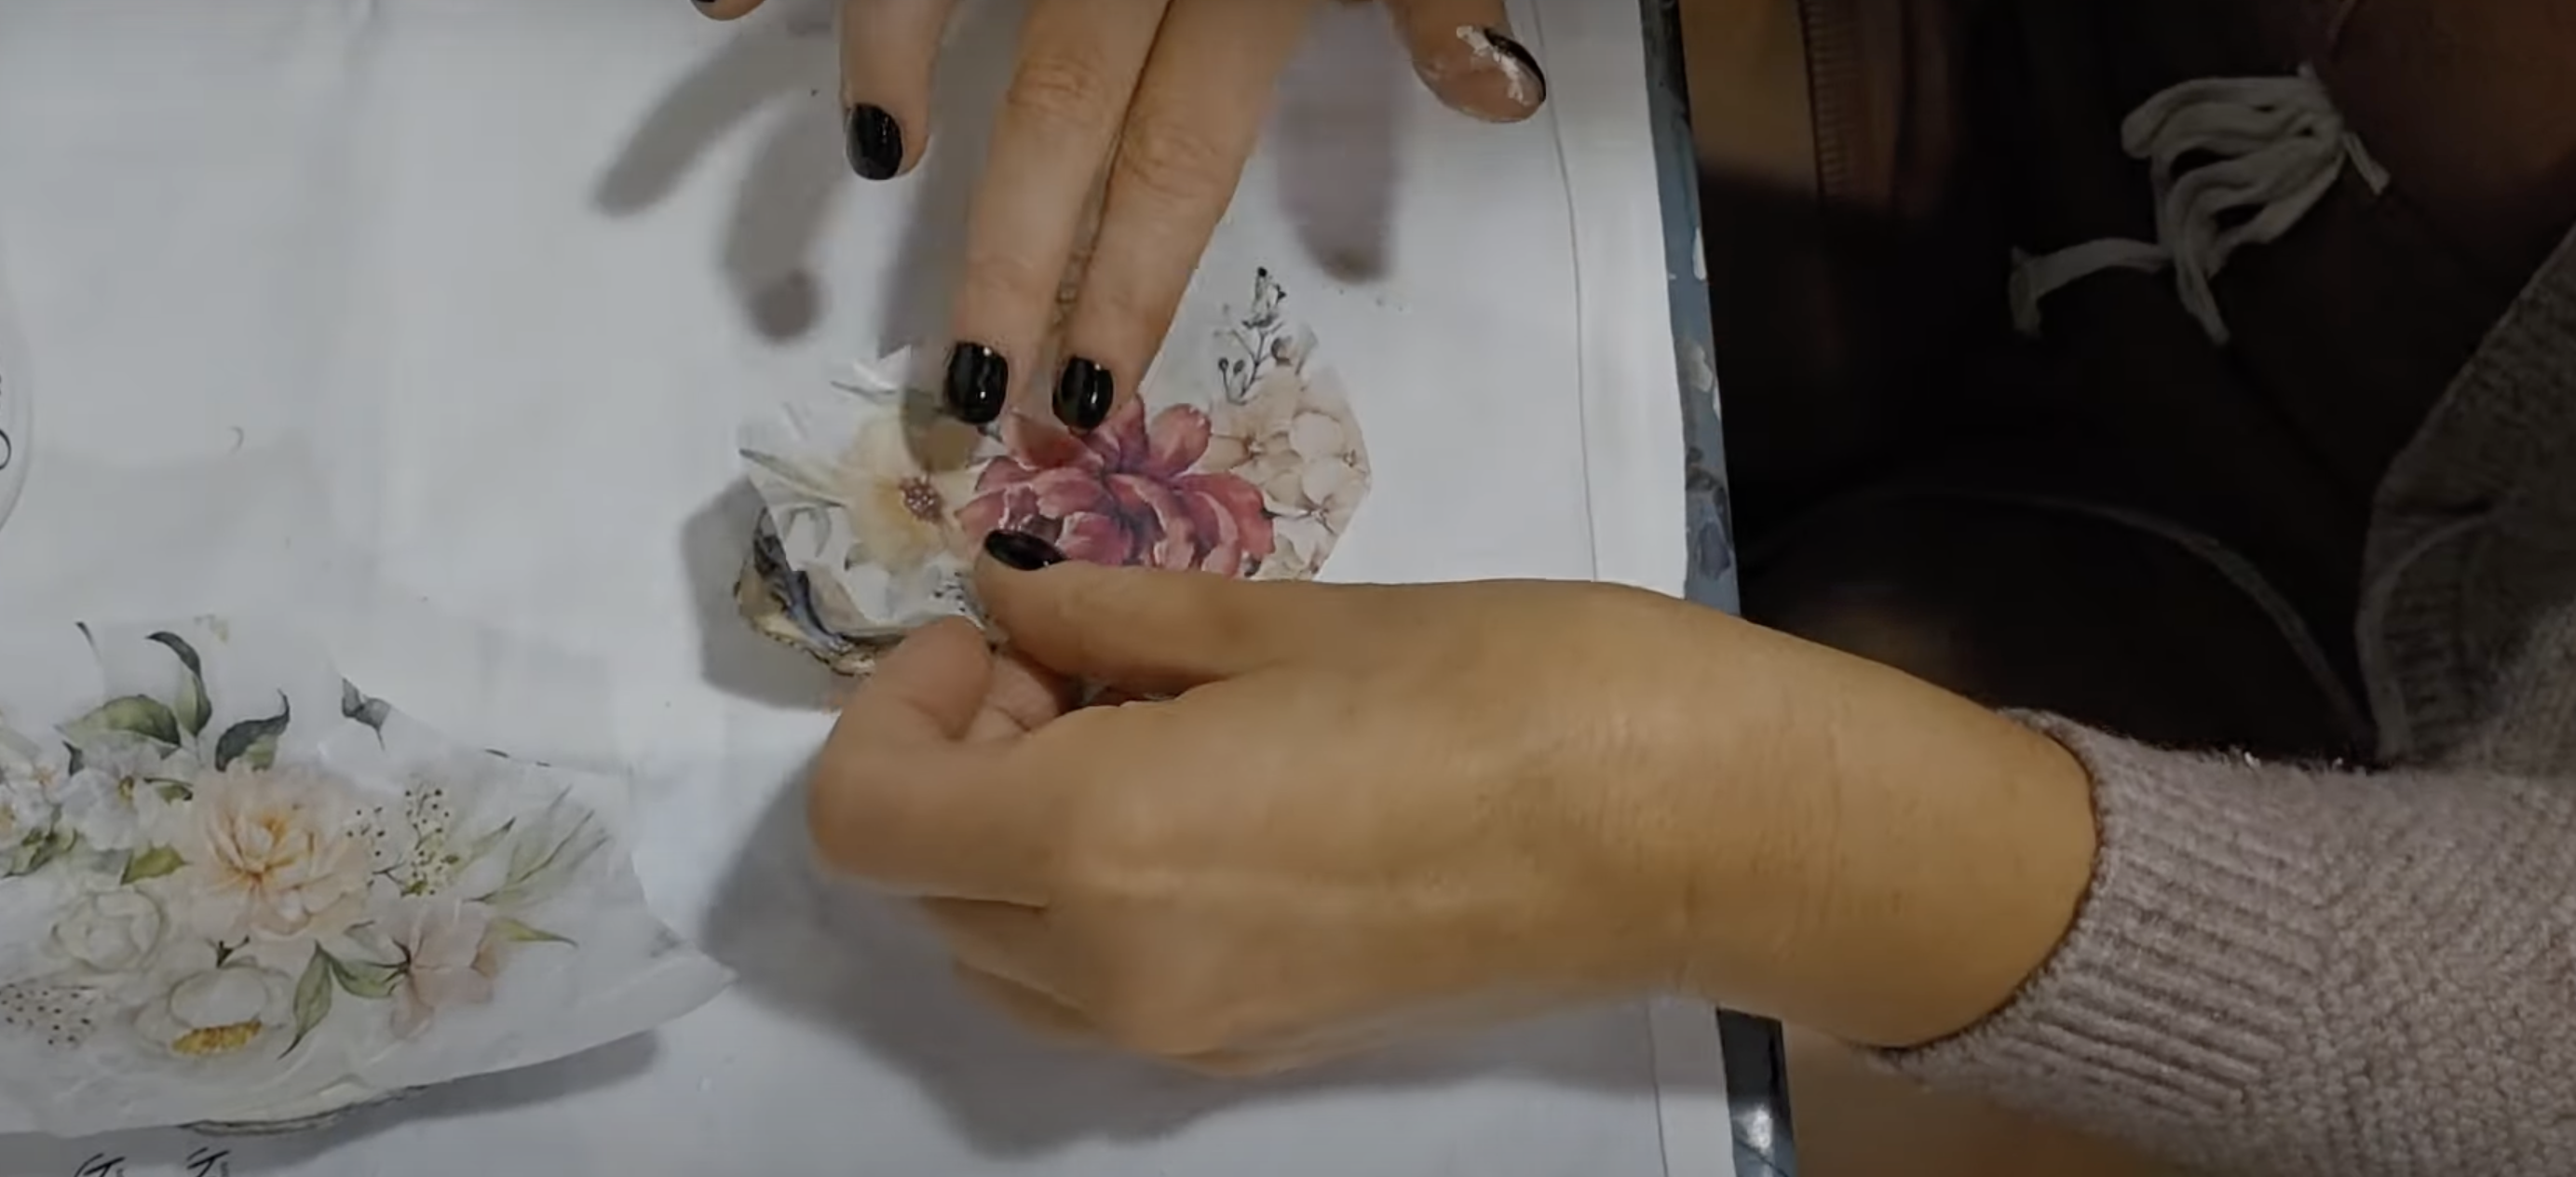
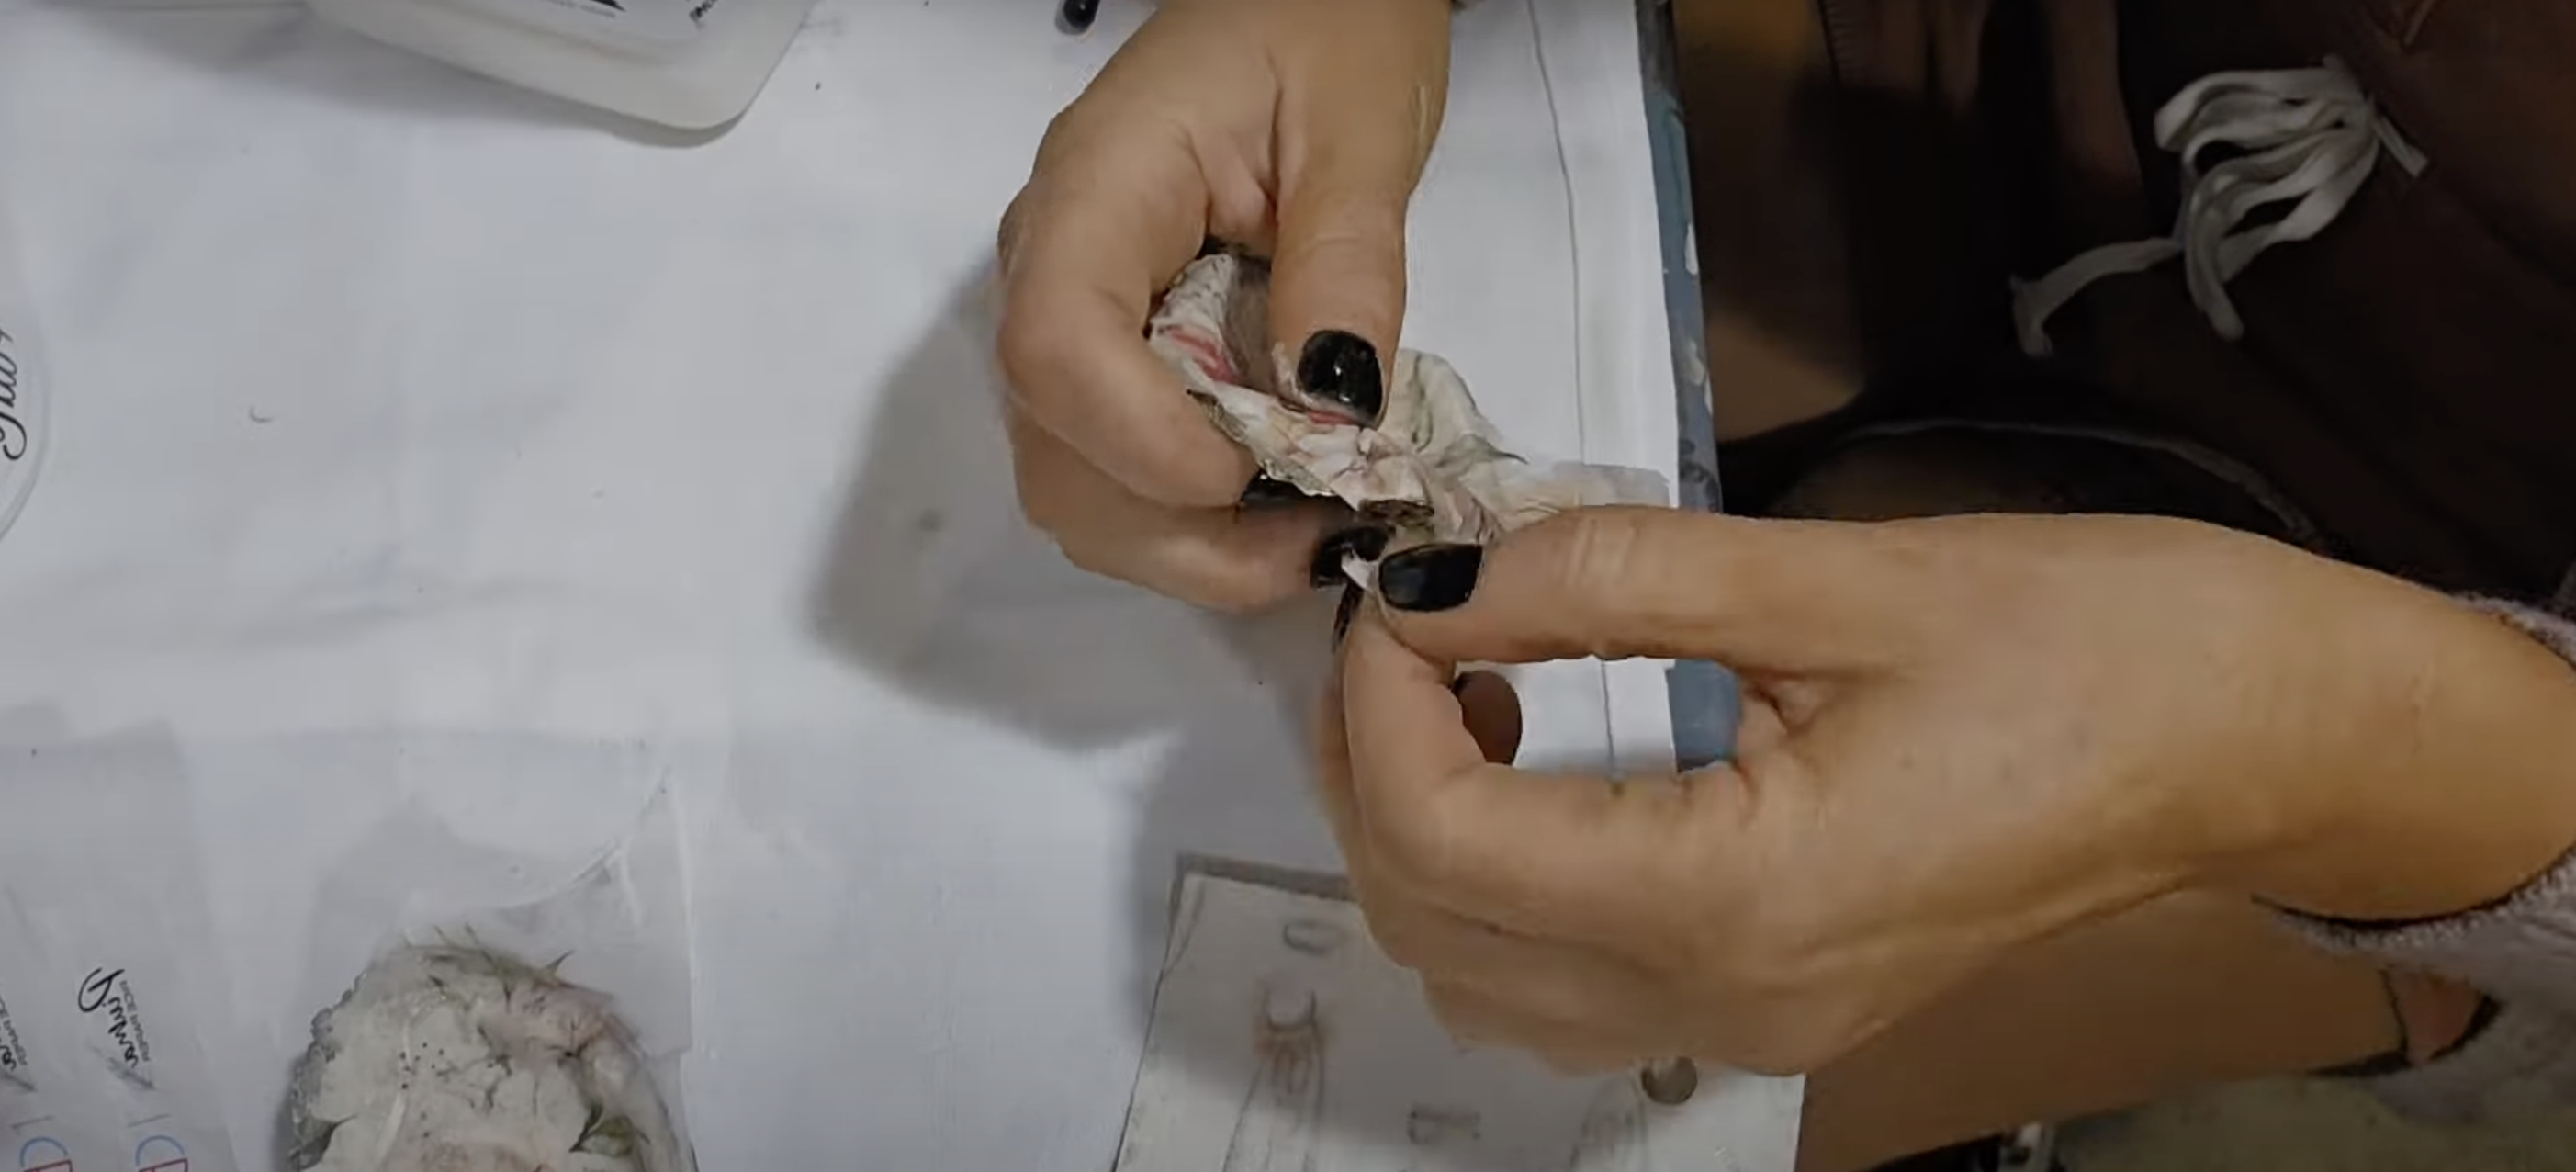
Choose rice paper with patterns that fit your style. Small designs work best with the shell’s inner shape. Place the shell on the back of the paper and trace around it. Cut a bit bigger than the line you traced. Brush a layer of glue onto the painted part of the shell. While still wet, place the cut paper on top. Start from the middle and smooth out.
Press the paper softly to get rid of air bubbles and wrinkles. For tough spots, make tiny cuts to help the paper fit the shell’s shape. Once flat, add a thin layer of glue over the top to seal it.
Let this layer dry fully. Good paper choices include floral, geometric, or sea-themed patterns. Pick what fits your taste and home style.
Step 4: Clean Up the Edges
When the glue is dry, look for paper hanging over the edge. Use fine sandpaper or small scissors to trim off the extra for clean lines. After trimming, add a clear top coat over the whole inner part. This includes the edges where you cut. This step seals the paper and makes the design last longer.
The clear coat also gives a nice look to your craft. It makes the colors pop and adds shine. Let the clear coat dry as told on the product. Clean edges make your craft look more put-together and well-made. This step turns a basic craft into something that looks like a store-bought item.
Step 5: Add Metallic Trim
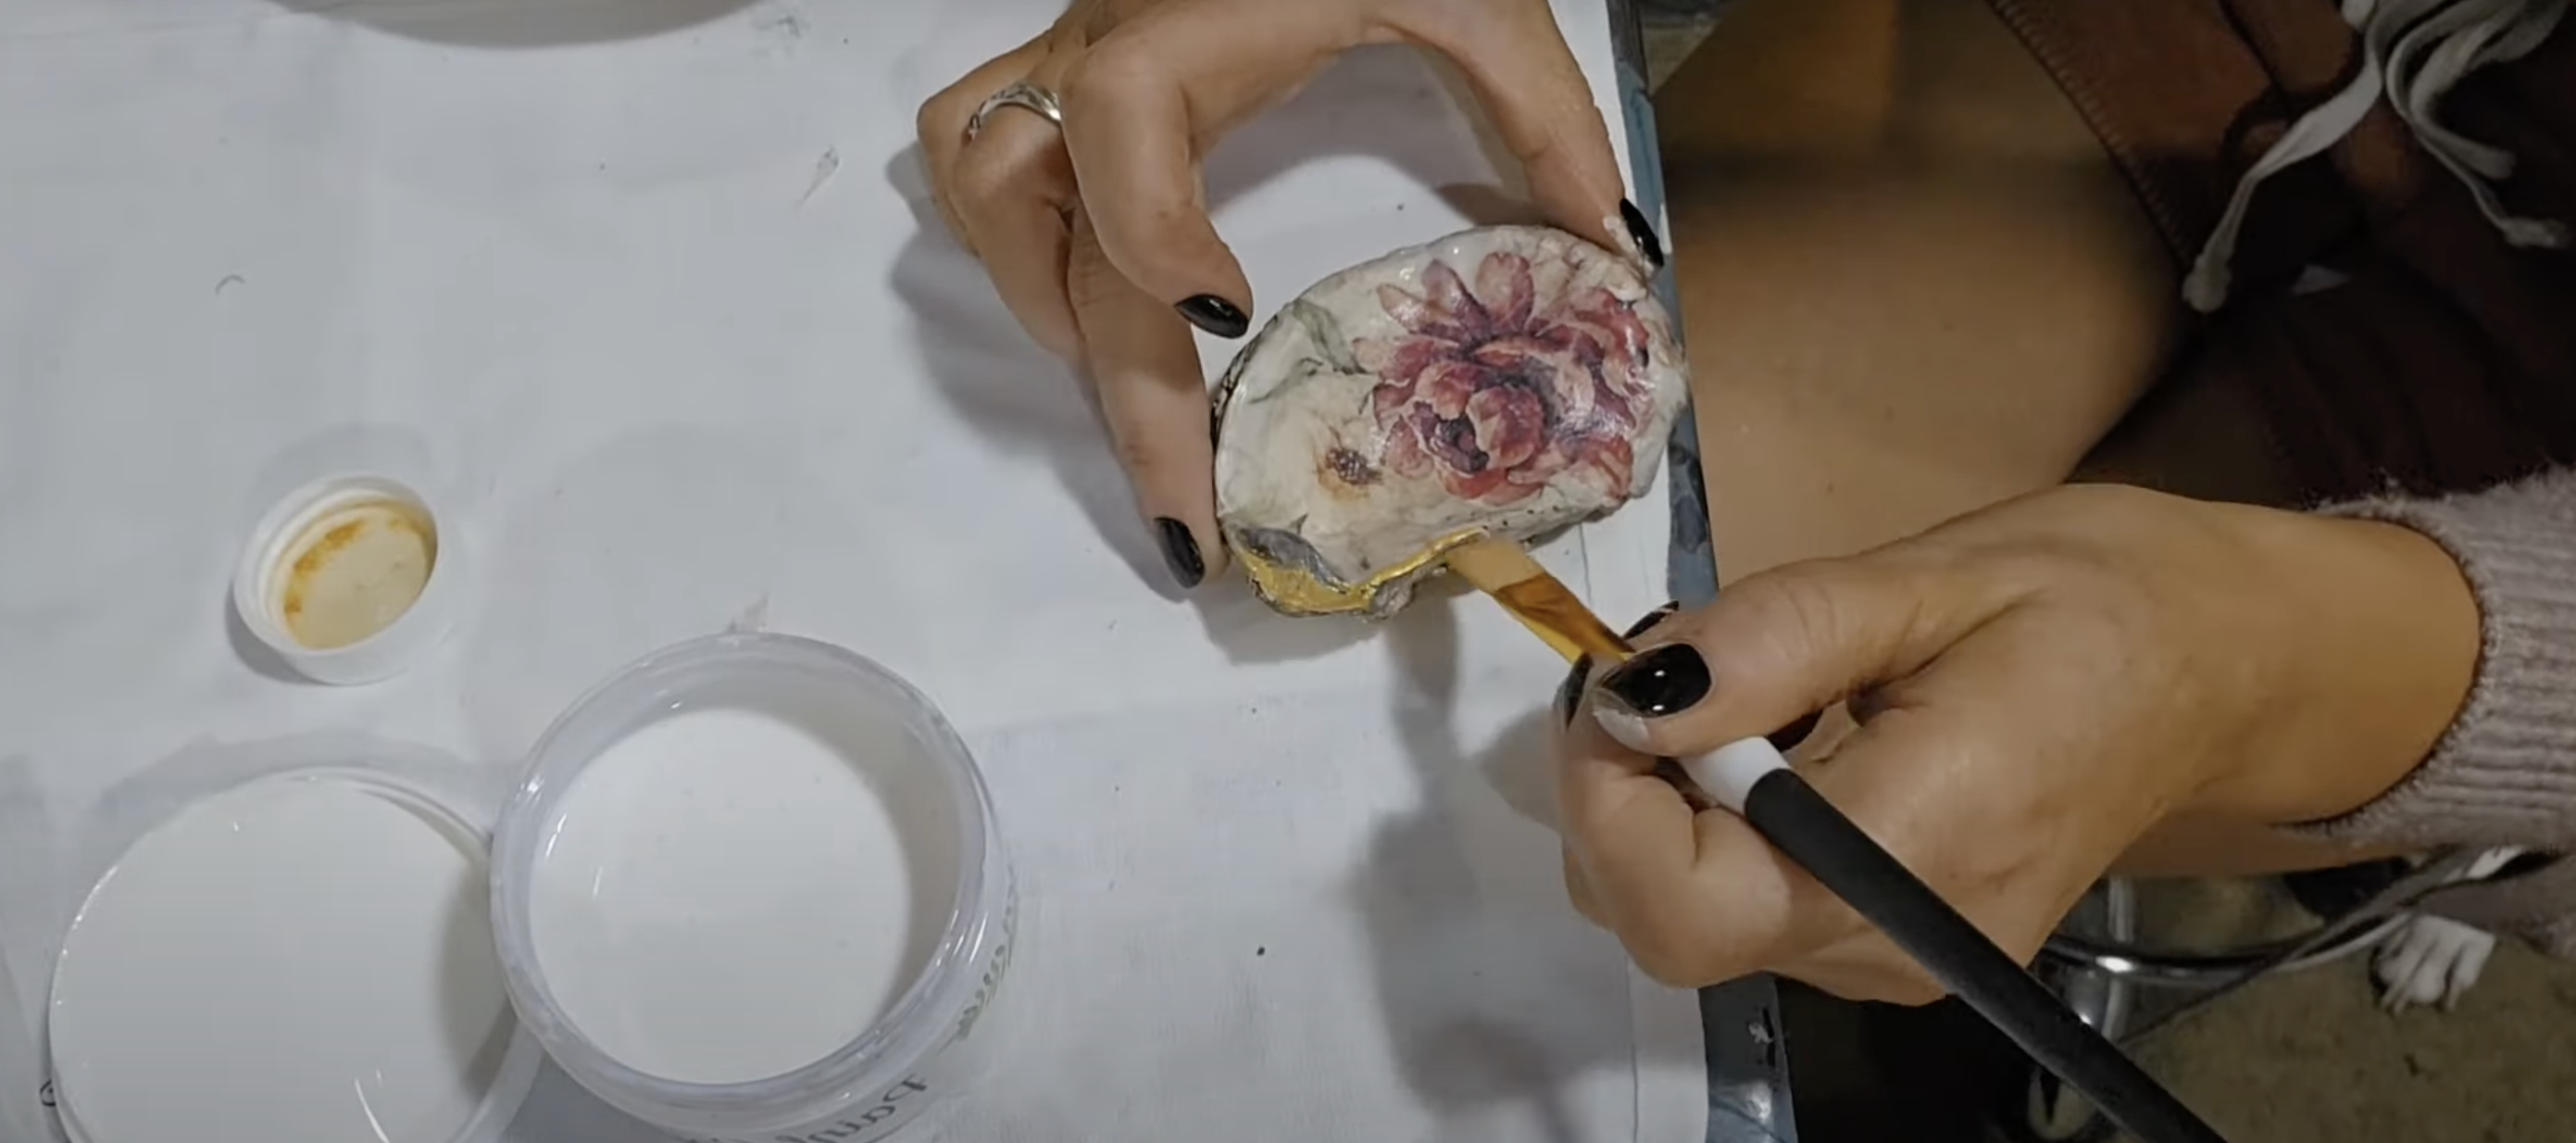
Mix your metallic powder with the medium as told on the package. Most times, you use a small bit of powder to medium to get a thick cream-like mix.
With a small brush, put the metallic mix along the inner edge of the shell. This outlines the design and makes the shell’s natural shape stand out. Both gold and silver look nice, based on what you like.
The metallic edge gives a fancy touch to your craft. It makes the shell look more like a real dish and less like a plain shell. Let the metallic edge dry fully. This step takes your craft from nice to wow. The shine of metal next to the paper design looks rich and well-made.
Step 6: Seal and Let Dry
Once the metal edge is dry to touch, add one last clear coat over the whole inner part of the shell. This final layer gives a shield and makes the shell have a shiny finish.
Let your shell crafts dry for at least 24 hours. This makes sure all layers are fully set. After that, they’re ready to use for holding rings, earrings, or other small things. Your oyster shell crafts can sit on a dresser or in a bathroom. They make nice gifts, too. Each one is unique due to the shape of the shell and your choice of design.
Video Tutorial
For more tips and step-by-step guidance, check out the video tutorial that inspired this blog.
By – Paint Couture Paint
Good shell crafts can work in many spots around your home. Here are some top uses for the shells you’ve turned into art:
Different Ways to Use Your Oyster Shell Crafts
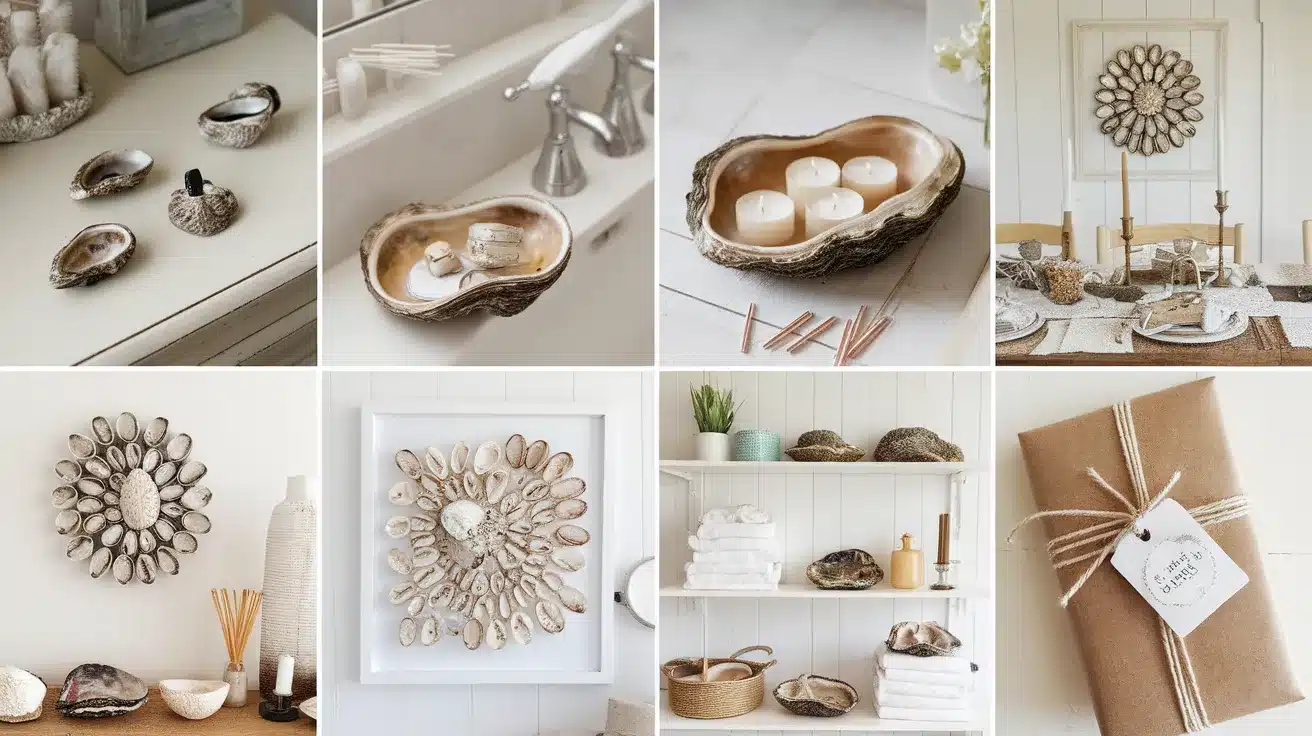
Good shell crafts can work in many spots around your home. Here are some top uses for the shells you’ve turned into art:
1. Useful Storage Solutions
Oyster shells make perfect small holders for daily items. You can use them to keep rings and earrings safe on your dresser. They work well for paper clips or pins in your work space.
Many people store small buttons or sewing needs in them too. Some folks place keys by the door so they won’t forget them. The flat shape and smooth inside of the shells makes them ideal for these small things that often get lost.
2. Bath and Home Items
Your shell crafts fit well in many rooms and serve helpful roles. Set them as soap dishes in bathrooms for a touch of style. They can hold cotton balls or swabs in guest baths.
In the kitchen, place them under hot tea bags to protect your tables. Larger shells work well with small candles for soft lighting during dinner time. These uses blend function with style, making your shell crafts both useful and pretty.
3. Wall and Shelf Display
Turn your shells into home decor that catches the eye. You can add hanging parts to make wall art from your best shells. Some people build a group display on a shelf with shells of different sizes.
Try mixing them with photos and other sea items for a theme. White or cream colors go well with blues to create a sea feel. The white or pearl look of oyster shells fits with many home styles from beach themes to clean, bright spaces.
4. Gift Ideas
Shell crafts make great gifts that show care and thought. Friends who love the ocean will enjoy these natural items. New home owners often like small, unique decor pieces.
Some crafters make special dishes as wedding gifts for couples. Tiny shell cups can hold small plants for those who love growing things. Add a small note about where you found the shells to make the gift more personal and full of meaning.
Tips for Perfect Shell Crafts
For the best results with your shell crafts, keep these tips in mind:
- Pick shells with a deep cup shape for dishes
- Wash shells in hot water to kill any germs
- Let each layer dry fully before adding the next one
- Use thin layers of paint and glue to stop peeling
- Try small stamps instead of paper for a different look
- Add small feet with clay or glue dots for dishes that sit flat
- Spray with clear sealer if the craft will be used in damp areas
These tips help you avoid common issues and make your crafts better. With time, you’ll find what works best for you. The key is to take your time and enjoy the process. Crafting should be fun, not stressful.
Conclusion
Making oyster shell trinket dishes is both fun and simple. We’ve walked through cleaning, painting, adding pretty designs, and finishing with shiny edges.
These small projects turn discarded shells into useful items for your home. The best part? Each dish is totally unique.
Why not try different papers, colors, or metal finishes next time? You might create a set with matching designs or go wild with mixed patterns.
Remember to share your creations with friends – they make thoughtful handmade gifts. You can also use your shells for other small items like paper clips or bobby pins.
Ready to start collecting shells on your next beach trip?
Frequently Asked Questions
How to Clean Oyster Shells to Use for Crafts?
Scrub shells with a nail brush under running water to remove dirt and residue. Rinse well and let dry completely on a towel before starting your craft project.
What Paint to Use on Oyster Shells?
Acrylic paints work best on oyster shells. Use clear gloss for sealing and metallic paints for decoration. Two small brushes – one for details and one for larger areas – are helpful.
How Do You Seal Acrylic Paint on Shells?
Apply a clear acrylic sealer after the paint dries fully. Choose brush-on for control or spray-on for speed. Add 2-3 thin coats for better protection than one thick layer.