How to Create a Moss Mushroom for Decor
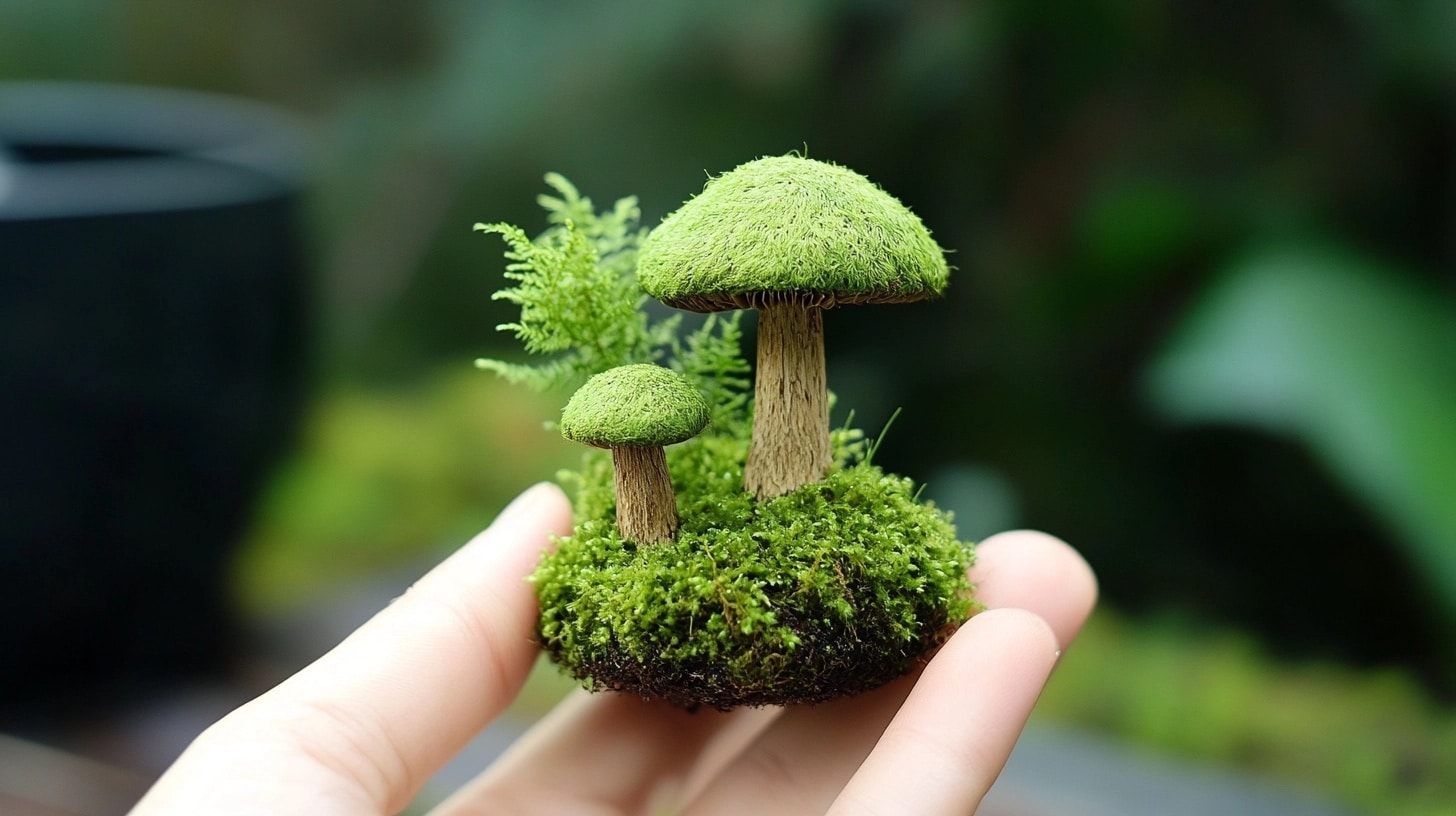
You’ve probably noticed those charming moss mushrooms brightening up home decor photos lately. I was fascinated when I first saw them—they add such a natural, whimsical touch to any space.
I know crafting something that looks store-bought can feel tricky. Many of my readers tell me they tried making moss mushrooms but had results that didn’t match their vision.
Here’s the good news: I’ve mastered a simple technique to create beautiful moss mushrooms at home. These little decorations will make your space feel more cozy and natural.
I will show you my step-by-step method for making moss mushrooms that look just like professional decor pieces.
Let’s start creating your natural-looking decorations.
What is Moss?
I often find myself drawn to the soft, green, carpet-like plants that grow in shady spots. That’s moss – a small, simple plant that grows close to the ground.
Unlike typical garden plants, moss doesn’t have roots. Instead, it has tiny stem-like structures and small leaves that help it soak water directly from its surroundings.
In nature, moss plays a key role. I’ve noticed how it acts like a natural sponge, helping to control water flow and prevent soil loss. It gives small insects homes and adds to the fresh, earthy smell of forests.
These little green plants also make bare spots look more natural by filling gaps between rocks and trees.
What is a Mushroom?
When I look at mushrooms, I see just the top part – the cap and stem. But there’s much more to these fascinating organisms.
A mushroom is the visible part of a larger fungal network that lives underground or inside wood.
The main body of a mushroom, called mycelium, stays hidden from view.
Think of it like an apple tree – the mushroom we see is like the apple, while the mycelium is like the tree itself. The visible mushroom part helps spread spores (like seeds) to create new fungal growth.
In craft projects, we copy this natural design to create lifelike decorations that remind us of walks in the woods.
Moss vs. Mushrooms
| Aspect | Moss | Mushrooms |
|---|---|---|
| Classification | Non-vascular plants (Bryophytes). | Fungi (Kingdom Fungi). |
| Structure | Composed of small, simple leaves and stems; lacks true roots. | Composed of mycelium (root-like structure) and fruiting bodies (caps and stems). |
| Reproduction | Reproduces via spores in capsules. | Reproduces via spores in gills or pores. |
| Energy Source | Photosynthetic; uses sunlight to produce energy. | Non-photosynthetic; absorbs nutrients from organic matter. |
| Growth Habitat | Grows in moist, shaded areas, on rocks, trees, and soil. | Grows on decaying organic matter, soil, or living organisms. |
| Role in Ecosystem | Stabilizes soil, retains moisture, and aids in water absorption. | Decomposes organic matter and recycles nutrients into the ecosystem. |
| Nutritional Role | Not a source of food. | Some species are edible; others are toxic or medicinal. |
| Symbolism | Associated with resilience and grounding. | Symbolizes transformation, interconnectedness, and renewal. |
How Moss and Mushrooms Interact in Nature:
- Both thrive in cool, damp, and shady forest areas
- Moss acts as a natural water holder for mushroom growth
- Mushrooms break down dead plant matter into food for moss
- Moss keeps the soil in place while mushrooms grow through it
- Together they create small homes for forest insects
- Both help control soil moisture levels in forest areas
- Moss provides a natural base for mushroom growth
- They share nutrients through the forest floor
Types of Moss Mushroom Products
1. Terrarium Ornaments
I love using moss mushrooms in terrariums – they fit perfectly in small glass homes. These tiny decorations add charm to any mini garden setup.
I place them near small plants or tiny pebbles. They work great in open and closed terrariums, adding a forest-like feel.
2. Garden Sculptures
For outdoor spaces, I make moss mushrooms from weather-safe materials like concrete or resin. These sturdy decorations withstand rain and sun.
I put them in shady spots under trees or between plants, which look most natural and last longer.
3. Wall Art and Moss Paintings
I create wall pieces by combining moss mushrooms with preserved moss backgrounds. These living-looking art pieces bring nature indoors.
They work best in rooms with indirect light. They need no water or care, making them perfect low-maintenance decorations.
4. Planters and Functional Pieces
I design moss mushroom planters that do more than just look pretty. These pieces hold small plants while adding woodland charm.
I use proper drainage and the right soil mix. They’re perfect for small herbs or succulents.
Why Make Your Own Moss Mushrooms?
Making moss mushrooms at home lets me customize nature-inspired decor. I can choose the exact sizes, colors, and shapes that match my space. Plus, creating my pieces saves money—store-bought versions can be pricey.
When I craft these little decorations, I feel a sense of joy. Each mushroom turns out unique, and there’s something special about displaying something I made myself.
The materials are simple and budget-friendly, making it an ideal weekend project.
Essentials Required for Crafting Moss Mushrooms
| Tools | Materials |
|---|---|
| Toothpick (rounded and pointy ends) | Polymer clay (various colors) |
| Chopstick | Moss (different shades) |
| Hot glue gun | Clear quartz crystals |
| Baking tray (for polymer clay) | Wooden base (e.g., slice or slab) |
| Scissors (for moss trimming) | Optional: Mineral oil wood conditioner |
Decorative Moss Mushroom: A Complete Tutorial
1. Prepare the Tools and Workspace
- Sharpening one end of a toothpick to a point and rounding the other end creates a versatile crafting tool.
- Set up your workspace with all the required materials and tools.
2. Craft the Mushroom Stems and Caps
- Roll polymer clay into a cylindrical shape to form the mushroom stems. Flatten both ends slightly for a stable base and cap attachment.
- Shape small clay discs for the caps by gently pressing the clay on your knuckle to achieve a natural curve. Adjust thickness and size as needed.
3. Attach the Cap to the Stem
- Use the rounded side of the prepared toothpick to smooth and secure the cap onto the stem. Ensure it adheres firmly.
- With the pointy end, etch realistic gill lines under the cap. Place the crafted mushrooms on a baking tray.
4. Bake the Mushrooms
- To cure the mushrooms, follow the polymer clay baking instructions on the packaging. Allow them to cool completely before proceeding.
5. Prepare the Wooden Base
- If desired, enhance the wood’s natural tones by applying a thin layer of mineral oil wood conditioner. Let it dry before assembling.
6. Assemble the Moss Mushroom Display
- Arrange the baked mushrooms, moss, and quartz crystals on the wooden base. Secure them with a hot glue gun, ensuring stability and aesthetic balance.
- If included, leave sufficient space for any additional elements like candles or card holders.
For a more detailed tutorial, check out the video below:
Tips for Perfecting Your Moss Mushroom Craft
- Use white glue instead of hot glue for a better moss grip
- Pat the moss gently to help it stick – don’t press too hard
- Keep your hands clean to avoid staining the mushroom caps
- Work on a protected surface – moss can get messy
- Let each layer dry fully before adding more details
- Spray with water mist to keep moss fresh-looking
- Store extra moss in a paper bag to prevent mold
- Make stems slightly thicker than you want – moss adds bulk
- Check all materials are fully dry before the final display
- Mix different moss types for a more natural look
- Shape the cap while the clay is still soft
- Keep your mushrooms away from direct sunlight
- Brush off loose moss bits after the glue dries
How to Care for Moss Mushrooms
- Dust with a soft brush once a week
- Keep away from heating or cooling vents
- Place in spots with indirect light only
- Don’t water preserved moss mushrooms
- Clean with a dry cloth – avoid wet cleaning
- Store in room temperature settings
- Check regularly for any loose moss pieces
- Avoid touching with wet hands
- Keep pets away from your displays
- Remove dust with gentle air puffs
- Fix loose parts quickly with white glue
- Protect from high-humidity areas
- Move away from windows that get direct sun
- Handle gently when moving or cleaning
Incorporating Moss Mushrooms into Your Space
1. Decorative Jars
Fill glass jars with moss, mushrooms, and fairy lights to make glowing decor for shelves or desks. Add tiny pebbles or figurines for extra charm and create a soothing, warm glow perfect for ambient lighting.
2. Lamp Base Decor
Attach moss and mushrooms around the base of a lamp for an enchanting look. Use earthy tones to blend with the lamp’s design, creating a whimsical, nature-inspired focal point for your room.
3. Bookend Accents
Glue moss and small decorative mushrooms to plain bookends to add character to your bookshelf. Pair them with natural wood or metallic bookends for a unique rustic and modern design blend.
4. Coffee Table Decor
Line your coffee table with moss, mushrooms, and small potted plants to create a lush, earthy centerpiece. Add elements like a stack of books or a decorative tray to tie the natural theme into your living space.
5. Bathroom Shelves
Tuck moss and mushrooms into the empty corners of bathroom shelves to add life to the space. Pair them with small succulents or scented candles to create a calming, spa-like atmosphere.
6. Hanging Ornaments
Make lightweight clay mushrooms and pair them with moss to create hanging ornaments for windows or walls. Hang them on a clear fishing line or rustic twine, giving your space a whimsical and airy charm.
Conclusion
Making your moss mushrooms is simpler than you might think. I’ve shared my tested methods, from picking the right materials to placing them in your home.
These small details can make your space feel more peaceful and natural.
Remember, each moss mushroom you create tells its own story. The beauty lies in the small differences that make them unique to your style and space.
Ready to start? Gather your supplies and try making one this weekend.
Don’t worry if your first attempt isn’t perfect – mine wasn’t either! Share your creations in the comments below, or ask any questions you have. I’d love to see how your moss mushrooms turn out.
Let’s bring some forest magic into our homes, one mushroom at a time.

