Does your yard turn into a swamp every time it rains? Standing water around your foundation, soggy soil that won’t dry, and a sump pump that runs constantly are clear signs your property needs better drainage.
Installing French drain systems is the proven solution that redirects water away from your home and keeps your yard dry year-round.
This complete guide shows you exactly how to install French drain systems that work. You’ll learn proper planning techniques, material selection, step-by-step installation methods, and maintenance tips that ensure decades of reliable performance.
From calculating the critical 1% slope to connecting dual pipe systems, we cover everything you need to convert your waterlogged property into a dry, functional space that protects your home’s foundation and increases your property value.
Why is Installing a French Drain Important?
A French drain is a simple yet highly effective solution for managing water drainage. It redirects water away from your home’s foundation and problem areas in your yard.
By installing a French drain, you can prevent basement flooding, reduce soil erosion, and keep your landscape healthy.
French drains work 24/7 to protect your most valuable investment, your home. Poor drainage can cause foundation cracks, basement leaks, and expensive structural damage that costs thousands to repair.
The system also prevents mold growth by keeping moisture levels down around your foundation walls.
The investment pays for itself by preventing costly water damage repairs. A properly installed French drain system can last 30-50 years with minimal maintenance.
French Drain Installation: The Complete Step-By-Step Process
Installing French drain systems properly protects your home’s foundation and keeps your yard dry throughout the year. Follow these proven methods to solve drainage problems once and for all.
Tools and Materials Required
Getting the right tools and materials up front saves time and prevents costly mistakes during your French drain installation project.
Here’s what you’ll need for a successful French drain installation:
| Tool/Material | Purpose | Notes |
|---|---|---|
| Mini excavator | Digging trenches | Rent for runs over 100 feet |
| Shovel | Hand digging | Essential for tight spaces |
| 4-inch solid pipe | Roof/sump water | Connects downspouts to discharge |
| 4-inch perforated pipe | Groundwater collection | Has slits for water entry |
| Non-woven geo-textile fabric | Prevents soil clogging | Must be a drainage-type fabric |
| ¾-inch washed limestone gravel | Surrounds pipes | Plan 1.5 tons per 100 feet |
| Catch basins | Access/maintenance | Install every 100 feet |
| Y-connectors | Joining pipes | For downspout connections |
| Duct tape & baling wire | Securing connections | Waterproof tape essential |
| Utility knife | Cutting pipes/fabric | Sharp blade needed |
| Laser level | Maintaining slope | Critical for proper drainage |
Now that you have your plan and materials ready, it’s time to start the actual French drain installation. Follow these four steps carefully to ensure your system works properly for years to come.
Step 1: Digging the Trench

Dig your trench 14-18 inches deep and about 12 inches wide. Mark the utilities first and dig by hand around them. Check your slope often using a level to ensure water flows properly.
Remove 3 inches of sod first and save it for later. Rent a mini excavator for runs over 100 feet—hand digging long trenches takes forever and hurts your back.
Pro Tip: Use a hand tamper to pack the trench bottom flat. This creates a stable base for both pipes when installing French drain systems.
Step 2: Lining and Laying the Pipes
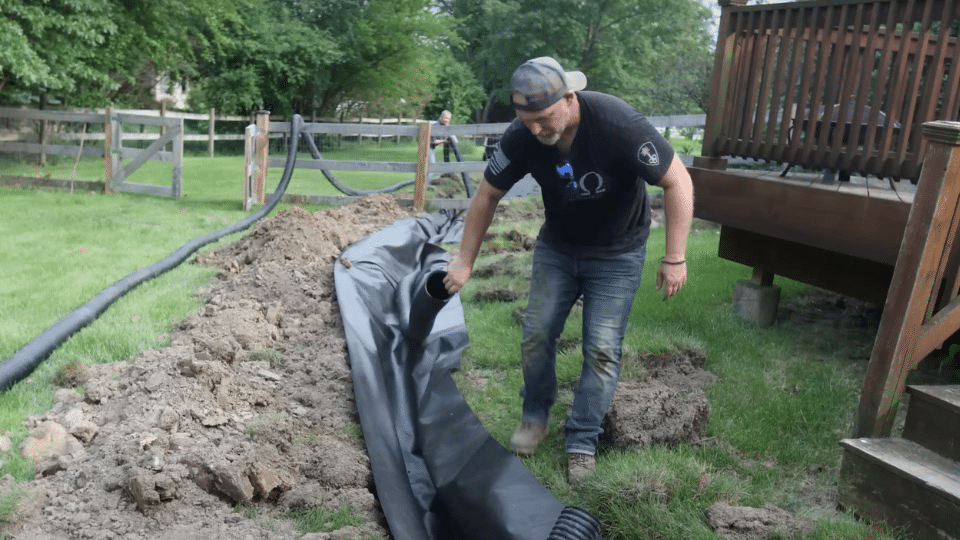
Line the trench with drainage fabric. Place the solid pipe nearest the house for downspouts and sump pumps. The perforated pipe sits farther out for groundwater. Connect sections with clips and tape.
Use non-woven geo-textile fabric designed for drainage, some fabrics block water instead of filtering it. Check inside pipes for animal nests before laying them.
Pro Tip: Place the solid pipe closest to your foundation. This carries roof water directly to discharge, while a perforated pipe handles yard drainage during French drain installation.
Step 3: Installing Catch Basins
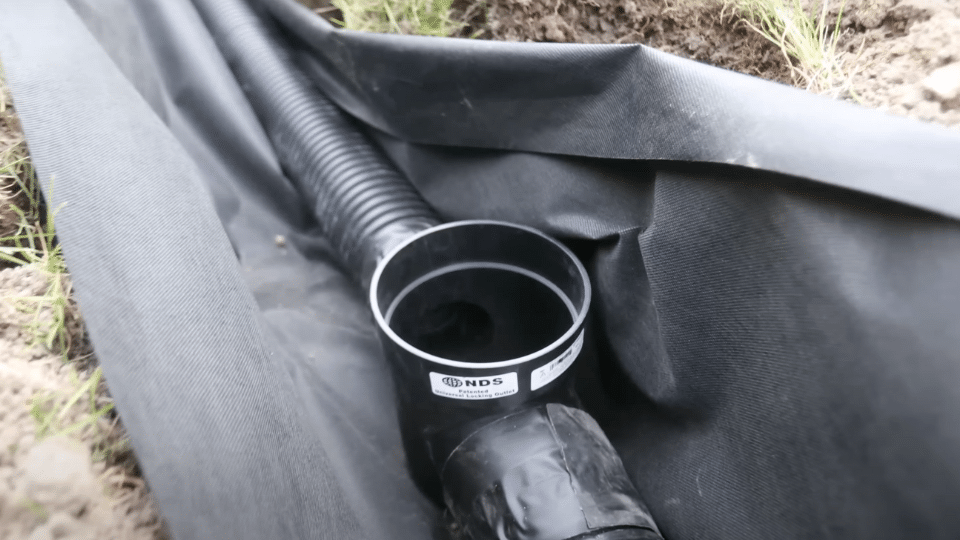
Install catch basins every 100 feet for maintenance access and standing water collection. Use defender-style basins under downspouts to reduce debris entry.
Set grates just above yard level and connect with Y-connectors. Pack pea gravel around basins to prevent settling.
Pro Tip: Don’t set catch basins too deep, or you’ll lose slope to the main pipe. Proper height maintains water flow in your French drain installation.
Step 4: Backfilling and Wrapping
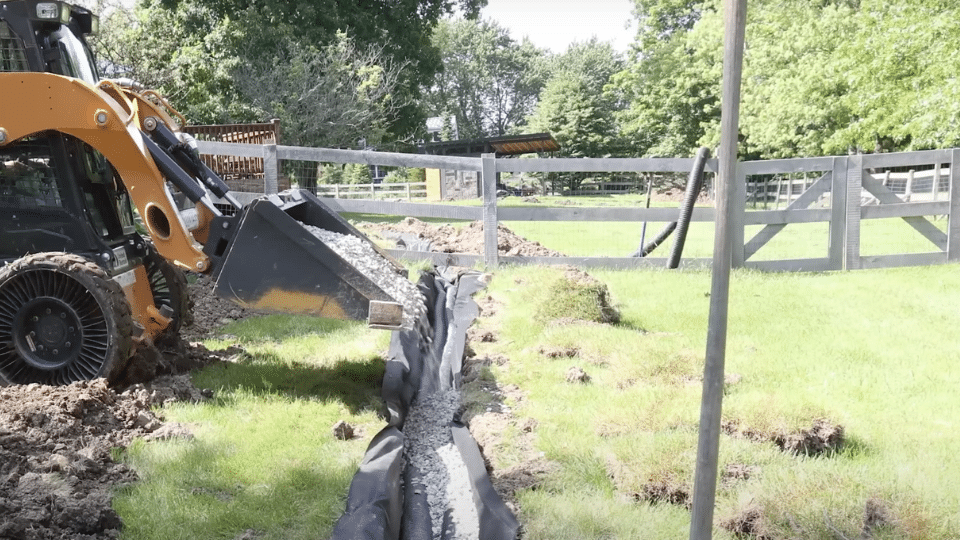
Fill around pipes with 3/4-inch washed limestone gravel. Cover pipes with 4-6 inches of gravel, wrap fabric tightly like a burrito, and secure with wire. Finish with soil and sod.
Plan 1.5 tons of gravel per 100 feet. More gravel gives water better access to pipes when installing French drain systems.
Pro Tip: Don’t dump gravel straight into trenches; this pulls fabric from the sides. Shovel from the equipment bucket to keep the fabric appropriately positioned.
Video Tutorial
I’d like to give credit to Komar Project for their informative video, which served as a reference for this guide.
Common Pitfalls to Avoid When Installing a French Drain
Avoiding these mistakes saves time and money and prevents system failure during your French drain installation project.
| Common Mistake | Why It’s Bad | How to Fix It |
|---|---|---|
| Failing to maintain a proper slope | Water pools in pipes | Check 1% slope every 25 feet |
| Skipping catch basins | No access for cleaning clogs | Install every 100 feet |
| Using a separation fabric | Blocks water from entering | Buy drainage-type fabric only |
| Wrong pipe placement | The system doesn’t work properly | A solid pipe near the house, perforated outside |
| Not checking pipes | Animal nests cause clogs | Inspect before installing French drain systems |
| Dumping gravel carelessly | Fabric shifts and creates gaps | Shovel from the bucket; don’t dump |
How to Maintain Your French Drain
Proper maintenance is key to ensuring your French drain continues to work effectively, preventing water damage and costly repairs. Here are some essential tips to keep your system running smoothly year-round.
1. Clear Debris Regularly: Check catch basins and grates for leaves and debris, especially after storms. Blockages can reduce drainage efficiency.
2. Flush the System Annually: Use a garden hose to flush out any minor debris from the pipes once a year to prevent clogs and ensure water flows freely.
3. Inspect for Water Pooling: Watch for areas that used to stay dry but are now pooling with water. This could indicate blockages or issues with slope that need attention.
4. Check and Maintain Proper Slope: Ensure your French drain maintains the critical 1% slope to allow proper water flow. Inspect it after heavy rainfall or any signs of water pooling.
5. Trim Overhanging Vegetation: Regularly trim nearby plants and trees to prevent roots from interfering with the pipes, which can lead to clogs and drainage issues.
Conclusion
Installing French drain systems is one of the smartest investments you can make for your property. This complete guide has walked you through every step, from assessing problem areas to long-term maintenance.
With proper planning, the right materials, and careful attention to slope requirements, your French drain installation will protect your foundation and keep your yard dry for decades.
Remember the key points: maintain that critical 1% slope, use the dual pipe system, and don’t skip the catch basins. Regular maintenance keeps your system working at peak performance.
Your French drain installation project may seem challenging, but the results speak for themselves. No more basement flooding, soggy yards, or expensive water damage repairs.
Take your time, follow these proven methods, and enjoy a dry, functional property year-round.