Tired of staring at boring, flat porch ceilings that lack character? I totally get it.
Most homeowners struggle with creating outdoor spaces that feel as inviting as their indoor rooms. Standard ceiling treatments often fall short of delivering that cozy, architectural appeal we’re all after.
But here’s what I’ve learned: exposed rafter porch ceilings can completely change your outdoor space. They add instant charm, create visual height, and give your porch that custom-built look without breaking the bank.
In this blog, I’ll share practical exposed rafter porch ceiling ideas that actually work.
From natural wood treatments to creative lighting solutions, you’ll find options that fit your style and budget. Ready to give your porch the makeover it deserves?
Transform your porch into a serene retreat is achievable with boho porch ideas for a relaxing outdoor space, which complement the charm of exposed rafter ceilings.
What Are Exposed Rafter Porch Ceilings?
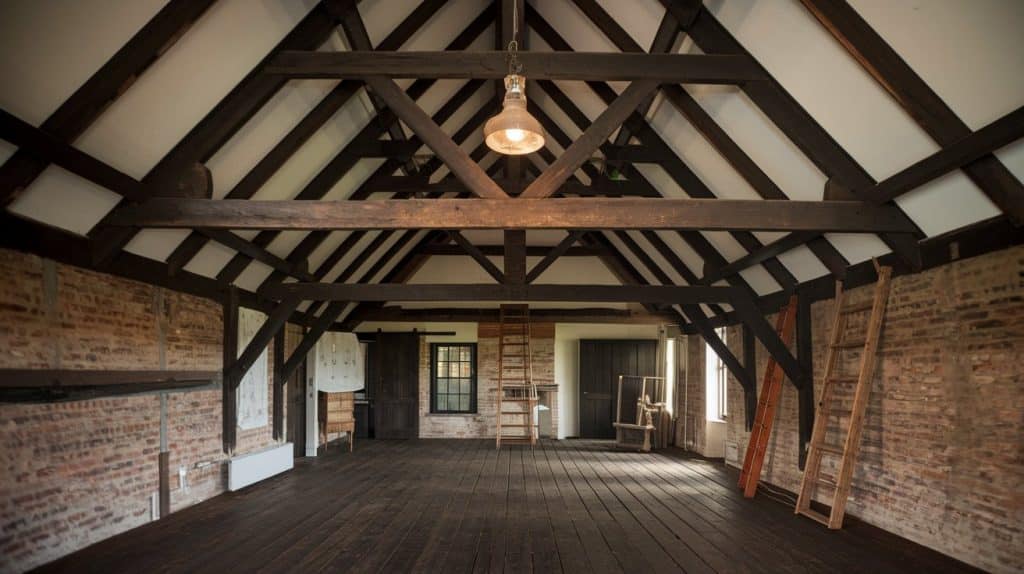
Exposed rafter porch ceilings show the structural beams that normally hide behind drywall or other covering materials. Instead of concealing these support elements, you leave them visible to create an open, airy feel.
These ceilings feature the actual wooden rafters that hold up your porch roof. The beams run from the exterior wall to the ridge beam, creating natural lines and patterns overhead.
This design approach works well for both new construction and renovation projects. Many homeowners choose this style because it adds visual interest without requiring expensive materials or complex installation.
7 Creative Exposed Rafter Porch Ceiling Ideas
Here are proven exposed rafter designs. Each approach offers unique benefits, varying costs, and specific installation considerations to help you choose the perfect option for your space.
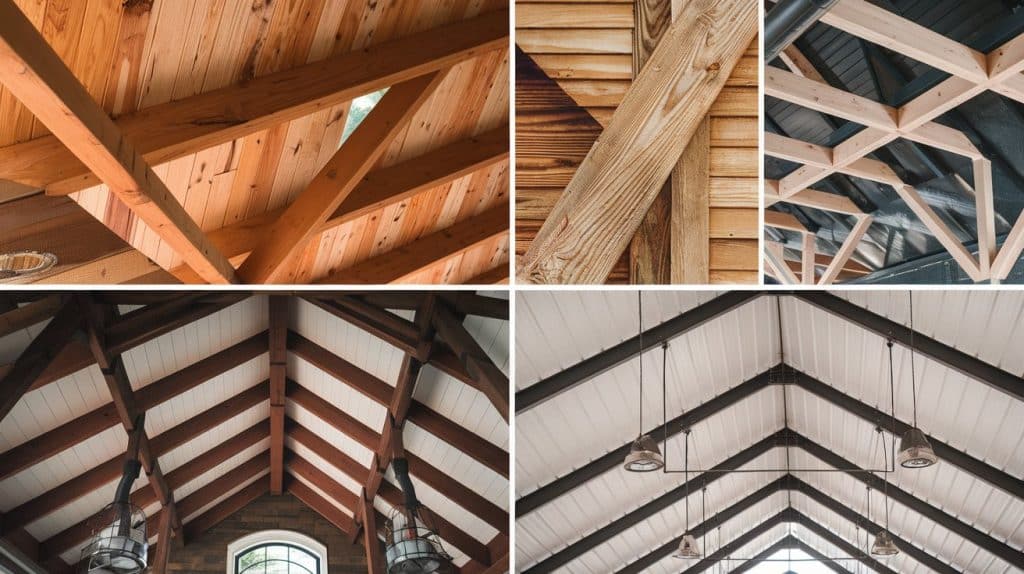
1. Natural Wood Tongue and Groove Ceiling
This classic approach combines exposed rafters with tongue and groove planking between the beams. The planks run perpendicular to the rafters, creating a beautiful grid pattern that adds both texture and finished appeal to your ceiling.
Installation costs range from $8-15 per square foot, depending on wood species and local labor rates. Cedar and pine remain popular choices, with cedar lasting longer in outdoor conditions.
Pro Tip: Choose pre-finished planks to save installation time and ensure consistent color matching.
2. Dark Stained Wood Rafters
Rich, dark stains like espresso or ebony create a striking contrast against lighter porch elements. This treatment works especially well with white or cream-colored walls, making the ceiling feel more intimate and cozy.
Expect to spend $3-6 per square foot for professional staining, plus the cost of quality exterior stain ($40-80 per gallon). Dark stains hide dirt and imperfections better than lighter colors.
Expert Advice: Apply stain in thin, even coats during cooler parts of the day to prevent lap marks and ensure proper penetration.
3. Painted White Rafters
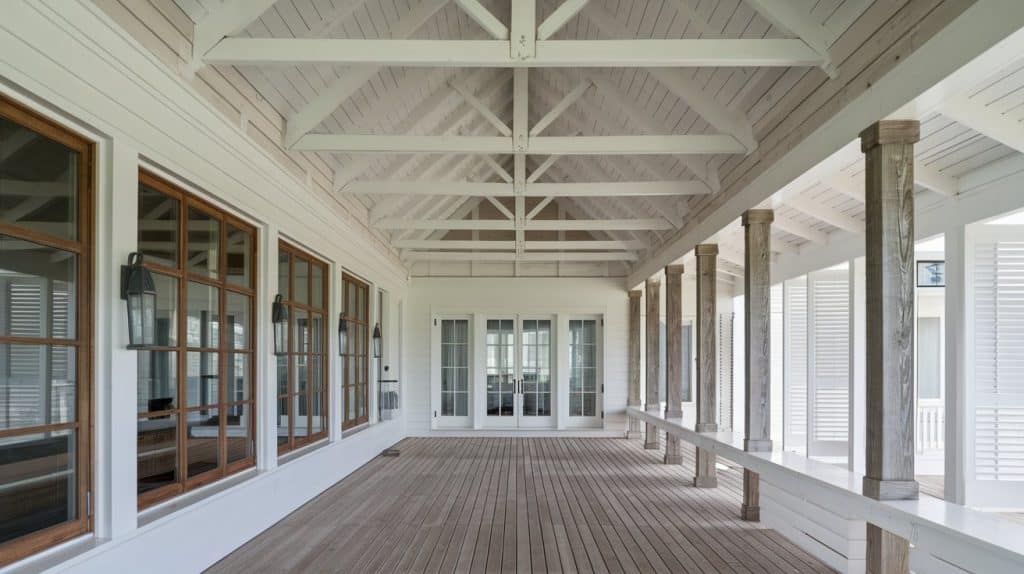
White-painted rafters brighten your porch space and create a clean, coastal vibe. This treatment reflects light effectively, making smaller porches feel larger and more open.
Professional painting costs $2-4 per square foot, with high-quality exterior paint running $50-70 per gallon. White shows dirt and wear more readily than darker colors, requiring touch-ups every 2-3 years.
Important Note: Use a high-quality primer before painting to ensure better adhesion and longer-lasting results on bare wood.
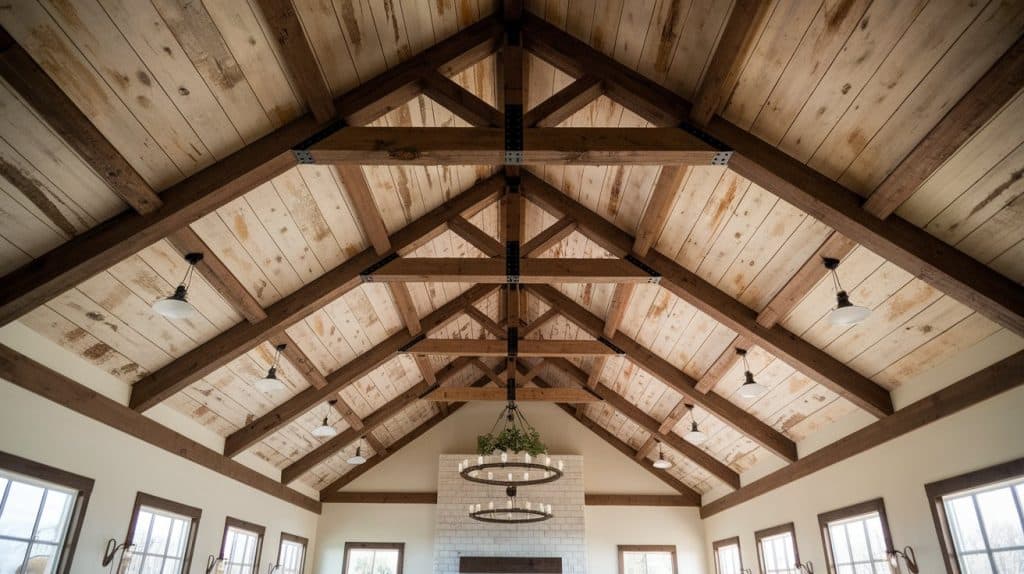
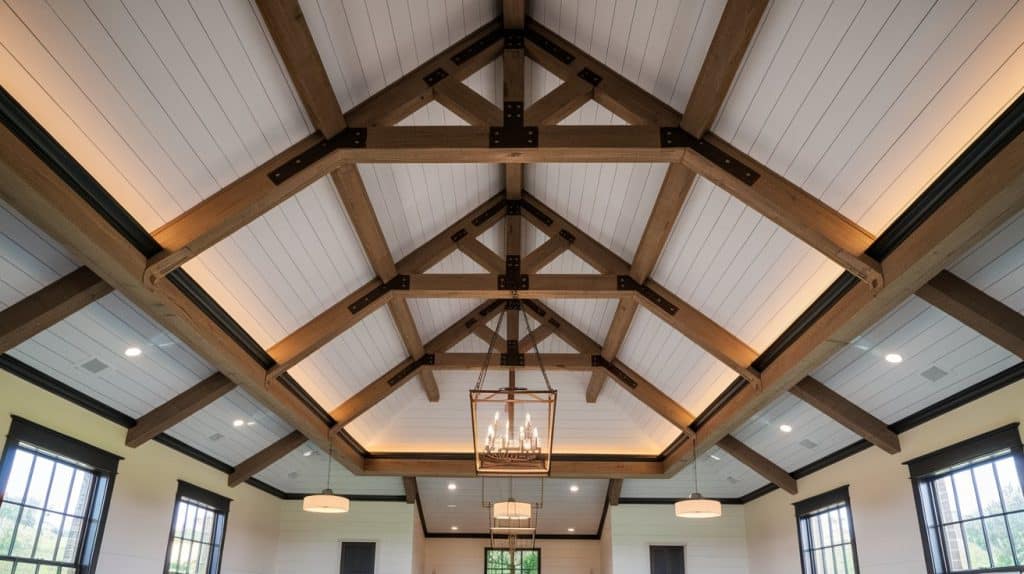
4. Exposed Beam Cathedral Ceiling
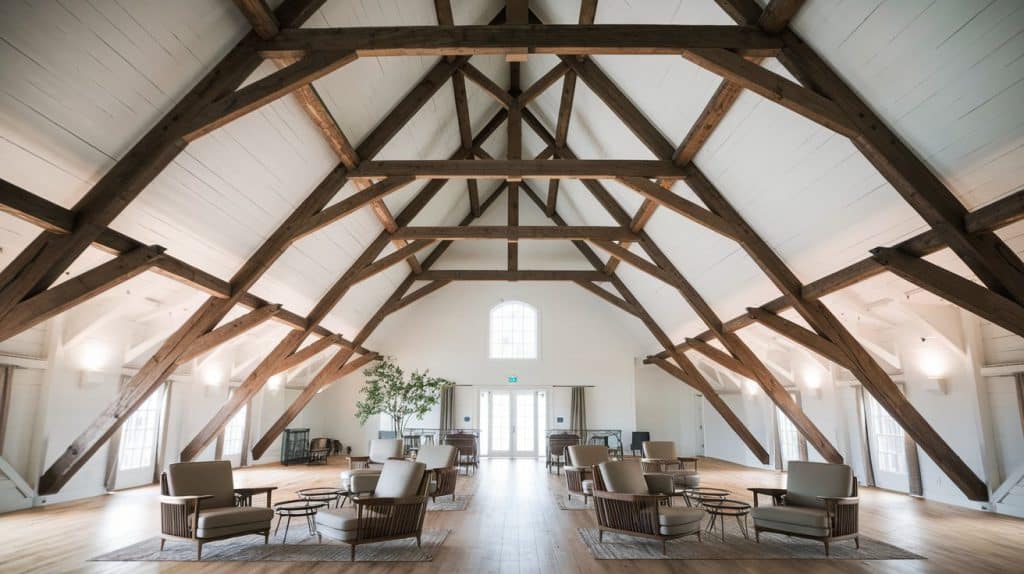
Large, heavy beams create vaulted ceilings that add grandeur to your porch space. These installations typically feature 4×8 or larger beams spaced wider apart than standard rafters.
Costs range from $15-30 per square foot due to larger lumber sizes and potential structural modifications. You may need additional support posts or foundation work to handle the increased load.
Remember This: Consult a structural engineer before installation to ensure your existing foundation can support the additional weight.
5. Coffered Ceiling with False Beams
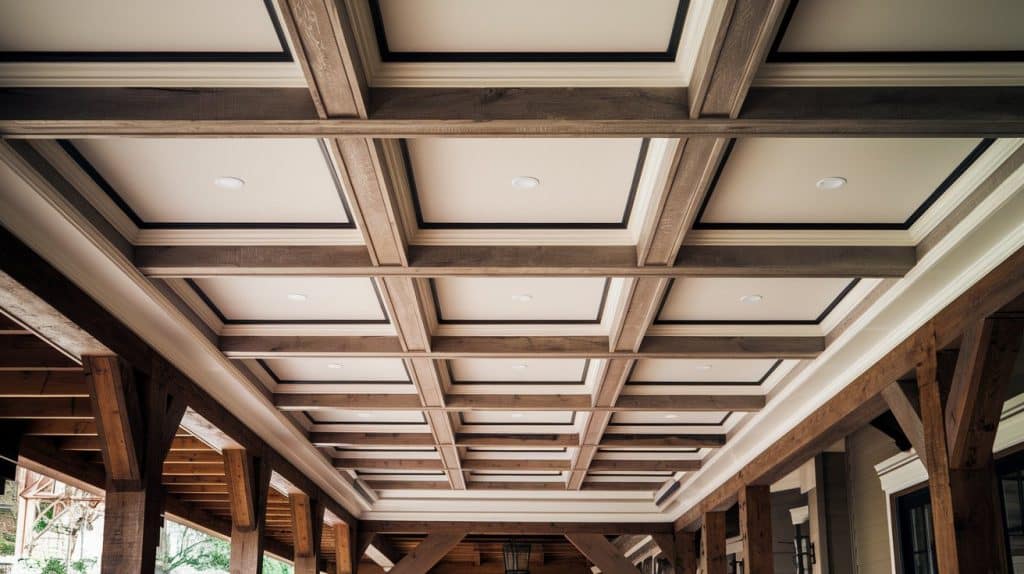
This sophisticated approach uses decorative false beams to create the appearance of traditional coffered construction. The beams form rectangular or square patterns across your ceiling, adding depth and visual interest.
Installation costs $10-20 per square foot, depending on beam size and spacing. False beams are hollow and lightweight, making them easier to install than solid lumber.
Pro Tip: Plan your beam layout carefully to ensure proportional spacing that complements your porch dimensions.
6. Fabric and Lath Strip Ceiling
This solution combines thin wood lath strips with outdoor fabric to create weather-resistant ceiling panels. The fabric stretches between rafters while lath strips provide structure and visual interest.
Material costs run $5-10 per square foot, with outdoor fabric being the primary expense. This system allows water to drain through while providing some weather protection.
Expert Advice: Install fabric with slight slack to allow for natural expansion and contraction with temperature changes.
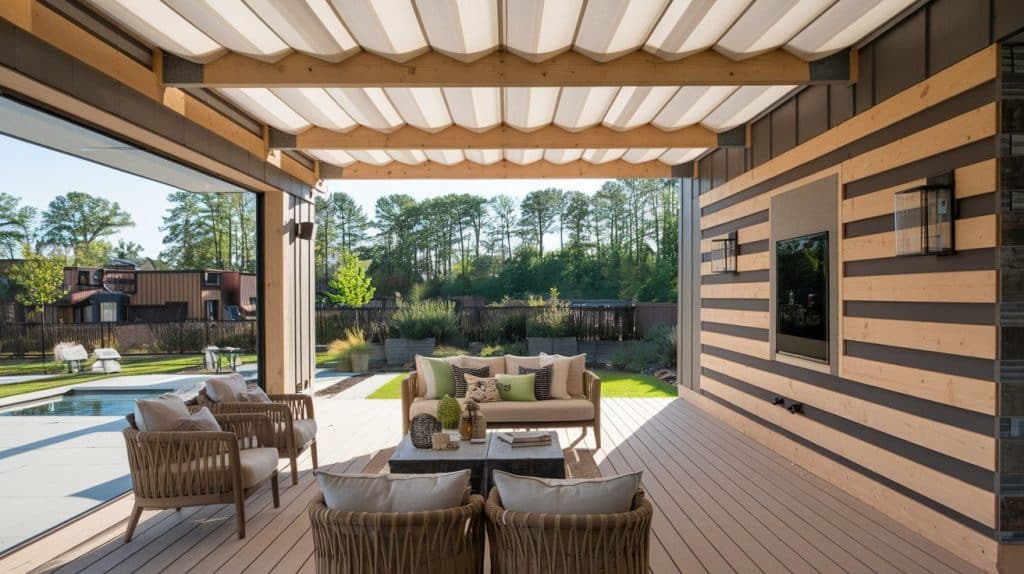
7. Decorative Braces and Lighting Integration
Ornate brackets and decorative braces add Victorian or craftsman styling to exposed rafter ceilings. Combined with pendant lights or LED strips, this approach creates both functional and decorative ceiling treatments.
Decorative hardware costs $25-100 per brace, depending on size and material. LED strip lighting adds $3-8 per linear foot.
Expert Advice: Choose weather-resistant fixtures rated for outdoor use and consider smart controls for convenient operation.
Features of Exposed Rafter Porch Ceilings
Exposed rafter ceilings offer several distinct characteristics that set them apart from traditional flat ceiling designs. These features make them both functional and visually appealing for porch spaces.
1. Visible Structural Elements
The most notable feature is the wooden framework that creates natural geometric patterns across your ceiling. These beams typically measure 2×6 or 2×8 inches and are space 16 to 24 inches apart, depending on your roof structure.
2. Height and Space Variation
Most exposed rafter ceilings slope upward from the exterior wall, following your roof’s natural pitch. This creates an open, spacious feeling even in smaller porch areas.
3. Natural Texture and Shadow Play
The beams cast interesting shadows throughout the day as sunlight moves across your porch. You also get natural spots for hanging plants, lights, or ceiling fans between the rafters.
4. Open Framework Design
The spacing between rafters allows for better air circulation and ventilation. This open design also makes it easier to access electrical wiring or plumbing that runs through the ceiling area.
5. Authentic Structural Appeal
These ceilings showcase the actual building materials and construction methods used in your home. The honest display of structural elements creates a genuine, unfinished look that many homeowners find appealing.
Pros and Cons of Exposed Rafter Porch Ceilings
Before choosing exposed rafters for your porch ceiling, it’s important to weigh the benefits against potential drawbacks. Here’s a balanced look at what you can expect.
| Pros | Cons |
|---|---|
| Cost-effective installation – No need for drywall or additional ceiling materials | Weather exposure – Direct contact with rain and moisture can cause damage |
| Visual height – Creates a spacious feel by following the roof pitch | Maintenance requirements – Regular cleaning and refinishing are needed |
| Easy utility access – Simple to run wiring, fans, or plumbing | Limited insulation – Reduced energy efficiency compared to enclosed ceilings |
| Natural ventilation – Better airflow through the open beam structure | Dust collection – Horizontal surfaces gather dirt and debris |
| Flexible lighting options – Multiple mounting points for fixtures | Pest concerns – Birds or insects may nest in open spaces |
| Authentic character – Shows true construction and craftsmanship | Sound issues – Less noise reduction from outdoor elements |
Popular Materials and Finishes for Exposed Rafters
The right material and finish choice can make or break your exposed rafter ceiling design. Different options offer varying levels of durability, maintenance, and visual appeal for your porch space.
- Cedar Wood: Cedar naturally resists moisture, insects, and decay, making it ideal for porch environments. This wood weathers to a beautiful silver-gray color over time or maintains its rich tone with regular sealing. Cedar costs more upfront but requires less maintenance.
- Pressure-Treated Pine: The most budget-friendly option for exposed rafters. Pressure-treated lumber handles outdoor conditions well and accepts stains and paints easily. You’ll need to seal it regularly to prevent warping and splitting.
- Reclaimed Wood: Salvaged barn wood or old building materials add instant character and history to your ceiling. Each piece tells a story through unique grain patterns, nail holes, and weathering marks. Prices vary widely based on wood type and condition.
- Composite Materials: Modern composite beams look like real wood but resist moisture, insects, and fading. They come pre-finished in various wood tones and require minimal upkeep. Initial costs run higher than natural wood options.
- Metal Rafters: Steel or aluminum beams offer a contemporary look with superior durability. They won’t warp, rot, or attract pests. Metal works especially well with modern home styles and industrial design themes.
Tips for Installation and Maintenance
Proper installation and regular upkeep ensure your exposed rafter porch ceiling stays beautiful and functional for years. Here are practical guidelines to help you succeed with your project.
- Check local building codes before starting any ceiling work
- Measure your porch accurately and create a detailed plan
- Order 10-15% extra materials for waste and future repairs
- Use galvanized or stainless steel fasteners for outdoor exposure
- Pre-drill holes to prevent wood splitting during installation
- Install rafters level and square using a chalk line for reference
- Inspect the ceiling twice yearly for damage or loose fasteners
Conclusion
Choosing the right rafter ceiling design comes down to matching your home’s character with your maintenance preferences. Some options need yearly touch-ups while others last for decades with minimal care.
Don’t overthink the decision – even basic exposed beams make a bigger impact than flat, featureless ceilings. The key is getting started rather than waiting for the perfect plan.
Your porch should feel like a destination, not just a covered walkway. The right ceiling treatment helps create that sense of place and purpose you’re looking for.
Take time to plan properly, but don’t let planning become procrastination. Your outdoor space is waiting for the attention it deserves.
Frequently Asked Questions
Are Exposed Rafter Tails More Expensive?
Yes, exposed rafter tails use solid stain-grade wood with matching tongue and groove planking, which increases material costs significantly compared to standard ceiling options.
Can I Remove a Ceiling to Expose Rafters?
Removing existing drywall ceilings isn’t recommended due to the cleanup complexity. Consider DIY faux beams or polyurethane alternatives for a similar appearance with less effort.
What Are Exposed Rafters Called?
Exposed rafter ends are called “rafter tails.” They may also be known as outlookers, outriggers, lookouts, or tailpieces, depending on their specific location.