Looking for a stylish deck railing? Want to add some flair and beauty to your outdoor area? Well, you’re in luck!
Here, we’re going to show you the ropes on how to build a horizontal deck railing that will leave your neighbors stunned. We’ve got your back with step-by-step guidance to make you understand more precisely.
So grab your tools, put on your favorite DIY hat, and let’s get started on this expedition of changing your deck into a stunning outdoor vibe with horizontal deck railing ideas.
It’s time to laugh and learn while becoming the deck master of the neighborhood!
What is a Horizontal Deck Railing?

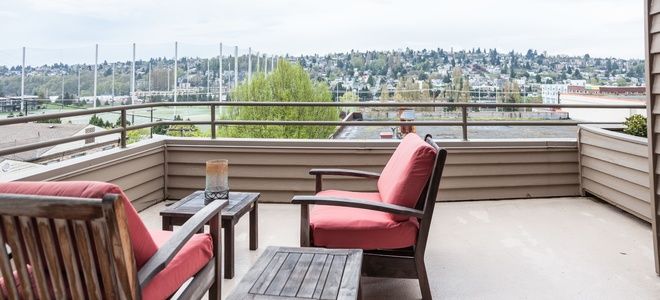
A Horizontal Deck Railing is a safety fence for decks and balconies. Instead of the usual up-and-down posts and railing, this one has handrails running from side to side.
The balusters are placed close together, making the railing look smooth and recent while keeping everyone safe from falling. This type of railing has become popular in contemporary architecture because it appears simple yet attractive in outdoor areas.
Remember, safety comes first, but you can still enjoy the stylish and simple look of a horizontal deck railing on your deck or balcony.
These horizontal deck railing ideas will add to the overall appearance of your outdoor space while keeping you and your loved ones protected.
Horizontal Deck Railing Ideas
Horizontal deck railings offer a sleek, modern look that can transfigure your outdoor space. These designs create clean lines and provide an open feel while maintaining safety and style.
Let me share some popular horizontal deck railing ideas that will make your deck stand out.
1. Classic Horizontal Wood Planks
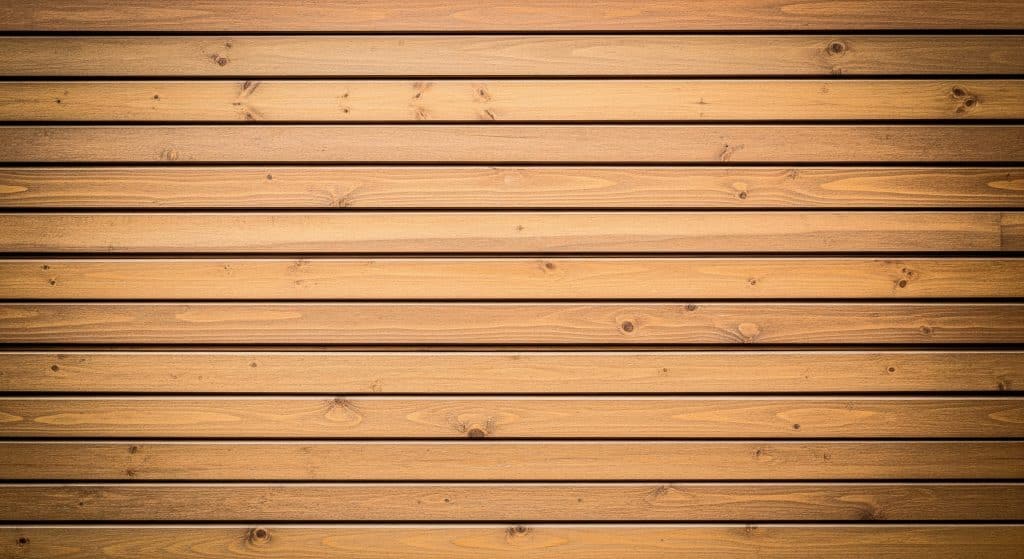
Horizontal wooden planks offer a timeless, clean look that suits traditional and modern homes alike. They provide a sturdy barrier while maintaining an open feel.
- Natural Aesthetic: Use cedar or redwood for a warm, rustic charm that blends with outdoor settings.
- Customizable Stain: Apply a weather-resistant stain in various shades to match your deck’s color scheme.
- Easy Maintenance: Pressure-treated wood ensures durability with minimal upkeep.
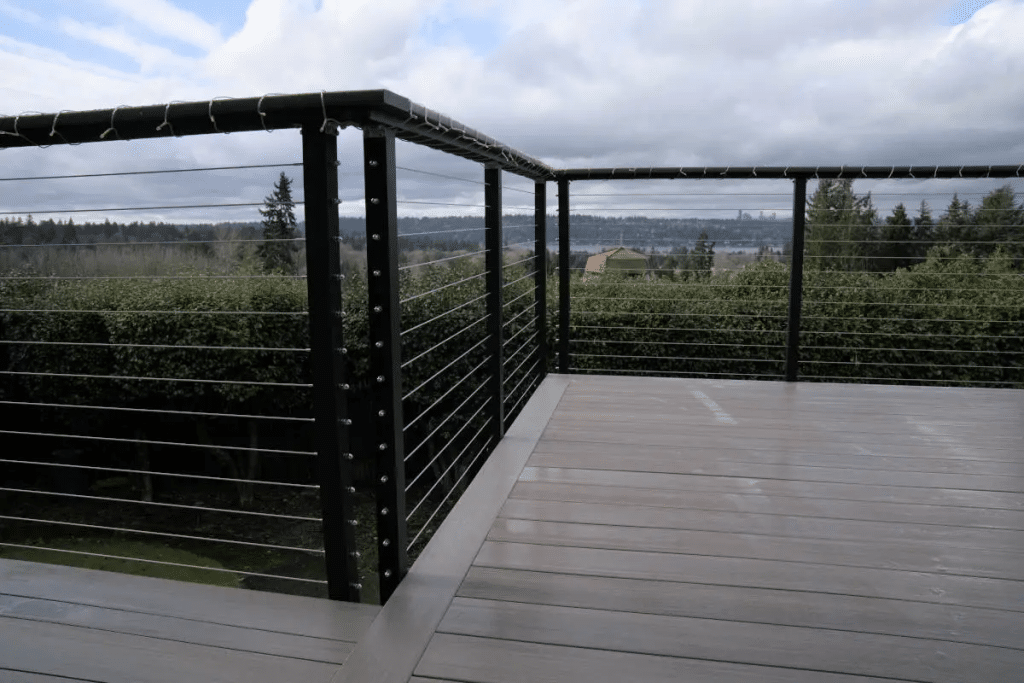
2. Cable Railing System
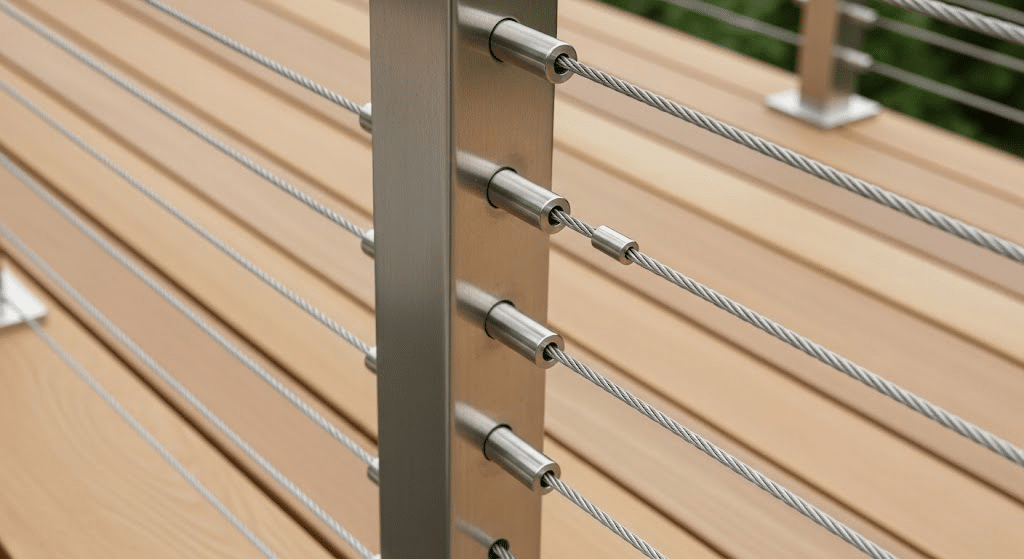
Cable railings use horizontal stainless steel cables for a sleek, industrial vibe. They maximize views while ensuring safety.
- Unobstructed Views: Thin cables allow clear sightlines, perfect for scenic backyards.
- Durable Material: Stainless steel resists rust and weathering, ideal for coastal areas.
- Modern Appeal: Complements contemporary deck designs with a minimalist edge.
3. Metal Horizontal Bars
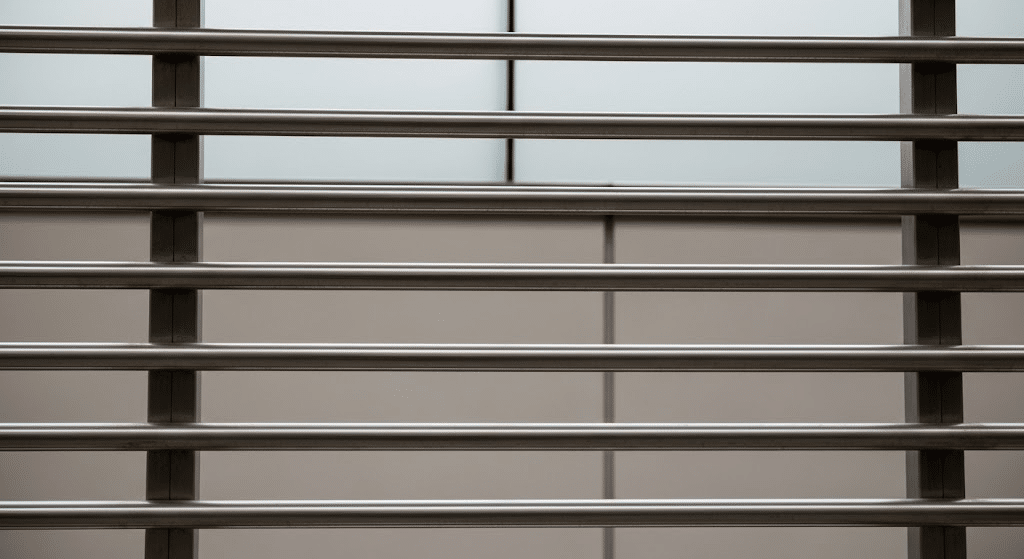
Metal railings with horizontal bars bring a bold, modern touch to decks. They’re strong and versatile for various architectural styles.
- Powder-Coated Finish: Choose black or bronze for a sleek, low-maintenance surface.
- Custom Spacing: Adjust bar spacing for safety while maintaining an open look.
- High Durability: Aluminum or steel ensures long-lasting performance in harsh weather.
4. Glass Panel with Horizontal Supports
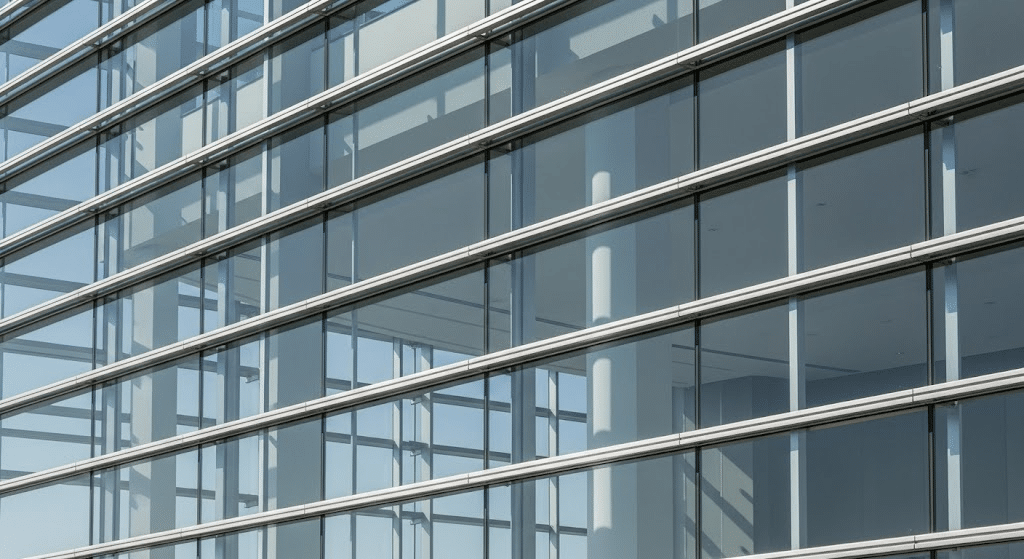
Glass panels framed with horizontal metal or wood supports combine transparency with structure. This design improves light and views.
- Sleek Transparency: Tempered glass provides safety without blocking scenery.
- Sturdy Framing: Horizontal supports add stability and a modern geometric flair.
- Low Maintenance: Glass is easy to clean, keeping your deck looking pristine.
5. Mixed Material Railings

Combine wood, metal, and cable for a dynamic, custom look. This hybrid style adds texture and visual interest to your deck.
- Versatile Design: Mix wood posts with metal cables or glass for a unique aesthetic.
- Customizable Elements: Choose materials to match your home’s exterior palette.
- Balanced Strength: Combines the durability of metal with the warmth of wood.
6. Horizontal Pipe Railing
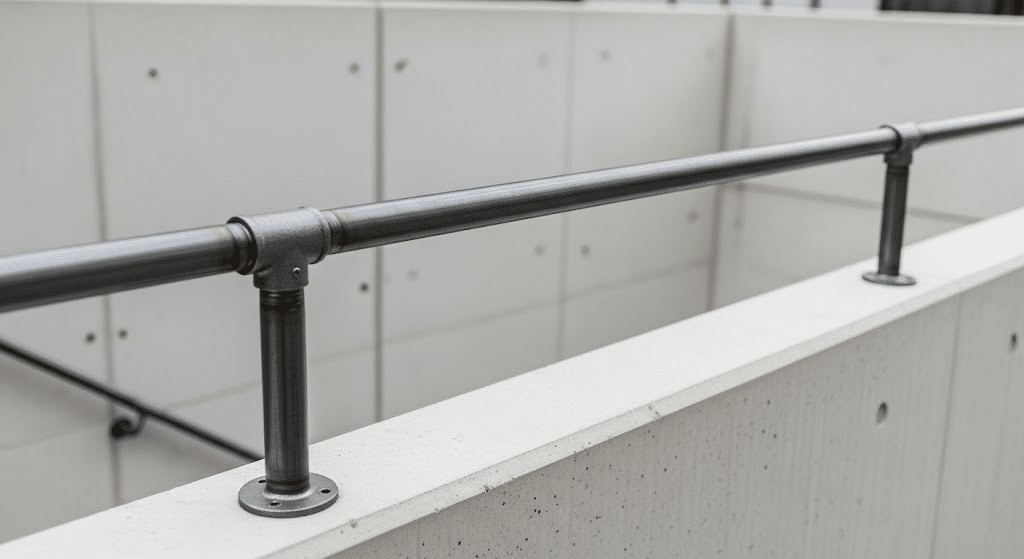
Industrial-style pipe railings use horizontal metal pipes for a rugged, urban aesthetic. They’re perfect for bold, modern decks.
- Raw Appeal: Galvanized or black pipes create a distinctive, edgy look.
- Cost-Effective: Pipes are affordable and widely available for DIY projects.
- Sturdy Build: Heavy-duty pipes ensure a secure railing system.
7. Composite Horizontal Railings
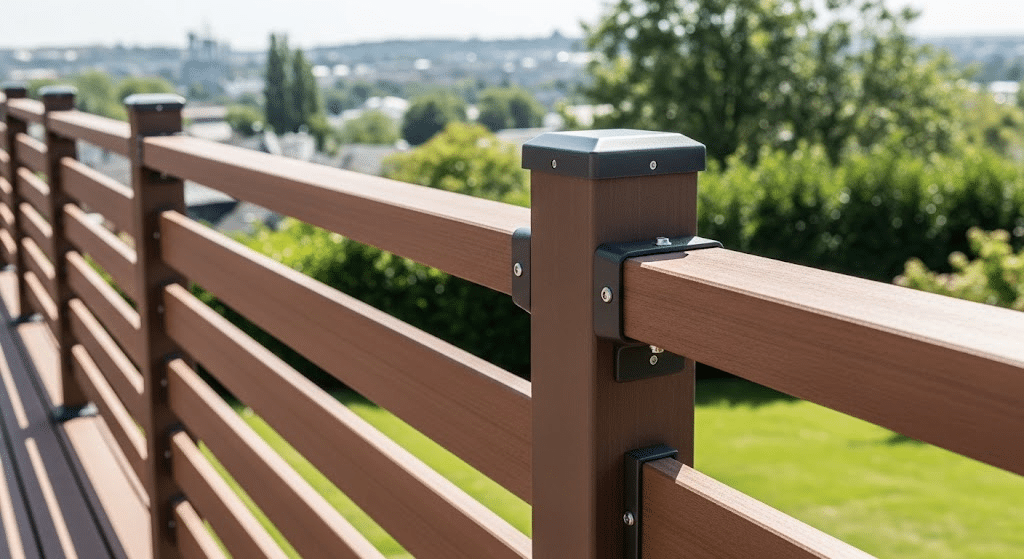
Composite materials mimic wood’s look but offer superior durability. Horizontal composite boards create a polished, low-maintenance railing.
- Weather-Resistant: Resists fading, warping, and rot in all climates.
- Variety of Colors: Available in shades like gray, brown, or white to match your deck.
- Eco-Friendly: Often made from recycled materials, ideal for sustainable builds.
8. Horizontal Louvered Design
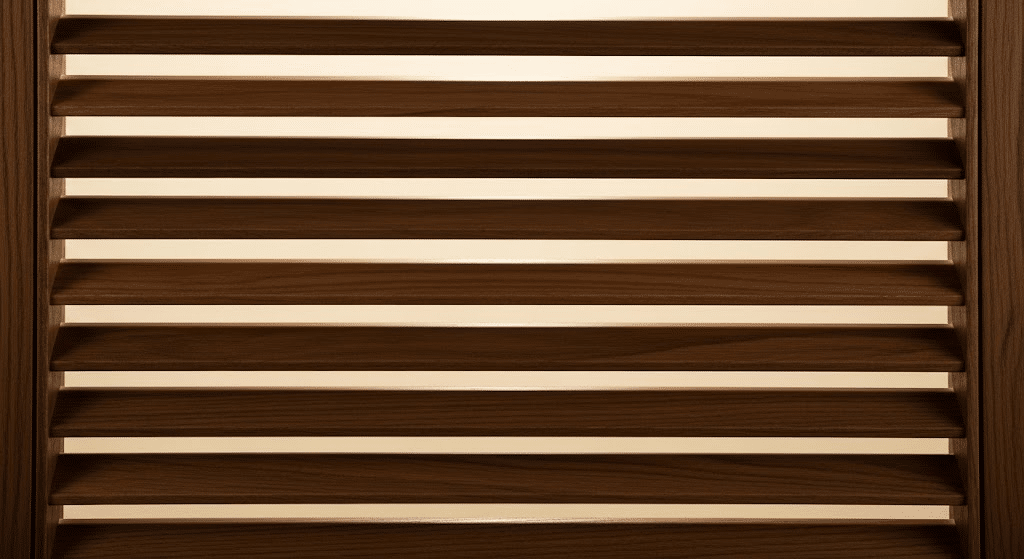
Louvered railings feature angled horizontal slats, offering privacy while allowing airflow. They add a sophisticated, modern touch.
- Privacy Control: Angled slats block views from certain angles without feeling closed off.
- Ventilation: Gaps between slats promote air circulation, ideal for hot climates.
- Custom Angles: Adjust slat angles to balance privacy and openness.
9. Rope Railing
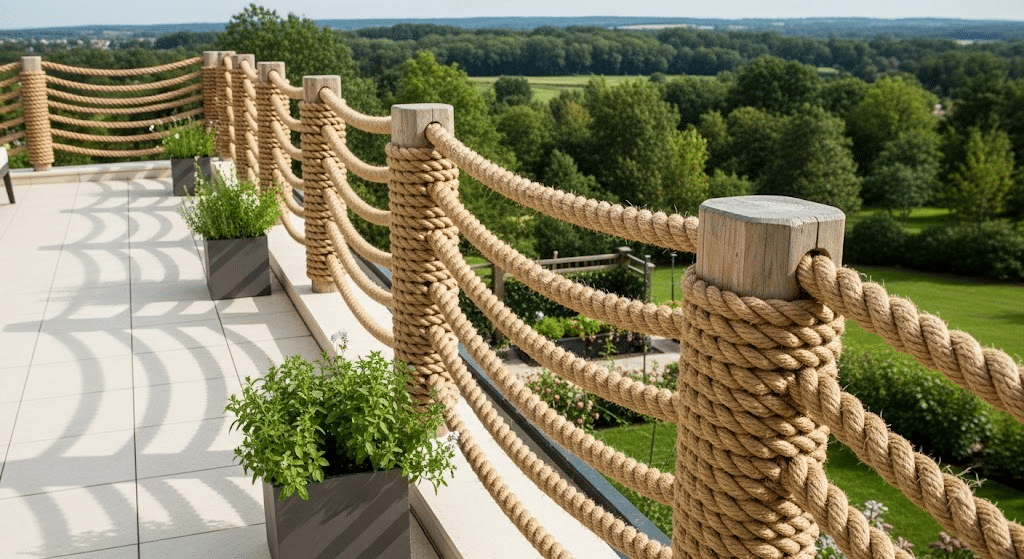
Horizontal rope railings provide a nautical or rustic charm, using thick ropes instead of traditional materials. They’re great for unique, coastal-inspired decks.
- Natural Texture: Hemp or synthetic ropes add a tactile, organic feel.
- Flexible Installation: Easy to install and adjust for custom spacing.
- Safety Considerations: Ensure tight, secure knots to meet safety codes.
10. Horizontal Lattice Railing
A lattice design with horizontal wooden or vinyl strips creates a decorative, open feel. It’s ideal for adding subtle privacy.
- Decorative Pattern: Crisscross or straight lattice adds visual intrigue.
- Light Filtering: Allows light through while creating a semi-private barrier.
- Versatile Material: Choose wood for a classic look or vinyl for low maintenance.
11. LED-Lit Horizontal Railings
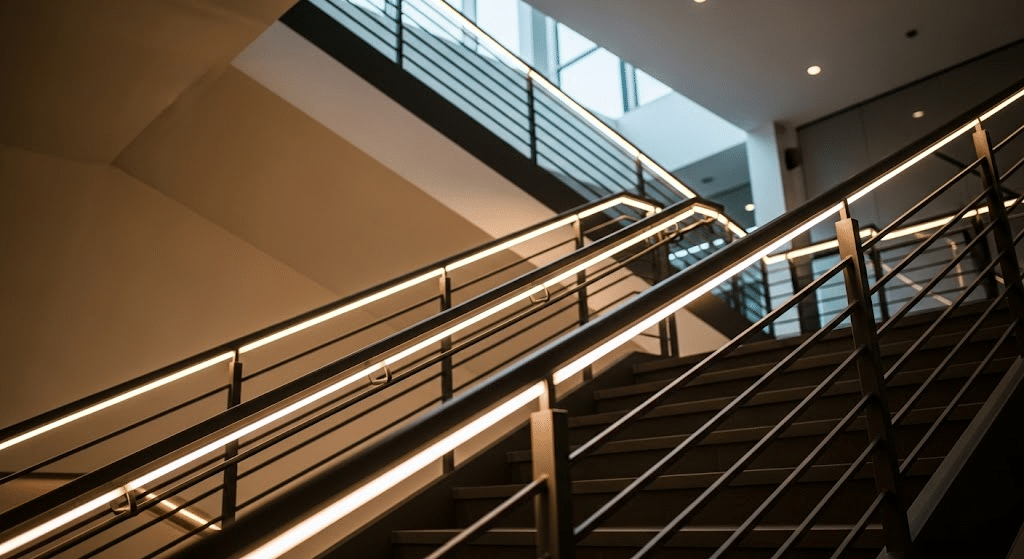
Incorporate LED lighting into horizontal railings for a functional and stylish glow. This design adds safety and ambiance for evening use.
- Integrated Lighting: Embed LED strips along rails for subtle illumination.
- Energy-Efficient: Low-voltage LEDs reduce energy costs while adding flair.
- Safety Boost: Lights improve visibility on stairs and edges at night.
Step-by-Step Guide for Applying Horizontal Deck Railing
Ready to build your stylish deck railing? This guide will walk you through the entire process of creating beautiful horizontal deck railing ideas. I’ll show you exactly how to measure, plan, and install your railing from start to finish.
Step 1: Getting the Right Tools and Materials
Before you start building, make sure you have all the tools and materials you need. Here’s a list of what you’ll require:
- Tape measure
- Level
- Power drill
- Circular saw
- Screwdriver
- Decking screws
- Balusters
- 2×4 boards for rails
- 1×4 or 1×6 boards for slats
- Post caps
- Wood stain or sealant (optional)
Step 2: Measuring and Planning the Railing
Before you start building, measure your deck’s length and height carefully. This will help you determine the materials you need.
Determine the desired spacing between the balusters and posts. Follow local building rules. Draw a detailed plan to see how the railing will look.
Planning everything well in advance will save you time and money during construction.
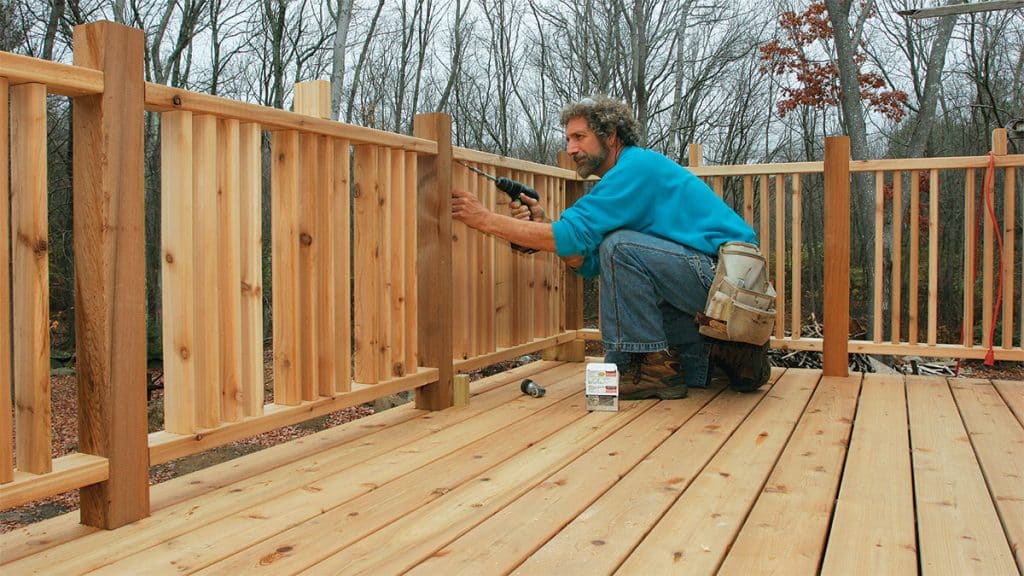
Step 3: Installing Posts and Balusters
Put up strong posts evenly on the deck using post anchors or brackets to keep them steady. Then, attach the balusters between the posts, making sure they are straight and evenly spaced.
Check all the connections again to be sure the railing is strong and reliable. With this, you can have a safe and good-looking deck railing.
Step 4: Creating the Top and Bottom Rails
Cut the top and bottom rails to the right size so they fit perfectly with the posts. Use screws or fit fasteners to attach the rails securely.
These rails are important because they give strong support to the balusters, making the whole railing solid and tough.
Step 5: Assembling the Horizontal Slats
Take the cut bars and place them flat between the posts. Make sure to tighten them securely.
Leave a little space between each bar to make it look nice and even. This will give your deck a modern look and keep everyone safe.
Step 6: Finishing and Maintenance
Once you put the railing together, check all the parts and surfaces. Smooth any rough edges with sandpaper and add a weather-resistant coating.
Clean it regularly and add more coating to make your deck railing last longer.
Step 7: Safety Measures and Local Building Codes
When you build a deck railing, safety should be your top priority. Follow the safety rules and local building codes to make sure your railing is safe.
Use strong materials and attach all parts firmly to avoid accidents.
Step 8: Adding Custom Elements
Make your railing look special by adding unique touches. Try things like fancy caps, lights for the posts, built-in lights, or using different materials like metal or glass.
These steps will help you create your horizontal deck railing ideas, showcasing your unique style.
Benefits of Installing A Deck Railing
1. Better Views
Horizontal railings sit sideways so you can see more of your yard. Regular up-and-down railings block some of your view. These flat railings make your deck feel bigger and more open.
You can see gardens, lakes, or mountains without anything in the way. I love how these railings let you enjoy nature while staying safe on your deck. The clear sight lines make your outdoor space feel connected to the world around it.
When I sit on my deck, I want to see everything. Birds flying by, kids playing in the yard, or just watching the sunset. Horizontal railings give me that full view I’m looking for.
2. Safety First
These railings keep you safe while making your deck look good. You won’t fall off your deck, so your family stays secure. Kids and pets can play without you worrying about accidents.
Make sure to check local rules about spacing between posts. Most areas have specific codes you need to follow. Your deck will meet safety codes and look great too.
I always tell my friends to put safety first when building a deck. Good railings protect everyone who uses your outdoor space. You can relax knowing your deck is built right.
3. Comfy Seating
The flat railings work like armrests when you sit on your deck. You can put drinks and snacks on them while you relax. They’re the perfect height for leaning against too.
The wide top rail gives you plenty of space for books, phones, or snacks. You won’t need extra tables cluttering up your deck. Everything you need is right at hand.
4. Easy Care
Flat railings are easier to clean than up-and-down ones. They have fewer spaces where dirt can hide. Rain washes most dirt away naturally. Less dirt means less cleaning time for you. You’ll spend more time enjoying your deck instead of scrubbing it. A simple wipe-down once in a while keeps them looking fresh.
I used to spend hours cleaning my old vertical railings. Now with horizontal ones, cleaning takes just minutes. More time for fun, less time for work.
5. Many Choices
You can pick from wood, metal, glass, or composite materials. Each type gives your deck a different look. Wood feels warm and natural. Metal looks clean and modern.
Glass railings give you the clearest views but need more cleaning. Composite materials last longer and need less care. Choose what fits your style best.
Pros and Cons of Building Deck Railing
| Pros | Cons |
|---|---|
| • Lower cost than vertical railing systems | • Children and pets can slip through wider gaps |
| • Quick and simple installation process | • Flat surfaces trap dirt and leaves easily |
| • Works with many different material choices | • Water pools on top, causing faster decay |
| • Blocks view from neighbors for more privacy | • Weather damage happens sooner than vertical styles |
| • Fits both modern and classic home styles | • May not meet local building safety codes |
| • Needs fewer support posts and hardware | • Requires more frequent cleaning and care |
| • Creates clean lines that look good | • Can sag or bend under weight over time |
Conclusion
You now know how to build horizontal deck railings and also have horizontal deck railing ideas! We’ve covered planning, measuring twice, and cutting once. Safety goggles are your best friend when using power tools.
With posts in place and rails laid out horizontally, your deck will look great. The horizontal deck railing ideas offer a clean view and modern style. Take a moment to appreciate your work – you’ve significantly improved your outdoor space.
Now relax and enjoy your new railing. You’ve earned it! This blog has demonstrated how to construct a horizontal deck railing that’s both functional and aesthetically pleasing.
Frequently Asked Questions
Can I Use Composite Materials for The Railing?
Yes, you can use mixed materials for your horizontal deck railing. Mixed materials offer strength and require less maintenance than traditional wood.
Is It Necessary to Have a Railing on My Deck?
The necessity of a railing depends on local building codes. In most cases, decks raised above a certain height require railings for safety purposes.
How Do I Clean and Maintain My Deck Railing?
To clean your railing, use a mild soap solution and a soft brush or cloth. For maintenance, inspect the railing regularly for any signs of damage and reseal or repaint as needed.
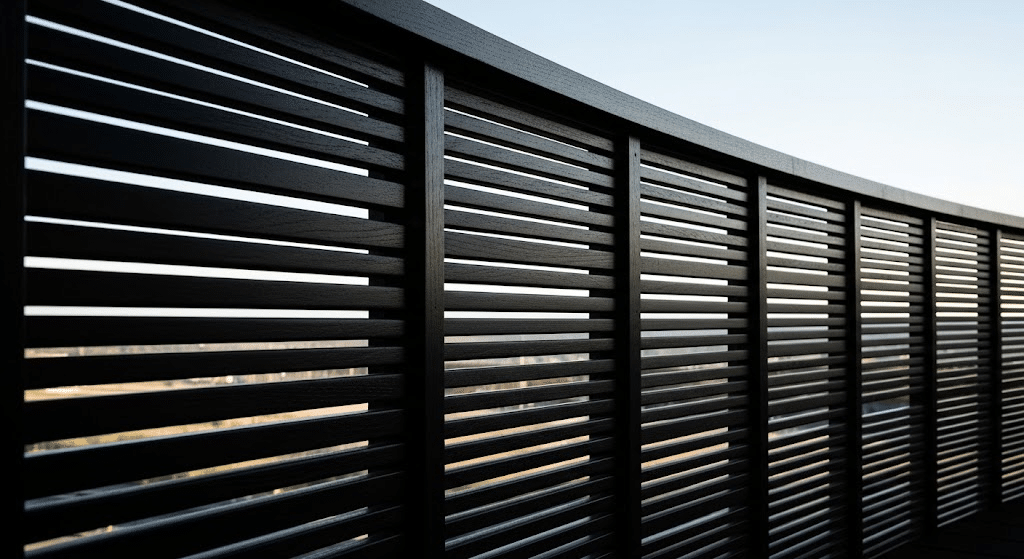
Can I Build a Curved Horizontal Railing?
Building a curved horizontal railing requires more advanced carpentry skills and might be challenging for a DIY project. Consider consulting a professional for such designs.
What Wood Species Are Best for a Horizontal Deck Railing?
Cedar, redwood, and tropical hardwoods are popular choices due to their natural resistance to decay and insects. However, pressure-treated pine is a more budget-friendly option.