Attention crafters! I’m about to reveal the secret to creating a stunning welcome sign that will decorate your entryway with faithful charm.
Picture this: your friends asking where you bought that stunning porch decoration, only to see their jaws drop when you reveal you made it yourself for just $5!
Are you passionate about changing ordinary fence pickets into something lavish? I’ve found a seamless process anyone can follow.
The best part?
This project sparks creativity without draining your wallet. Gather simple materials now, and within an hour, you’ll convert plain wood into a beautiful welcome sign that perfectly showcases your unique style!
Why a DIY Welcome Sign is Perfect For Your Home?
- Creating a custom welcome sign brings unmatched personality to any home entrance. Unlike generic store-bought options, handcrafted signs tell a story unique to each household.
- First impressions matter. When guests approach, they immediately sense the care that went into crafting something special. This simple decoration speaks volumes about the warmth waiting inside.
- The versatility of welcome signs makes them ideal for any decor style, rustic farmhouse, sleek modern, or colorful bohemian. They adapt seamlessly to front porches, entryways, or living spaces.
- Best of all, DIY versions cost a fraction of boutique prices while delivering that coveted “custom-made” look. The time invested transforms basic materials into a statement piece that instantly upgrades your home’s character.
Step-by-Step Guide for a DIY Welcome Sign
Create an adorable DIY welcome sign with just a few affordable materials and easy steps. This simple project adds a personal, rustic touch to your home in under an hour.
Tools And Materials Required For DIY Welcome Sign:
| Material | Purpose |
|---|---|
| 2 Fence Pickets | Used for the main structure of the sign; provides the wooden base. |
| 1 Thinner Fence Picket | Used for the top part of the sign, adds a smaller layer for the design. |
| Wood Stain (Briar Smoke) | To give the sign a rustic finish and an aged look. |
| Twine/String | Used to hang the sign or for decorative elements. |
| Paper Stencil (Welcome) | Used to create the ‘Welcome’ message on the sign. |
| Paint for Stenciling | Used to apply color to the stencil for lettering. |
| Tool | Purpose |
|---|---|
| Saw | Cut the wooden pickets to the appropriate size for the sign. |
| Wood Glue | Bonds the pieces of wood together to form a solid structure. |
| Tacks/Small Nails | To secure the twine or other elements to the sign. |
| Paintbrush | For applying the stain and other details to the sign. |
| Rag for Wiping Stain | To wipe off excess wood stain and create a smooth finish. |
Step 1: Cut and Assemble

Start by cutting two fence pickets to 11 inches, though this measurement can be adjusted based on preference!
Position the thinner fence picket across the back, measuring 6 inches from the bottom and 7.5 inches from the top.
A dab of wood glue and a few tacks secure everything perfectly.
There is no need for extra waterproofing; these materials are ready for outdoor life from day one.
Pro Tip: Fence pickets are already pressure-treated, making them perfect for outdoor displays without extra weatherproofing!
Step 2: Stain the Wood
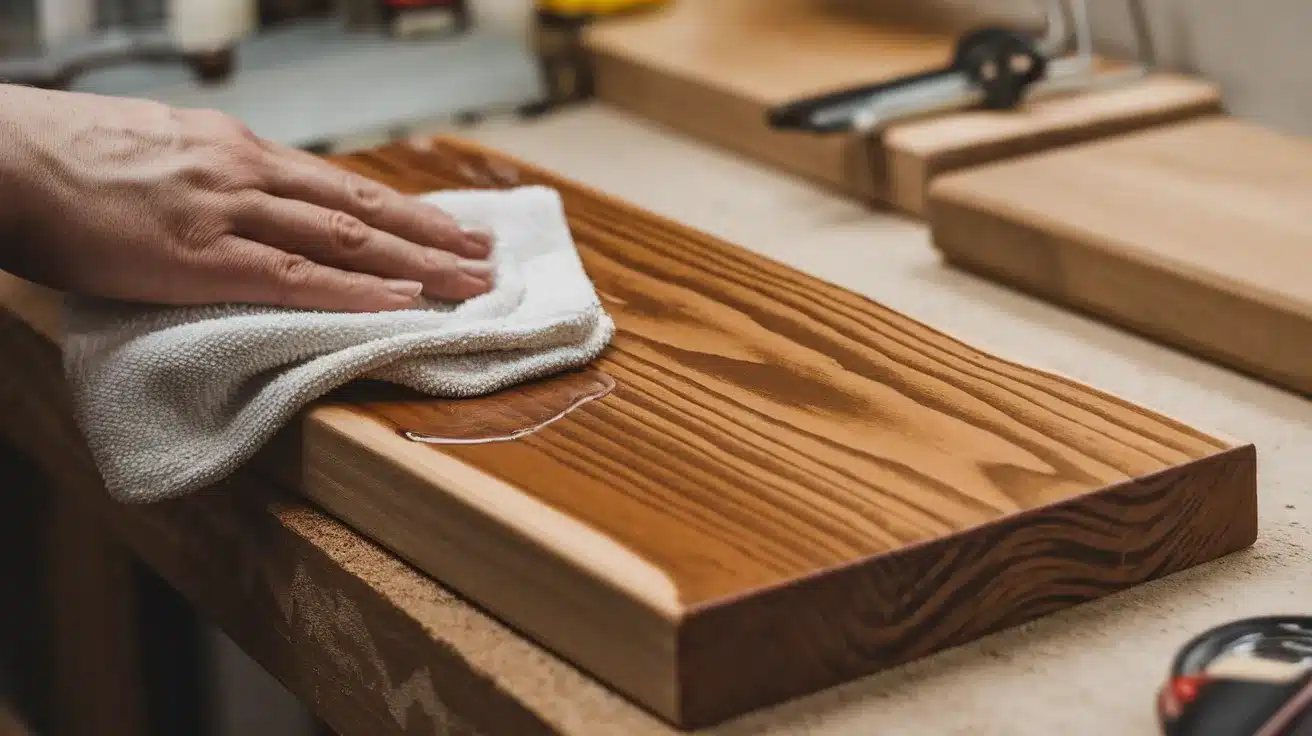
Apply a generous coat of your favorite wood stain (Briar Smoke works beautifully, but any color will do!) to the entire front surface. The key is letting it sit for just 5 minutes, not too long!
Then, wipe away excess stain with a clean rag. This quick wipe technique leaves behind a natural finish where beautiful wood grain still shines through. While it dries for about an hour, take a quick break, maybe grab a coffee! Patience pays off here for that professional-looking finish.
Pro Tip: A quick wipe-down after 5 minutes gives you a more natural look while still allowing the wood grain to show through.
Step 3: Add Decorative String
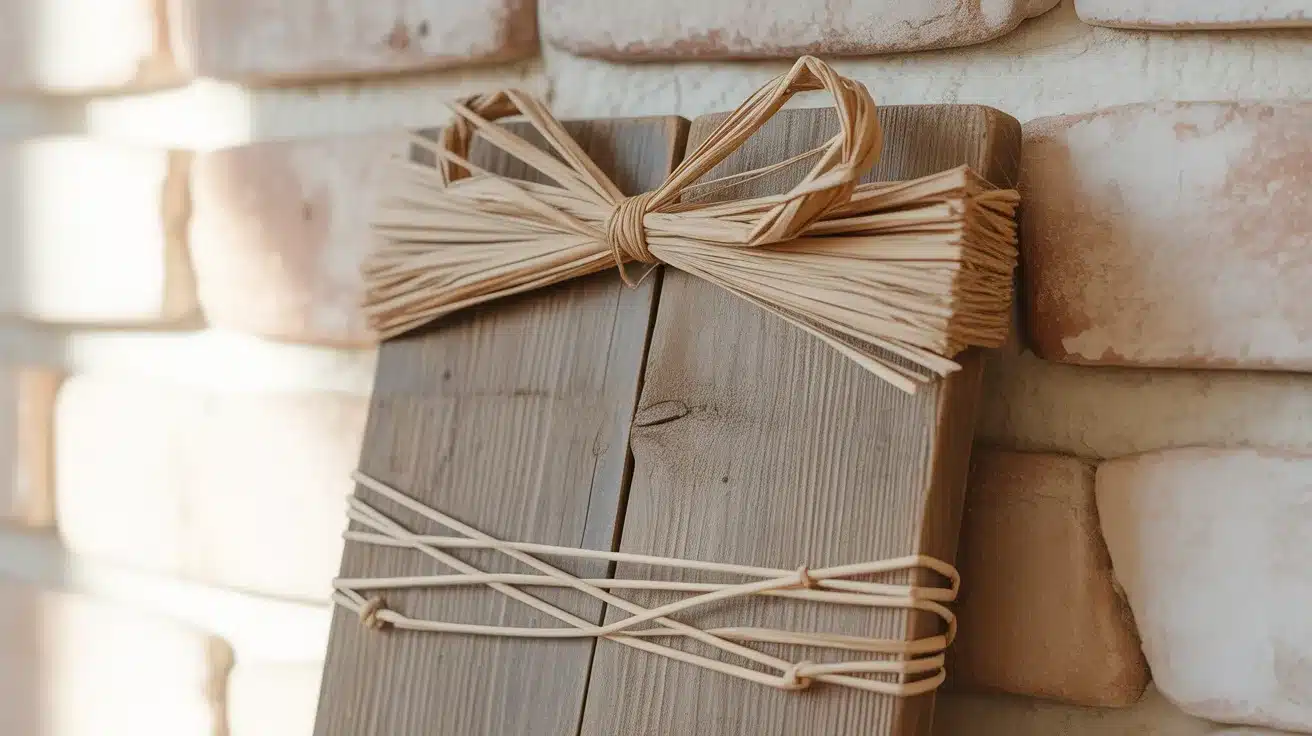
Now for the fun part, wrap some rustic twine around the top portion of the sign. There is no need for perfect spacing! Create a simple bow at the top for that homemade charm.
For the bottom section, crisscross the string in a casual pattern and secure with simple knots in the back. The beauty lies in adopting imperfection; those slightly uneven wraps and asymmetrical patterns actually add character!
This handcrafted touch is what separates a custom sign from mass-produced store versions.
Pro Tip: Don’t aim for perfection with the string; a slightly uneven, rustic look adds character to your handmade sign!
Step 4: Apply the Welcome Stencil

Carefully center the “welcome” stencil on the dried, stained wood. Using a dabbing motion (never brushing – that causes bleeding!), apply paint directly over the stencil.
The trick is to use very little paint on the brush and build up color gradually. Once the coverage looks good, carefully lift the stencil while the paint is still wet.
Have you made a smudge? No worries! Quickly grab a dry rag to fix mistakes. If that doesn’t work, a slightly damp one usually does the trick!
Pro Tip: If you make a mistake, quickly wipe it with a dry rag first, then try a slightly damp one if needed.
Step 5: Final Touches
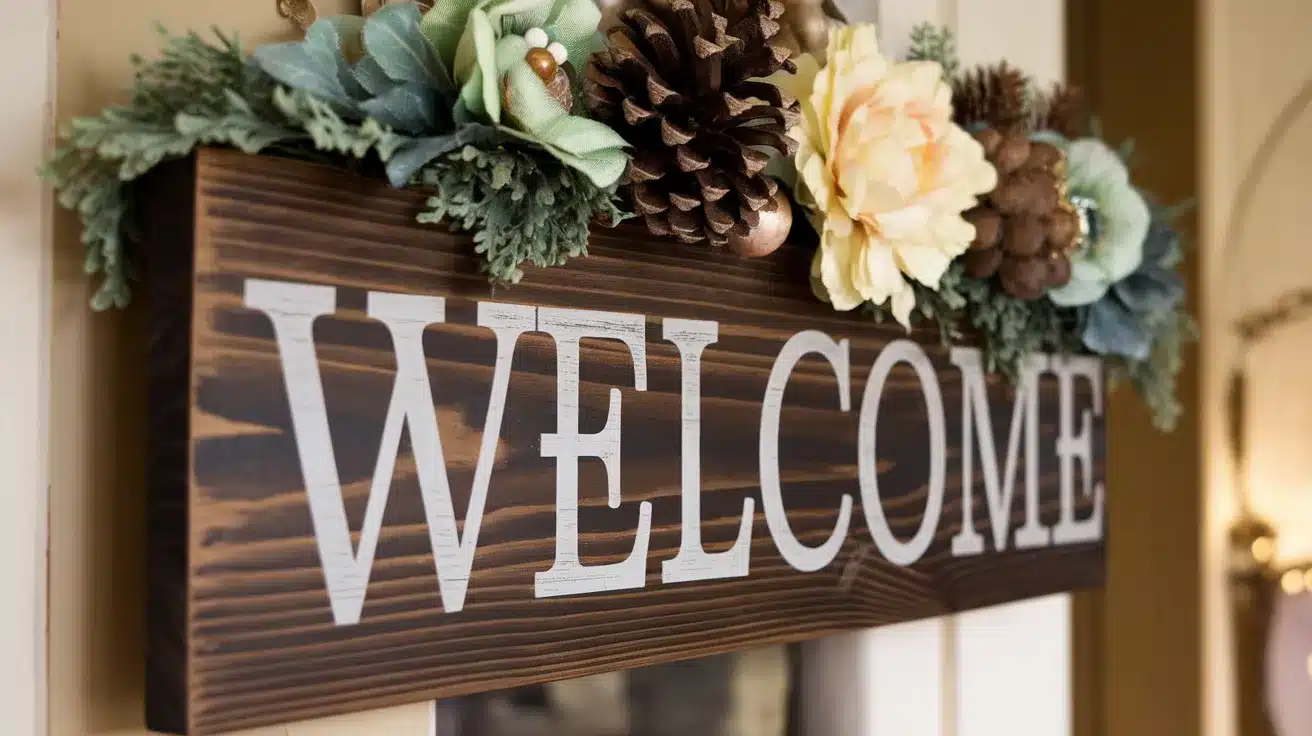
After everything dries completely, examine the creation with pride. Consider adding small seasonal elements, such as a tiny artificial flower in spring or a miniature pinecone in winter.
The versatility is endless! This project can easily be transformed with different stain colors, string types, or even different words on the stencil.
Standing back, it’s amazing that this professional-looking porch decoration costs just $5 and about an hour of enjoyable crafting time. Now that’s what crafters call a satisfying project with serious curb appeal!
Pro Tip: This simple project can be customized for any season by changing the color of stain, string, or adding small seasonal decorations.
Special thanks to Kim and Garrett Make It!for providing valuable insights in their video, which I referenced while creating this guide.
Creative Variations for Your Welcome Sign Design
1. Personalized Phrases
“Welcome” is classic, but consider alternatives that showcase personality
- “Hello There” for a casual vibe
- Family last name (e.g., “The Patels”)
- “Come on in” for friendly warmth
- Seasonal greetings like “Happy Fall Y’all”
2. Material Variations
Beyond fence pickets, examine
- Reclaimed barn wood for authentic vintage charm
- Smooth pine boards for clean, contemporary lines
- Old cabinet doors repurposed with fresh paint
- Slate or ceramic tiles for weather-resistant options
3. Finishing Techniques
- Distressed edges using sandpaper for aged appeal
- Whitewashing for coastal cottage aesthetics
- Two-tone staining for depth and dimension
- Clear epoxy coating for high-gloss, weather-resistant finish
4. Embellishment Ideas
- Small hanging elements (bells, mini chalkboards)
- Decorative corner brackets for architectural interest
- Pressed flowers sealed under clear varnish
- Battery-operated mini string lights for evening glow
Maintaining and Caring for Your DIY Welcome Sign
Keep your DIY welcome sign looking fresh by regularly cleaning, protecting it from the elements, and refreshing its paint or stain. Proper storage and seasonal care ensure it lasts for years to come.
1. Seasonal Protection
Outdoor welcome signs need different care as seasons change. In winter, apply an extra coat of polyurethane to shield against moisture. During summer, move signs to partially shaded areas to prevent sun fading. For spring and fall, inspect for water damage or loose elements after storms.
2. Cleaning Techniques
Dust weekly with a soft microfiber cloth for indoor signs. For outdoor versions, gently wash with mild soap and water using a soft cloth; never power wash, as this damages wood fibers and paint. Allow to dry completely before rehanging to prevent warping.
3. Refresh Routines
Lightly sand any rough patches every six months and touch up paint or stain as needed. For outdoor signs, reapply a clear protective finish annually. Replace worn strings or decorative elements when they begin to look tired.
4. Storage Solutions
When not in use (perhaps when rotating seasonal decor), store signs flat in a dry place, never leaning against walls, which can cause warping. If stacking multiple pieces, place acid-free tissue between the signs to prevent scratches or paint transfer.
Conclusion
Ready to change your entryway with a homemade touch?
This simple DIY welcome sign project proves that beautiful home décor doesn’t require fancy tools or deep pockets. With just $5 worth of materials and an hour of crafting time, you can create something truly unique.
Remember that the beauty of handmade items lies in their slight imperfections, these tell a story of creation that mass-produced items simply can’t match. As seasons change, your welcome sign can evolve, too, swap out decorative elements, or even change the message entirely.
The skills learned here open doors to countless other woodworking projects. Now step back, hang your creation proudly, and watch as guests notice that special handcrafted touch!
Frequently Asked Questions
What is a Good Size For a Welcome Sign?
A good welcome sign typically ranges from 12-24 inches wide and 6-18 inches tall.
How Do You Weatherproof a Wooden Sign?
To weatherproof a wooden sign, apply polyurethane or marine-grade sealant after staining.
What Colors are Prohibited Signs?
Prohibited signs typically use red, yellow, or orange to indicate danger, warnings, or restrictions.