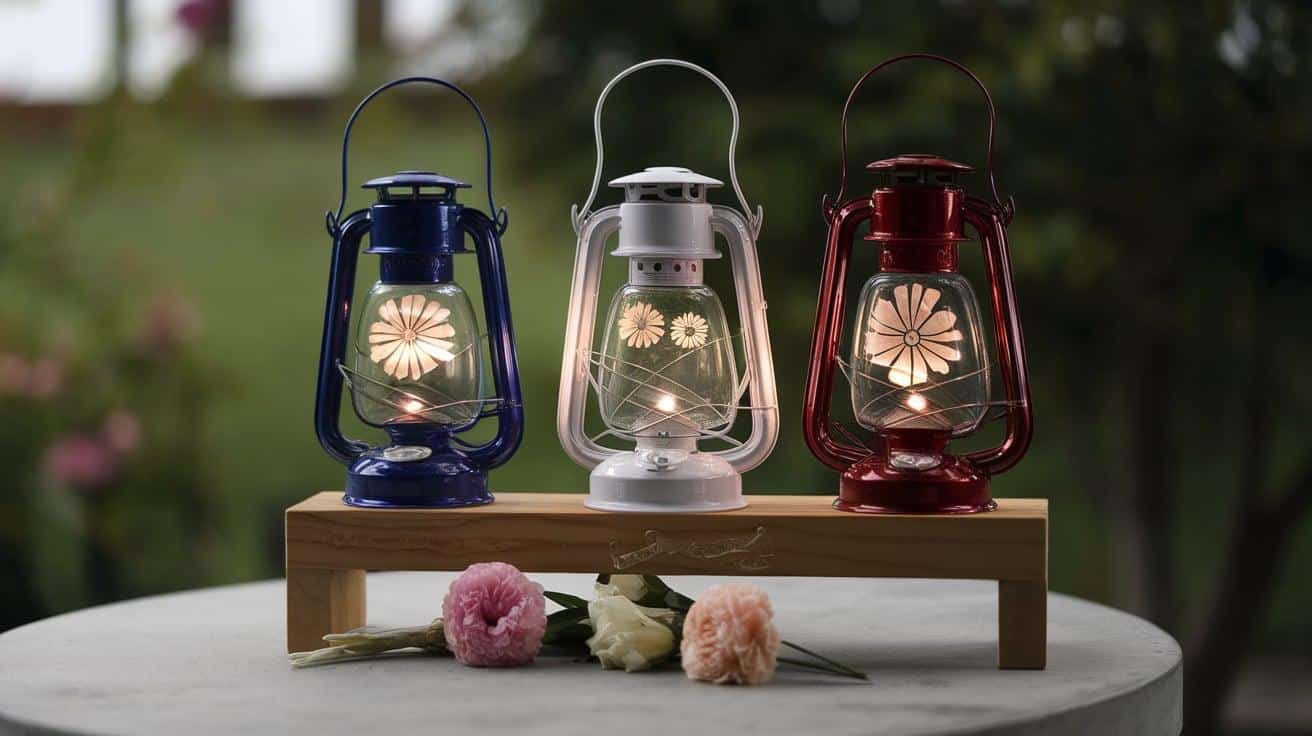
Create beautiful light displays that capture nature’s beauty with pressed flower lanterns. This timeless craft turns simple glass jars into glowing works of art using preserved blooms and soft light.
Our complete guide shows you how to make these beautiful decorative pieces step by step. You’ll learn to select the right flowers, master pressing techniques, and create lasting displays that brighten any space.
Whether planning a special event or adding warmth to your home, these lanterns offer endless possibilities.
We’ll walk you through every creative process stage from material selection to finishing touches. You’ll discover tips for long-lasting results and ways to solve common challenges.
By the end, you’ll have the skills to craft unique lanterns that preserve garden memories while casting a gentle, natural glow.
What Are Pressed Flower Lanterns?
Pressed flower lanterns blend natural beauty with soft lighting to create gentle, warming spaces in your home.
These handmade items feature dried blooms and leaves carefully arranged on glass surfaces, creating a magical glow when lit from within.
Each lantern tells its story through the flowers chosen and their arrangement on the glass surface. The light passes through the preserved petals, casting gentle shadows and highlighting the natural patterns of each bloom.
These decorative items are rooted in traditional paper lantern crafts, combining old techniques with modern materials. People worldwide use them to mark special occasions and create lasting memories of garden bounty.
The Appeal of Crafting with Pressed Flowers
Working with pressed flowers connects us directly to nature’s simple beauty. Selecting and preserving flowers brings peace while creating something useful and beautiful.
The craft offers endless possibilities for personal expression. Many find this creative process brings a sense of calm and satisfaction, helping reduce stress and increase focus.
Creating these lanterns lets you preserve memories from special events like weddings or garden harvests.
The finished pieces serve as gentle reminders of warm summer days throughout the year. Your creative choices in flower placement make each piece uniquely yours.
Materials and Tools Needed
Essential Materials
Glass jars with smooth sides work best for pressed flower lanterns. Look for wide-open containers so candles can be easily placed and lit.
You’ll need pressed flowers and a reliable adhesive like Mod Podge or PVA glue. Select small, thin flowers that dry well and maintain color through pressing.
Local thrift stores often offer perfect glass containers at low prices. Consider recycling clear glass jars from your kitchen – ensure they’re thoroughly cleaned and label-free.
Small decorative elements like fine twine or natural raffia add finishing touches. These materials help create a finished look while maintaining the lantern’s natural theme.
Tools for Success
Basic tools include fine-tipped tweezers for handling light flowers and soft brushes for applying adhesive. Keep scissors handy for trimming flowers and twine, and protect your work surface with a craft mat.
Consider having a pair of craft gloves to keep fingerprints off the glass. Small measuring tools help space flowers evenly around your container. Clear rulers work well for marking placement guidelines.
Step-By-Step Pressed Flower Lantern Crafting Guide
STEP 1: Gather and Press Flowers
Collect flat flowers like pansies, violas, or daisies and press them for about three weeks using cardboard and books. For a quicker method, dry them in a low-temperature oven with the door open.
STEP 2: Prepare the Balloon Base
Inflate a balloon and mark where the lantern’s opening will be. Please place it in a pot or bowl for stability. Tear translucent tissue paper into small pieces to begin the paper mache.
STEP 3: Make Glue and Apply Layers
Mix equal parts flour and water into a smooth paste. Brush glue onto the balloon, layer tissue paper over it, and repeat until you’ve built 3–5 layers. Let each layer dry before adding another.
STEP 4: Decorate with Pressed Flowers
Using PVA glue, glue the pressed flowers and leaves onto the dry lantern. Arrange them creatively, ensuring they stick well. Add a top layer of glue over the decorations to secure them.
STEP 5: Finish and Display
Once the lantern is dry, pop and remove the balloon. Use a skewer to create hanging holes, thread a string, and place a battery-operated tea light inside. Enjoy the soft glow of your garden-inspired creation!
Video Tutorial
For more information, check out this video tutorial by Gardening Australia.
How to Press Flowers?
Choosing the Right Flowers
Small, thin-petaled flowers press more effectively than thick, watery blooms. Pick flowers on a dry day when they’re fresh and free from morning dew.
Flowers like pansies, violets, and small daisies work particularly well. For best results, remove any damaged petals and arrange flowers face-down.
Consider collecting flowers throughout the growing season to build a varied collection. Store pressed flowers carefully between sheets of wax paper until needed. Keep notes about which flowers maintain their color best.
Pressing Methods
Traditional book pressing involves placing flowers between absorbent paper and weighing them with heavy books. This method takes two to three weeks but yields good results.
A microwave flower press offers quicker results, often in just a few minutes. This method helps maintain vivid colors in your pressed flowers.
Watch weather conditions when pressing flowers naturally. Humid days require longer drying times and extra paper changes. Check your pressed flowers regularly during the process to prevent unwanted spots or mold.
Creating Your Pressed Flowers Lantern
Basic Assembly
Start by thoroughly cleaning your glass container. Using a soft brush, apply a thin adhesive layer to a small area of the jar’s surface.
Place your pressed flowers carefully using tweezers, working in small sections. Once positioned, cover each flower with another thin layer of adhesive.
Plan your design before starting to apply flowers. Light pencil marks on the glass can guide placement. Work in small sections to maintain control over flower positioning.
Consider layering different types of flowers and leaves for depth. Start with larger elements as base layers, adding smaller details on top. Allow each layer to dry completely before adding more.
Lighting Options and Safety
LED candles provide safe, long-lasting light without heat or fire risk. They work especially well for homes with children or pets.
Traditional candles create beautiful, warm light but require careful placement and supervision. Always keep burning candles away from flammable materials.
Battery-operated fairy lights offer another lighting option. These tiny bulbs create magical effects when woven through multiple lanterns. Solar-powered options work well for outdoor displays.
Lantern Care and Maintenance
Preserving Your Creation
Store your lanterns in a cool, dry place away from direct sunlight when not in use. Gently dusting with a soft cloth helps maintain their appearance.
Handle your lanterns with clean, dry hands to prevent oils from affecting the adhesive. Avoid placing them where they might get wet or exposed to extreme temperatures.
Regular inspection helps catch any lifting flowers early. Keep your lanterns away from heat sources and humid areas. Consider using clear protective sprays designed for dried flowers.
Troubleshooting Tips
If flowers start to lift, apply a small amount of adhesive using a fine brush. Press gently and allow to dry completely before using the lantern.
Keep spare pressed flowers on hand for touch-ups or repairs. Store them in paper envelopes to maintain their dried state until needed.
Creating pressed flower lanterns brings natural beauty into your home while providing a satisfying craft experience.
These luminous decorations are functional lights and artistic displays, perfect for special occasions or everyday use.
With proper care, your pressed flower lanterns will glow gently and bring joy for years.
Conclusion
Creating pressed flower lanterns combines the joy of preserving nature’s beauty with the warmth of handmade lighting.
This guide teaches you to select materials, press flowers effectively, and craft unique pieces that brighten any space.
Remember that each lantern you create tells its story through the flowers you choose and arrange. Don’t hesitate to try different flower combinations, container sizes, or lighting options. Your creative choices make these pieces special and meaningful.
As you practice this craft, you’ll develop your techniques and style. You can share your creations with others, pass on your knowledge, or make thoughtful gifts.
With proper care, these lanterns will continue to cast their gentle glow and preserve precious moments in your garden for years.


