Building a paver patio extension can seem hard when you don’t know where to start.
I’ve seen many homeowners give up on this project because they lack clear steps and feel lost with all the small details involved.
I’m going to show you how to create a perfect paver patio extension that looks professional and lasts for years.
No fancy skills are needed, just some basic tools and my simple method.
This guide will walk you through each step of the process, from setting up the base and getting the right pitch for water runoff to laying pavers in a pleasing pattern and finishing with the correct sand.
You’ll also learn how to handle tricky spots like pipes and borders.
Why Choose a Full Paver Extension for Your Patio?
Adding pavers to extend your patio gives you extra space for outdoor living without major construction. When done right, pavers offer both good looks and function; they handle heavy furniture, foot traffic, and weather changes without issues.
The clean lines and smooth surface make your outdoor area look put together. Pavers last for decades when installed correctly with proper base work and drainage.
Unlike some other options, they won’t crack easily, and if one does get damaged, you can replace just that piece instead of fixing the whole patio.
Planning Your Paver Patio Project
1. Assessing Your Patio Space
When planning my paver extension, I first take exact measurements of the area I want to cover. I use a tape measure to find the length and width, then multiply these numbers to get my square footage.
This helps me buy the right amount of materials. I also mark the space with string or spray paint to see how the new section will look and flow with my existing patio.
I make sure to note any fixed objects like pipes or outlets that I’ll need to work around.
2. Understanding the Terrain
The ground under my paver patio is just as important as what goes on top. I check if my soil is clay, sand, or a mix since this affects how water drains. Clay soils might need extra base material.
I look at how water flows across my yard during rain and plan my patio pitch to direct water away from my house. A slope of about 1/4 inch per foot works well.
I also check for any low spots that might collect water and fill these before starting. This prevents my pavers from sinking or heaving in the future.
Extend Concrete Patio with Pavers: Step-By-Step Breakdown
Tools Required for Extending Patio with Pavers
| Tool | Purpose |
|---|---|
| Hand compactor | To compact the base material |
| Water hose | To wet the base for better compaction |
| Steel pipes (1-inch) | To create level guides for sand |
| Core drill | For cutting holes for pipes |
| Dead blow hammer | To set pavers firmly in place |
| Whitewash brush | To sweep in polymeric sand |
| Broom | To sweep sand into joints |
Materials Required for Extending Patio with Pavers
| Material | Purpose | Quantity |
|---|---|---|
| DGA base material | Creates a stable foundation | 6 inches deep |
| Concrete sand | Bedding layer for pavers | 1 inch thick |
| TECO block Sandalwood blue 60 pavers | Main patio surface | Based on square footage |
| G2 polymeric sand (tan) | Fills joints, stops weed growth | Enough to fill all joints |
| PVC bags | To protect pipes during installation | As needed |
STEP 1: Prepare the Base
The first step is adding 6 inches of DGA base material, compacting it in layers. Wetting the entire area with a hose helps the material settle and compact better.
This forms a solid foundation that prevents future shifting of the pavers.
STEP 2: Add Bedding Sand
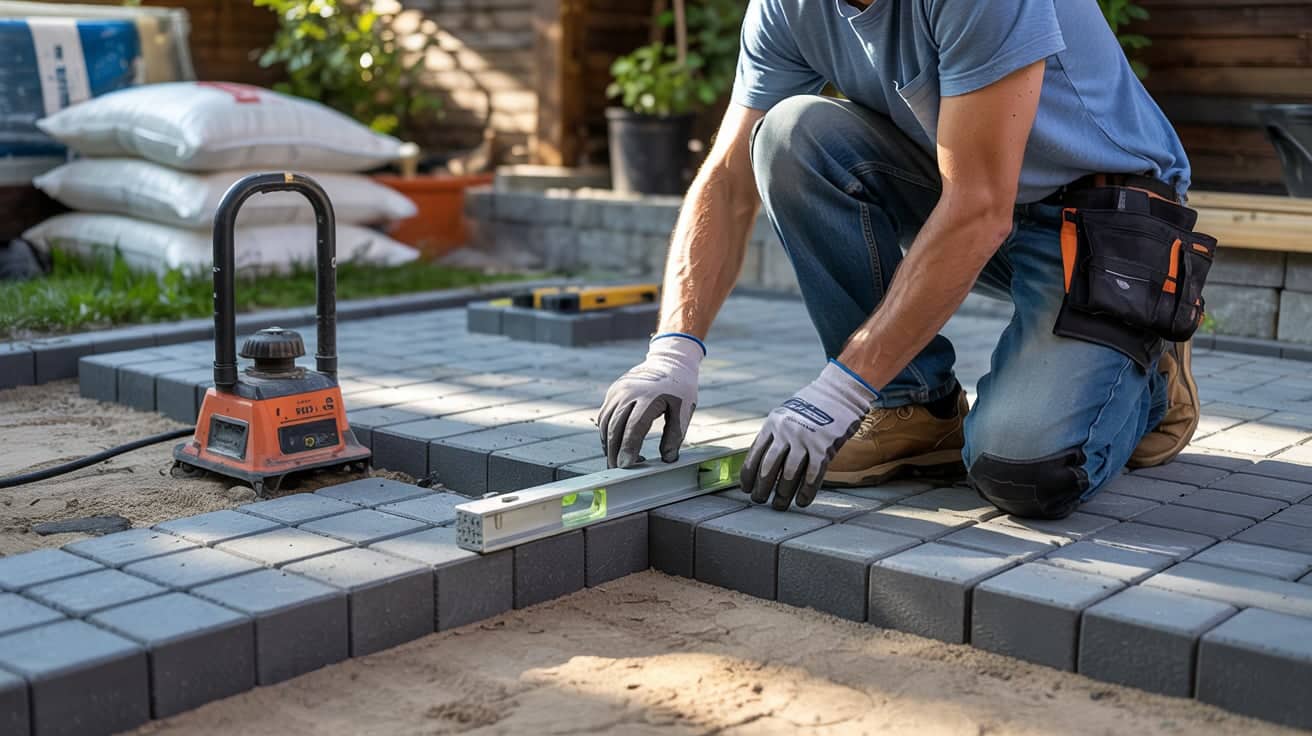
Place 1-inch steel pipes across the base as guides. Then add concrete sand (not typical sand) on top and screed it level with the pipes.
This creates a flat 1-inch sand bed that helps with proper drainage under the pavers.
STEP 3: Plan for Proper Pitch
The surface should have a slight pitch away from the house. This allows water to run off properly and prevents pooling issues.
Check the level throughout the process to maintain this slope consistently.
STEP 4: Address Obstacles
Place bags over any pipes or electrical work to keep out debris. Use a core drill to make precise cuts in pavers to fit around these features. This step takes time but results in a clean, professional look.
STEP 5: Lay the Pavers
Remove the steel pipes and fill those spaces with sand. Then, carefully place pavers in the chosen pattern, working from one edge.
Use a dead blow hammer to tap each paver into place so it sits firmly in the sand.
STEP 6: Add Border Pavers
Use the existing border as an edge, placing new pavers to match the pattern. This helps the extension blend with the original patio. Make any needed cuts to fit pavers snugly against the border.
STEP 7: Apply Polymeric Sand
Sweep G2 polymeric sand into all joints, making sure it fills. Using a whitewash brush, work the sand into every gap. Tap pavers to help the sand settle, keeping it about 1/8 inch below the surface.
STEP 8: Activate the Sand
Use a hose on the shower setting to wet the sand for 15 seconds in each section, working from the highest to the lowest point. This activates the glue in the sand. Rinse away any white residue from the surface of the pavers.
Check out this YouTube video for detailed step-by-step guidance: Extension of Patio with Pavers.
Why Teco Block Sandalwood Blue 60 Is a Great Choice?
-
Color Blend Technology – TECO Block Sandalwood Blue 60 pavers have a mix of tan and blue tones that hide dirt and stains better than solid colors. The varied shades also blend well with most home exteriors and garden settings, creating a natural-looking patio that feels like it belongs in the space.
-
Size and Layout Flexibility – These pavers come in a standard size that works well for both simple and complex patterns. The uniform dimensions make them easier to install in straight lines or random layouts, and they cut cleanly when you need to fit them around corners or obstacles like pipes.
-
Surface Texture Balance – The top surface has enough texture to prevent slipping when wet but remains smooth enough for comfortable barefoot walking. This makes it perfect for pool areas or patios where people might walk without shoes during summer gatherings.
Different Types of Pavers and Their Benefits
- Concrete Pavers – More affordable than natural stone with many color and style options. They hold up well to weather and can last 25+ years with proper care.
- Natural Stone Pavers – Made from limestone, slate, or bluestone with unique patterns. They cost more but offer a one-of-a-kind look that many find worth the price.
- Brick Pavers – Classic red-clay look that fits well with older homes. They’re smaller than other types, which allows for more pattern options.
- Porcelain Pavers – Non-porous and stain-resistant, making them good for pool areas. They come in styles that mimic wood or stone but need special installation.
- Rubber Pavers – Made from recycled tires, these offer cushioning and slip resistance. They work well in play areas but don’t have the high-end look of other options.
Breaking Down Material Costs
| Material | Unit Cost | Quantity Needed for 100 sq ft | Total Cost |
|---|---|---|---|
| TECO Block Pavers | $2.50-$4 per sq ft | 100 sq ft | $250-$400 |
| DGA Base Material | $30-$45 per ton | 1.5-2 tons | $45-$90 |
| Concrete Sand | $35-$50 per ton | 0.5 ton | $17.50-$25 |
| Edge Restraints | $1.50-$2.50 per linear foot | 40 linear feet | $60-$100 |
| Landscape Fabric | $0.15-$0.30 per sq ft | 100 sq ft | $15-$30 |
| Polymeric Sand | $25-$35 per 50 lb bag | 2-3 bags | $50-$105 |
| Total Materials | $437.50-$750 |
Labor Costs and Time Estimates
| Task | DIY Time Estimate | Professional Labor Cost |
|---|---|---|
| Site Prep/Excavation | 4-6 hours | $300-$500 |
| Base Installation | 3-5 hours | $250-$400 |
| Sand Bed Preparation | 2-3 hours | $150-$250 |
| Paver Installation | 6-10 hours | $500-$800 |
| Cutting Pavers | 2-4 hours | $200-$350 |
| Sand Finishing/Sealing | 2-3 hours | $150-$250 |
| Total | 19-31 hours | $1,550-$2,550 |
When to consider hiring pros:
- For patios larger than 200 square feet
- When working with slopes or complex drainage issues
- If you need to match existing stonework exactly
- When many custom cuts around pipes or structures are needed
- If you have physical limitations or lack proper tools
Regular Cleaning and Maintenance Tips
-
Routine Sweeping – Sweep your patio weekly to remove leaves, dirt, and debris. This stops plants from growing in the joints and prevents staining from organic matter.
-
Spot Cleaning – Clean spills quickly with water and mild soap. For oil spots, use a cleaner made for pavers, applying it while the stain is fresh for best results.
-
Joint Maintenance – Check sand joints twice a year for any washing out. Top up with polymeric sand as needed, following the wetting instructions to activate the binding agents.
-
Weed Management – Pull any weeds that appear right away, getting the full root. A vinegar-and-water mix works well as a natural weed killer that won’t harm your pavers.
-
Seasonal Care – In fall, clear leaves often to prevent staining. In winter, use plastic snow shovels instead of metal ones, and choose salt alternatives that won’t damage your pavers.
Conclusion
Adding a paver patio extension brings new life to your outdoor space. By following these steps, from careful planning and base preparation to proper paver placement and finishing touches, you can build a patio that stands the test of time.
Remember that the quality of your base work largely determines how long your patio will last.
Take time with the small details, like getting the right pitch for water flow and making clean cuts around obstacles.
Your patience will pay off with a smooth, sturdy surface for family gatherings and quiet evenings outdoors.
The techniques in this guide work for both small and large projects, giving you the know-how to create a patio you’ll enjoy for many years.


