
Tired of looking at ugly concrete floors in your basement or garage? You’re not alone. Many homeowners struggle with unsightly concrete surfaces that make their spaces feel cold and uninviting.
The good news is that painting concrete floors can completely change the look of your room without breaking the bank.
This guide will show you exactly how to paint concrete floors from start to finish. You’ll learn the proper preparation techniques, the necessary materials, and step-by-step instructions that guarantee professional results.
By following these proven methods, you can turn your dull concrete into a beautiful, durable surface that lasts for years.
Get ready to see your concrete floors go from boring to brilliant in just a few days of work.
Why Paint Your Concrete Floors?
Painting concrete floors offers several benefits that make this project worthwhile and a good use of your time and effort. First, it creates a clean, finished look that instantly improves any room.
Raw concrete can make spaces feel cold and industrial, but painted floors add warmth and style to your home.
Cost savings represent another major advantage. Professional floor installation can cost thousands of dollars, while painting concrete requires only basic materials and tools. You can achieve a high-end appearance for a fraction of the price of other flooring options.
Painted concrete floors are also easier to clean and maintain than bare concrete. The paint creates a smooth, sealed surface that resists stains, dust, and moisture.
This makes regular cleaning simple and helps prevent odors from becoming ingrained in the porous concrete surface.
For detailed techniques on cleaning concrete surfaces, refer to our comprehensive guide on "How to Clean Concrete: A Guide to Maintaining Your Surfaces.
How to Paint Concrete Floors: Complete Step-by-Step Guide
Tools and Materials Needed:
| Category | Item | Use |
|---|---|---|
| Cleaning | Cleaner, Spray, Brush, Scraper | Remove residue, clean surfaces |
| Preparation | Nail Remover, Mallet, Filler, Etching | Surface prep |
| Safety | Glasses, Gloves, Fan | Protection & ventilation |
| Painting | Paint, Roller, Tray, Brush | Apply and finish coating |
Step 1: Remove Existing Floor Coverings
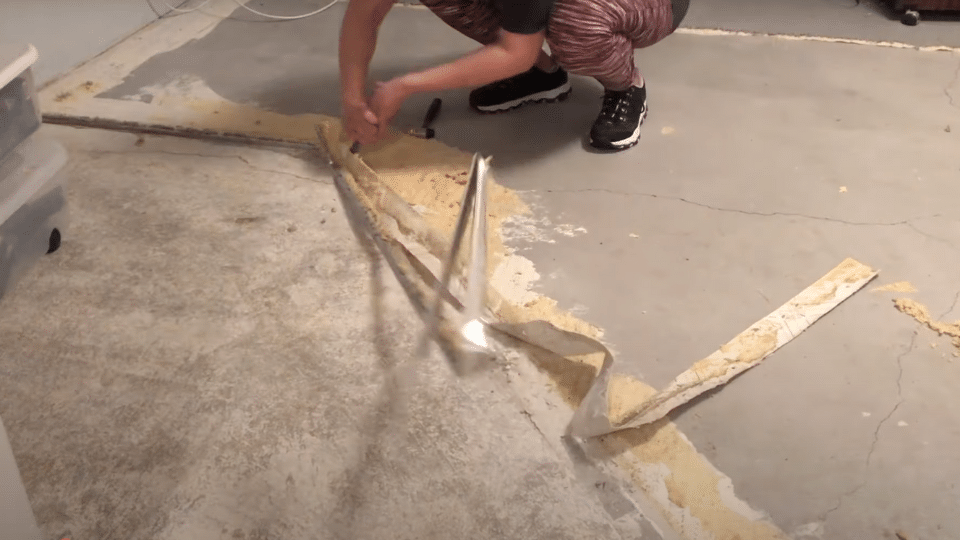
The first step in painting concrete floors involves removing any existing carpet, tile, or vinyl flooring. This process can be messy and time-consuming, but proper removal ensures your paint will stick correctly to the concrete surface.
Start by cutting the carpet into manageable sections and rolling it up for disposal. Pull up all tack strips and remove any staples or nails from the concrete. If you’re removing tile, use a floor scraper or chisel to break the adhesive bond and lift each tile carefully.
Materials Needed in This Step:
- Utility knife
- Floor scraper
- Hammer
- Pry bar
Instructions:
- Cut flooring materials into smaller sections for easier handling
- Remove all fasteners, staples, and nails from the concrete
- Clean up debris and dispose of old flooring materials properly
- Inspect the concrete for any remaining adhesive or foreign materials
Step 2: Clean Off Adhesive Residue
After removing old flooring, you’ll likely find adhesive residue stuck to your concrete. This sticky material must be removed entirely before painting, or your new finish won’t adhere properly to the surface.
The easiest method for removing most adhesives involves spraying it with water and letting it soak for several minutes. The moisture softens the glue, making it easier to scrape away. For stubborn residue that won’t budge with water alone, use an all-purpose cleaner mixed with water.
Apply the cleaning solution generously and let it sit for 10-15 minutes. Then scrub the area with a stiff brush and scrape away the softened adhesive with a paint scraper. This process may need to be repeated several times for heavily stuck areas.
Materials Needed in This Step:
- Water spray bottle
- All-purpose cleaner
- Scrub brush
- Paint scraper
Instructions:
- Spray adhesive residue with water and let it soak
- Apply cleaning solution to stubborn areas
- Scrub with a brush to loosen the adhesive
- Scrape away softened material with a paint scraper
- Rinse the area with clean water when finished
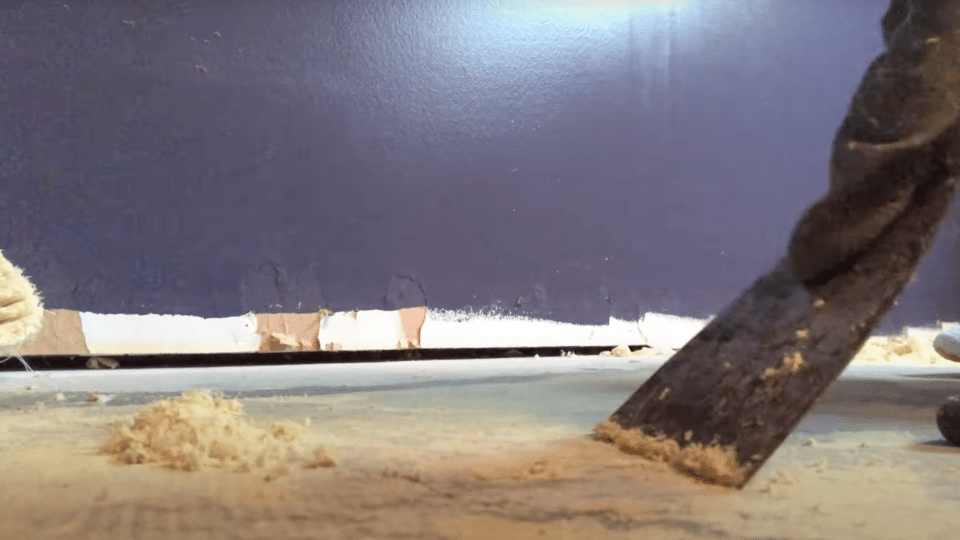
Step 3: Remove Embedded Nails and Hardware

Concrete floors often have nails, screws, or other metal fasteners embedded in the surface. These items must be removed completely before painting, as they can cause rust stains and prevent smooth paint application.
Removing nails from concrete requires special tools because regular hammers won’t provide enough leverage. A nail remover tool combined with a rubber mallet works best for this job. The nail remover grips the nail head securely while the mallet provides the force needed to extract it.
Position the nail remover over each nail head and strike it firmly with the rubber mallet. Drive the tool as far into the nail as possible, then apply steady pressure to pull the nail out. This technique works for most nails, though some may require multiple attempts.
Materials Needed in This Step:
- Nail remover tool
- Rubber mallet
- Safety glasses
- Work gloves
Instructions:
- Put on safety glasses and gloves before starting
- Position nail remover over each nail head
- Strike the tool with a rubber mallet to drive it into the nail
- Apply steady pressure to extract the nail from the concrete
- Check the entire floor surface for any remaining fasteners
Step 4: Fill Cracks and Holes
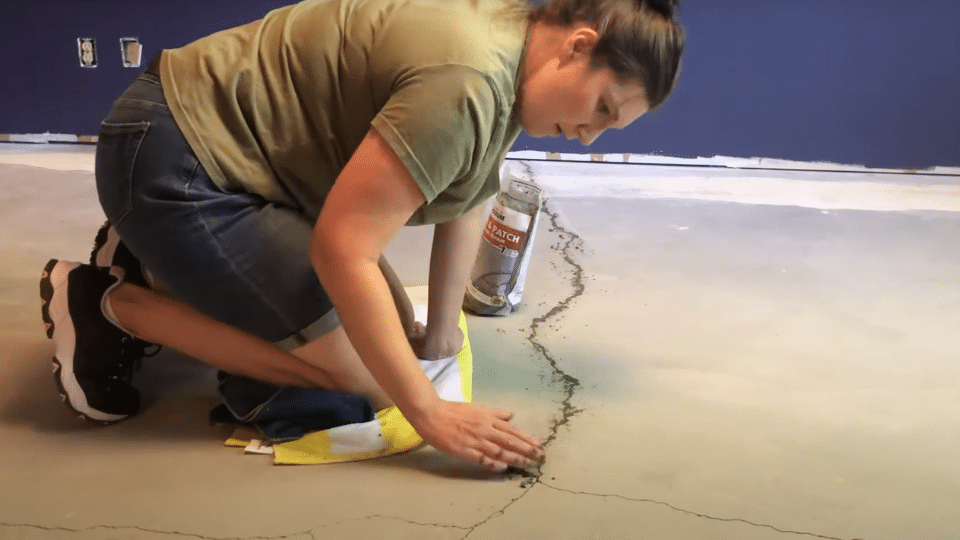
Even small cracks and holes in concrete can show through paint and create an uneven finish. Filling these imperfections before painting ensures a smooth, professional-looking result that will last longer.
Concrete crack filler comes in powder form that you mix with water or in pre-mixed containers. The pre-mixed version is easier to use and doesn’t dry out as quickly during application. Apply the filler with a putty knife, pressing it firmly into each crack or hole.
Work the filler material into the defect completely, then smooth the surface level with the surrounding concrete. Allow the filler to dry according to the manufacturer’s instructions before proceeding to the next step.
Materials Needed in This Step:
- Concrete crack filler
- Putty knife
- Water (if using powder mix)
- Mixing container
Instructions:
- Clean out loose debris from cracks and holes
- Mix filler according to package directions (if using powder)
- Apply filler with a putty knife, pressing firmly into defects
- Smooth surface level with the surrounding concrete
- Allow to dry completely before continuing
Step 5: Etch and Clean the Concrete Surface

Etching prepares the concrete surface for paint by creating tiny grooves that help the paint stick better. This step is critical for long-lasting results, as paint applied to smooth concrete often peels off within a few months.
Concrete etching solution combines cleaning and surface preparation in one product. Open windows and doors for good air circulation before starting, as these products can produce strong fumes. Wear safety glasses and rubber gloves throughout this process.
Start by dampening the concrete with clean water, but don’t leave standing puddles. Apply the etching solution using a watering can for even distribution. Work the solution into the concrete with a scrub brush, paying attention to all areas of the floor.
Materials Needed in This Step:
- Concrete etching solution
- Watering can
- Scrub brush
- Safety glasses and gloves
- Garden hose or bucket of water
Instructions:
- Open windows and ensure good ventilation
- Dampen the concrete surface with clean water
- Apply the etching solution evenly using a watering can
- Scrub the solution into the concrete with a brush
- Rinse thoroughly with clean water three times
- Allow the surface to dry completely before painting
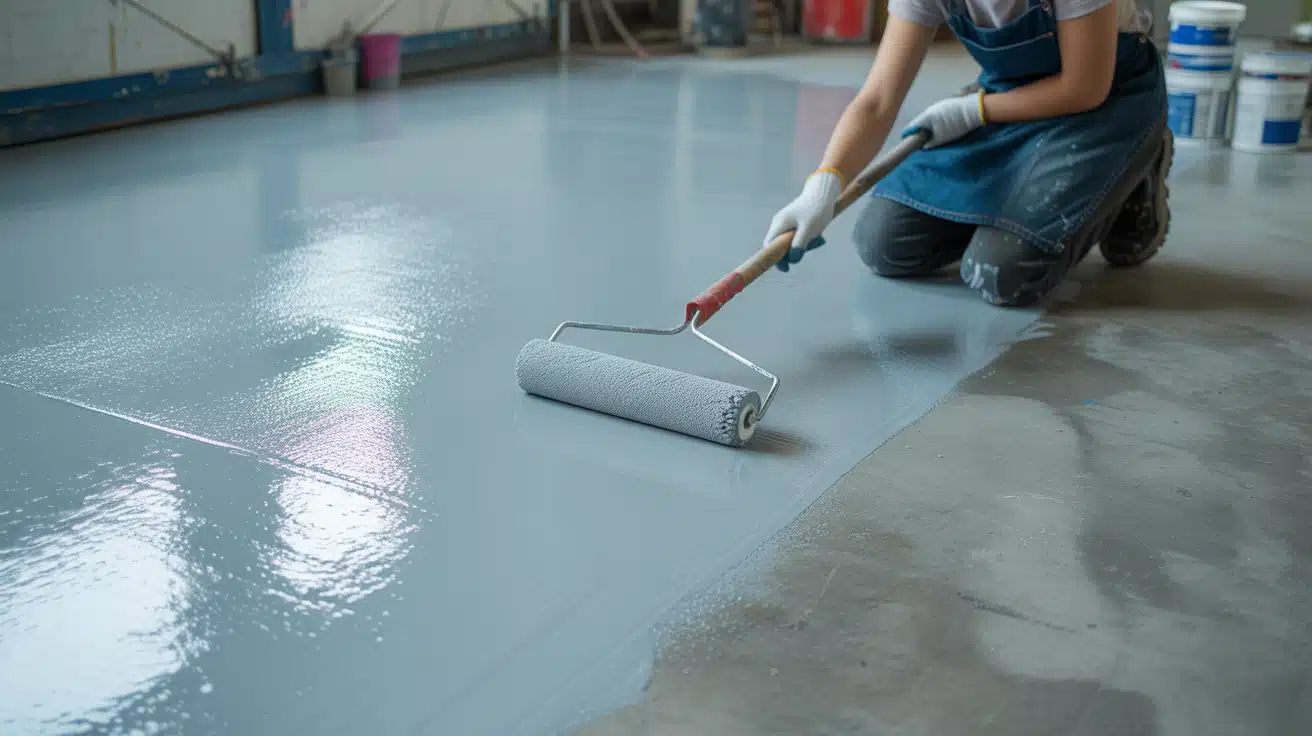
Step 6: Apply the Paint

With proper preparation complete, you’re ready to apply paint to your concrete floor. Select a high-quality concrete paint specifically designed for floor use, as regular wall paint may not withstand the wear and tear of foot traffic.
Start by cutting in the edges with a paintbrush, painting a 3-4 inch border around the room’s perimeter. This technique ensures clean, straight lines where the floor meets the walls. Use a roller for the main floor area, working in small sections to maintain a wet edge.
Pour paint into a roller tray rather than directly onto the floor. This method provides you with better control over coverage and reduces waste. Roll the paint in overlapping strokes, maintaining consistent pressure for even coverage.
Materials Needed in This Step:
- Concrete floor paint
- Paint roller and cover
- Paint tray
- Paintbrush for edges
- Extension pole for roller
Instructions:
- Cut in the edges with a paintbrush first
- Pour paint into a roller tray
- Apply paint with a roller in overlapping strokes
- Work in small sections to maintain a wet edge
- Allow the first coat to dry before applying the second coat if needed
Video Tutorial
Special thanks to Emily Wilson for providing valuable insights in their video, which I referenced while creating this guide.
How I Painted My Concrete Floor! DIY Budget-Friendly Basement Floor Option
Maintenance Tips for Painted Concrete Floors
1. Regular Cleaning Schedule
To keep your painted concrete floors looking their best, a consistent cleaning routine is essential. Sweep or vacuum weekly to remove dirt and debris that can scratch the paint surface.
Use a damp mop with mild soap for deeper cleaning, but avoid harsh chemicals that damage the finish. Clean up spills immediately to prevent staining, and never use abrasive cleaners on painted concrete.
2. Protect High-Traffic Areas
High-traffic zones like doorways experience more wear than other areas. Place mats at entrances to catch dirt and moisture before they reach your painted surface.
Consider applying a clear protective coating in high-traffic areas for added protection. Use furniture pads under movable items to prevent scratches and gouges on the paint.
3. Address Minor Damage Quickly
Small chips and scratches should be repaired promptly to prevent spreading. Keep original paint for touch-ups, stored in a cool, dry place.
Clean damaged areas thoroughly before applying touch-up paint in thin coats. For larger damage, you may need to repaint an entire section during low-traffic periods.
4. Monitor for Moisture Issues
Watch for signs like bubbling, peeling, or discoloration that indicate water infiltration. Check basement and garage areas regularly for water seepage, especially after heavy rains.
Improve drainage around your foundation if you notice recurring moisture problems. Fix the moisture source before repainting any damaged areas.
5. Seasonal Care Considerations
Winter road salt and ice-melting chemicals can damage paint finishes if not cleaned promptly. Summer heat and humidity require adequate ventilation to prevent condensation under the paint.
Inspect floors at the beginning of each season for any weather-related damage and plan repairs during mild weather periods.
Project Budget and Cost Breakdown for Concrete Floors
| Item Category | Price Range | Notes |
|---|---|---|
| Concrete Paint (2-3 gallons) | $80-$150 | Quality varies by brand |
| Cleaning Supplies | $20-$40 | Includes etching solution |
| Tools and Equipment | $50-$100 | Rollers, brushes, safety gear |
| Crack Filler | $15-$25 | For minor repairs |
| Total Project Cost | $165-$315 | For a 400-500 sq ft area |
Conclusion
Painting concrete floors can completely change the look and feel of your basement, garage, or any room with concrete surfaces. While this project requires time and effort, the results are worth every minute you invest in proper preparation and application.
The key to success lies in thorough preparation. Removing old adhesive, filling cracks, and properly etching the concrete creates the foundation for a paint job that will last for years.
Skipping any of these steps often results in premature paint failure and necessitates a restart.
Please note that this project typically takes several days to complete from start to finish. Don’t rush the process, especially the drying time between steps.
Your newly painted concrete floors will provide years of beauty and functionality when properly maintained. Regular cleaning, prompt repairs, and attention to moisture issues will keep your floors looking their best.
The investment in time and materials pays off with a dramatically improved space that you’ll be proud to show off to family and friends.
Frequently Asked Questions
What Is the Downside of Painting Concrete?
Paint can chip, peel, or wear off over time, especially in high-traffic areas, and requires regular maintenance and reapplication.
Can you Paint Straight onto Concrete?
No, you must clean, etch, and prepare the concrete surface first, or the paint won’t stick properly and will fail quickly.
What Is the Cheapest Way to Cover a Concrete Floor?
Painting is the most affordable option, ranging from $165 to $315 for most rooms, followed by concrete stain or basic vinyl tiles.