Have you noticed how cabinet doors instantly change your kitchen’s look? Many homeowners avoid replacing them due to high professional costs.
But here’s something interesting – you can make beautiful cabinet doors at home with basic tools and materials.
By creating your own cabinet doors, you’ll save money, get exactly what you want, and feel proud showing friends your handiwork.
This guide walks you through selecting materials, measuring correctly, building different door styles, and finishing them professionally. You’ll learn everything needed to create cabinet doors that look store-bought.
Ready to remake your kitchen with your own hands? Let’s get started on making those cabinet doors!
Tools and Materials Required for DIY Cabinet Doors
Materials and Their Purpose
| Material | Purpose |
|---|---|
| Wood for Stiles and Rails (e.g., hardwood or softwood) | Forms the frame of the cabinet door. |
| Plywood Panel | Fills the center of the door for structure. |
| Wood Glue | Bonds joints securely for durability. |
| Sandpaper | Smooths surfaces for a clean finish. |
| Paint or Stain | Provides the desired color and protection. |
| Hinges | Allows the door to open and close. |
| Screws | Secures hinges and other hardware. |
Tools and Their Purpose
| Tool | Purpose |
|---|---|
| Measuring Tape | Ensures accurate dimensions for cuts. |
| Table Saw | Cuts wood for stiles, rails, and panels. |
| Miter Gauge | Helps make precise angled cuts. |
| Clamps | Holds pieces in place while gluing. |
| Forstner Bit | Drills hinge holes accurately. |
| Drill | Creates holes for screws and hardware. |
| Screwdriver | Fastens screws for hinge installation. |
How to Build Cabinet Doors: A Complete Step-by-Step Guide
Step 1- Measuring and Preparation
Measure your cabinet opening carefully for door height and width. Cut stiles to the exact door height. For rails, calculate length using: door width minus width of both stiles plus ¾” for tenons.
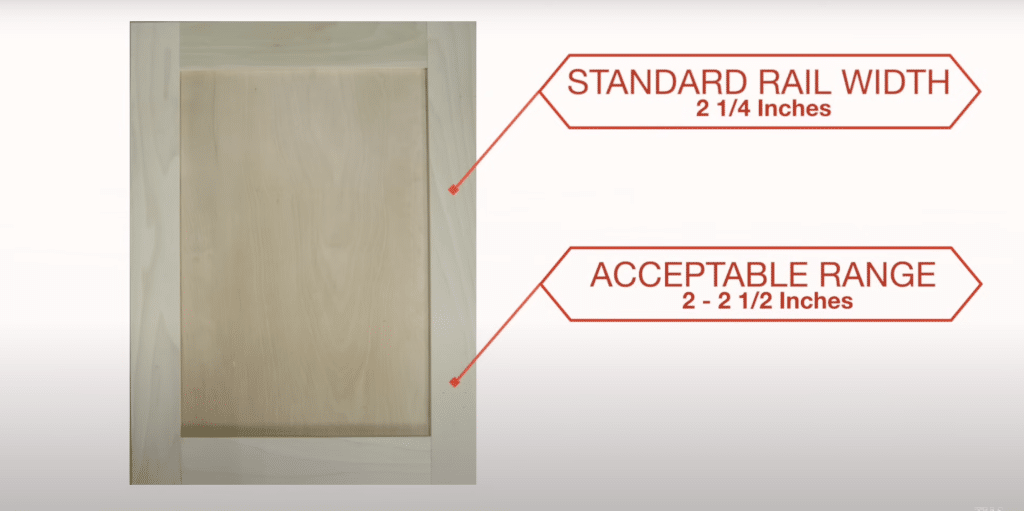
The standard width for stiles and rails is around 2¼”. These pieces will form your door frame, with stiles running vertically and rails connecting horizontally between them.
Step 2- Creating the Frame Joints
Start by making a groove in all stiles and rails. Set your saw blade to ⅜” height and align with the center of each board. Run all the pieces through the saw.
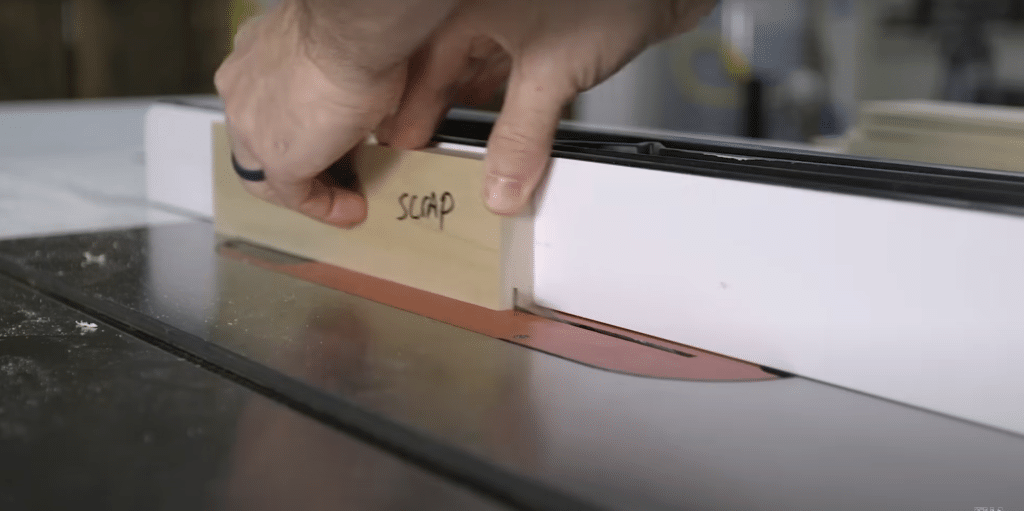
Test with scrap wood to check panel fit and adjust as needed. Next, create tenons on both ends of the rails. Add a scrap block to the fence as a guide. Lower the blade to below groove depth and mark ⅜” from rail ends.
Run rail ends through the saw using the miter gauge, then flip and repeat for all sides of the tenon.
Step 3- Panel Cutting and Assembly
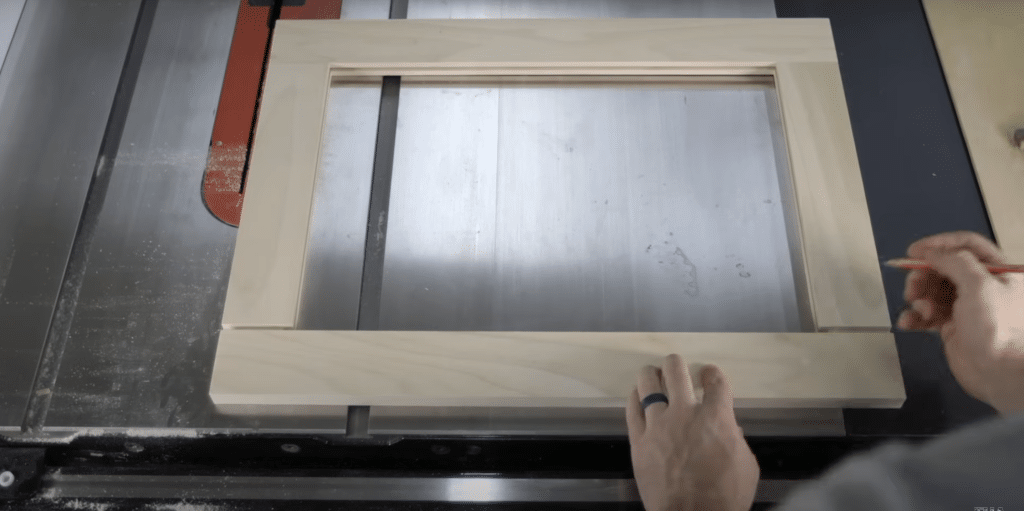
Cut your plywood panel to fit inside the frame. Measure between where tenons meet stiles and subtract ⅛” for proper fit. Test all pieces together before gluing.
When ready, apply glue to tenons and stile grooves but not on the panel itself. Assemble one side first, slide in the panel, then add the remaining stile.
Tighten clamps evenly and check that the door lies flat and square by measuring corner-to-corner diagonally.
Step 4- Finishing and Hardware
Let the glue dry completely before sanding the door smooth. Mark hinge positions (typically 4″ from top to bottom) for hardware. Use a jig for accuracy and drill holes with a Forstner bit.
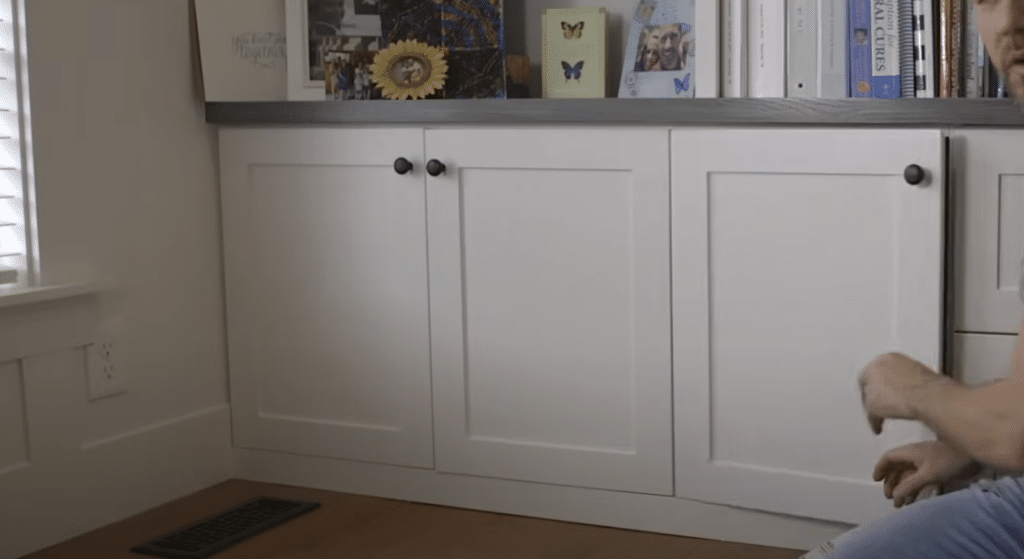
Apply your finish of choice – paint or stain – and then install the hinges following the manufacturer’s instructions. Your custom cabinet door is now ready to mount.
For a visual tutorial, refer to this video:
Tips for DIY Cabinet Doors
- Keep tools sharp for clean cuts. Dull blades cause splintering and rough edges.
- Invest in a good square tool to check corners throughout the building process.
- Use painter’s tape along cut lines to reduce wood splintering, especially with plywood panels.
- Make a test door with cheaper wood first to practice joints and techniques.
- Take pictures of your process to help you remember what worked well for future projects.
- Buy extra wood – about 20% more than calculated for mistakes and practice cuts.
- Use wood glue rated for cabinets and kitchen use, as some areas get humid.
- Pre-drill holes for hardware to prevent wood splitting.
- Sand with the grain, not against it, for the smoothest finish.
- Keep door design simple at first – skills improve with each project.
Common Mistakes to Avoid
To avoid size errors, always measure twice and cut once. When calculating rail lengths, write down all measurements before making cuts and account for stile width.
Choose kiln-dried lumber without knots in joint areas, and ensure that all pieces are the same thickness. Before adding glue, dry-fit all parts to check for proper fit.
Remember to leave panel edges unglued so the wood can move with humidity changes. When clamping, check that the corners are square. For finishing, sand through progressive grits first and remove all dust.
Apply thin coats of finish rather than thick ones and allow proper drying time between layers. Testing your finish on scrap wood from your project can prevent surprises on your completed doors.
Conclusion
Building your own cabinet doors saves money and gives you a sense of pride. We’ve walked through choosing door styles, measuring correctly, building the frame with basic tools, and avoiding common mistakes.
Remember to take your time with measurements, select quality wood, and test-fit before final assembly. These simple steps help ensure your doors look professional.
What’s next? Start small with a simple flat panel or Shaker door before trying more complex styles. Take photos of your work to track your progress. Need more help? Leave a comment below with your questions.
Ready to show off your handmade cabinet doors to friends and family? Grab your tape measure and head to the lumber store – your kitchen update awaits!