Most homeowners believe that installing crown molding requires hiring expensive contractors or having years of carpentry experience.
This belief leads to spending thousands on projects that take professionals several frustrating days to complete.
But here’s what changes everything: Crown molding installation is one of the most straightforward home improvement projects when you know the proper techniques. The secret isn’t having fancy tools or special skills, it’s understanding basic cuts and following a simple step-by-step process.
This guide will walk you through the exact method that converts any room from plain to polished. The same process that saves thousands of dollars and delivers perfect results every time.
Ready to turn those blank walls into something special?
Also, read our blog on how to paint crown molding.
Why Crown Molding Still Matters in Modern Homes
Many homeowners believe that crown molding is only suitable for traditional houses. This is wrong. Modern homes need crown molding just as much as classic spaces.
The key is choosing the right profiles for today’s design trends.
1. Timeless Appeal Meets Modern Function:
Crown molding creates clean lines between walls and ceilings. Open floor plans often lack this definition. Simple profiles add structure without overwhelming modern spaces. The craftsmanship brings warmth to stark rooms.
2. Plain Surfaces Get Instant Upgrade:
Basic crown molding transforms flat walls into finished spaces. Minimal designs work perfectly in contemporary homes. The visual interest comes from shadows and clean lines. This maintains the modern look homeowners want.
3. Modern Profiles Fit Contemporary Styles:
Today’s crown molding includes sleek profiles for current trends. Single-step designs and flat-edge styles work with modern trim. These simplified versions skip ornate details while finishing the room properly.
4. Home Value Stays Strong:
Buyers see crown molding as quality construction. This helps homes stand out in competitive markets. The upgrade cost stays low while visual impact remains high. Real estate professionals recommend crown molding before selling.
Step-by-Step Installation Crown Molding Guide
Follow these step-by-step instructions to measure, cut, and install crown molding with precision, ensuring tight corners, seamless joints, and a professional-quality finish.
Tools Required
| Tool | Purpose |
|---|---|
| Miter Saw | Makes precise angled cuts for corners and joints. |
| Nail Gun | Secures molding quickly with consistent nail depth. |
| Tape Measure | Measures wall lengths accurately for proper fit. |
| Safety Glasses | Protects eyes from debris while cutting. |
| Ladder | Provides access to the ceiling height during installation. |
| Caulk Gun | Apply caulk evenly to fill gaps and holes. |
Materials Required
| Material | Purpose |
|---|---|
| Crown Molding Pieces | Decorative trim for wall-ceiling junction. |
| 18-Gauge Nails (2.5 inches) | Secure molding to studs without splitting. |
| Paintable Caulk | Fills and hides joints, gaps, and holes. |
Step 1: Measure and Mark Your Walls
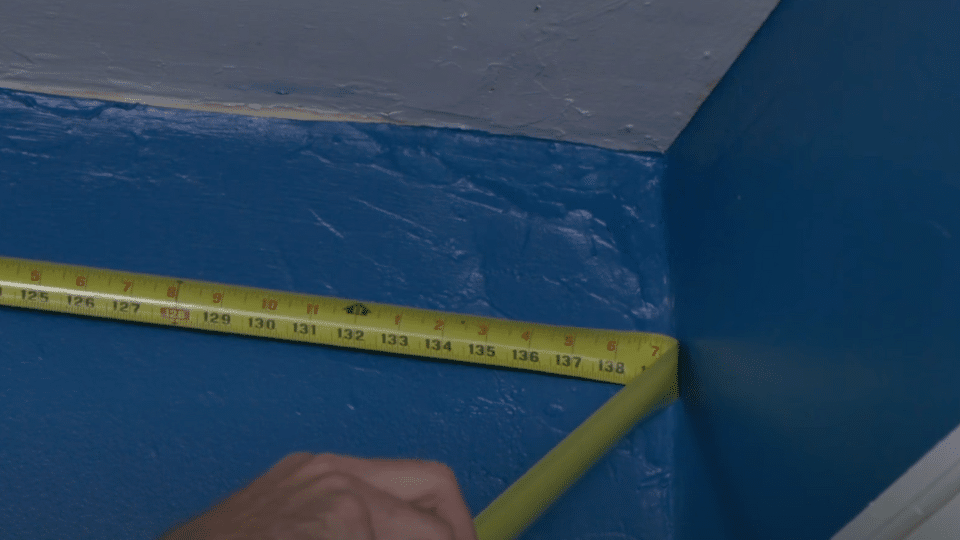
Measure each wall section from corner to corner where the bottom edge of the crown molding will sit. Mark these measurements on the bottom of your molding pieces.
Draw a small directional line past your measurement to indicate the angle and direction of each cut. This step ensures you cut the right length for each wall section.
Important Note: The measurement should be taken where the molding actually sits, not at the ceiling line.
Step 2: Set Up Your Miter Saw with Reference Marks
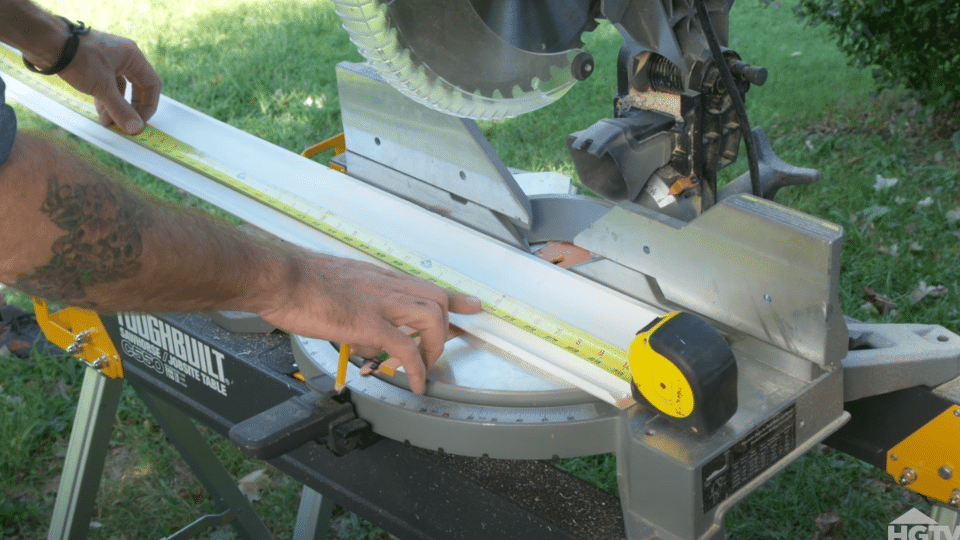
Mark a reference line on your miter saw table where you’ll consistently place your molding. This visual guide ensures all your cuts remain uniform from piece to piece.
The reference mark eliminates guesswork and keeps your cuts accurate throughout the project.
Safety Reminder: Always wear safety glasses when operating the miter saw to protect from flying debris.
Step 3: Cut Inside Corners
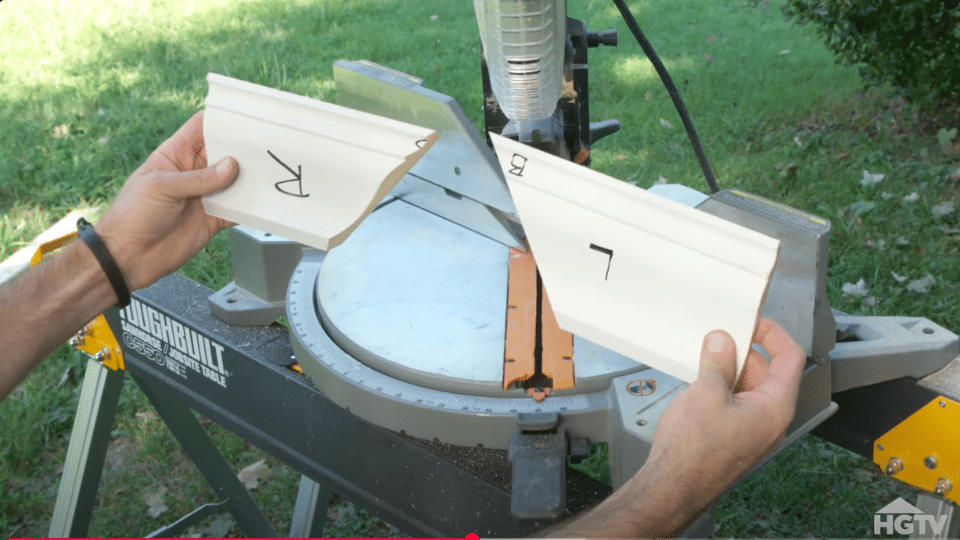
Place molding upside down against the saw with the wall side facing up. For left-side pieces, angle the saw 45 degrees to cut up and to the left. For right-side pieces, cut up and right.
The bottom edge stays longer than the top edge for inside corners.
Key Detail: The molding must be positioned upside down to simulate its actual installation position.
Step 4: Cut Outside Corners
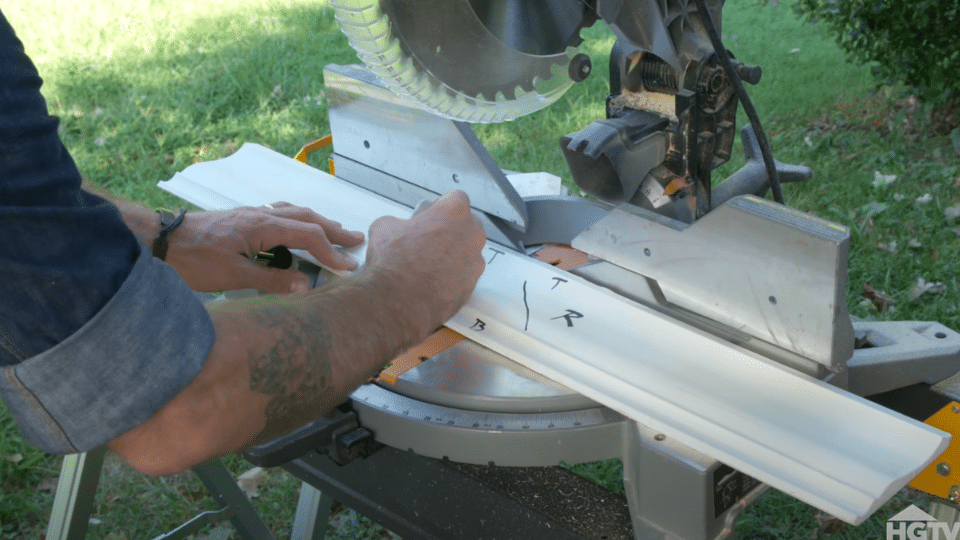
Position molding upside down as before. For outside corners, the bottom edge becomes shorter than the top edge. Right-side pieces are cut up and left, while left-side pieces are cut up and right.
This creates the opposite angle pattern from inside corners.
Critical Point: Outside corners require precise cuts, as caulk cannot effectively hide gaps in this area.
Step 5: Make Scarf Joints for Long Walls
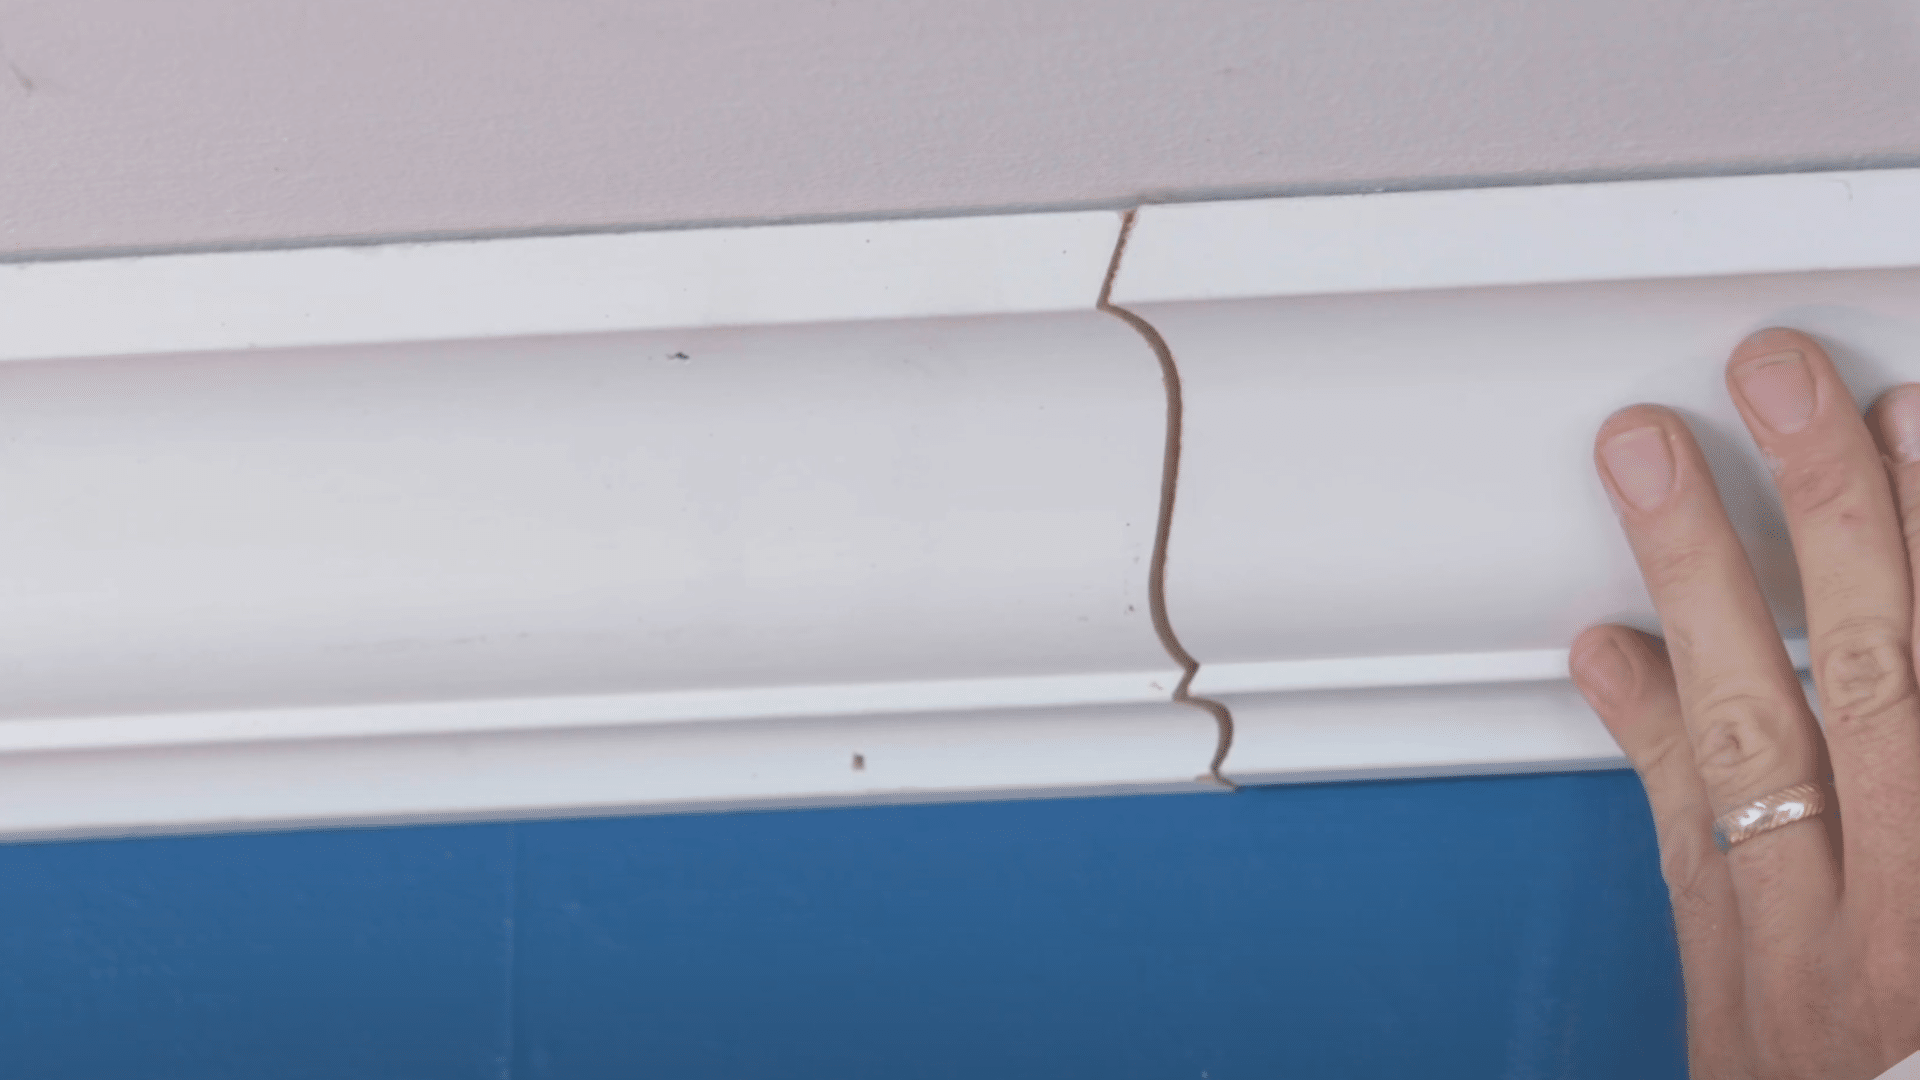
For walls requiring multiple pieces, create scarf joints by laying molding flat (not upside down) on the saw. Tilt the blade to a 45-degree angle and cut both pieces in the same direction.
This creates an overlapping joint that hides the seam on long wall sections.
Essential Info: Unlike corner cuts, scarf joints are cut with molding lying flat, not upside down.
Step 6: Install and Secure the Molding

Fit cut pieces together snugly at corners and nail them into place using your nail gun. Please verify that all joints align properly before securing them.
Work systematically around the room, ensuring each piece sits flush against both wall and ceiling surfaces.
Watch Out: Test-fit all pieces before nailing to ensure proper alignment and tight joints.
Step 7: Finish with Caulk and Touch-ups
Fill any gaps at inside corners with paintable caulk, then smooth with a damp cloth. Also, fill nail holes and ceiling gaps for a clean finish.
Note that outside corners require perfect fits, as caulk won’t effectively hide major gaps there.
Final Step: Allow caulk to dry completely before painting for the best finished appearance.
Video Tutorial
I want to acknowledge HGTV for the insightful video, which served as a key reference in compiling this guide.
Choosing the Right Crown Molding Style for Your Room
The right crown molding style transforms any room from basic to beautiful. Selecting the wrong profile can make the ceiling look too low or clash with the existing decor.
The key lies in matching three main factors: room style, ceiling height, and existing trim work.
1. Match Style to Interior Design
- Traditional rooms need ornate profiles with multiple layers and detailed curves. These complex designs add richness to classic spaces, often featuring heavy furniture and formal layouts. Victorian, colonial, and craftsman homes work best with these decorative options.
- Modern and minimalist spaces require clean, simple lines. Basic profiles with minimal detail prevent visual clutter in contemporary settings. Single-step or basic cove moldings work perfectly for sleek, uncluttered rooms.
2. Scale According to Ceiling Height
- Low ceilings under 9 feet require smaller profiles, typically between 2-3 inches. Larger moldings make short ceilings appear even lower and create cramped feelings. Simple, narrow designs help maintain proper proportions.
- Standard 9-to-10-foot ceilings work well with 3-to-5-inch profiles. This range offers flexibility without dominating the space or disappearing entirely.
3. Coordinate with Existing Trim Elements
- Crown molding must complement baseboards, door casings, and window trims. Mismatched styles create a confusing and unfinished appearance that detracts from the room’s overall design.
- Keep consistent detail levels across all trim work. Simple baseboards pair with simple crown molding. Ornate door casings work with detailed crown profiles.
4. Select the Right Material for Look and Budget
- Wood offers classic beauty with natural grain patterns and staining options. Oak, pine, and poplar offer traditional appeal but are more expensive than alternatives. Wood requires more skill to cut and install properly.
- MDF (Medium Density Fiberboard) delivers budget-friendly results with smooth, paintable surfaces. This engineered material costs less than solid wood and takes paint beautifully. MDF works well for painted finishes in any color.
Practical Tips for Uneven Surfaces
Even with uneven ceilings or wavy walls, you can achieve a flawless crown molding finish using smart prep techniques and adaptive installation methods.
| Tips | What to Do | Why It Helps |
|---|---|---|
| 1. Use Flexible Caulk | Apply paintable, flexible caulk to small gaps between molding and surface. | It conceals minor inconsistencies and accommodates slight settling or seasonal changes. |
| 2. Scribe the Molding | Use a pencil and compass to trace the ceiling or wall profile onto the molding before cutting. | Helps the molding fit flush against wavy or sloped surfaces. |
| 3. Shim Where Needed | Insert thin wood or composite shims behind the molding to even it out. | Maintains a level line visually, even when surfaces aren’t flat. |
| 4. Use a Laser Level | Project a level reference line across the room before starting. | Ensures consistent installation height even when ceilings dip or slope. |
| 5. Cope Inside Corners | Cut one molding end straight, then use a coping saw to match the profile of the intersecting piece. | Creates tighter, more forgiving joints on uneven surfaces. |
| 6. Pre-Paint Before Installation | Paint all molding before mounting, then touch up afterward. | Avoids messy touch-ups in uneven or gapped areas post-installation. |
Working with imperfect ceilings and walls doesn’t mean you have to settle for poor results. By planning and using innovative techniques like coping, scribing, and leveling, you can make your crown molding look flawless, even when your walls aren’t perfectly straight.
Conclusion
Crown molding installation doesn’t have to drain your wallet or require professional help. The seven-step process covered here proves that anyone can achieve professional-looking results with basic tools and the proper cutting techniques. Remember to measure accurately, cut upside down for corners, and always test-fit before nailing.
Why does this matter?
This single weekend project can save thousands in contractor fees while adding instant visual appeal and home value. The skills are also transferable to other trim work projects, making this knowledge even more valuable.
Ready to get started?
Start by practicing these techniques in a small room. Grab your tools, measure twice, and take your time with those corner cuts. Once you see how simple crown molding installation is, you’ll wonder why you waited so long to try it.
Frequently Asked Questions
Do You Use Glue or Nails for Crown Molding?
Use nails to secure crown molding. 18-gauge nails (2.5 inches) work best with a nail gun for consistent depth and secure attachment to wall studs.
What Is the Correct Direction for Crown Molding?
Inside corners: left pieces cut up and left, right pieces cut up and right. Outside corners: left pieces cut up and right, right pieces cut up and left.
Why Does Crown Molding Have to Be Cut Upside Down?
Cutting upside down simulates the actual installation position. This ensures cuts match perfectly when the molding is installed against the wall and ceiling junction.