Looking to convert old furniture without spending too much money?
Many people don’t know that making chalk paint at home is both simple and cost-effective. Store-bought chalk paint can be expensive, but you can create the same results with items you might already have in your kitchen.
When you make your own chalk paint, you get to choose the exact color, texture, and finish. Plus, you’ll save money and feel proud of your completely handmade project.
Follow these easy steps to mix and apply homemade chalk paint to your next furniture project. This guide breaks down everything beginners need to know to get started right away.
Why Chalk Paint Is a Beginner’s Best Friend?
Chalk paint differs from regular paint with its thick texture and matte finish. It skips the need for sanding or priming, making it perfect for beginners who want quick results.
What makes chalk paint different:
- Thicker consistency with a soft, matte look
- Applies directly to most surfaces without prep work
- Works on wood, metal, and some plastics
For furniture makeovers, chalk paint shines through its simple application. It dries fast and covers well, letting you finish projects in a single day.
Benefits of furniture makeovers:
- Quick-drying formula for same-day projects
- Excellent coverage over dark colors
- Easy to distress for vintage looks or seal for protection
First-timers find chalk paint particularly helpful because it forgives mistakes. The matte finish hides brush marks, and clean-up needs only water.
Why it’s ideal for beginners:
- Water-based with low odor
- Forgiving of errors and easy to fix
- Builds confidence through successful early projects
What You’ll Need: Materials and Tools Required
| Materials | Tools |
|---|---|
| Plaster of Paris | Measuring cups and spoons |
| Water | Stir stick or spoon |
| Flat latex paint | Mask (optional, for Plaster of Paris) |
| Container for mixing | Gloves (optional) |
| Container for storage |
DIY Chalk Paint Recipe
| Recipe Size | Plaster of Paris | Water | Flat Latex Paint | Coverage Estimate |
|---|---|---|---|---|
| Full Recipe | 1/3 cup | 1/3 cup | 1 cup | Covers a 3-drawer dresser (1 coat) |
| Half Recipe | 2 tbsp + 2 tsp | 2 tbsp + 2 tsp | 1/2 cup | Ideal for small projects |
Step-by-Step Instructions: DIY Chalk Paint
Make your own chalk paint at home with just a few ingredients perfect for giving furniture a vintage, matte finish without spending a fortune.
1. Set up your workspace
Getting ready before you start will make your paint project go well. When you prepare your area first, you won’t worry about mess or missing tools later.
- Put old newspapers or a cloth on your table and floor
- Find all tools and materials before you begin
- Choose containers you’ll never use for food items
Keep in mind: Good setup saves time and makes cleanup much easier.
2. Measure your ingredients
Exact amounts matter when making chalk paint at home. The right mix gives you the best finish for your furniture projects.
- Use containers marked only for craft projects
- Look for a simple container to mark your water line
- Write down your recipe for future projects
Keep in mind: Making notes about your mix helps you repeat good results.
3. Mix Plaster of Paris with water
The base of good chalk paint starts with a smooth mixture. Take time with this step to avoid bumps in your final paint.
- Put your measured plaster powder in the container
- Add water slowly while stirring
- Mix until it looks like pancake batter
Keep in mind: Lumps now mean bumps later on your painted surface.
4. Add the paint
The color choice makes your project unique. Flat latex paint works best as a base for chalk paint.
- Pour your chosen paint into the plaster mix
- Stir well until the color looks even
- Check that no white streaks remain
Keep in mind: The paint might look lighter when wet than when dry.
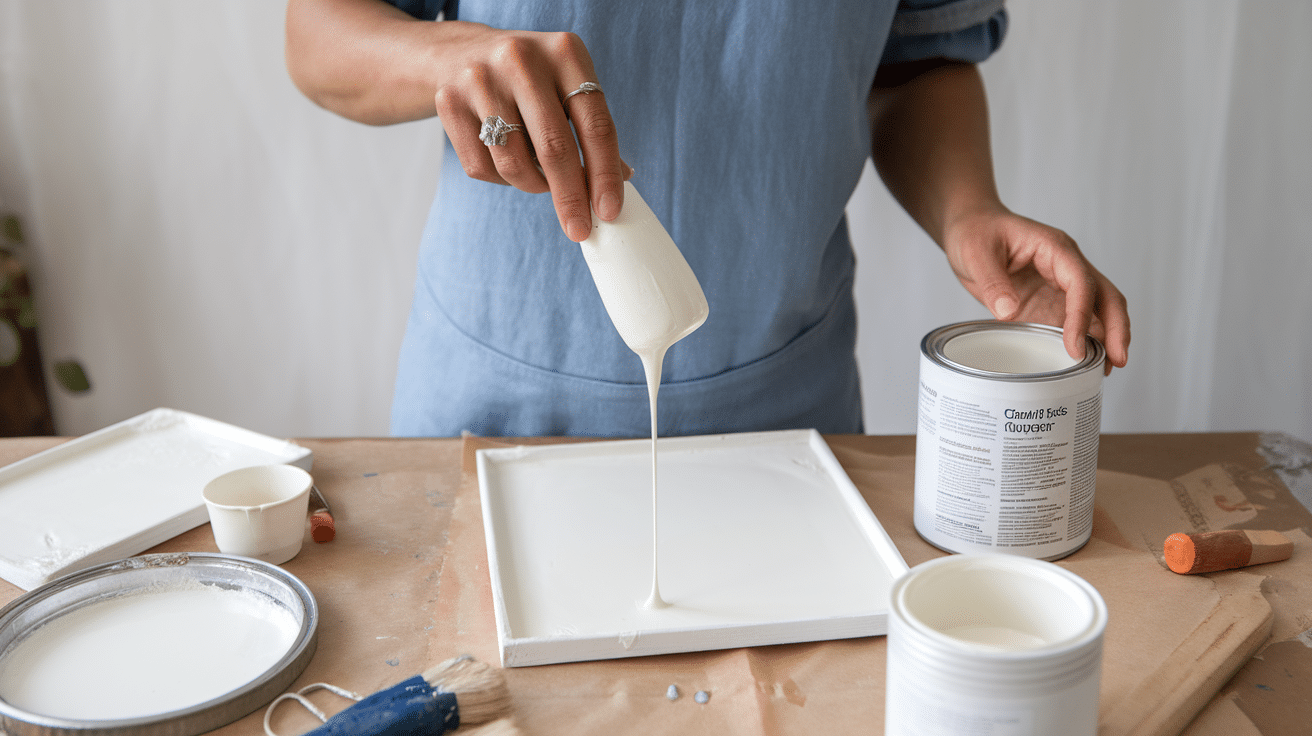
5. Test the consistency
The right thickness makes chalk paint easy to apply. Testing now saves problems when you start painting.
- Lift your stir stick to watch how the paint flows
- Paint should drop in a steady, slow stream
- Add tiny amounts of water or plaster to adjust
Keep in mind: Perfect thickness means better coverage with less work.
Use immediately or store:
- Best used within a few hours of mixing
- Can be stored in an airtight container for 1-2 days
- May need to be remixed if settled during storage
Application tips:
- Apply with a brush in even strokes
- No sanding needed for most surfaces
- Dries to a matte finish
- One to two coats typically provides full coverage
Remember: This homemade chalk paint works just like store-bought versions but at a fraction of the cost. You can apply it to furniture without sanding first, saving time and effort on your DIY projects.
For a visual tutorial, refer to this video by Our Handcrafted Life
Three Foolproof Chalk Paint Recipes to Try
Chalk paint is a versatile and easy-to-use option for creating a vintage or rustic look on furniture and decor. Whether you’re a seasoned DIY enthusiast or a first-time crafter, these three foolproof recipes will help you create the perfect chalk paint right at home.
1. Classic DIY Chalk Paint with Plaster of Paris
This recipe is a time-tested favorite and guarantees a smooth, matte finish for any project.
Ingredients:
-
1 cup of flat latex paint (any color of your choice)
-
1/4 cup of Plaster of Paris
-
1/4 cup of water
Instructions:
-
In a mixing bowl, combine the Plaster of Paris and water. Stir until the mixture is smooth.
-
Slowly add the latex paint to the mixture, stirring constantly to ensure there are no lumps.
-
Once fully mixed, use a paintbrush or foam brush to apply it to your furniture or decor piece.
-
Allow the first coat to dry before applying a second coat for full coverage.
- Best For: Furniture and small decor pieces.
- Estimated Cost: $15–$20
- Weather Resistance: Indoor use recommended, can withstand mild humidity.
2. Baking Soda Chalk Paint for a More Textured Look
For those who love a rustic, textured finish, this baking soda chalk paint recipe is the way to go. It adds extra grit to your projects, making them perfect for farmhouse-style pieces.
Ingredients:
-
1 cup of flat latex paint
-
1 tablespoon of baking soda
-
1 tablespoon of water
Instructions:
-
Mix the baking soda and water in a bowl until it dissolves completely.
-
Stir in the latex paint, combining until smooth.
-
Apply to your surface with a brush, using a stippling motion for added texture.
-
Let the first coat dry before applying a second for better coverage.
- Best For: Textured furniture, rustic home decor.
- Estimated Cost: $10–$15
- Weather Resistance: Indoor use, best for dry areas.
3. Calcium Carbonate Chalk Paint for a Super Smooth Finish
For a smoother, more refined finish, try using calcium carbonate, which is an all-natural ingredient. It results in a fine, smooth texture that’s perfect for creating sleek, professional-looking furniture.
Ingredients:
-
1 cup of flat latex paint
-
2 tablespoons of calcium carbonate powder
-
1/4 cup of water
Instructions:
-
Mix the calcium carbonate powder and water in a bowl until fully dissolved.
-
Slowly add the latex paint to the solution and stir until smooth.
-
Apply the paint evenly with a brush or roller, and allow it to dry thoroughly between coats.
- Best For: Sleek, smooth furniture pieces and modern home decor.
- Estimated Cost: $20–$25
- Weather Resistance: Indoor use, not recommended for high-humidity areas.
Selecting and Caring for Chalk-Painted Finishes
Protect your chalk paint project with the right sealer to ensure it lasts for years to come.
When and Why to Use Wax or Polycrylic
Wax Finish: Wax works best for lightly used items like side tables or decor pieces. It creates a soft, hand-rubbed look that adds depth to dark colors and distressed finishes. Choose wax for indoor furniture when you want that true vintage feel, but avoid using it on pieces that will face moisture or heavy use.
Polycrylic Finish: Polycrylic is ideal for high-traffic items such as dining tables, kitchen chairs, and dressers. It provides strong protection against water, scratches, and daily wear while drying clear without yellowing. Select polycrylic when durability matters most, especially for bathroom or kitchen pieces that might get wet.
Matte vs Satin Finishes
Matte Finish: A matte finish maintains the true chalk paint look with no shine, hiding flaws and imperfections. It looks more authentic for farmhouse and vintage styles while showing less dust and fingerprints. Wax typically results in this soft, subtle look that doesn’t reflect light.
Satin Finish: Satin adds a slight sheen without being too glossy, making it more durable and easier to clean than matte. It offers a good middle ground between flat and glossy finishes, making it suitable for kitchens and bathrooms. This finish shows paint colors more richly, and most polycrylics come in satin finish.
Caring for Chalk-Painted Furniture Long-Term
For Waxed Pieces: Dust waxed furniture with a soft cloth and clean with mild soap when needed. Re-apply wax every 6-12 months, keep away from heat sources, and avoid placing hot items directly on the surface. Touch up worn areas with chalk paint before re-waxing.
For Polycrylic-Sealed Pieces: Wipe polycrylic-sealed pieces with a damp cloth, use coasters under drinks, and apply furniture polish twice yearly. Keep out of direct sunlight to prevent fading, and for stubborn marks, gently use a magic eraser. Touch up scratches with matching paint before adding a new sealer coat.
General Care Tips: Use felt pads under items, wait 30 days before placing heavy objects, and lift, don’t slide. Clean spills promptly, keep sharp objects away, and reseal every few years for high-use furniture.
7 Common Chalk Paint Mistakes to Avoid
1. Using too much water or powder: Too much water makes paint runny and transparent; too much powder creates lumps and cracks when dry.
2. Skipping sanding or prep: Even chalk paint needs clean, grease-free surfaces to stick properly and last longer.
3. Applying too thick or too thin: Thick paint causes drips and takes forever to dry; thin paint requires extra coats and wastes time.
4. Not stirring enough: Inadequate stirring leaves lumps that show up on your furniture as bumps and texture problems.
5. Rushing between coats: Paint needs proper drying time between coats or it can peel, bubble, or look uneven.
6. Wrong brush choice: Low-quality brushes shed bristles and leave streaks in your finish.
7. Forgetting to seal: Unsealed chalk paint stains easily and wears away quickly with normal use.
Conclusion
Making your own chalk paint opens up a world of budget-friendly options for updating furniture. With just a few simple ingredients from your local store, you can create custom colors that match your home perfectly.
Remember to mix your ingredients properly, apply thin coats, and choose the right sealer for your project’s needs. Whether you use Plaster of Paris, baking soda, or calcium carbonate, each method offers unique benefits for different projects.
Take your time with each step, and don’t worry about small mistakes—they often add character to your finished piece. With practice, you’ll soon master the art of DIY chalk paint.
Now you’re ready to start your first chalk paint project! Your old furniture is just waiting to be given new life with your personal touch.


.png)
.png)
.png)
.png)
.png)


