12 Creative and Unique Spring Classroom Door Ideas
Want to make your classroom feel special this spring? I used to look at other teachers’ decorated doors and wonder how they came up with such bright, cheerful designs.
I know finding fresh ideas that won’t take hours to create or cost too much is tricky.
But after trying different decorations over the years, I’ve found some simple ways to turn classroom doors into fun spring displays.
I’m excited to share 12 door decoration ideas that my students loved.
These designs will help you welcome spring and create a warm, happy space for your class. Let me show you how to make your classroom door stand out this season.
How Spring Door Decor Makes Your Classroom Better
Spring door decorations do more than make the classroom look nice – they help create a positive learning space for students.
When kids walk into school and see bright, seasonal displays, it brings smiles to their faces and sets a happy mood for the day. I’ve noticed how my student’s eyes light up when they spot something new on our door.
These decorations also give students a sense of time and season, which is especially helpful for younger learners who are still getting familiar with the calendar year.
The best part? Making these displays can turn into a fun class project.
My students love helping with the decorations, and it gives them a chance to show their creative side. Also, it’s a great way to showcase student work and make them feel proud of their contributions to our classroom community.
Creating Your Spring Door Displays: A Simple Guide
1. Blooming Flowers Extravaganza
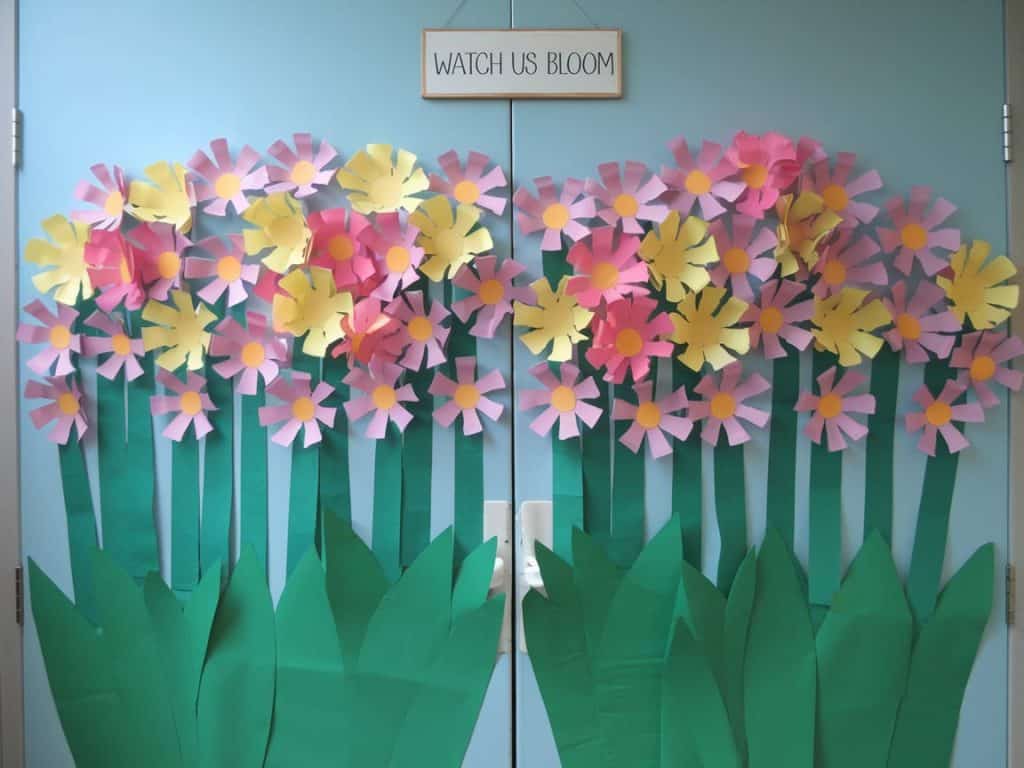
Color Palette: Pink, Yellow, Purple, Green, Light Blue
Material required: Construction paper, scissors, tape, paint
Instructions:
- Paint the door light blue as a sky backdrop
- Make big paper flowers in pink, yellow, and purple
- Add green stems and leaves that reach up from the bottom
- Put a “Watch Us Bloom” sign at the top
DIY Level: Easy
2. Welcome to the Butterfly Garden
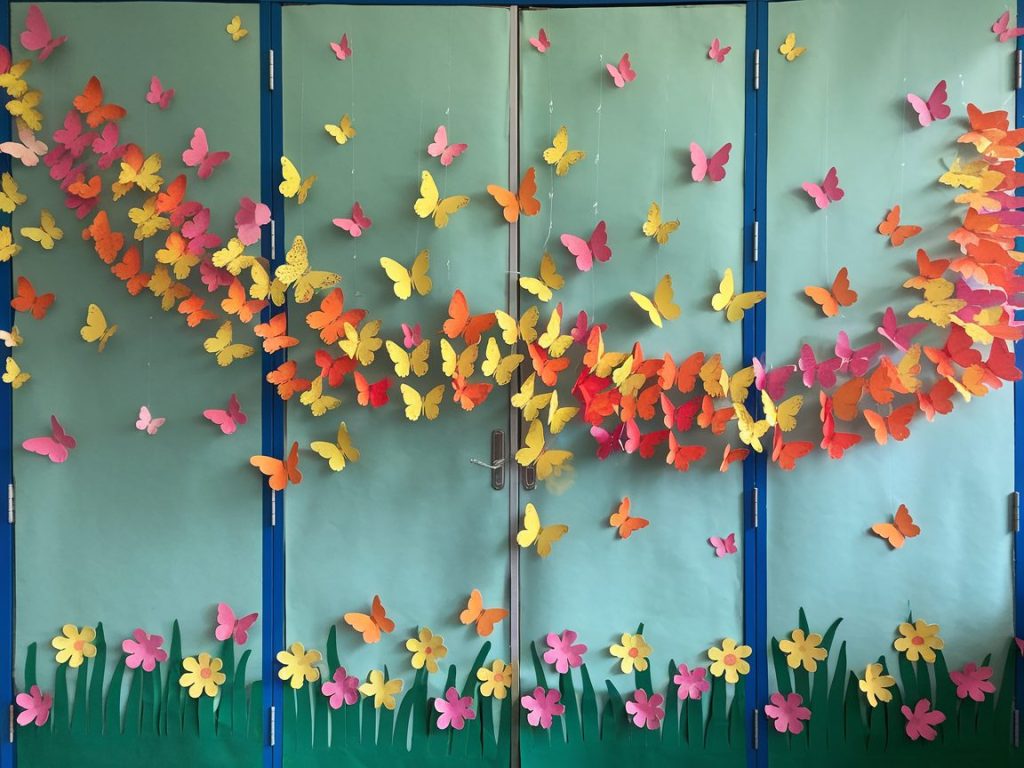
Color Palette: Orange, Yellow, Pink, Light Green
Material required: Colored paper, string, glue, scissors
Instructions:
- Cover the door in light green paper as a background
- Cut out paper butterflies in different sizes
- Add paper flowers at the bottom edge
- String butterflies from the top to look like they’re flying
DIY Level: Medium
3. Rainy Day Fun
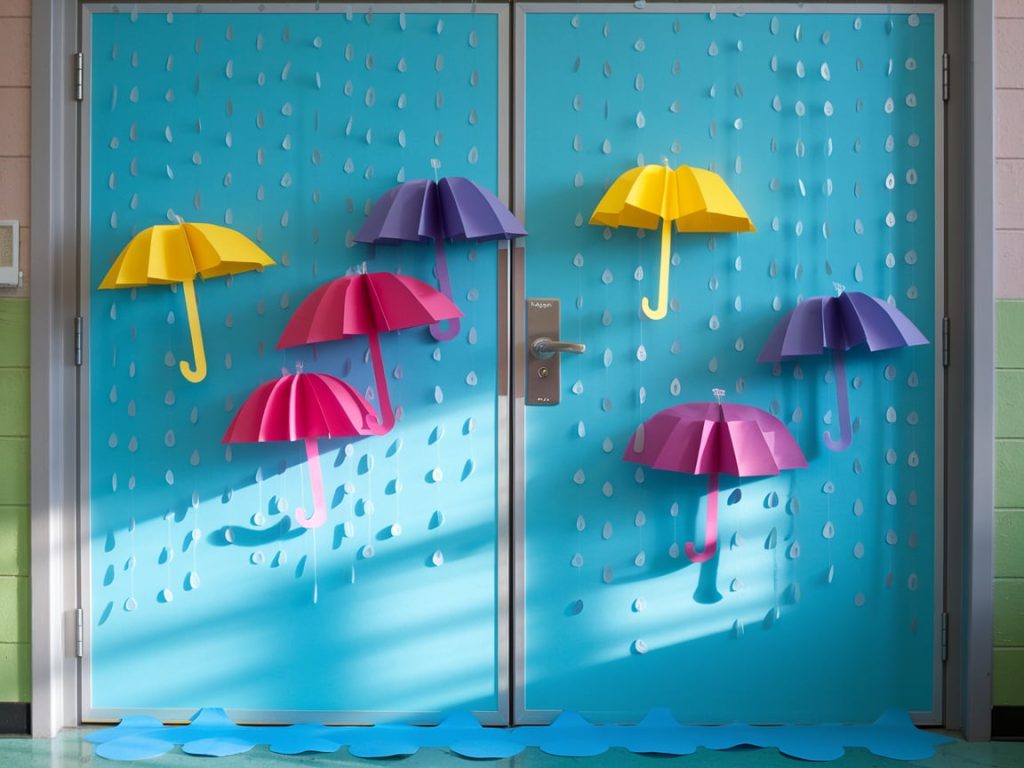
Color Palette: Blue, Yellow, Pink, Purple
Material required: Blue paper, string, clear tape, scissors
Instructions:
- Paint the door sky-blue
- Make paper umbrellas in bright colors
- Add paper raindrops on clear strings
- Create paper puddles at the bottom
DIY Level: Easy
4. Buzzing into Spring
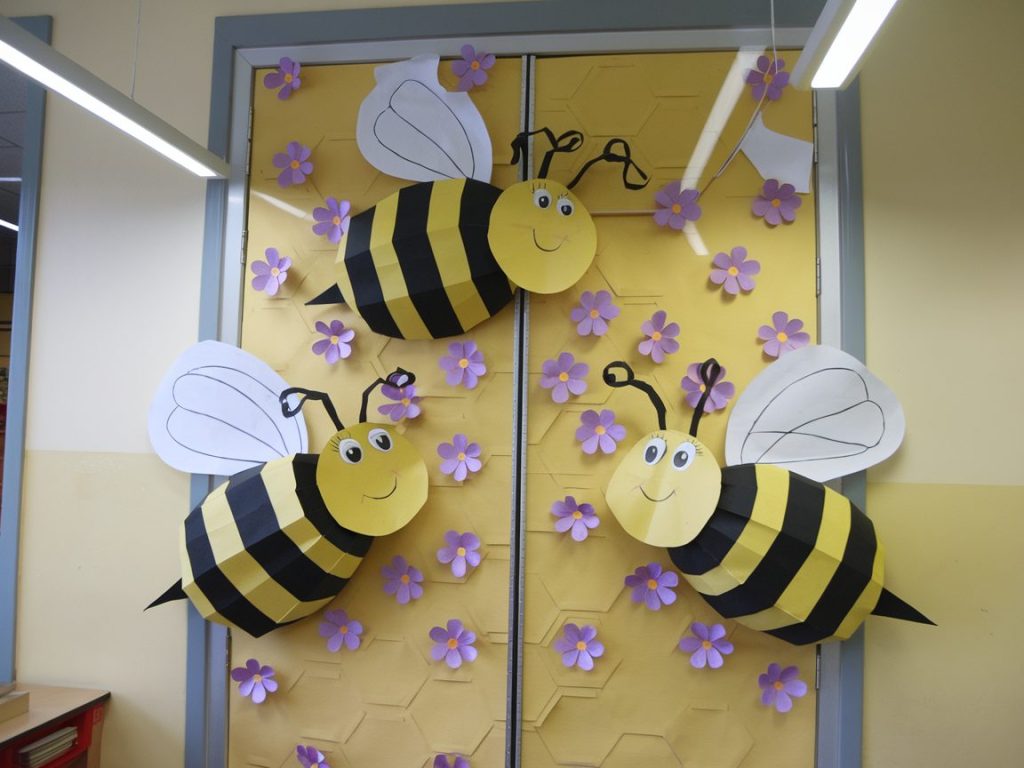
Color Palette: Yellow, Black, White, Purple
Material required: Yellow and black paper, markers, tape
Instructions:
- Cover the door in light yellow paper
- Add paper honeycomb patterns
- Make big friendly bees from black and yellow paper
- Create paper flowers as bee targets
DIY Level: Medium
5. Sunny Days Ahead
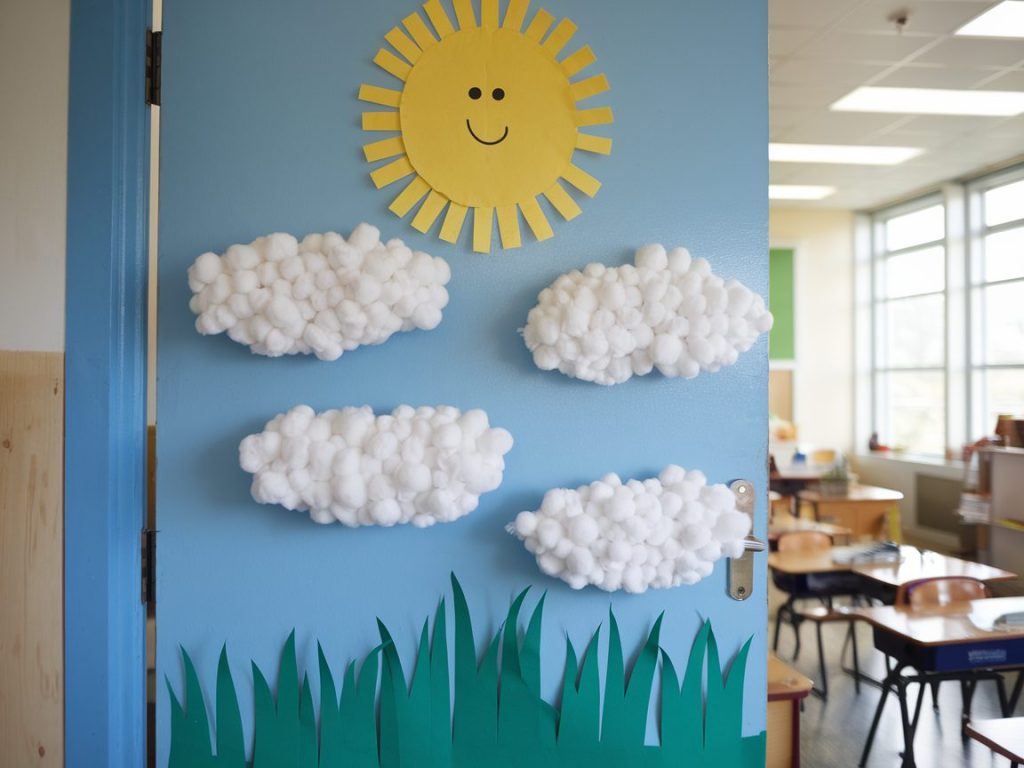
Color Palette: Blue, Yellow, White, Green
Material required: Paint, cotton balls, paper
Instructions:
- Paint the door light blue.
- Make a big yellow sun at the top
- Add fluffy white clouds
- Put paper grass at the bottom
DIY Level: Easy
6. Hopping into Spring
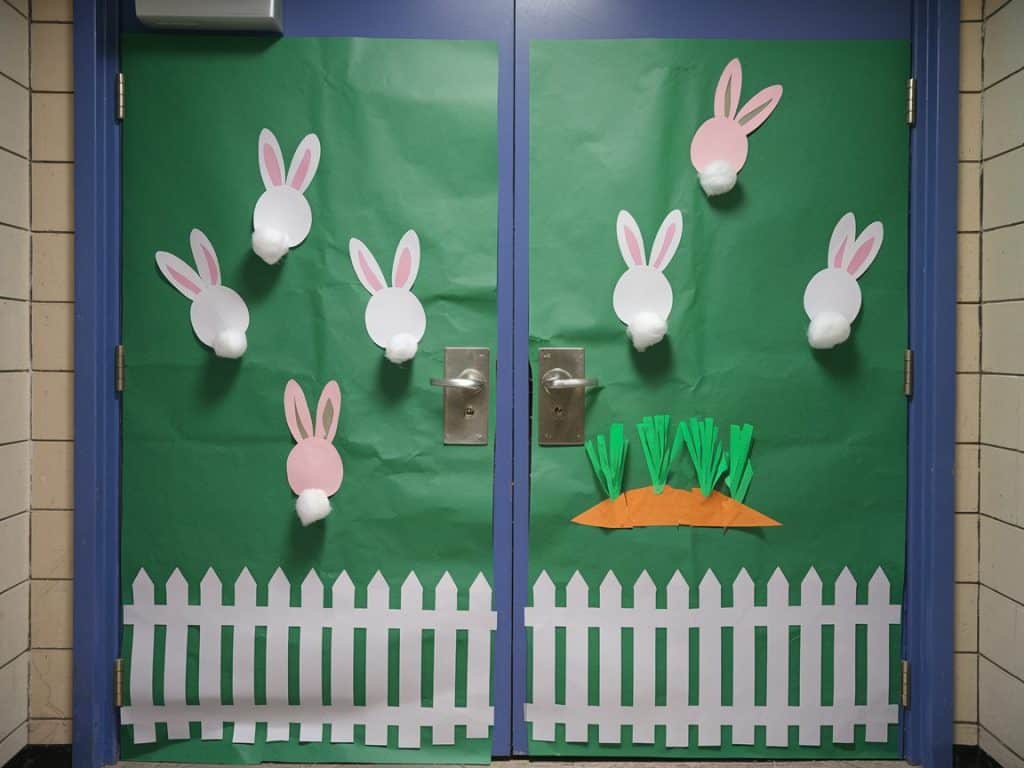
Color Palette: Green, White, Pink, Orange
Material required: Construction paper, cotton balls, markers
Instructions:
- Cover the door with green paper
- Add paper bunnies in white and pink
- Make paper carrots and flowers
- Create a small garden fence at the bottom
DIY Level: Medium
7. Under the Rainbow
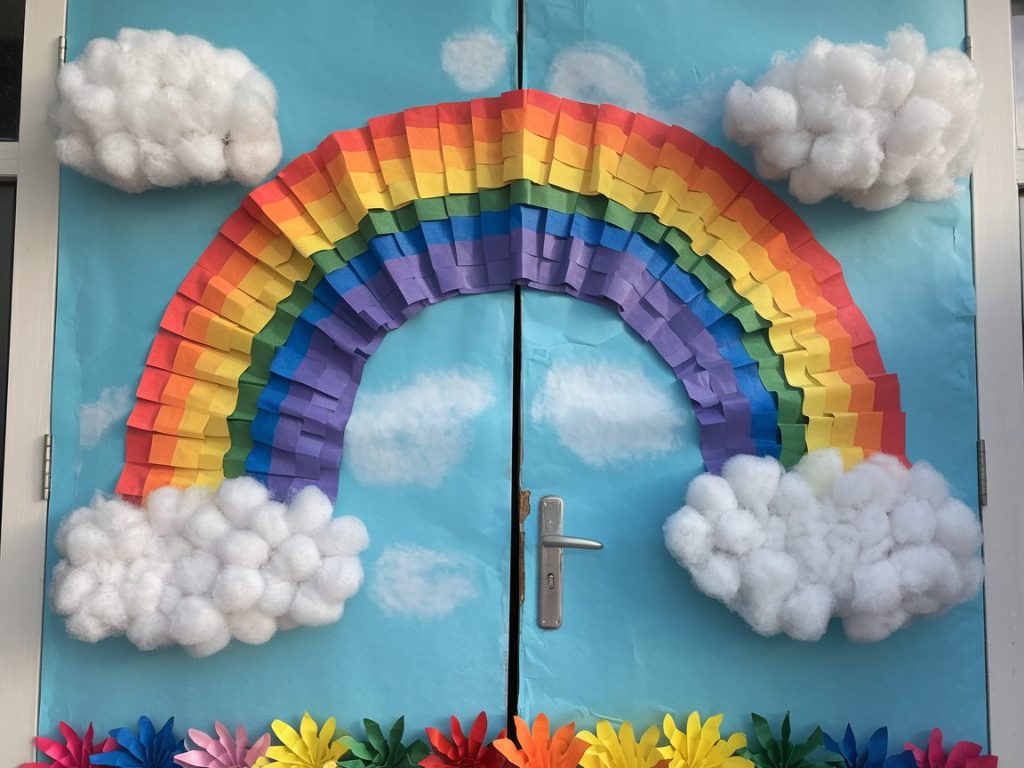
Color Palette: Rainbow colors, White, Blue
Material required: Colored paper, cotton, glue
Instructions:
- Paint the door sky-blue.
- Create a big paper rainbow arch.
- Add cotton ball clouds.
- Put paper flowers at the bottom.
DIY Level: Easy
8. Cherry Blossom Delight
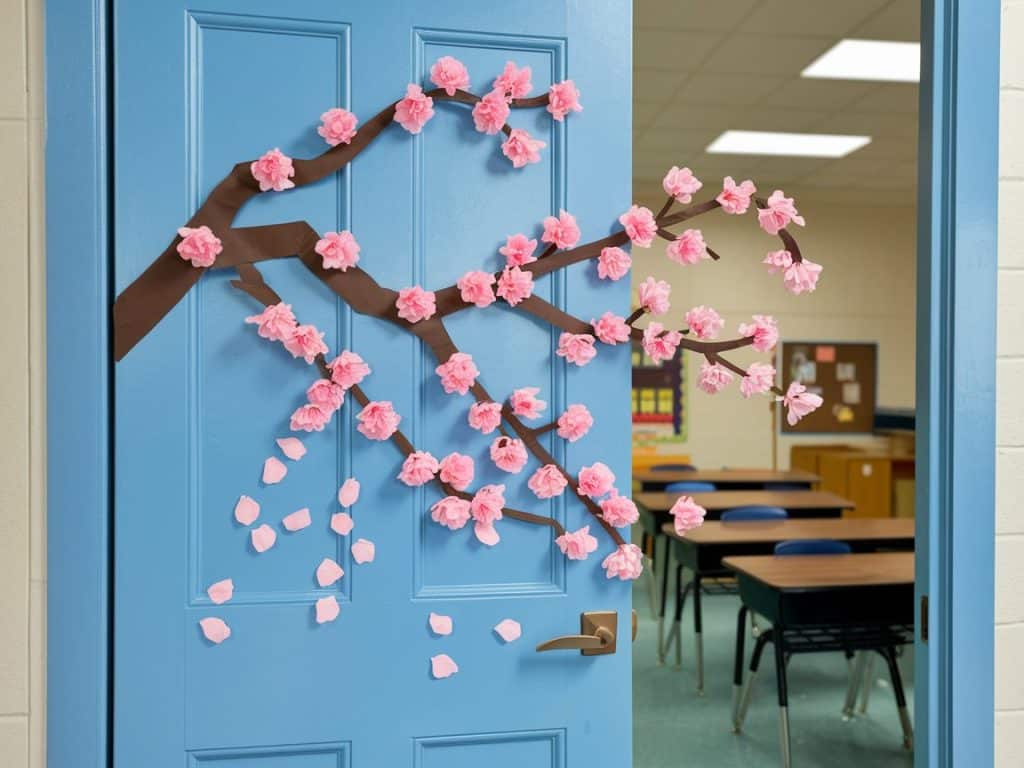
Color Palette: Pink, Brown, Light Blue
Material required: Tissue paper, brown paper, tape
Instructions:
- Paint the door light blue.
- Make brown paper branches.
- Add pink tissue paper flowers.
- Put paper petals falling down.
DIY Level: Medium
9. Spring Picnic Delight
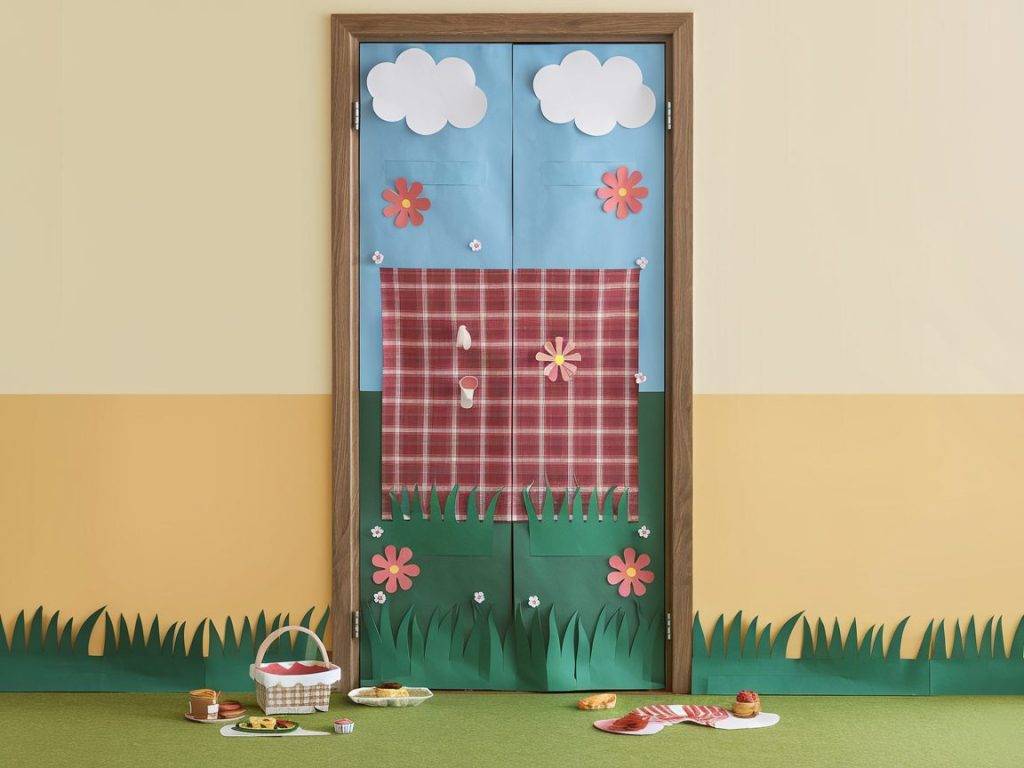
Color Palette: Red, White, Green, Blue
Material required: Patterned paper, scissors, glue
Instructions:
- Cover the door with blue paper.
- Add paper grass and flowers.
- Make a checkered picnic blanket.
- Put paper food items and baskets.
DIY Level: Medium
10. Floating Hot Air Balloons
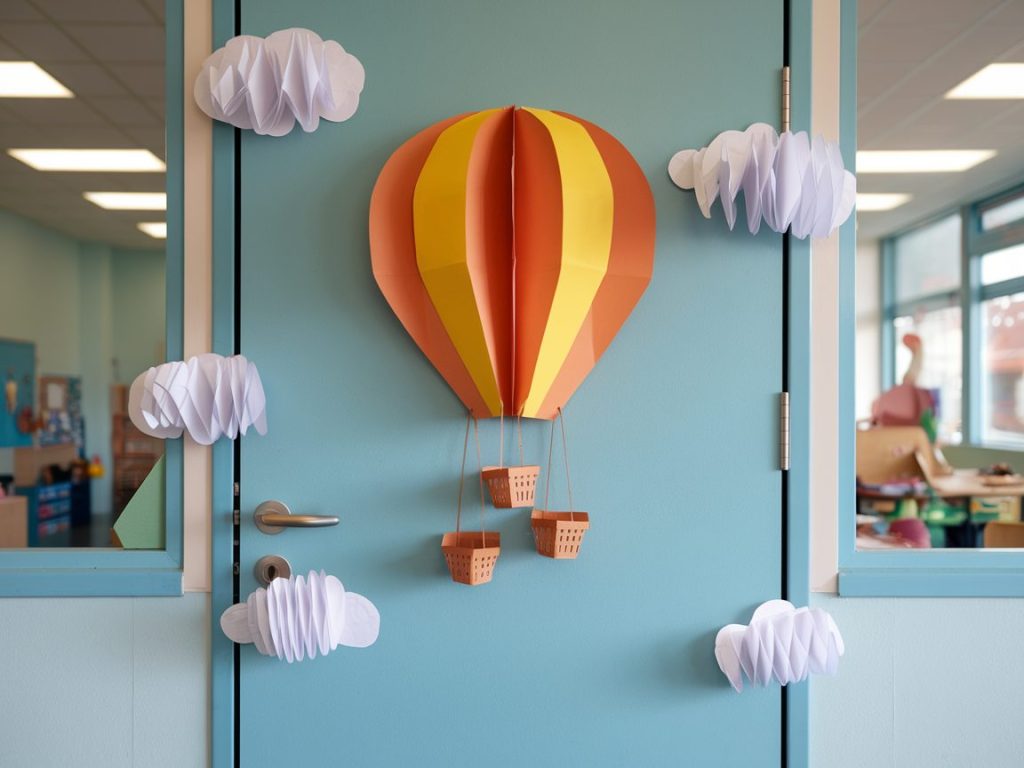
Color Palette: Blue, Rainbow colors, White
Material required: Construction paper, string, tape
Instructions:
- Paint the door sky-blue
- Create colorful paper hot air balloons
- Add white paper clouds
- Make paper baskets for balloons
DIY Level: Medium
11. Ladybugs in the Meadow
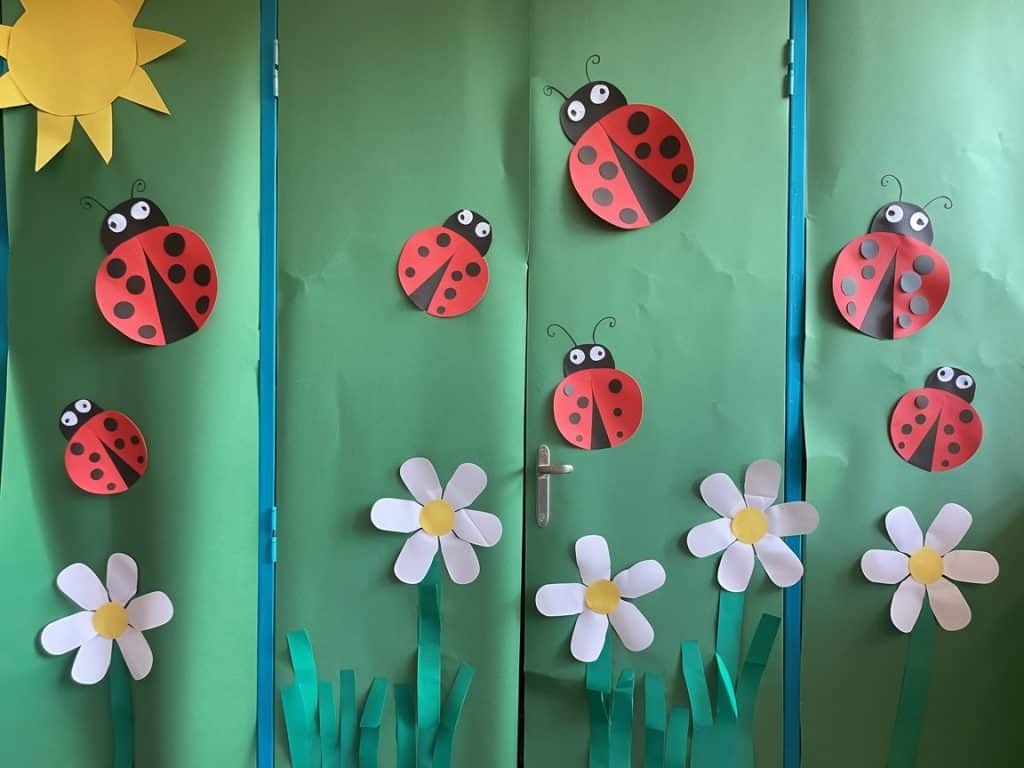
Color Palette: Green, Red, Black, Yellow
Material required: Colored paper, markers, glue
Instructions:
- Cover the door with green paper
- Add black and red paper ladybugs
- Make paper flowers and grass
- Put the paper sun in the corner
DIY Level: Easy
12. Springtime Carnival
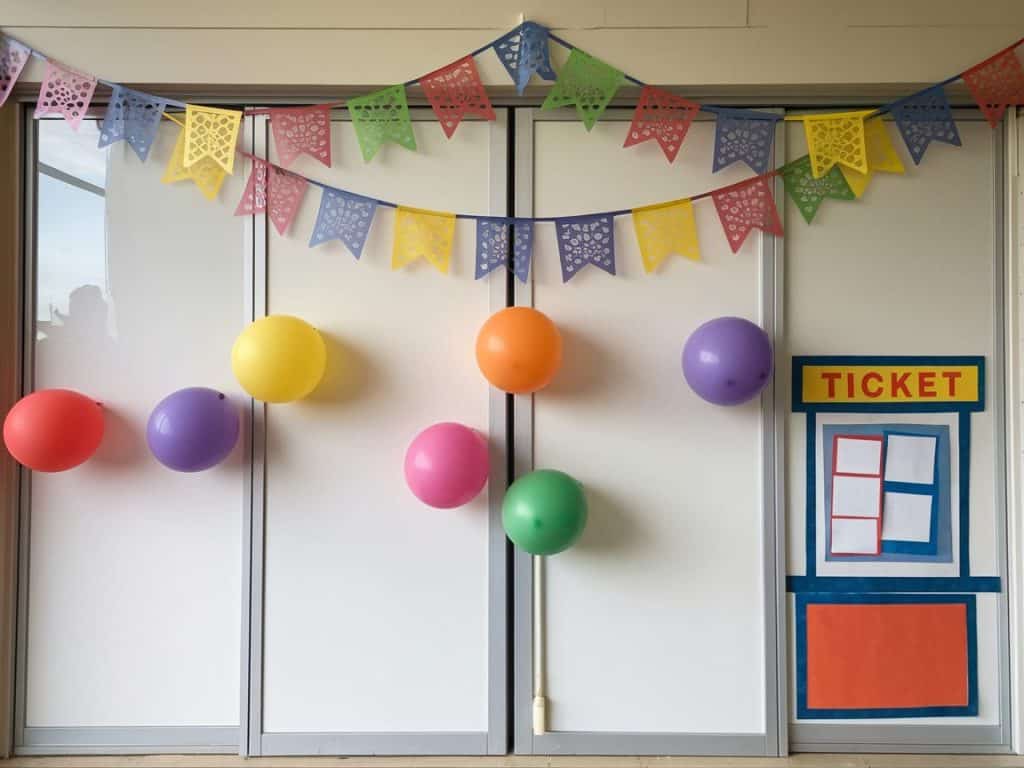
Color Palette: Red, Yellow, Blue, Green
Material required: Crepe paper, balloons, colored paper
Instructions:
- Paint door white
- Add colorful paper streamers
- Make paper balloons and flags
- Create a paper ticket booth corner
DIY Level: Medium
Making Decoration Fun for Everyone: Engaging Students
I’ve found that getting kids involved in door decorating creates more than just pretty displays – it builds teamwork and creativity. Let me share some tried-and-true ways to make this a fun class activity.
Create Design Teams:
Form small groups of 4-5 students. Each team can work on different parts of the door.
One team makes flowers, another cuts shapes, while others arrange pieces. This teaches teamwork.
Set Up Creation Stations:
Make separate spots for cutting, coloring, and assembly.
Students can move between stations.
This keeps the work organized and lets kids try different tasks.
Make It Educational:
Turn decoration time into learning chances.
Count petals for math practice. Write spring poems to display. Use new vocabulary words in the design.
Have a Door Design Vote:
Let students pick colors or themes. Hold a friendly vote between two design ideas.
This makes them feel ownership of the final display.
Start a Helper Schedule:
Create a small team of weekly decoration helpers.
Switch teams often.
This keeps everyone interested and gives each student a turn.
Remember, when students help create their classroom environment, they feel more connected to their learning space. I’ve seen even the quietest kids shine during these activities.
How to Make Your Door Decorations Last
As someone who’s decorated countless classroom doors, I’ve learned that keeping decorations looking good isn’t just about putting them up – it’s about making them last.
Here are my tested tips from years of trial and error:
- Put clear packing tape on edges and corners where students often touch the door
- Use strong mounting putty instead of tape for heavier items
- Layer decorations with a clear protective sheet to guard against scratches
- Keep spare copies of key decoration pieces for quick replacements
- Fix loose edges right away – small issues can quickly become bigger problems
- Mount items at least two inches away from door hinges to prevent tearing
- Use reinforced holes for any hanging elements to stop the paper from ripping
- Place a clear border at student height to protect against backpack scrapes
- Store a small repair kit with tape and extras in your desk drawer
- Check decorations each morning and fix any overnight damage
After trying these methods in my own classroom, I’ve saved both time and supplies. Also, my door stays looking fresh until I’m ready to change it for the next season.
Storing Your Spring Door Decor: Simple Solutions
As a teacher who loves seasonal decorations, I’ve found smart ways to keep my door decor safe and ready for next year.
Let me share my storage tips with you.
Storage Boxes
- Use clear plastic bins – you can see what’s inside
- Label each box with the season and contents
- Stack boxes with lighter items on top
- Keep boxes away from heat and moisture
Smart Organization
- Sort items by color in separate folders
- Roll paper crafts instead of folding
- Put small pieces in zip-lock bags
- Keep similar items together
Quick Tips
- Take photos of your display before taking it down
- Write notes about assembly steps
- Remove all staples and tape before storing
- Keep paper flat to prevent wrinkles
Space Saving
- Cut down large backdrops to fit storage boxes
- Nest similar-sized items together
- Use old file folders to separate flat items
- Store boxes under cabinets or on high shelves
I keep these supplies in my classroom’s storage closet, ready for next spring.
This system helps me stay organized and makes seasonal changes much easier.
Budget-Friendly Decoration Tips
After years of decorating on a tight budget, I’ve discovered ways to create beautiful door displays without spending much.
Here are my favorite money-saving tricks that work every time:
- Ask parents to donate old wrapping paper and ribbons for backgrounds
- Use both sides of colored paper to get two colors for the price of one
- Check dollar stores for basic supplies like tape and scissors
- Keep a scrap box – small pieces work great for smaller designs
- Partner with other teachers to buy and share supplies in bulk
- Use paper plates as bases for flowers and other round designs
- Turn old bulletin board borders into door trim
- Make templates from cardboard to reuse shapes next year
- Use white paper and let students color it – it saves on colored paper
- Turn tissue paper into textured flowers instead of buying fake ones
- Check recycling bins for paper that’s clean on one side
- Use old newspapers for paper mache projects
These tips have helped me save hundreds of dollars over the years while still creating displays my students love.
Remember- creativity matters more than cost; some of my best doors came from the simplest materials!
Wrapping It Up
When I first started decorating my classroom door, I wasn’t sure where to begin.
But after years of trying different ideas, I’ve learned that creating a cheerful spring display doesn’t need fancy materials or a big budget. Your classroom door is often the first thing students see each morning.
A thoughtfully decorated door can brighten their day and make them smile.
Whether you choose blooming flowers, friendly butterflies, or playful bunnies, these simple decorations help build a warm classroom community.
Why not start with one of these ideas tomorrow? Pick up some construction paper, gather your students, and let their creativity shine.
Together, you’ll create a spring display that makes everyone feel welcome.