Running out of floor space in your garage or workshop? I’ve been there too. You want to work on projects but can’t find room for a proper workbench. The solution isn’t buying expensive furniture or renting a bigger space.
Building a wall-mounted workbench changes everything. It gives you a solid work surface without eating up precious floor space.
I’ll show you exactly how to build one using simple materials and basic tools. These plans work for any skill level, and you’ll have a functional workspace in just one weekend.
Ready to reclaim your workshop space? Let’s get started with these wall-mounted workbench plans.
What Is a Wall-Mounted Workbench?
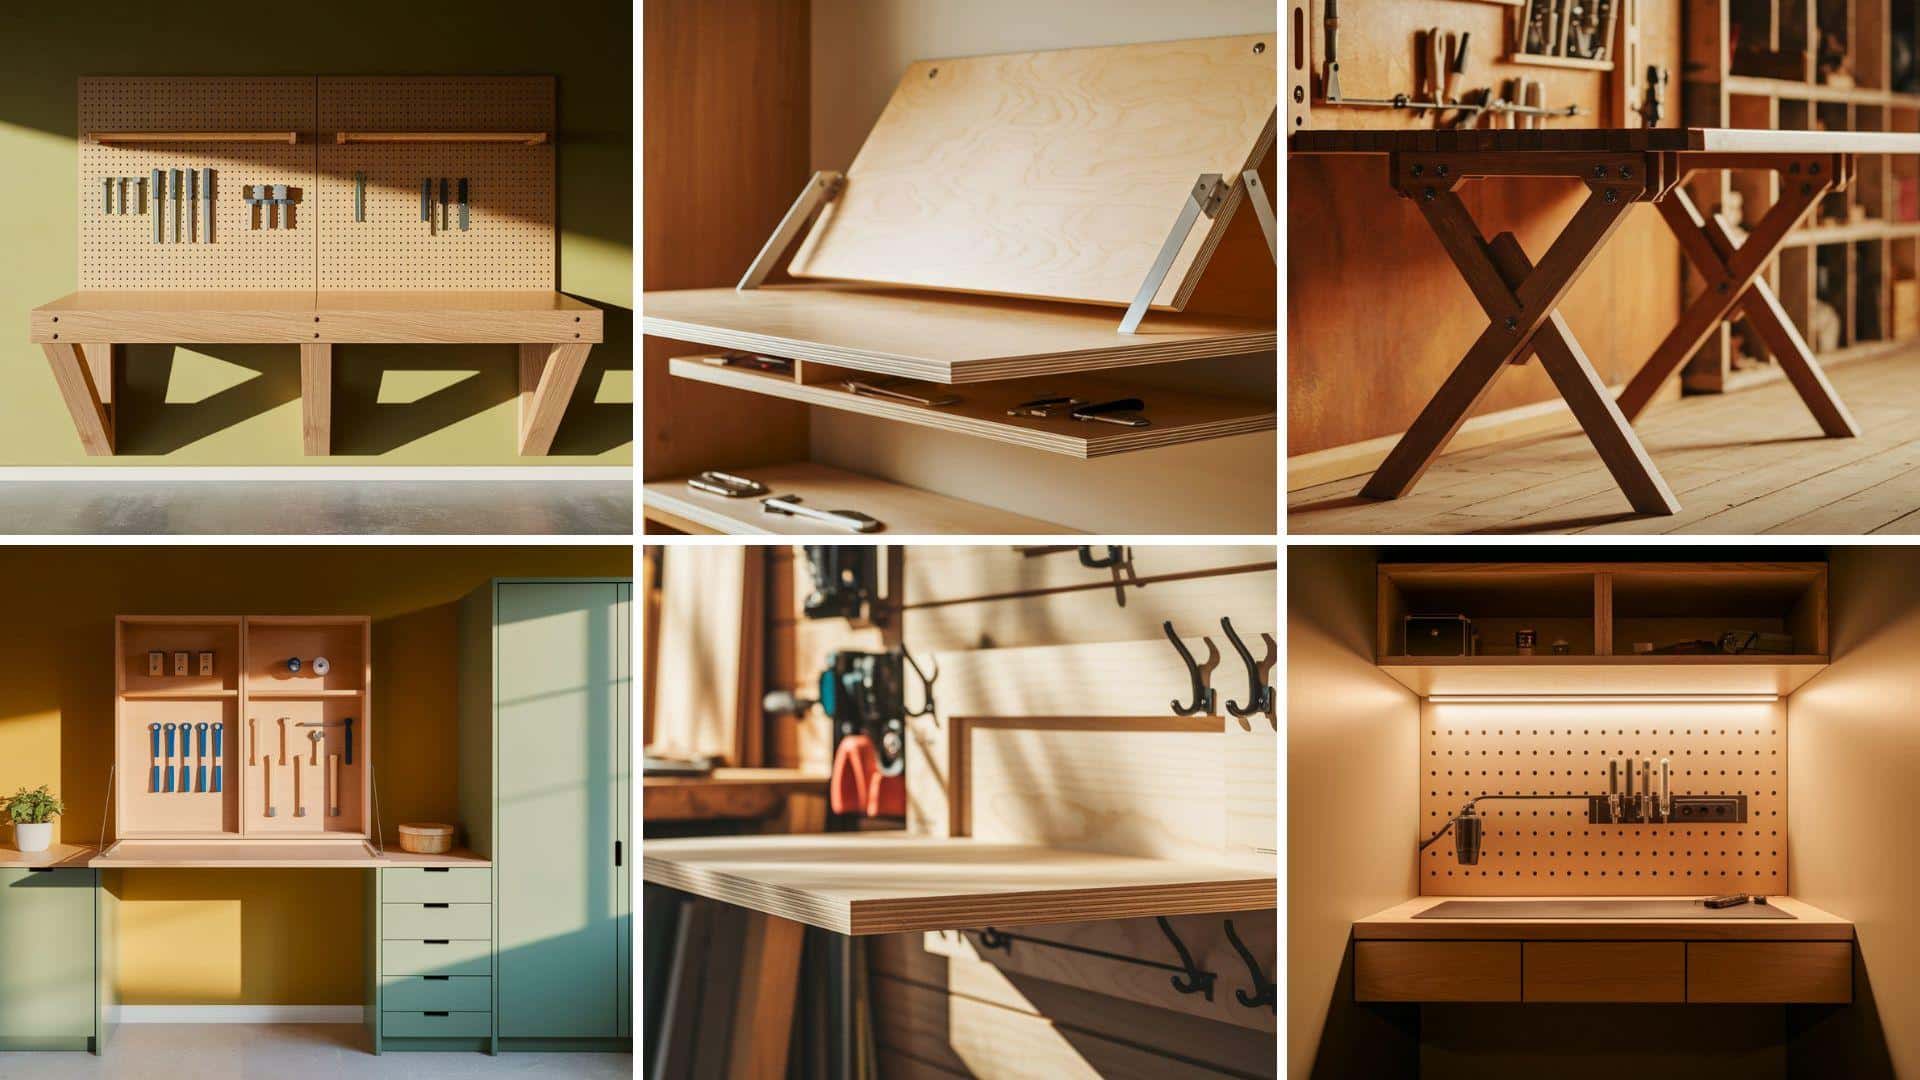
A wall-mounted workbench is a work surface that attaches directly to your wall. Think of it like a floating desk, but built for heavy workshop tasks.
The Basic Setup: The bench consists of a sturdy top surface supported by wall-mounted brackets. It stays in position permanently, giving you a reliable workspace that doesn’t take up floor space.
How It Works: Strong brackets connect the workbench top to a wall-mounted ledger board. Angled supports or triangle braces provide front stability. The entire structure mounts securely to wall studs for maximum strength.
Size Options: You can build these workbenches in any size that fits your space. Standard sizes range from 2 feet to 8 feet wide. The depth usually stays between 18 to 24 inches for comfortable reach.
Weight Capacity: A properly built wall-mounted workbench can hold 200-300 pounds. That’s enough for most woodworking, repairs, and hobby projects.
Types of Wall-Mounted Workbenches
Wall-mounted workbenches come in several styles to fit different workshop needs and space requirements.
| Type | Design | Best For | Pros | Cons |
|---|---|---|---|---|
| Fixed Wall-Mounted | Permanently attached, non-folding | Heavy-duty, permanent setups | Very sturdy, simple to build | Always takes up space |
| Fold-Down (Drop-Down) | Hinges at the wall, folds down vertically | Small garages, dual-use spaces | Space-saving, folds flat when not in use | Needs sturdy hinges and wall support |
| Folding Leg | Wall-mounted back + foldable front legs | Medium-heavy work, added stability is needed | Good weight support, still foldable | Requires more space and foldable leg hardware |
| Flip-Up (Torsion Box) | Flips up instead of down, often integrated into cabinetry | Tight rooms like sheds, laundry spaces | Keeps the floor clear, blends with the wall storage | It may be hard to reach or use if mounted too high |
| Rail System | Attaches to a wall rail (e.g., French cleat) | Modular, reconfigurable workspaces | Easy to remove, move, and adapt the layout | Less stable, needs a rail system |
| Wall-Mounted Workstation | Includes built-in tool storage or tech features like lighting or power | Compact hobby stations or tech repair | Compact, efficient, multitasking-friendly | Requires careful planning, more setup time |
Tools & Materials You’ll Need
Building a wall-mounted workbench requires basic workshop tools and standard lumber. Here’s everything you need from start to finish.
Tools
- Tape measure
- Circular saw or miter saw
- Drill/driver
- Level
- Stud finder
- Screwdriver or impact driver
- Pencil
- Square
Materials
- 2×6 lumber (for main ledger/support board)
- 2×4 lumber (for angled braces, spacers, and supports)
- Plywood sheet (for workbench top, approx. 33 inches deep)
- Wood screws (for assembling frame and attaching to wall)
- Lag bolts or heavy-duty screws (for securing ledger to wall studs)
- Scrap wood (for shims or filling gaps, if needed)
Key Material Notes: The 2×6 lumber serves as your main wall support, so choose straight boards without warping. Your plywood top should be at least 3/4 inch thick for strength. Lag bolts ensure your ledger board stays firmly attached to the wall studs.
Budget Planning: The total material cost typically ranges from $70 to $120, depending on lumber prices and workbench size. Most tools are common workshop items you likely already own.
6 Steps to Build a Fixed Wall-Mounted Workbench
Building your wall-mounted workbench follows a logical sequence that ensures strength and proper fit. Each step builds on the previous one, so follow them in sequence for optimal results.
Step 1: Plan and Measure Your Wall Space
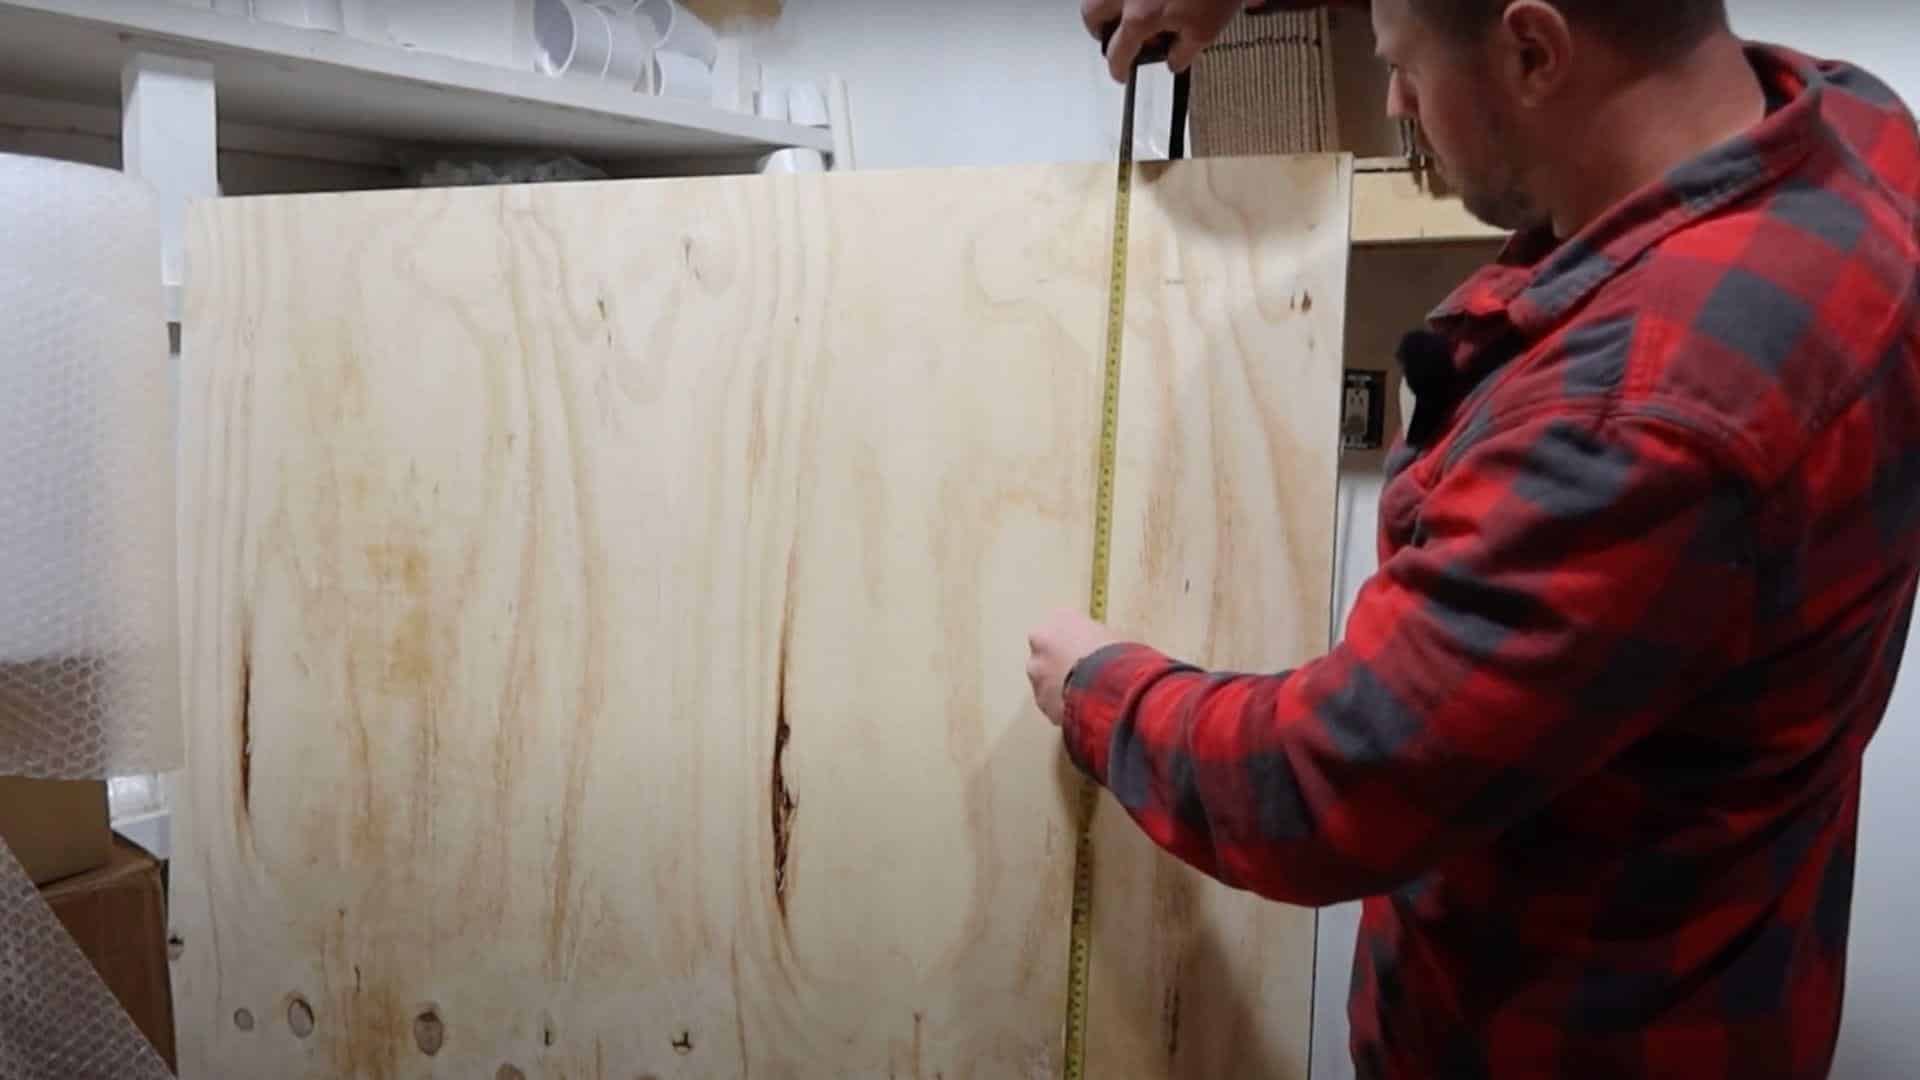
Start by choosing the right wall location. Look for a section with at least two wall studs 16 or 24 inches apart. Use your stud finder to mark each stud location with a pencil.
Measure the available space and decide on your workbench size. Most people find 4-6 feet wide and 24 inches deep works well. Mark the height where you want your work surface – typically 34-36 inches from the floor.
Step 2: Cut and Prep the Support Boards
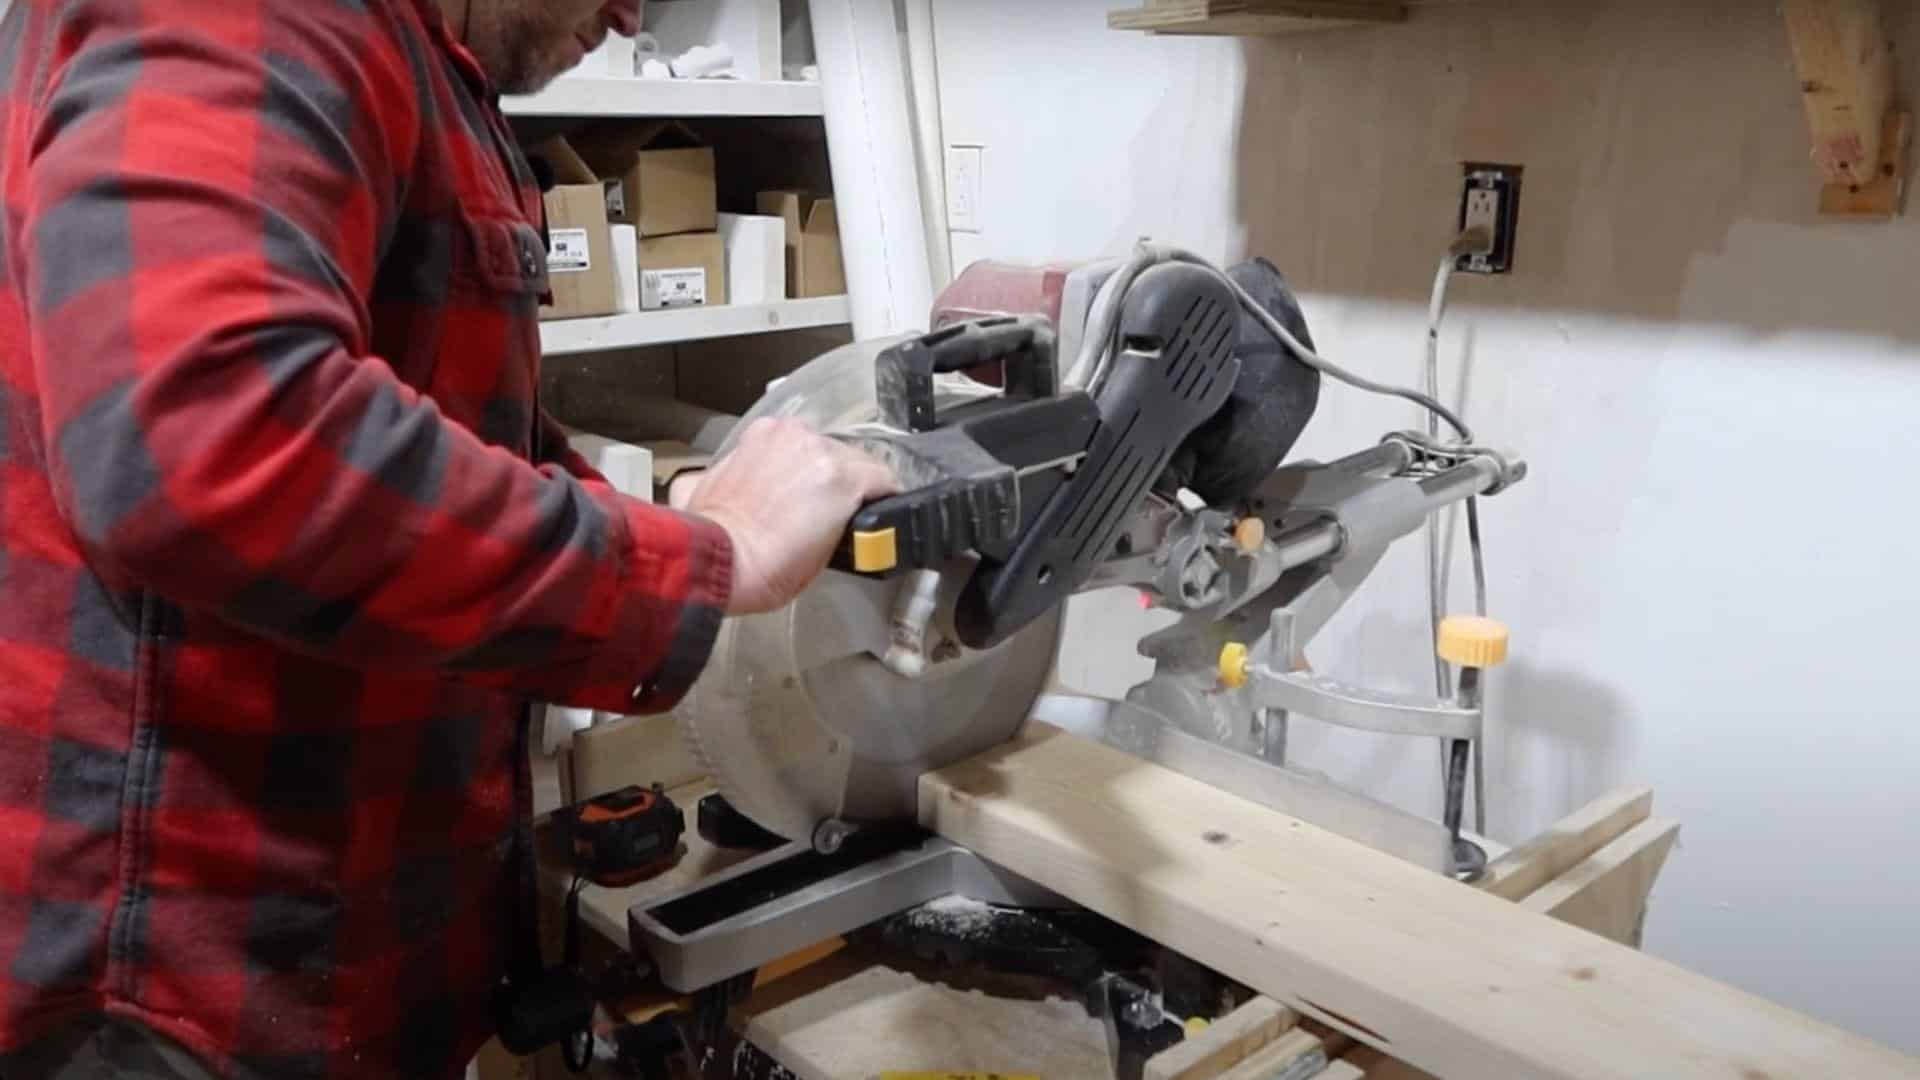
Cut your 2×6 ledger board to match your desired workbench width. This board carries most of the weight, so make clean, straight cuts. Sand any rough edges smooth.
Cut your 2×4 support pieces next. You’ll need angled braces, spacers, and edge supports. Measure each piece carefully and mark your cuts with a square before cutting.
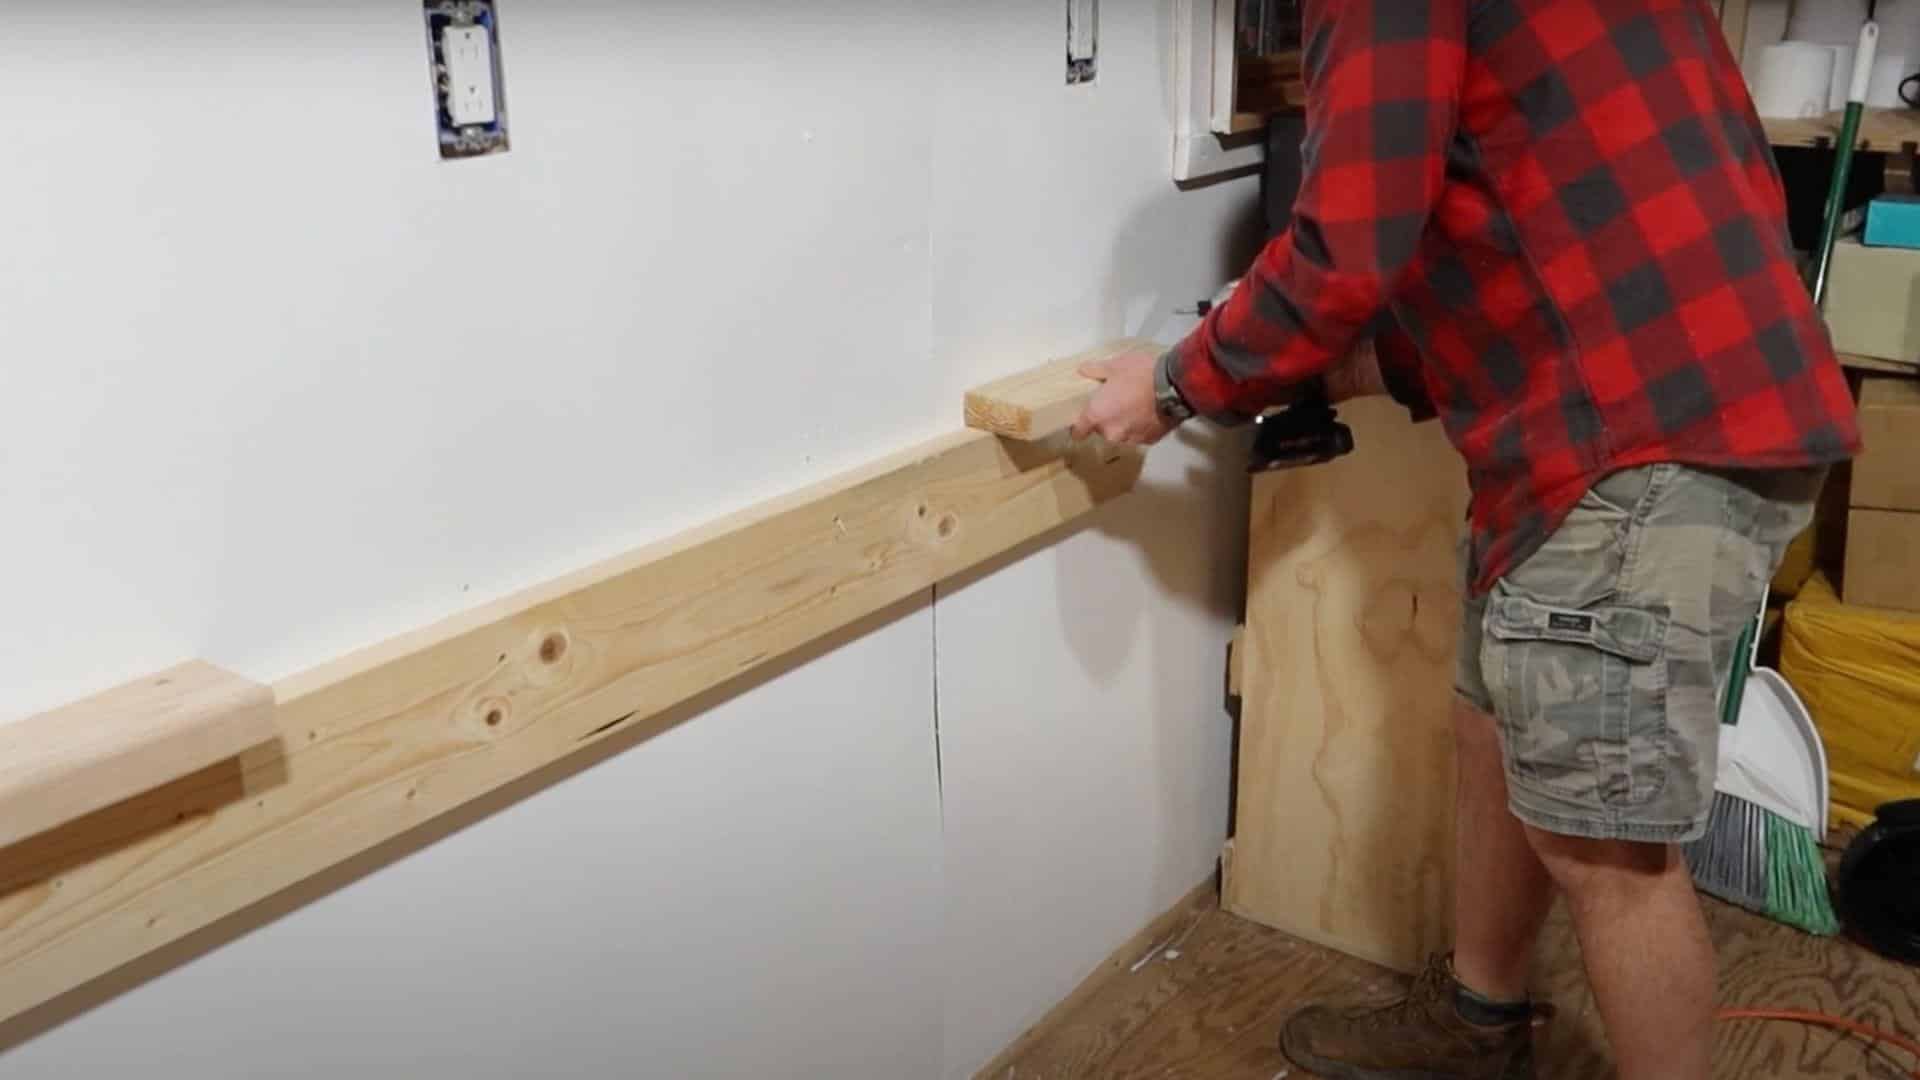
Step 3: Attach the Top Mount to The Wall
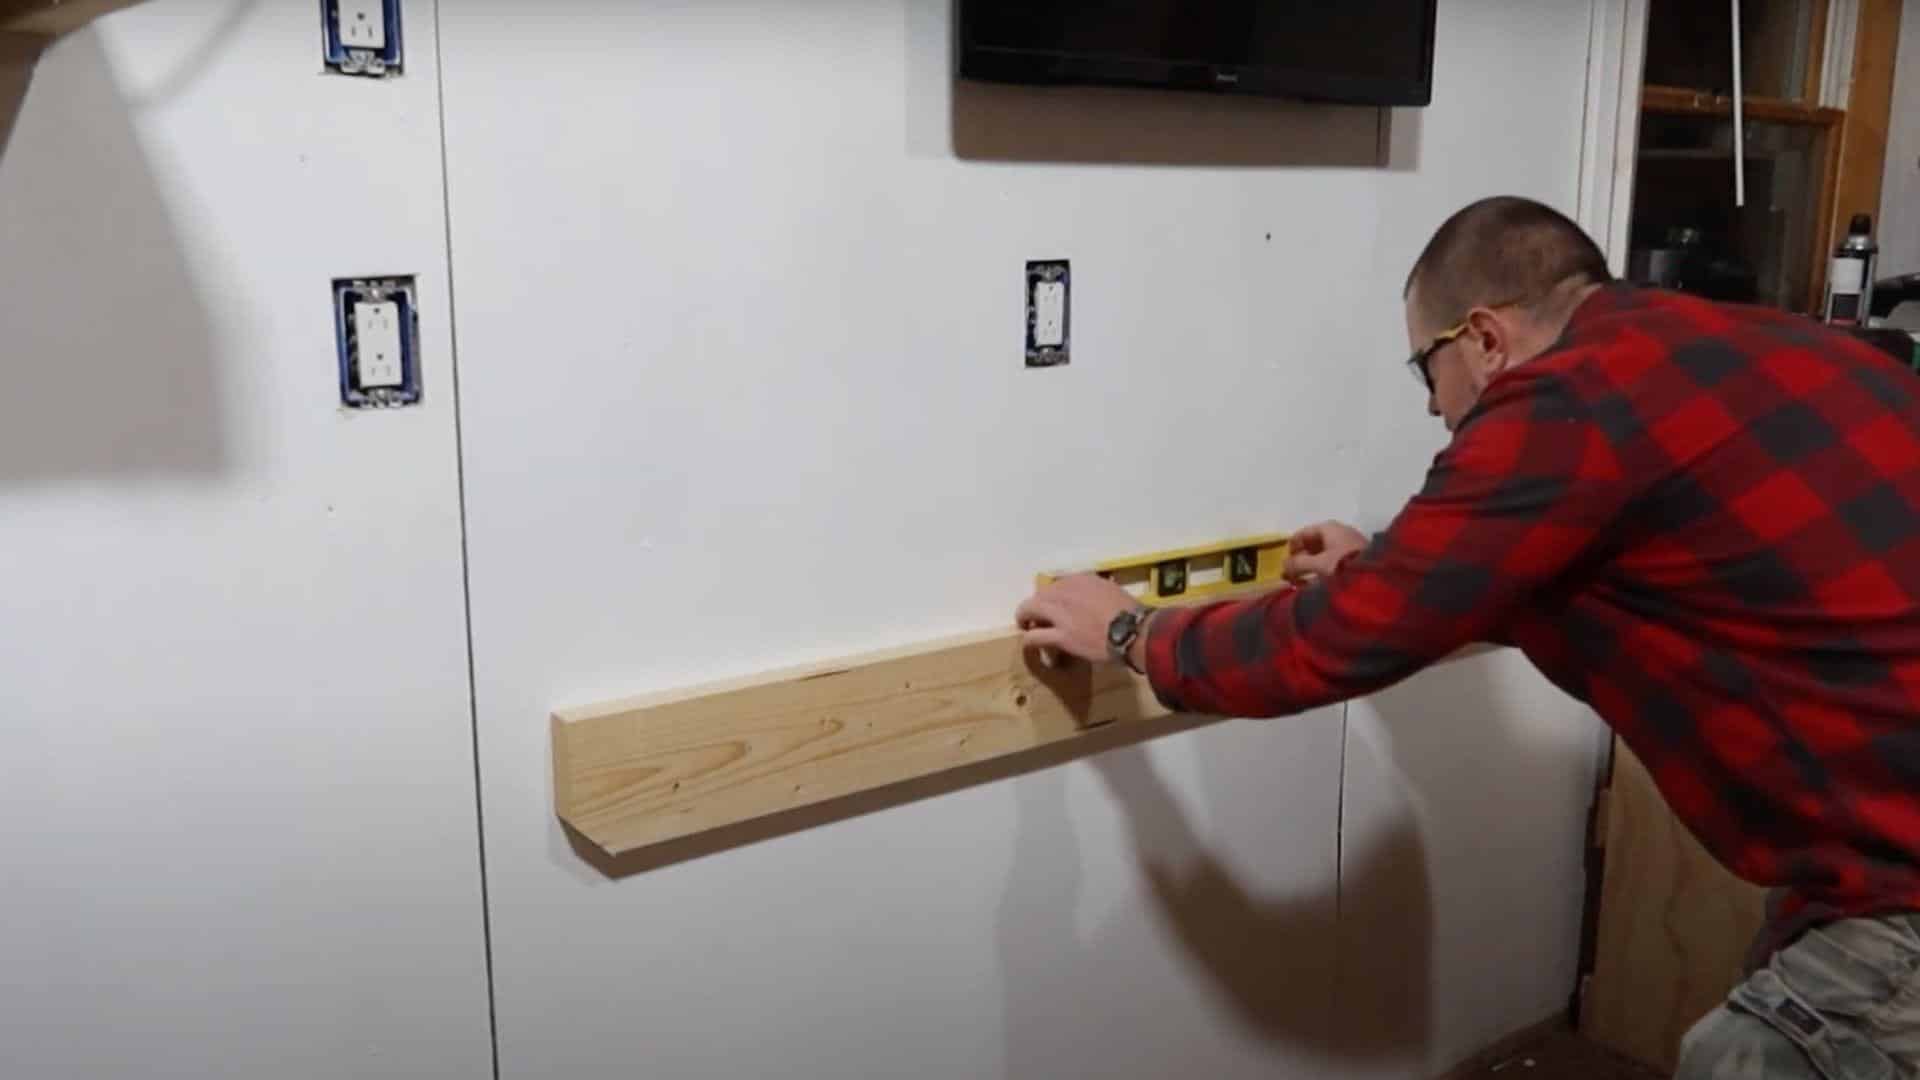
Position your 2×6 ledger board on the wall at your marked height. Use a level to ensure it’s perfectly straight. Mark the stud locations on the board.
Drill pilot holes and attach the ledger with lag bolts into each stud. Use at least 4-inch lag bolts for solid attachment. This board must be rock solid since it supports the entire workbench.
Step 4: Install Front Spacers and Edge Support
Cut 2×4 spacers to match the depth of your planned workbench top. These spacers attach to the front edge of your ledger board and provide support for the plywood.
Install edge supports on both ends of your ledger board. These pieces prevent the plywood from sagging and give you a finished look. Secure everything with 3.5-inch wood screws.
Step 5: Build and Install Triangular Brackets
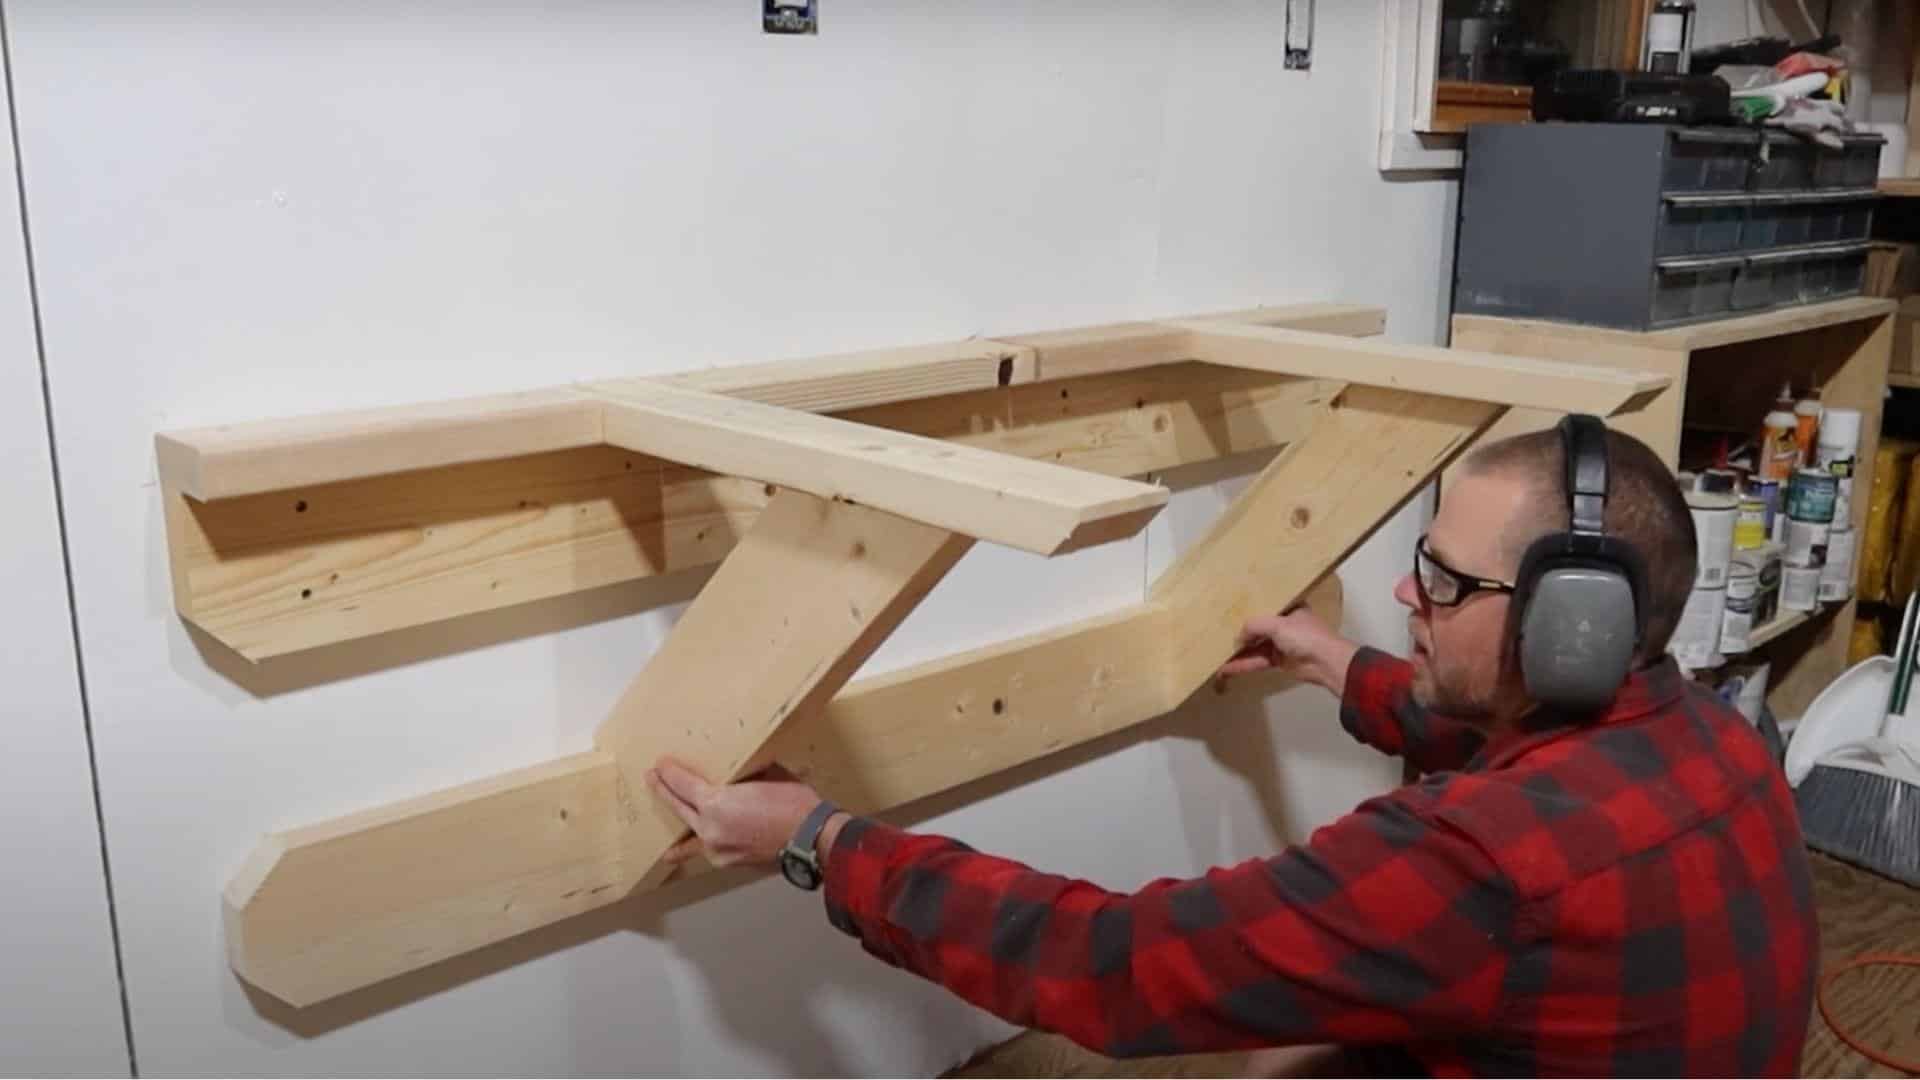
Create triangular support brackets using 2×4 lumber. Cut the pieces at 45-degree angles to form strong triangular shapes. These brackets provide permanent front support for your workbench.
Attach the brackets to your wall-mounted frame and the underside of your plywood top using 3.5-inch wood screws. Space them evenly for maximum support and stability.
Step 6: Secure Plywood Surface
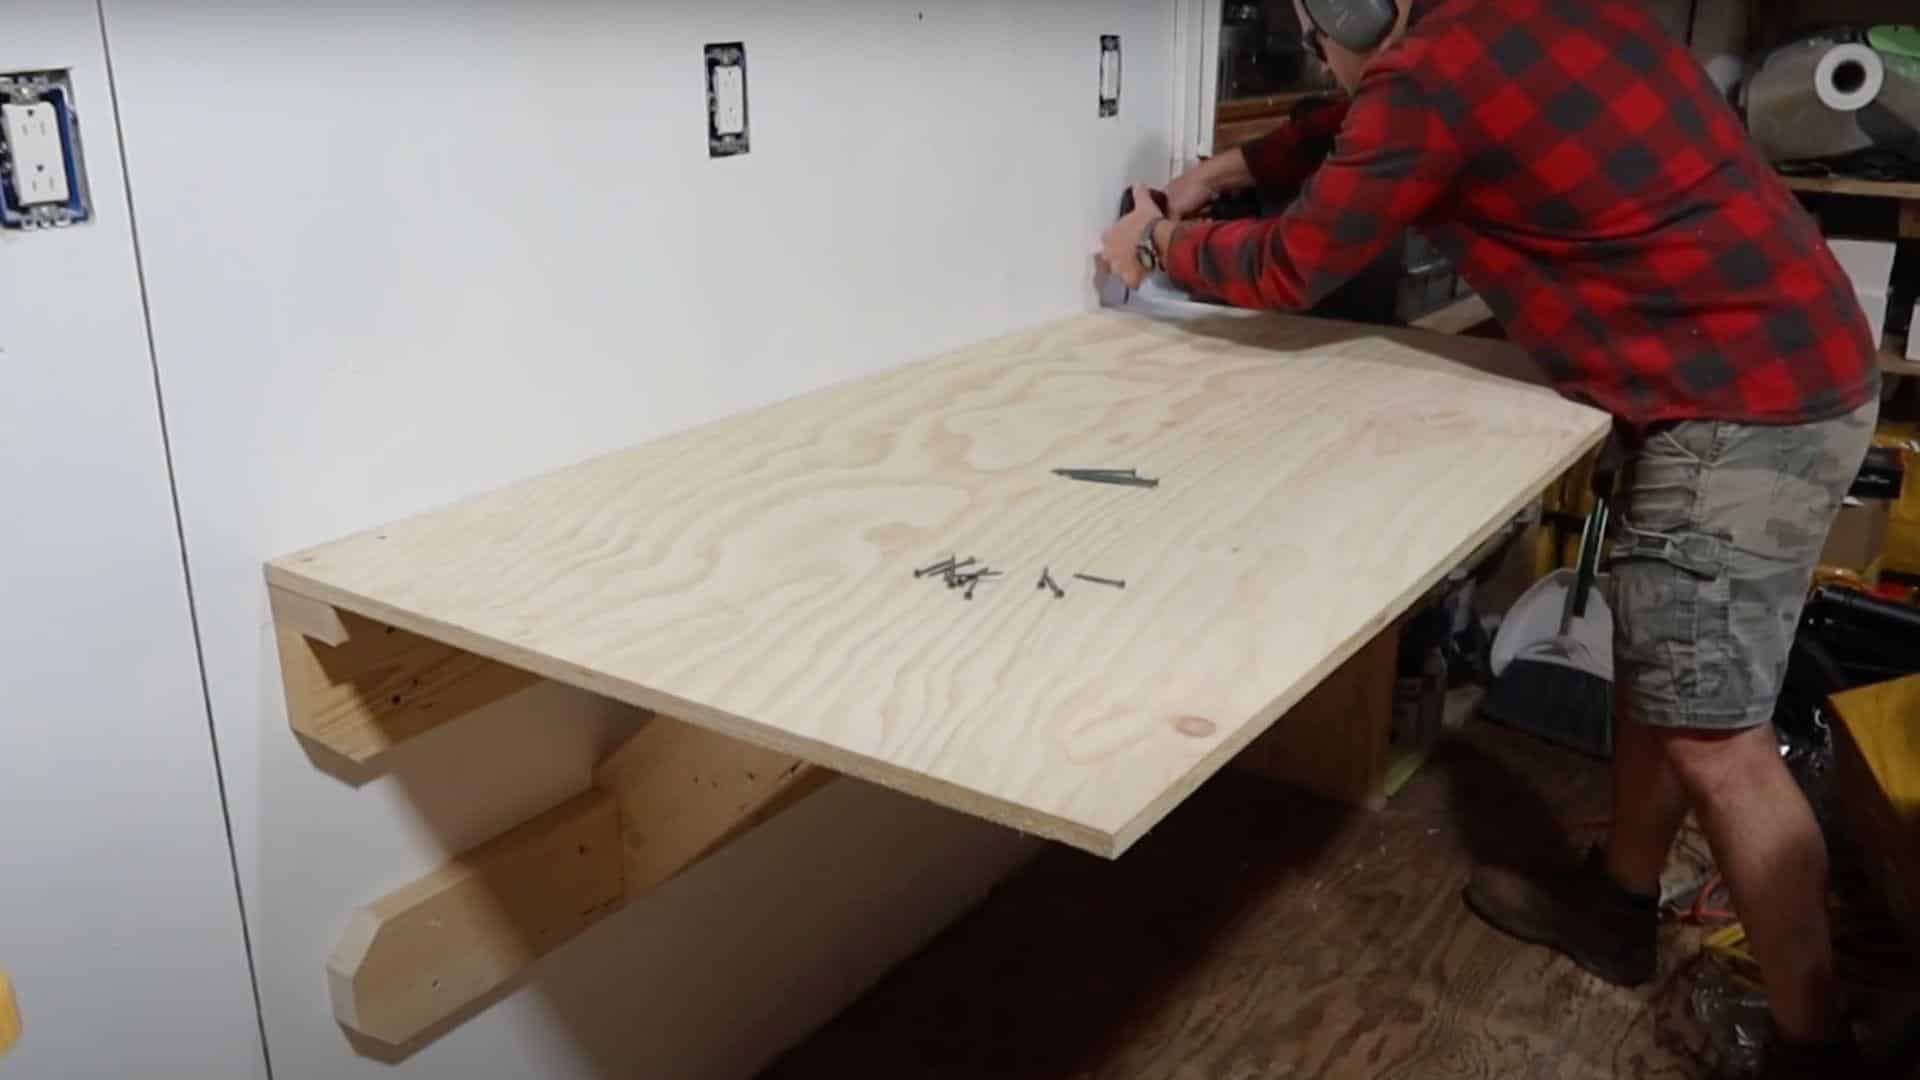
Cut your plywood to size, leaving about 1/4 inch overhang on the front and sides. Sand the surface smooth and round over any sharp edges for safety.
Attach the plywood to your frame using 2-inch wood screws every 8-10 inches around the perimeter. Pre-drill holes to prevent splitting. Test your completed workbench by applying gentle pressure before full use.
Video Tutorial
Check out the video for more insights! Watch a step-by-step demonstration of how to build a fixed wall-mounted workbench.
By – Land To House Life
Troubleshooting Common Issues
Even with careful planning, you may encounter a few bumps during your build. Here are the most common problems and their quick fixes.
- Workbench wobbles or feels unstable: Check that your lag bolts hit solid studs, not just drywall. Tighten all connections and make sure your triangular brackets lock firmly in place.
- Plywood top sags in the middle: Add a center support beam running from front to back. A 2×4 mounted under the middle of the plywood eliminates sagging on longer workbenches.
- Brackets don’t fold smoothly: Check hinge alignment and make sure nothing binds. Sand any rough spots on moving parts. A drop of oil on hinge pins helps them move freely.
- Gap between plywood and wall: Use scrap wood shims to fill small gaps. For larger gaps, you may need to adjust your spacer length or add additional support pieces.
- Workbench doesn’t stay level when folded down: Adjust your triangular bracket length so all contact points touch simultaneously. Minor adjustments make a big difference in stability.
- Screws strip out or won’t hold: Pre-drill pilot holes that are slightly smaller than your screw diameter. Switch to longer screws or add wood glue for problem areas.
Conclusion
Building a wall-mounted workbench turns any cramped workshop into a functional space. You get a solid work surface that disappears when not needed, freeing up valuable floor space for other activities.
The build process is straightforward with basic tools and materials. The key is taking time to measure carefully and secure everything properly to the wall studs.
Your new workbench will handle most workshop tasks while keeping your space organized. Add storage features as your needs grow, and you’ll have a workspace that works as hard as you do.
Ready to start building? Grab your materials and convert your workshop this weekend. Share your experience in the comments below and let me know how it turned out!
Frequently Asked Questions
How Deep Should a Wall-Mounted Workbench Be?
Keep your workbench 24 inches deep or less. Anything deeper makes it hard to reach the wall. Shorter people should consider 22 inches for better comfort.
How Thick Should My Workbench Top Be?
Use 3/4 inch plywood minimum for strength. Thicker material, like 1 inch, works better for heavy-duty projects but costs more and adds extra weight to your wall brackets.
How Much Space Do You Need Around a Workbench?
Leave at least 3 feet of clearance in front for comfortable movement. Side clearance can be less since wall-mounted benches don’t need access from all sides.