Before and After: Painted Concrete Porch Reveal
Is your concrete porch looking tired, worn, and just plain uninspiring? I completely understand the frustration of walking up to a dull entrance every day that doesn’t reflect your home’s true potential.
I promise that transforming your concrete porch doesn’t require a complete renovation or professional help—just some paint, patience, and a free weekend.
In this blog, I’ll share the simple steps I took to transform my porch from drab to fab. You’ll see exactly how I prepped the surface, selected the perfect paint colors, and added those finishing touches that make all the difference.
Get ready to be inspired by what a little paint and creativity can do for your home’s curb appeal!
Why You Should Consider Painting Your Concrete Porch?
Painting your concrete porch is one of those home improvement projects that delivers serious bang for your buck. I learned this firsthand when I finally tackled my sad-looking front entrance last summer.
Not only did the fresh paint instantly boost my home’s curb appeal (prompting several neighbors to ask for my “contractor’s” info!), but it also created a protective barrier against Michigan’s harsh weather cycles and daily wear.
I love how the color I chose now perfectly complements my siding and landscaping, creating a cohesive look that feels intentional rather than accidental.
The best part? The entire project cost me less than $200—a fraction of what replacing the concrete would have run. With the right preparation and paint, I’m expecting this refresh to last for years with minimal maintenance beyond occasional cleaning.
Before and After Painted Concrete Porch Makeovers
1. From Dull and Dirty to Fresh and Inviting
Before: Walking up to a weathered concrete porch with cracks and stains creates an uninviting first impression, years of exposure to the elements have left the surface looking neglected and tired.
After: A simple coat of warm beige or light gray paint completely transforms the space, making it look clean and welcoming. A colorful welcome mat and a few potted plants bring life to what was once a dreary entrance.
Tips: Power washing is essential before painting to remove all dirt and debris. Fill any cracks with a concrete patch and allow them to dry completely.
Choose exterior paint specifically formulated for concrete surfaces for the best durability, and consider your home’s exterior colors to create a cohesive look.
2. From Boring to Bold with Color
Before: The plain, gray concrete porch lacks personality and blends into the background rather than making a statement about your home.
After: Bold navy blue and white stripes create a dramatic visual interest that draws the eye and makes your entrance memorable. The geometric pattern adds a modern touch that elevates the entire front of the house.
Tips: Use high-quality painter’s tape to create crisp lines. Apply a concrete primer first for better paint adhesion. For stripes, measure carefully and mark with chalk before taping. Finish with a clear sealant to protect your design from foot traffic and weather.
3. From Cracked and Faded to Smooth and Sleek
Before: Visible cracks and a worn appearance make your porch look older than it is and potentially unsafe.
After: A concrete resurfacer fills in imperfections, creating a smooth canvas. A satin-finish paint that mimics natural stone or slate transforms ordinary concrete into what appears to be a high-end material.
Tips: Properly patch deep cracks before resurfacing. Sand rough edges for a professional finish. Apply at least two coats of paint with adequate drying time between applications. Consider adding a non-slip additive to the final coat for safety.
4. From Plain to Coastal Charm
Before: The uninspiring gray concrete porch fails to reflect any personality or style, missing an opportunity to set the tone for your home.
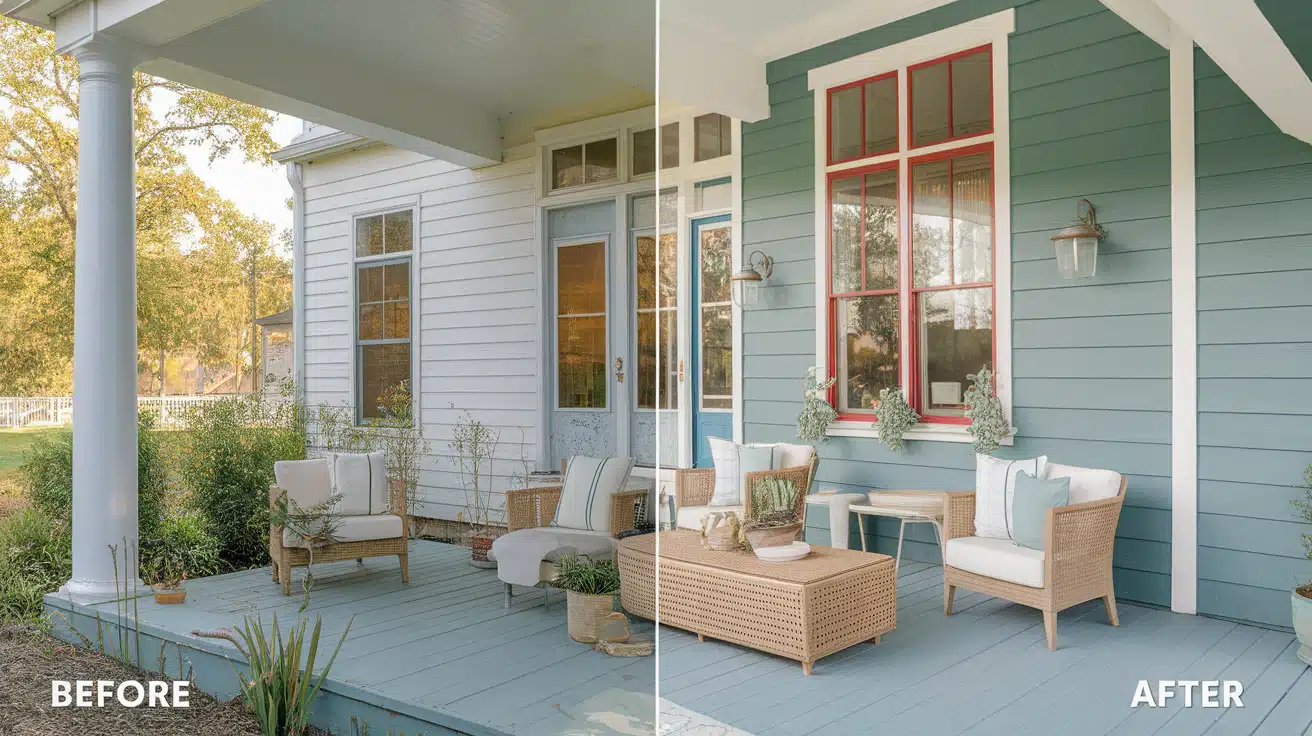
After: Soft blues and seafoam greens create a coastal vibe that feels relaxing and inviting, the beachy atmosphere begins before you even step inside the house.
Tips: Choose paint colors that complement your exterior but still evoke coastal feelings. Lightly distressed edges with sandpaper after painting for an authentically weathered look.
Accessorize with natural elements like rope, shells, or driftwood to complete the coastal theme.
5. From Unfinished to Sophisticated Two-Tone Design
Before: The unfinished concrete surface looks incomplete and unpolished, detracting from your home’s overall appearance.
After: A two-tone design with dark charcoal borders and a light gray center creates depth and visual interest. This sophisticated approach makes the porch look intentionally designed rather than merely functional.
Tips: Plan your design on paper first. Always paint the lighter color first, then add the darker accents. Use high-quality masking tape and ensure it’s firmly pressed down to prevent bleeding between colors.
Remove the tape while the final coat is still slightly wet for the cleanest lines.
6. From Dull Concrete to Luxurious Stained Concrete Look
Before: The plain gray concrete lacks warmth and character, appearing utilitarian rather than designed.
After: Rich, earthy stains transform the concrete into what appears to be natural stone; the warm terracotta or chocolate brown tones add luxury and complement the natural surroundings.
Tips: Test stain colors in an inconspicuous area first. Apply stain with a roller for even coverage, working in small sections. Multiple thin coats create richer colors than one heavy application.
Finish with a clear sealer to protect the color and enhance the natural variations in the stain.
7. From Cracked and Old to Fresh and Functional with Epoxy
Before: An aging porch with structural issues not only looks bad but can pose safety concerns for visitors.
After: A glossy epoxy coating creates a durable, water-resistant surface that looks brand new, the professional finish is easy to clean and maintains its appearance for years.
Tips: Proper preparation is crucial for epoxy application. The surface must be completely clean and dry. Follow the manufacturer’s instructions precisely regarding temperature conditions during application.
Consider adding decorative flakes between coats for added grip and visual interest. Allow the epoxy to cure completely before using the porch.
Alternate Ideas to Personalize Your Painted Porch
After I finished painting my concrete porch in a solid color, I realized I wasn’t completely satisfied. It looked better, sure, but it still didn’t feel like “me.” That’s when I started experimenting with some personalization techniques that really made the space pop.
1. Add Patterns
I was nervous about trying this at first, but using a simple geometric stencil, I found online transformed my porch from basic to custom. I used a slightly darker shade for the stencil design and placed it strategically in the corners.
If you’re feeling brave, try herringbone or Moroccan patterns – but start small if you’re new to stenciling like I was!
2. Use Multiple Colors
My neighbor’s porch inspired me here. Instead of one flat color, she used three shades of blue that gradually lightened from her front door outward. The ombré effect creates depth and interest without being overwhelming.
I tried a similar approach with earth tones and love how it draws the eye toward my entrance.
3. Incorporate Natural Elements
Paint alone wasn’t enough for me. I added large ceramic planters with cascading flowers that complement my paint color.
The contrast between the structured painted surface and the organic plant shapes creates this perfect balance. To prevent water damage to your newly painted surface, make sure your planters have drainage holes.
4. Create a Border
This was my simplest but most impactful addition. I painted a 6-inch border around the perimeter of my porch in a contrasting color (charcoal gray against my sandy beige).
It frames the space beautifully and makes it look like I hired a professional designer. All it took was some painter’s tape and an extra hour of work!
Common Mistakes to Avoid During Your Concrete Porch Makeover
| Mistake | Why It Happens | Quick Fix |
|---|---|---|
| Skipping the prep work | Rushing to start the fun part | Clean, repair, and etch the concrete thoroughly |
| Choosing the wrong paint | Not understanding paint types for concrete | Opt for epoxy or masonry paint designed for concrete |
| Overlooking sealant | Thinking paint alone is enough | Always apply a clear, protective sealant |
| Rushing the drying time | Wanting to speed up the process | Be patient and allow proper drying times between coats |
| Skipping primer | Thinking it’s an unnecessary extra step | Always prime for better adhesion and durability |
Conclusion
Ready to transform your porch? Don’t overthink it—start! I put off my porch project for three years, worried I’d mess it up, but now my only regret is not doing it sooner.
The best part is seeing the transformation each time I come home. Remember: thorough prep work is your foundation for success, quality paint is worth every penny, and personalization makes all the difference.
Whether you go bold with patterns or subtle with complementary colors, your painted porch will become a reflection of your style.
So grab that paintbrush this weekend—your future self will thank you for taking that first step toward an entrance that makes you proud every time you walk up to your front door.

