Ever wondered why your home feels humid even with air conditioning running?
Your crawl space might be causing the problem. Most homeowners ignore this dark area under their house until moisture problems spread throughout their entire home.
Water vapor rises from exposed soil and concrete, creating the perfect breeding ground for mold, wood rot, and pest infestations.
Installing a crawl space vapor barrier can change your home’s air quality and energy efficiency. This simple plastic sheeting acts as a moisture shield, blocking ground vapor from entering your living space.
The results speak for themselves when you see a before-and-after crawl space vapor barrier installation. Your musty odors disappear, humidity levels drop, and your home feels fresher and more comfortable year-round.
Why Crawl Spaces Need Vapor Barriers?
Most crawl spaces have serious moisture problems. These dark areas under your home trap humidity from the ground and outside air. Without protection, moisture seeps through dirt floors and concrete walls.
Common problems include standing water after heavy rain, musty smells throughout the house, high humidity levels all year, mold growth on wooden beams, and pest issues in damp areas.
These conditions hurt your entire home’s air quality. Air moves upward naturally, so bad air from below enters your living areas.
A vapor barrier acts as a protective shield between your crawl space and moisture sources. This plastic material blocks water vapor from entering your home’s foundation area. The results from a before-and-after crawl space vapor barrier installation show dramatic improvements in air quality and moisture control.
Key benefits include:
- Moisture control: Stops ground moisture from rising into the space
- Mold prevention: Reduces conditions that let mold grow
- Energy savings: Helps keep temperatures steady
- Structural protection: Keeps wooden supports dry and strong
For homes with severe moisture issues, crawl space encapsulation offers a more complete solution.
This process seals the entire area, including walls and floors, creating a controlled environment that delivers even more impressive before and after crawl space vapor barrier results.
Before and After: What a Crawl Space Looks Like?
See the change that occurs when moisture barriers are properly installed, with clear before and after crawl space vapor barrier examples showing how different foundation types respond to treatment.
1. Dirt Floor Crawl Space Change
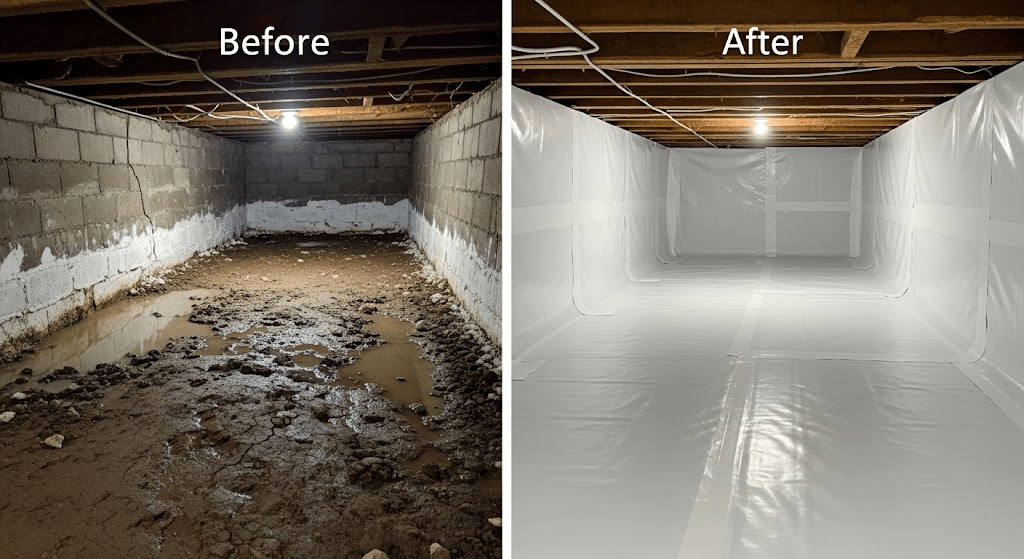
Before and after crawl space vapor barrier installation shows a dramatic change from exposed soil with moisture problems and muddy areas to a clean, continuous plastic barrier covering the entire floor.
The heavy, humid air with strong musty odors becomes noticeably drier and fresher, demonstrating clear results.
2. Concrete Floor Crawl Space Upgrade
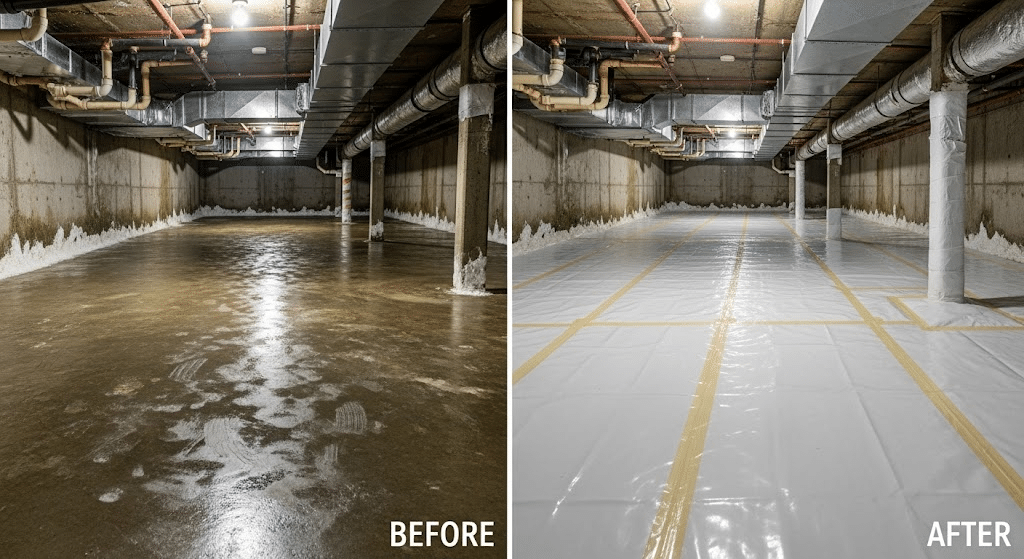
Before and after crawl space vapor barrier installation reveal how concrete floors change from dark stains, condensation droplets, and visible mold growth to a bright, clean appearance with professional-grade material.
All seams are properly sealed, and piers are wrapped individually, showing effective change.
3. Flooded Crawl Space Recovery
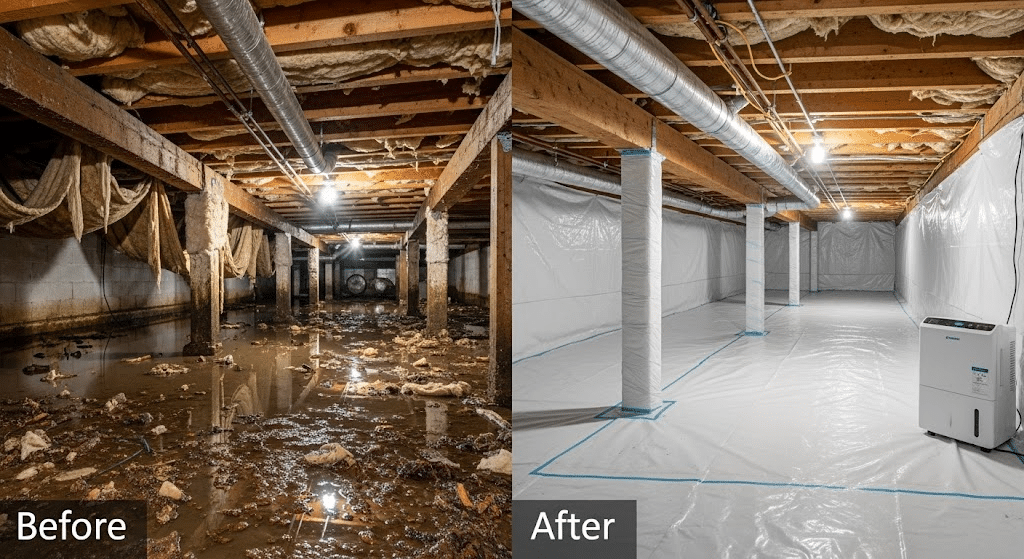
Before and after crawl space vapor barrier installation demonstrate how spaces with serious water problems evolve from standing water, swampy smells, and visible mold growth to completely dry areas.
A dehumidifier maintains proper humidity levels, showcasing impressive improvements throughout the space.
How Long Does a Crawl Space Vapor Barrier Last?
Most crawl space vapor barriers last 15 to 25 years with proper installation, and the before and after crawl space vapor barrier remain visible throughout this lifespan.
Heavy-duty 10-mil plastic lasts longer than basic 6-mil material. The actual lifespan depends on your area’s humidity levels, soil conditions, and how well the barrier was installed.
Regular maintenance helps your vapor barrier last longer. Check for tears or holes once a year and patch them with appropriate tape. Keep the area clean and free of debris that could damage the material.
To ensure your vapor barrier reaches its full lifespan, careful and correct installation is key. Let’s explore how you can install one yourself
DIY Crawl Space Vapor Barrier Installation
The before-and-after crawl space vapor barrier modification is achievable for most homeowners with basic tools, though professional installation may be needed for complex situations or full encapsulation projects.
Basic Tools and Materials Checklist
Before starting your DIY vapor barrier project, gather these essential items:
| Materials Needed | Tools Required |
|---|---|
| 10-mil vapor barrier plastic (order online for proper thickness) | Cobweb broom for cleaning |
| Zip system flashing tape for concrete surfaces | Rake for debris removal |
| Vapor barrier seam tape (white or black) | Measuring tape for precise calculations |
| Exterior insulation for vent holes | Zip roller for tape application |
| Spray foam for gap filling | Brush for cleaning pier surfaces |
| Duct tape for temporary positioning | Cutting tools for plastic trimming |
| Vapor barrier stakes for uneven areas |
Following proper preparation steps ensures your before and after crawl space vapor barrier installation delivers professional-quality results.
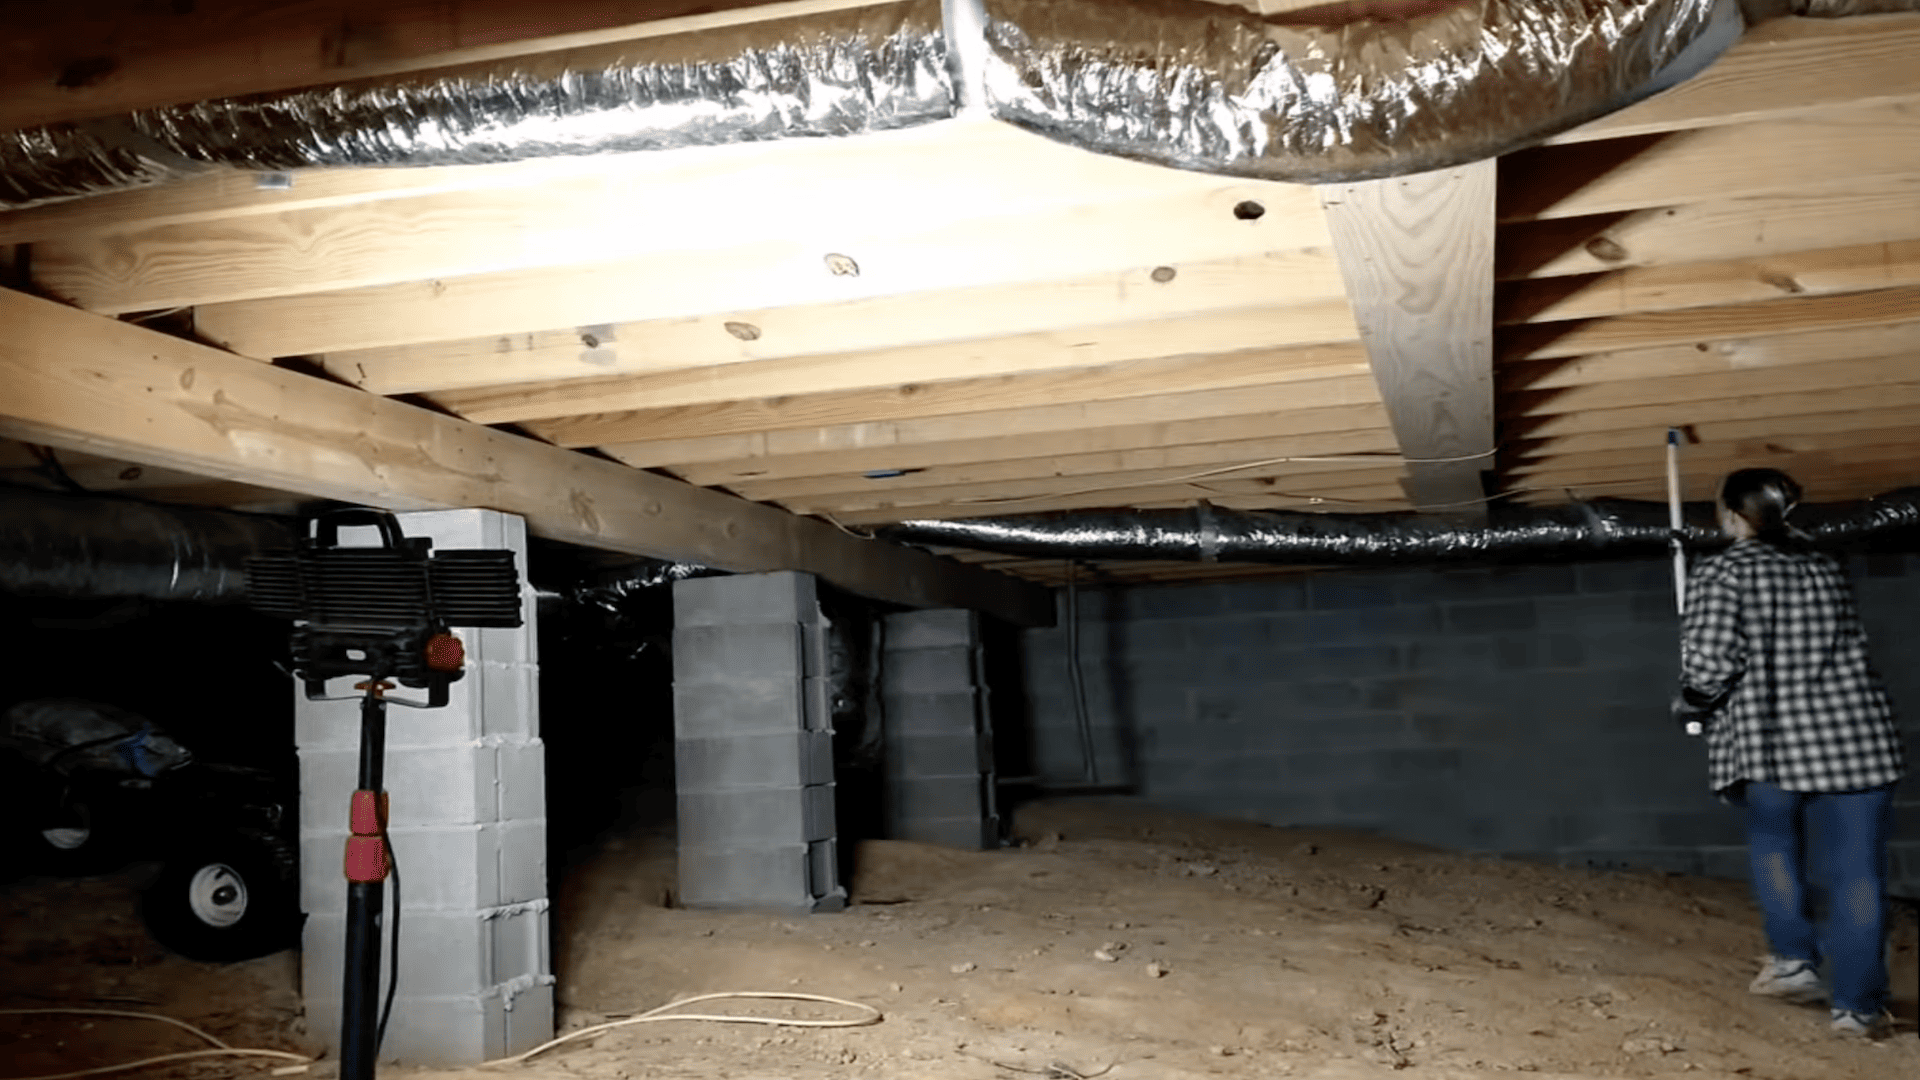
Step 1: Measure and Map Your Crawl Space

Start by creating a detailed drawing of your entire crawl space layout. Measure all dimensions carefully to calculate the total square footage needed.
Order extra material to allow for 6-8 inch overlaps, though 2-foot overlaps provide better coverage if you have extra material.
Step 2: Prepare the Crawl Space
Use a cobweb broom to remove all spider webs from the entire area. Pick up large debris and sharp objects that could puncture the barrier.
Rake out rocks and other materials, then clean the area thoroughly before installation begins.
Step 3: Seal Vents and Gaps
Place exterior insulation in all vent holes throughout the crawl space. Use zip system flashing tape to seal every vent completely.
Fill any gaps with spray foam to eliminate airflow and ensure no air can enter to cause humidity problems.
Step 4: Cut Materials in Advance
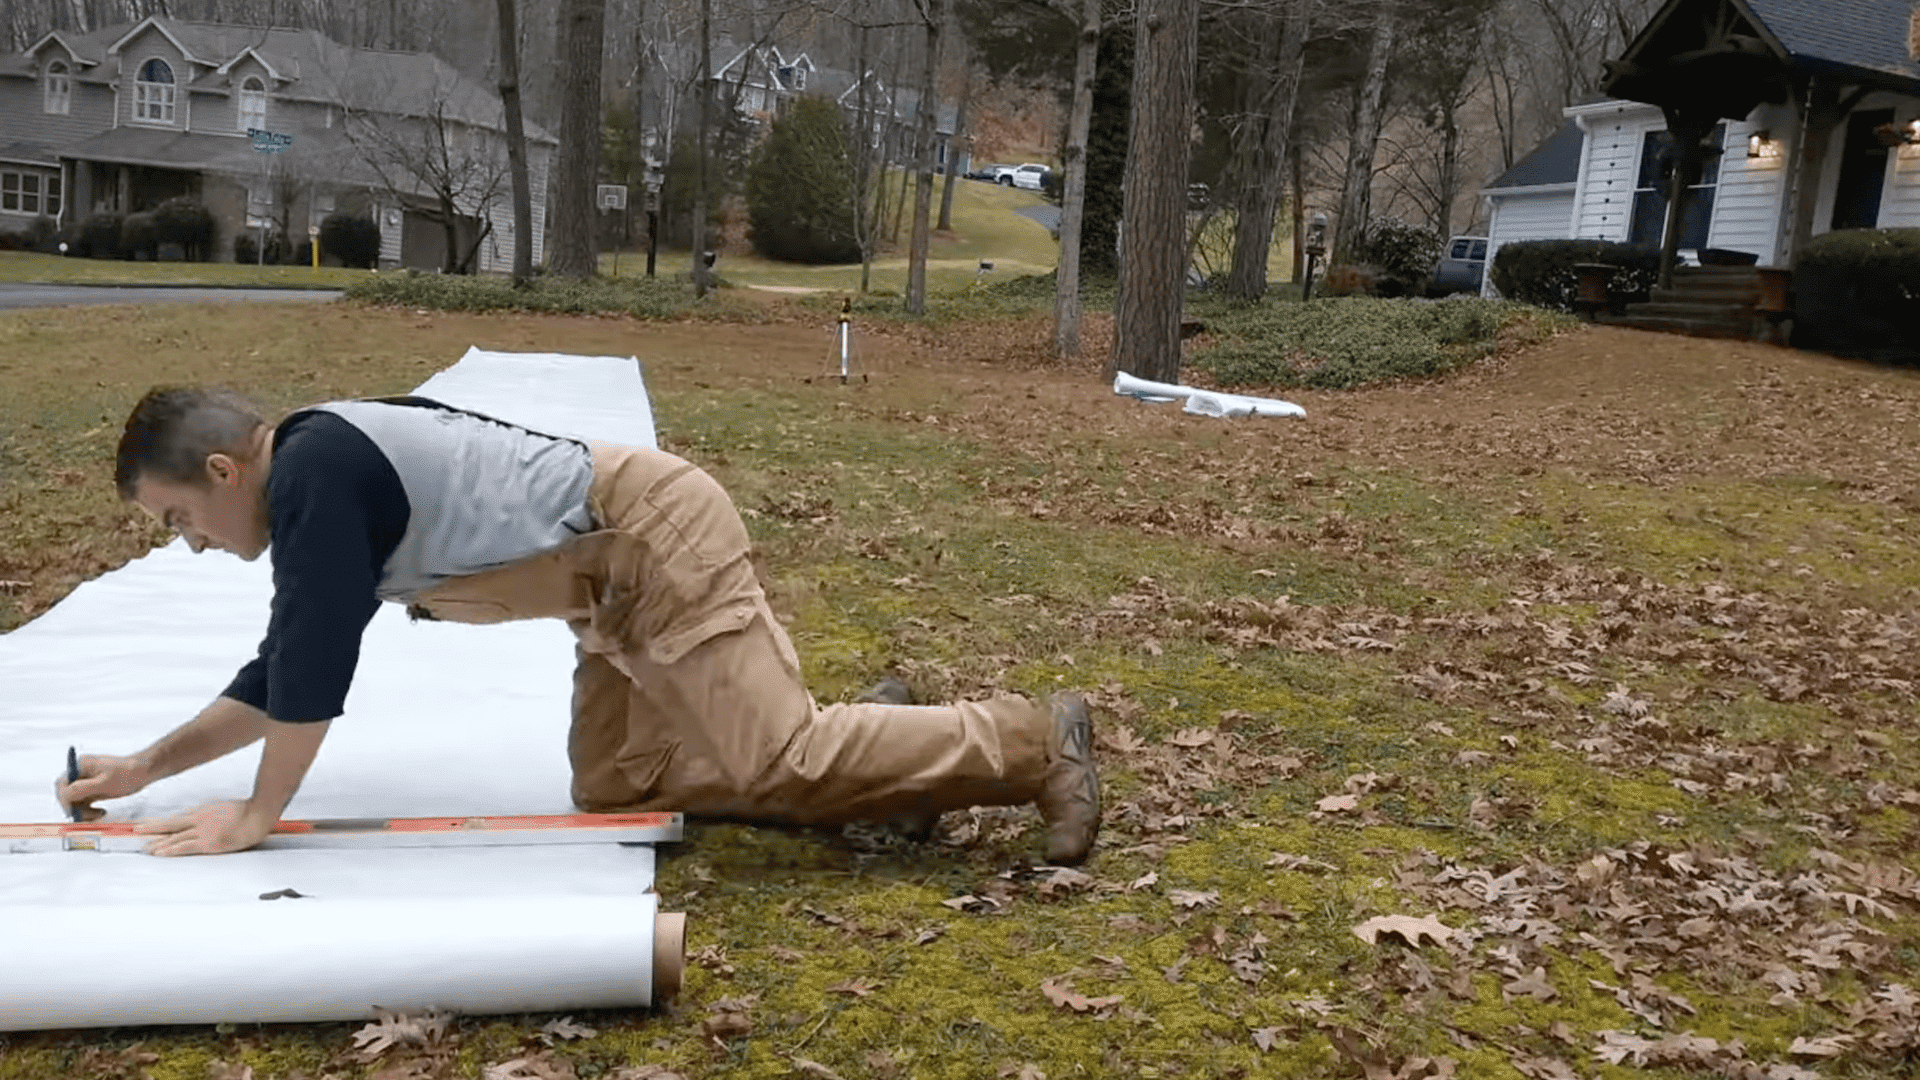
Work in a large, open outdoor area to cut all your pieces. Cut all pieces to fit your mapped sections, then roll up each section and label them clearly (A, B, C).
Save all scraps for wrapping around pillars and piers later.
Step 5: Install Around Piers and Pillars
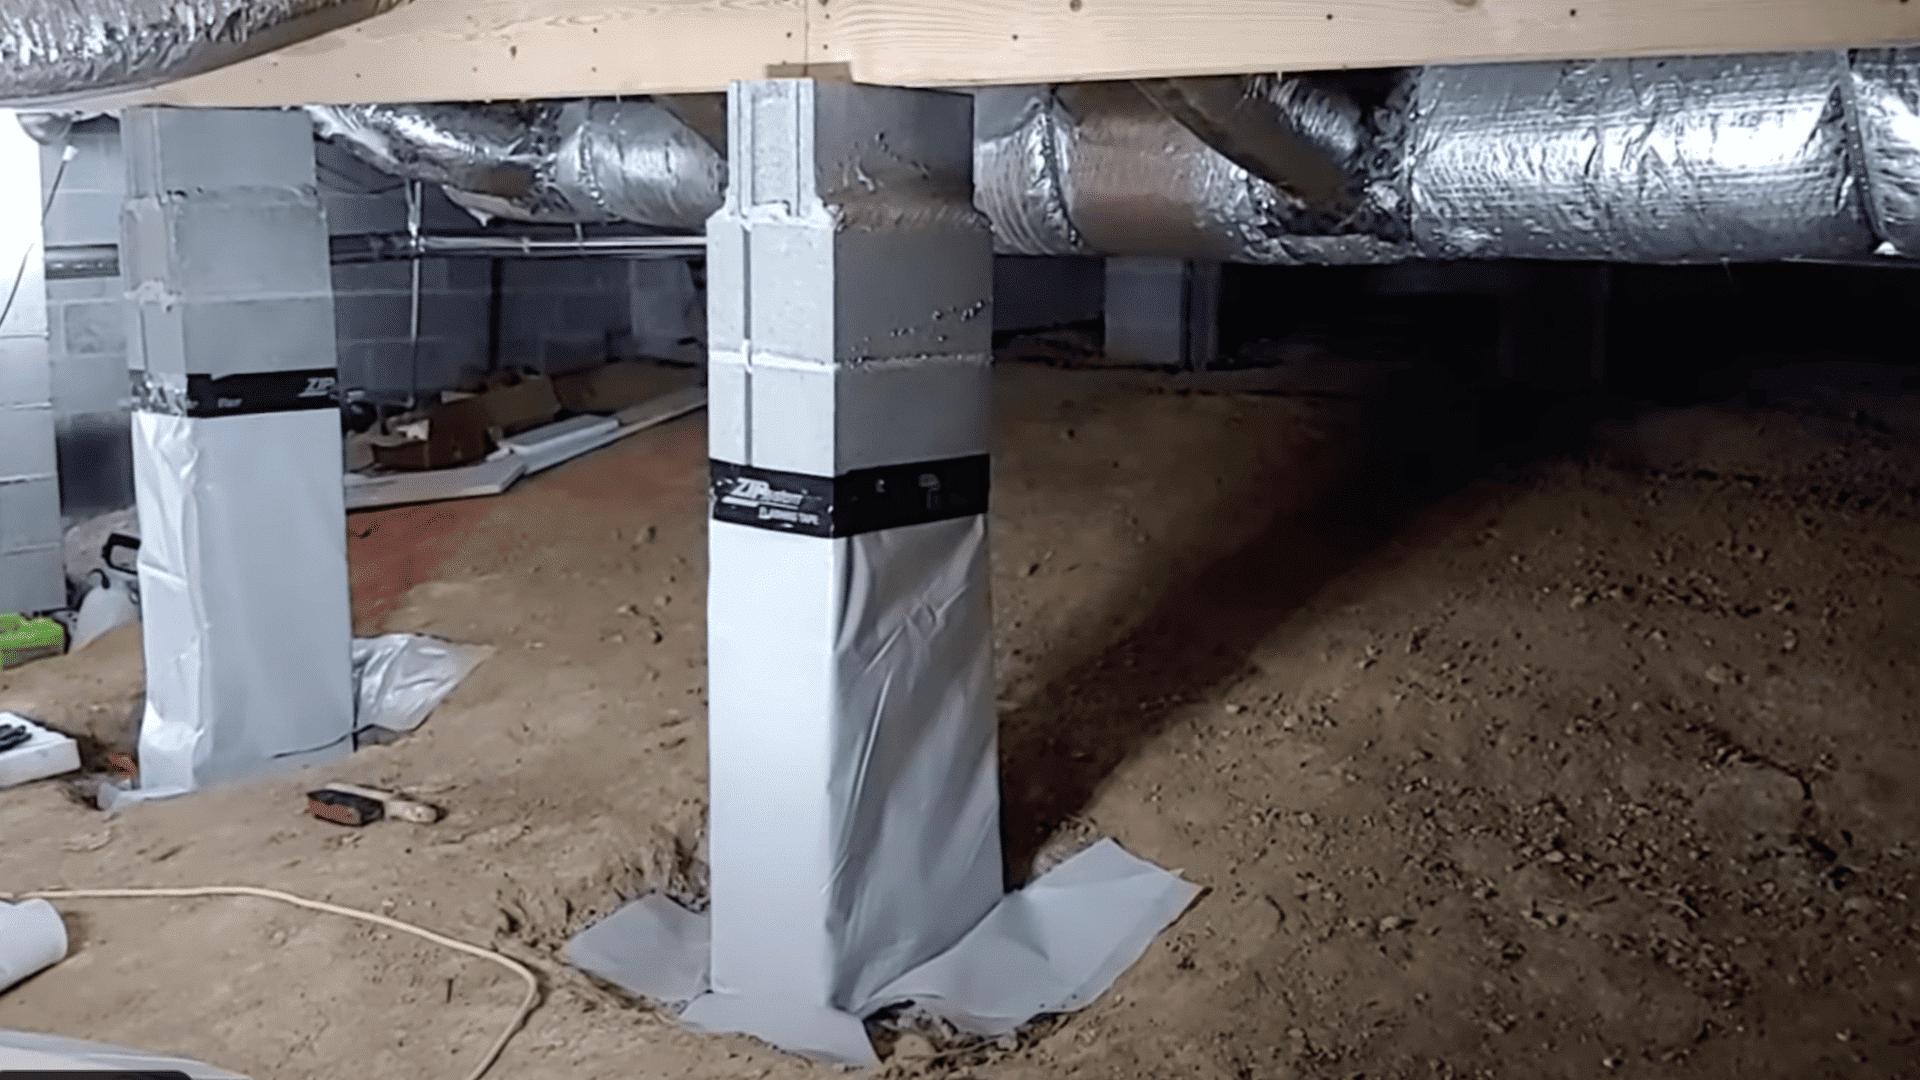
Measure pier height and cut barrier pieces accordingly. Brush off dust from pier surfaces for better tape adhesion. Wrap piers “like a Christmas present” with proper cuts to allow wrapping.
Use duct tape first for positioning, then zip system tape for permanent sealing. Go up about 4 feet on each pier.
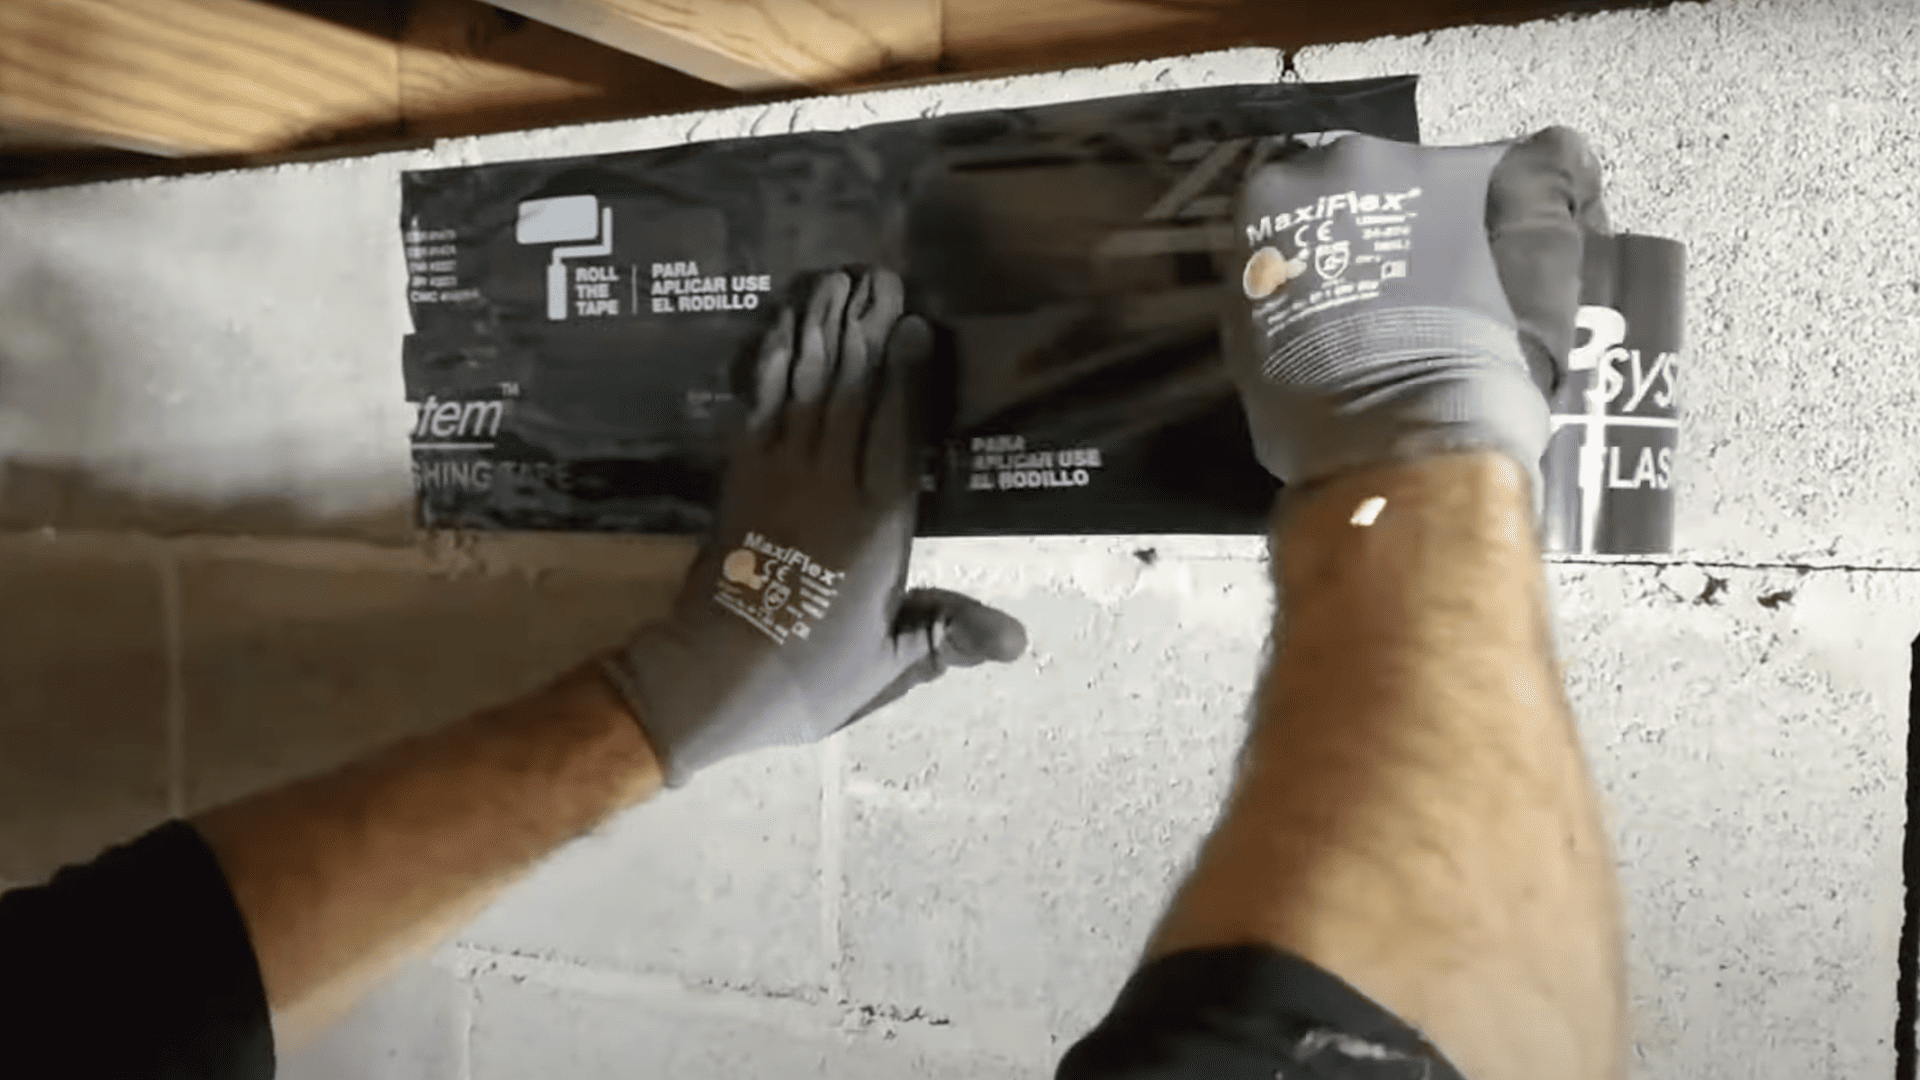
Step 6: Install Wall Barrier
Apply barrier material 2-4 feet up the walls, depending on your needs. Use duct tape for initial positioning to hold material in place.
Secure permanently with zip system flashing tape and use a zip roller to ensure proper adhesion to concrete surfaces.
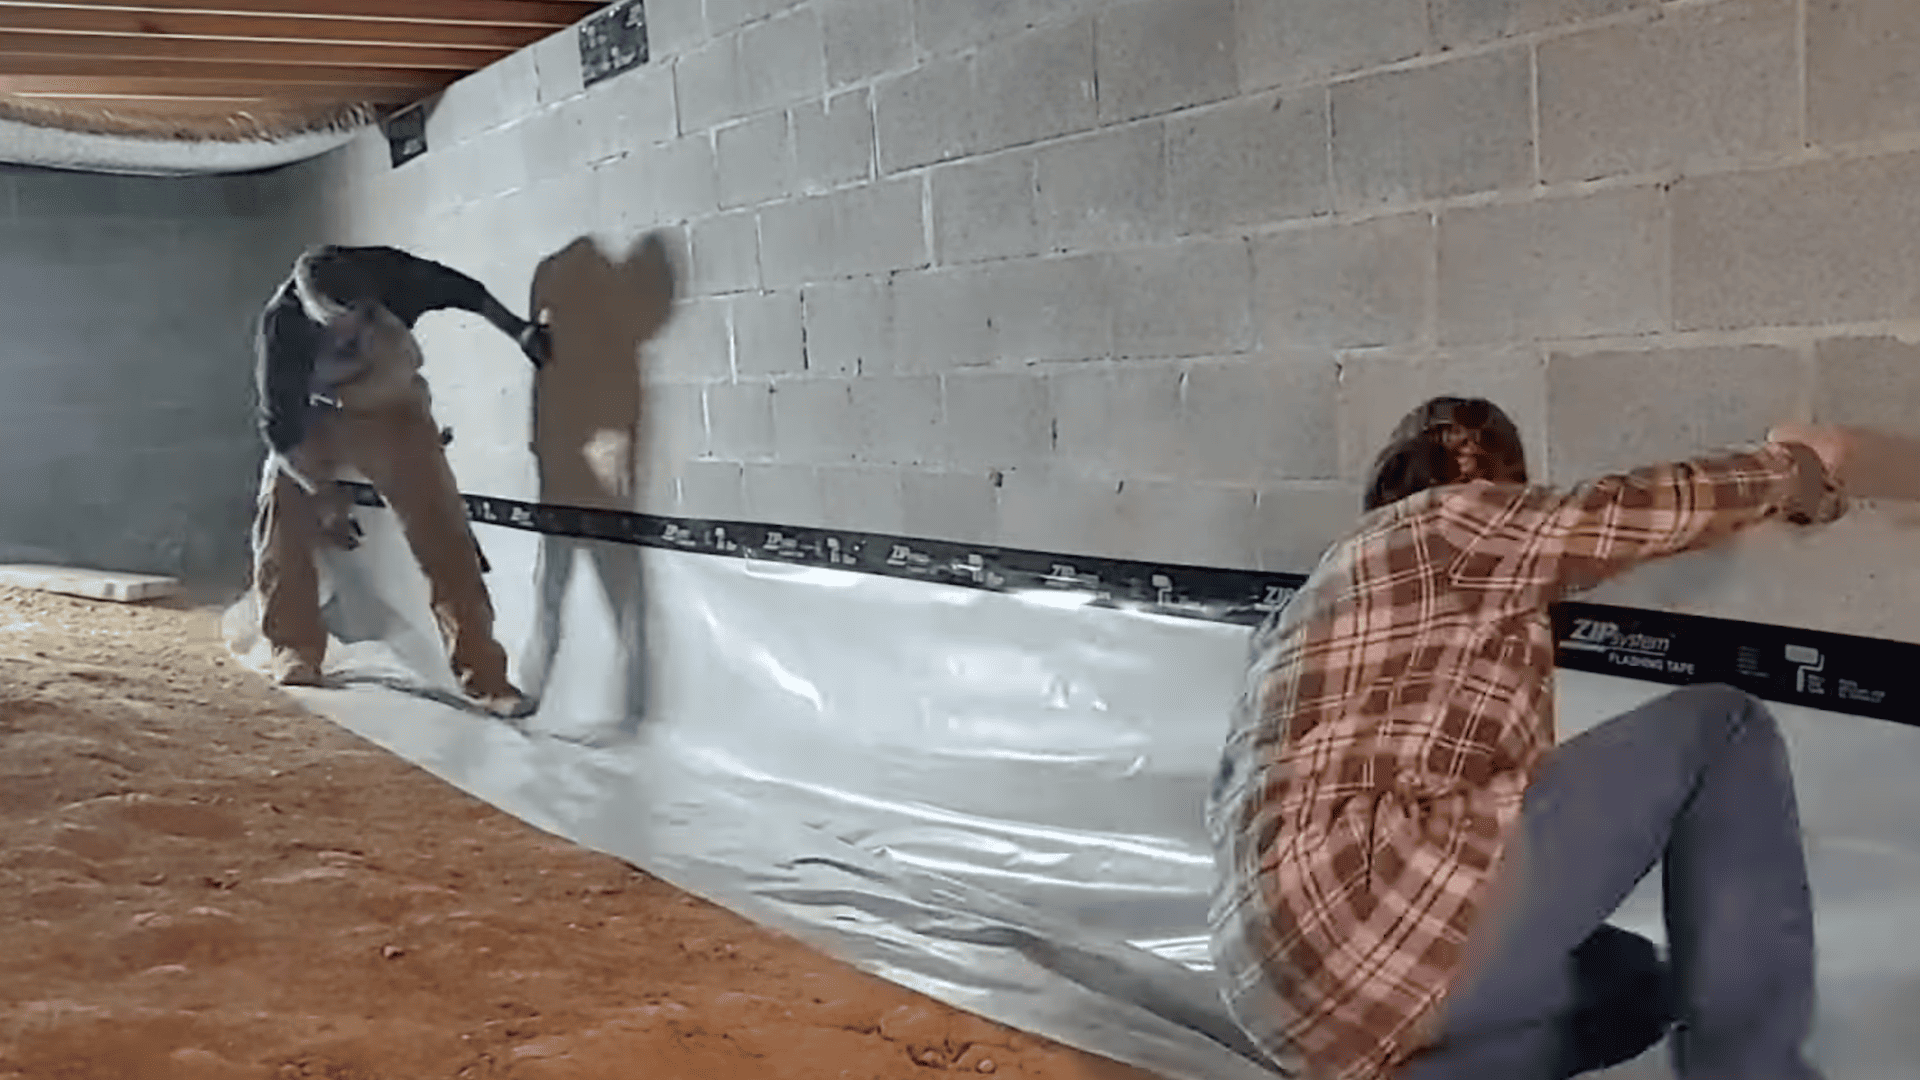
Step 7: Install Floor Barrier
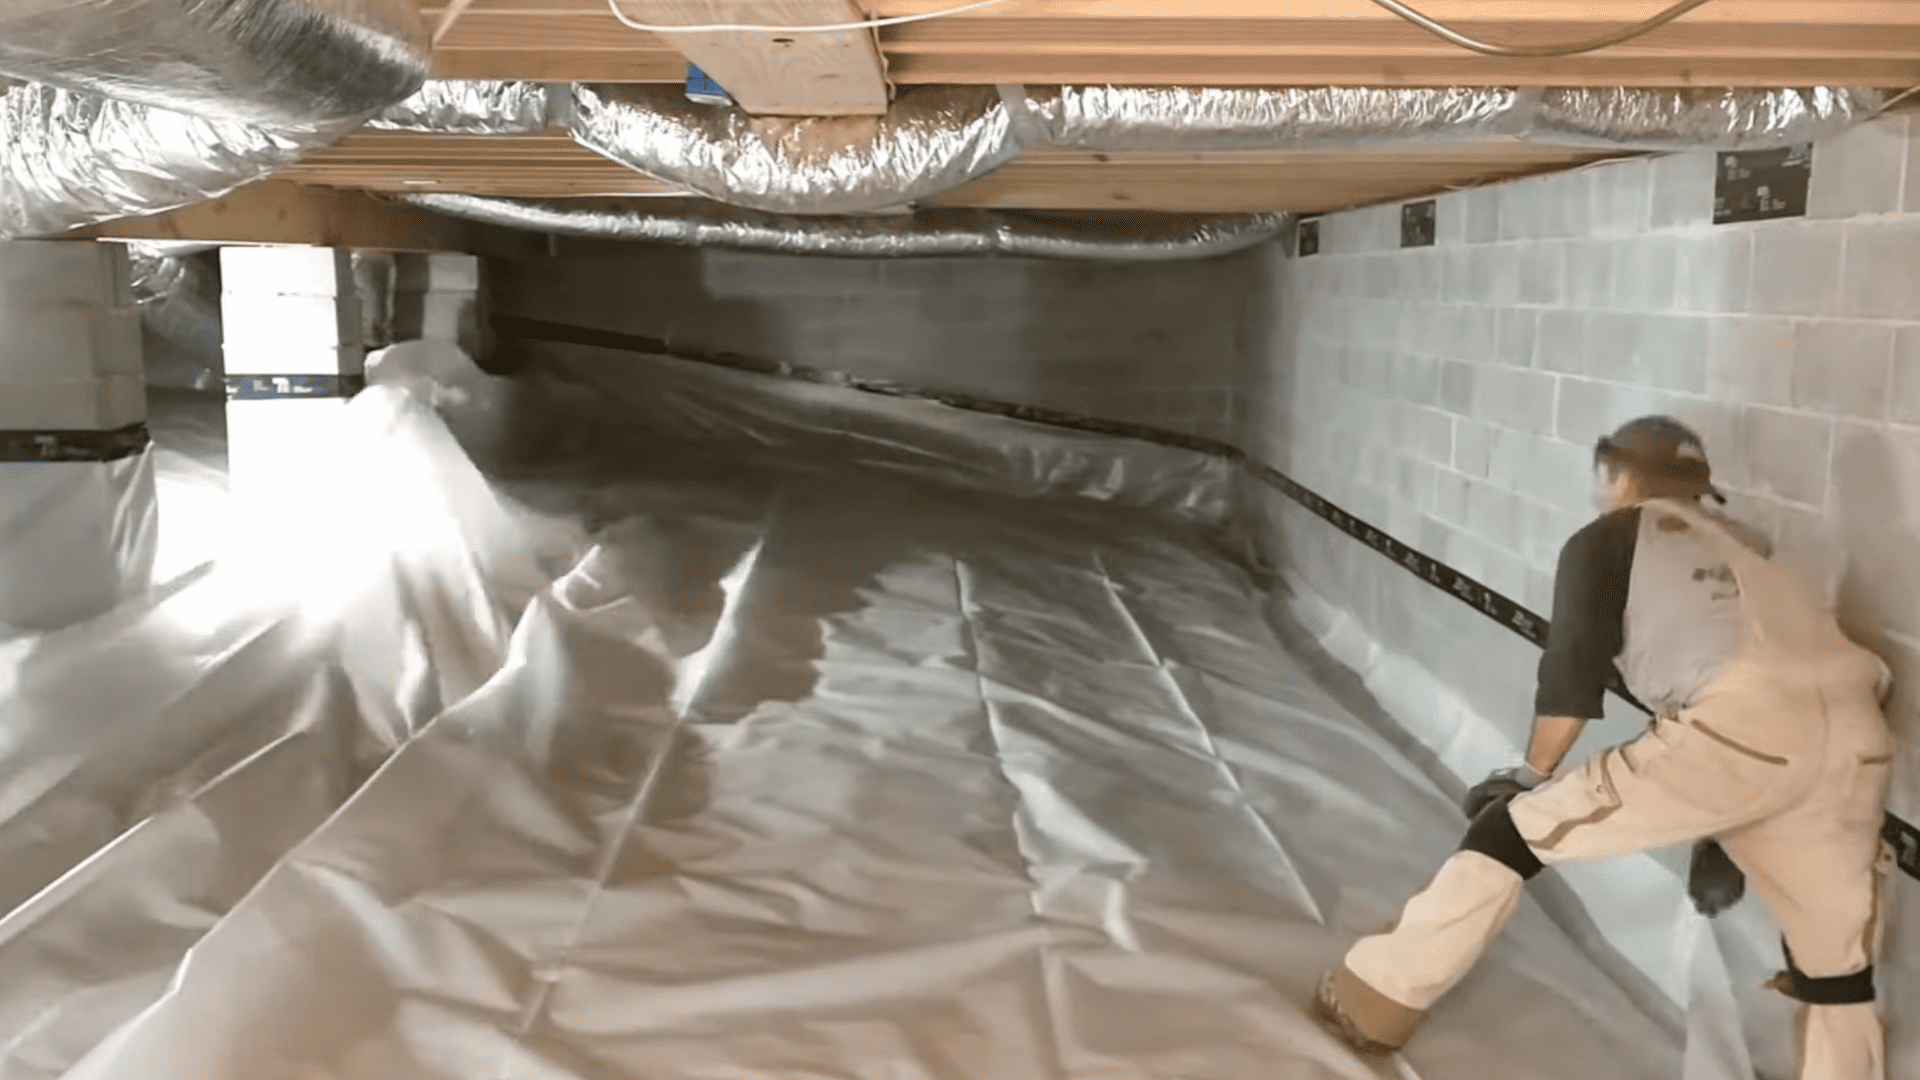
Unfold your pre-cut sections across the crawl space floor. Ensure proper overlap between sections with 6-8 inches of minimum coverage.
Use vapor barrier stakes in uneven areas to prevent tearing. Tape over stakes for protection and safety.
Step 8: Seal All Seams
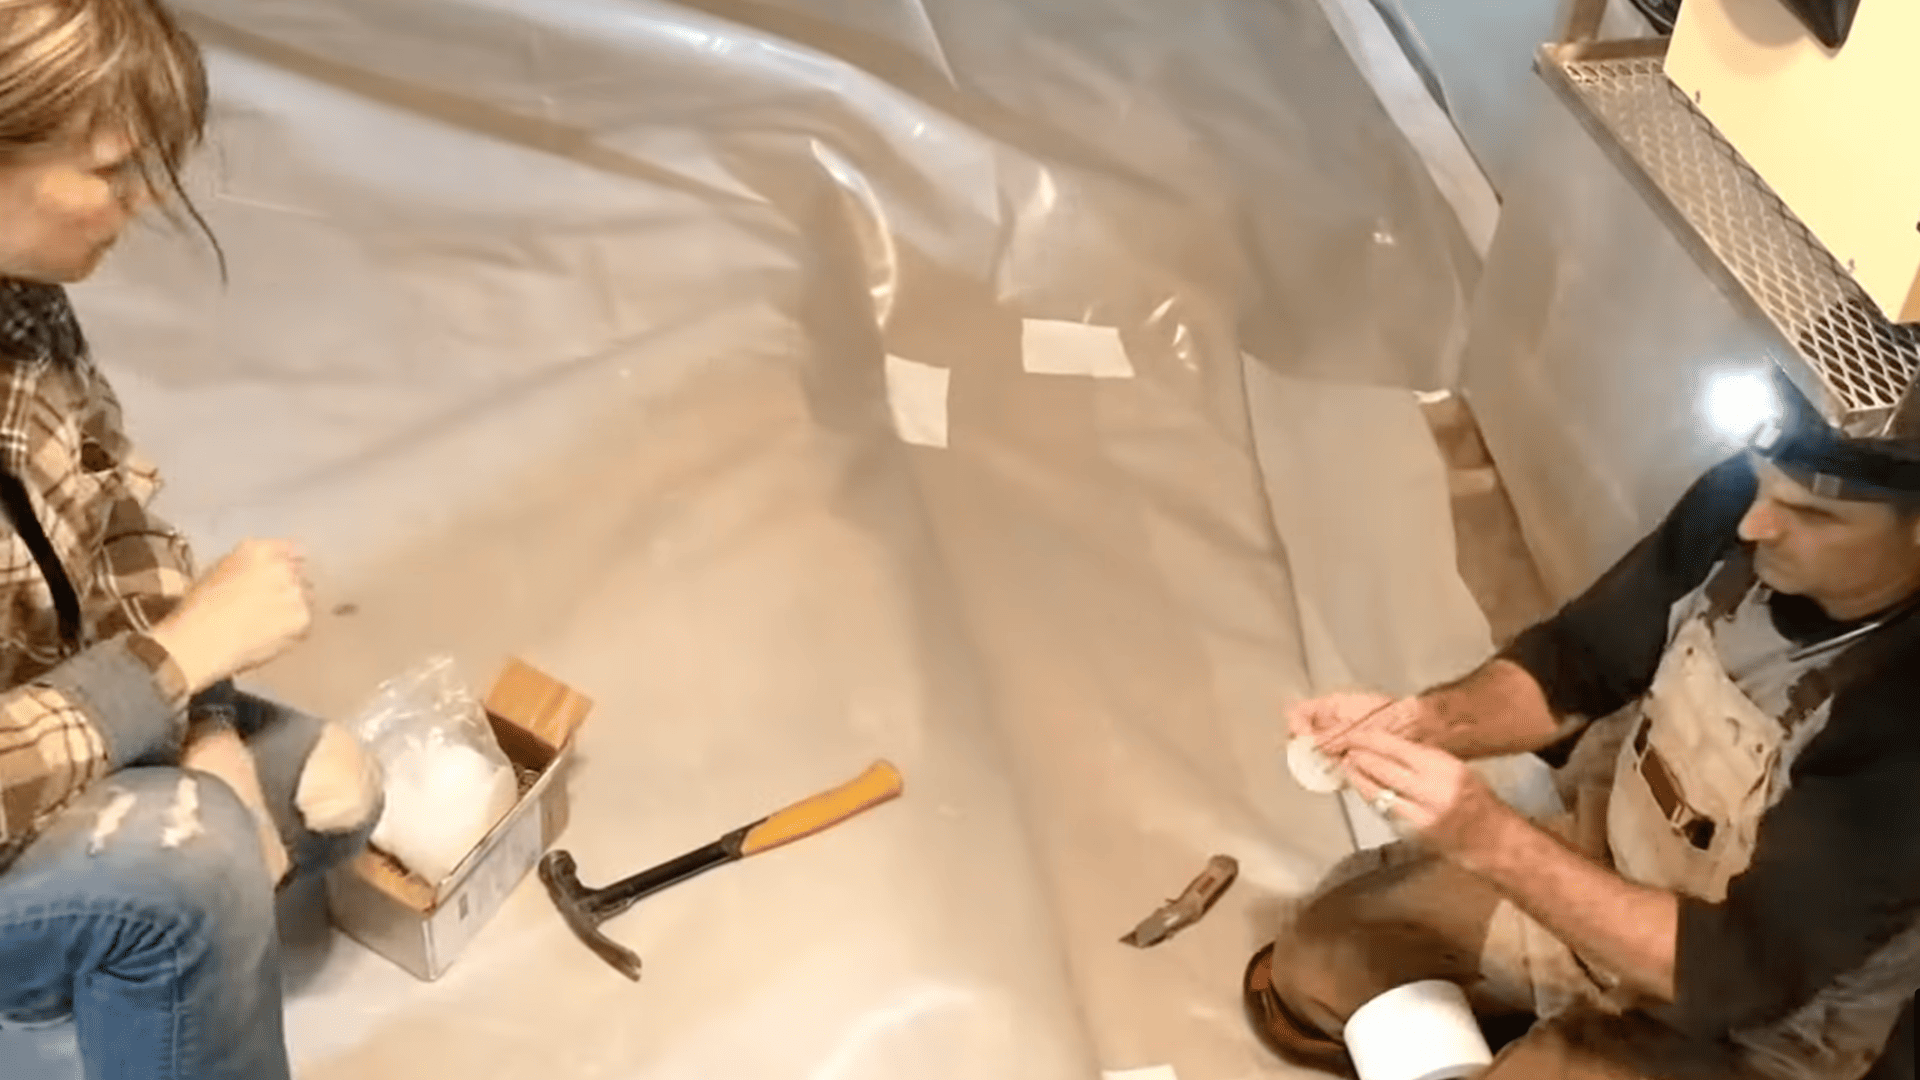
Use vapor barrier seam tape on all connections between pieces. Tape around each pier where the barrier meets the wrapping. Ensure no gaps remain anywhere in the system and check all edges for proper sealing.
Video Tutorial
I’d like to give credit to You Can Do It for their informative video, as a reference for this guide.
When to Get Professional Vapor Barrier Installation?
Consider hiring professionals for crawl space vapor barrier installation when dealing with low clearance spaces, extensive mold problems, or structural damage that requires specialized expertise.
- Crawl spaces with very low clearance (under 2 feet)
- Extensive mold problems requiring remediation
- Full encapsulation projects with wall sealing and dehumidifier installation
- Asbestos or other hazardous materials are present
- Structural damage or electrical work is needed
- Physical limitations preventing safe crawl space work
Professional installation ensures you achieve optimal before and after crawl space vapor barrier results, especially for full encapsulation projects that include dehumidifier installation and complete wall sealing.
What Does Crawl Space Vapor Barrier Installation Cost?
A crawl space vapor barrier installation typically costs $600-$2,400 for DIY projects or $2,400-$4,800 for professional installation on an average 1,200 square foot space.
The before and after crawl space vapor barrier investment pays for itself through reduced energy costs, prevented mold damage, and improved home value over time.
Cost Breakdown by Components
Understanding each component helps you budget accurately for your crawl space vapor barrier project:
| Component | DIY Cost | Professional Cost |
|---|---|---|
| Vapor Barrier Material | $0.50 – $2.00 per sq ft | Included in labor |
| Sealing Materials | $75 – $225 total | Included in labor |
| Prep Work & Cleaning | Your time | $300 – $800 total |
| Labor | $0 | $1.50 – $2.50 per sq ft |
| Permits | $50 – $200 | $50 – $200 |
| Moisture Issues | $200 – $1,000 | $500 – $2,000 |
Factors Influencing Price
- Crawl space size and accessibility
- Material thickness (6-mil vs. 10-mil plastic)
- Existing moisture or mold problems
- Site preparation requirements
- Regional labor costs
The Bottom Line
Your crawl space doesn’t have to be a source of moisture problems and poor air quality. A properly installed vapor barrier creates a protective shield that stops ground moisture from entering your home.
The difference between before and after crawl space vapor barrier installation is remarkable, with homeowners reporting fresher air, lower humidity levels, and reduced energy costs.
DIY installation or professional services both deliver excellent results when investing in a crawl space vapor barrier upgrade. Your family will breathe easier, your home will feel more comfortable, and you’ll protect your property’s structural integrity.
Take action today to address your crawl space moisture issues. Your future self will thank you for making this important home improvement decision that creates a healthier living environment for everyone.