With some careful work, a second-hand dresser can become a wonderful bathroom vanity. This method saves money and adds a personal touch to your bathroom. Old dressers often cost less than store-bought vanities and offer more storage space.
They also bring the warmth and character that mass-produced items lack. The wood texture and unique details make your bathroom feel cozy and lived-in.
This project works well for small bathrooms where standard-sized vanities might not fit.
You can pick a dresser that matches your space exactly matches your space. You’ll have fun and the satisfaction of creating something useful.
When guests ask about your bathroom, you’ll feel proud to say you made it yourself.
This guide will show you how to turn an ordinary dresser into a functional bathroom vanity that looks great and stands up for daily use.
How to Turn a Dresser into a Bathroom Vanity: A Complete Guide
Essential Tools
| Hand Tools | Power Tools | Measuring & Marking |
|---|---|---|
| • Paintbrush | • Orbital sander | • Speed square |
| • Plastic putty knife | • Jigsaw | • Measuring tape |
| • Wrench | • Drill | • Pencil |
| • Scissors | • Hole saw attachments (2¼” and 1½”) | • Tack cloth |
| • Clamps | • Nail gun |
Materials Checklist
| Base Components | Plumbing Supplies | Finishing Products | Modification Materials |
|---|---|---|---|
| • Used wooden dresser | • Vessel sink | • Citrus strip | • ¼” thick wood pieces |
| • New drawer pulls (optional) | • Faucet set | • Mineral spirits | • 1½” × ¼” wood strips |
| • Drain kit with P-trap | • Wood conditioner | • Wood glue | |
| • Water supply lines | • Wood stain | • All-purpose waterproof sealant | |
| • 1½” plumbing adapter | • Water-based polyurethane | • PVC cement and primer | |
| • Seal tape | • Fine-grit sandpaper | ||
| • Extra-fine grit sandpaper |
Easy step-by-step guide
Step 1: Find and Prepare Your Dresser

Find a dresser that fits your bathroom size. Look for one made of solid wood in good condition. Measure your space and the dresser to ensure it will fit.
Remove all hardware from the dresser, including drawer pulls, knobs, and any decorative elements you don’t want. Take out all the drawers and set them aside.
Step 2: Strip the Old Finish

Apply a thick layer of citrus strip to the entire dresser and drawer faces using a bowl and paintbrush. Let it sit for about 30 minutes. Test a small area to see if the finish is soft. Use a plastic putty knife to scrape off the old finish.
Clean the wood with mineral spirits on a rag to remove leftover residue from the stripper. Then, let the dresser dry completely.
Step 3: Sand the Wood

Once dry, use an orbital sander with fine-grit sandpaper to remove any remaining stain. Switch to extra-fine grit sandpaper to create a smooth surface for the final pass. Be careful not to sand away the natural wood grain texture.
After sanding, wipe down the entire dresser with a tack cloth to remove all dust.
Step 4: Apply Wood Conditioner and Stain

Using a clean rag, apply a wood conditioner to prepare the wood for staining. Let it sit for five minutes, then wipe off any excess. With a rag, apply the first coat of stain, following the wood grain.
Wipe off excess stain and allow it to dry. Add additional coats until you reach your desired color (for example, three coats of Early American stain).
Step 5: Seal with Polyurethane

After completely drying the stain, apply three coats of water-based satin clear polyurethane with a paintbrush. Let each coat dry completely before applying the next. Allow the final coat to cure for three days before moving the dresser into the bathroom.
Step 6: Prepare for Plumbing

Place the dresser in its final position in the bathroom. Remove the drawers and set them aside. If the dresser has wheels on the legs, remove them to create more space for plumbing.
Locate the middle of the dresser (measure the width and divide by 2). Remove any middle support pieces that might block the plumbing path. Use a jigsaw to cut a larger opening in the back to access pipes.
Step 7: Drill Holes for the Sink and Plumbing

Mark the center point of the dresser top. From this point, mark 7½ inches from the back for the drain hole. Mark 4½ inches behind this point for the water line hole.
Drill small pilot holes at both marks. Test-fit your sink above these holes to confirm placement. Use a 2¼-inch hole saw to drill the drain hole and a 1½-inch hole saw for the water lines.
Step 8: Connect the Plumbing

Cut old plumbing pipes along enough to connect new parts. Prime the waste water pipe and a 1½-inch adapter before joining them with PVC cement. Remove the tailpipe lock nut and washers.
To install the drain, Run a bead of waterproof sealant around the underside of the drain flange. Insert the drain into the hole, then attach the drain, friction washer, and nut to secure it.
Step 9: Install the Faucet and Sink

Remove the lock nuts and washers from the faucet, keeping the rubber flange in place. Insert the faucet through the sinkhole. Reattach the rubber and metal washers, then thread the lock nuts onto the bolts.
Hold the sink up to ensure the faucet is straight before fully tightening it. Apply waterproof sealant along the raised edges on the bottom of the sink. Place the sink on the dresser top, guiding water lines through the back hole and aligning the drain with its hole.
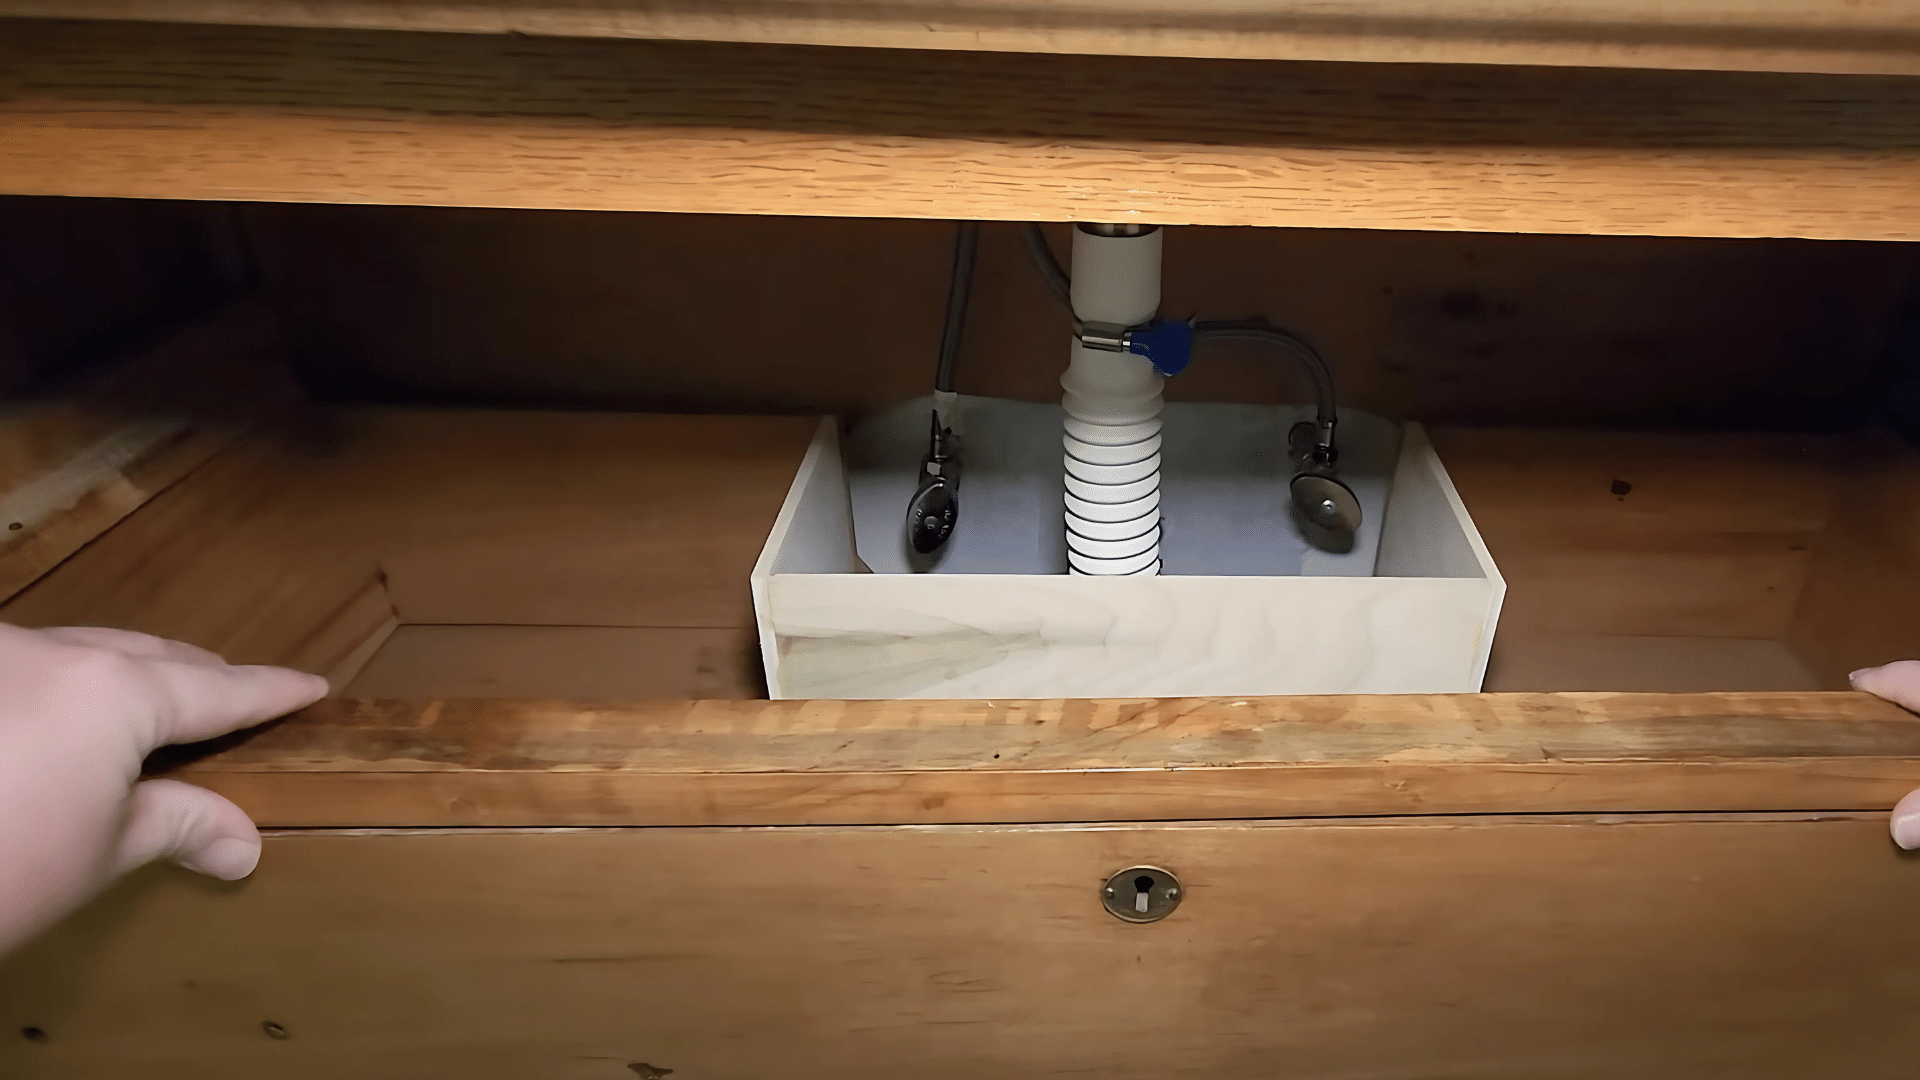
Step 10: Modify the Drawers

For the bottom drawer, mark the area where the P-trap hangs down. Find the widest points where water valves are located for the middle drawer and mark these on the drawer’s back.
Slide each drawer in as far as possible before hitting the plumbing, then measure how far it sticks out. Transfer these measurements to create U-shaped cutouts on the drawers. Use a ¾-inch spade drill bit to make corner holes, then cut along marked lines with a jigsaw.
Step 11: Reinforce Modified Drawers

Cut ¼-inch thick wood pieces to box in the U-shaped cutouts. Add side pieces first, making them slightly longer than the cutout. Apply wood glue along the edges and secure with a nail gun.
Add a middle piece between the sides, gluing and nailing it. Add a 1½-inch by ¼-inch support strip across the underside of each drawer for added strength.
Step 12: Finish and Install
Reinsert the modified drawers to ensure they fit properly around the plumbing. If desired, install new drawer pulls. Apply a final bead of waterproof sealant around the sink’s base and smooth it with your finger for a clean look.
Video Tutorial
Check out this YouTube video for a detailed step-by-step Guide on turning a dresser into a vanity.
Maintenance and Care of dresser vanity
1. Regular Cleaning
Simple cleaning habits can keep your dresser vanity looking fresh. To prevent damage to the wood finish, wipe up water spills promptly. Clean the vanity surface with a soft, damp cloth and mild soap.
Avoid harsh cleaners that might damage the polyurethane coating. Keep drawer tracks clean and free of debris for smooth operation.
2. Preventive Measures
Protect your vanity from everyday damage with these simple steps. Use felt pads on items placed on the vanity to prevent scratches. Avoid placing extremely hot items directly on the wood surface. These small actions will extend the life of your wooden vanity.
3. Routine Maintenance
Set a schedule for basic upkeep to ensure your vanity stays in top shape. Check under the sink monthly for any leaks or moisture. Tighten any loose connections in the plumbing system as needed.
To maintain water resistance, apply a fresh coat of polyurethane yearly. Treat the wood surface with furniture wax twice a year for added protection.
Common Mistakes to Avoid while turning a dresser into a vanity
| Common Mistake | Description |
|---|---|
| Skipping proper sealing | Wood and water don’t mix well without adequate protection. |
| Rushing the curing time | Not allowing finishes to dry fully leads to poor results. |
| Using incorrect sink size | Make sure your sink fits the dresser proportionally. |
| Forgetting seal tape | Always use seal tape on threaded plumbing connections. |
| Poor measurements | Double-check all measurements before cutting any holes. |
| Ignoring weight limits | Make sure your dresser can support the weight of a sink with water. |
| Cutting corners on waterproofing | Take time to seal all areas around the sink properly. |
| Forgetting about drawer space | Plan drawer modifications early to maximize storage. |
| Poor ventilation | Ensure good airflow in the bathroom to prevent moisture damage. |
| Not leveling the dresser | An uneven vanity can cause plumbing and usage issues. |
Conclusion
Turning an old dresser into a bathroom vanity combines practicality with personal style. This project lets you create a one-of-a-kind piece that fits your exact needs.
The wood tones bring warmth to what might otherwise be a cold, plain room. Beyond the good looks, you gain storage space that works much better than standard vanities. The feeling of using something you made yourself adds joy to daily routines.
This project teaches useful skills and builds confidence for future home improvements. As you use your new vanity day after day, you’ll notice details you might want to add or change in your next project.
Your bathroom now has a focal point that tells a story and showcases your creativity. This upcycled vanity will serve you well for many years with proper care.
So take your time, follow the steps carefully, and enjoy the process of creating something truly special for your home.