Transform Your Space with DIY Pottery Barn Pumpkin Dupe
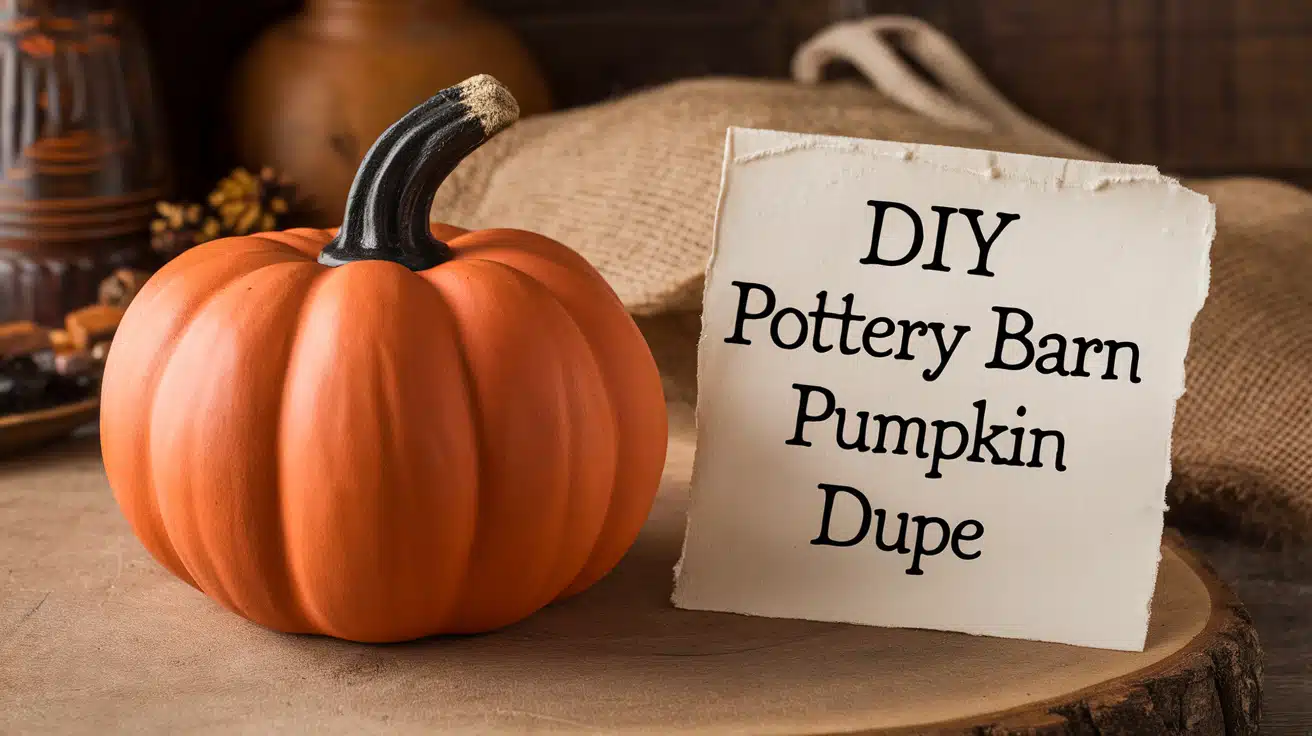
Fall decorating can drain your wallet, especially when you love Pottery Barn’s beautiful pumpkins. I know the feeling – I’ve stared at their $89 decorative pumpkins, wishing I could fill my home with them.
But here’s good news: I’ve found a way to make nearly identical pumpkins at home for less than $15 each. These dupes look as good as the expensive ones, and nobody will know the difference.
In this post, I’ll show you my step-by-step method for creating these budget-friendly pumpkins.
I’ll share the exact materials needed, simple techniques that work every time, and helpful tips for making your pumpkins look store-bought.
Get ready to save money while styling your home for fall!
Why Are Pottery Barn Pumpkin Dupes so Popular?
Money matters! At $89 per pumpkin, Pottery Barn’s fall decor can quickly add up. I’ve seen many home decorators turn to dupes for good reasons.
Let me tell you why these copies have caught everyone’s attention:
- Major Cost Savings: I can make 5-6 pumpkins for the price of one Pottery Barn version. That’s a huge win for my wallet!
- Look Just Like the Original: My homemade pumpkins match the store versions perfectly with the right materials and steps. Even my picky mother-in-law couldn’t spot the difference.
- Personal Touch: I get to pick my colors and sizes, which means my pumpkins fit my home’s style exactly as I want them to.
- Quality Control: When I make them myself, I control how strong and lasting they’ll be. There will be no surprises with poor construction or weak spots.
- Fun Project: Making these pumpkins turns into a fun afternoon activity. I often invite friends over, and we create our fall decor together.
Tools and Materials You’ll Need
| Tools | Materials |
|---|---|
| Sandpaper | Smooth pumpkin base |
| Damp paper towel | Terracotta paint |
| Paintbrushes | White paint (optional) |
| Sanding block (optional) | Clear matte sealant |
| Scissors (for décor) | Flowers, ribbons, or candles (optional) |
How to Create a DIY Pottery Barn-Inspired Terracotta Pumpkin
1. Prepare the Pumpkin Base
- Select Your Pumpkin: Choose a smooth pumpkin base made of ceramic, resin, or hard plastic. Avoid glittery or soft styrofoam pumpkins, as they may not hold the paint well.
- Sand the Surface: Use fine-grit sandpaper to lightly sand the pumpkin’s surface. This step creates a slightly rough texture, helping the paint adhere better.
- Inspect the Pumpkin: Look for any uneven areas and smooth them out with additional sanding. Ensure the surface is consistent for painting.
2. Clean the Surface
- Remove Dust and Debris: Use a damp paper towel or soft cloth to wipe down the entire pumpkin, including the stem and crevices.
- Ensure Dryness: Allow the pumpkin to air dry or pat it dry with a clean cloth. The surface should be completely dry before applying paint.
3. Apply the First Coat of Paint
- Prepare the Paint: Use a terracotta-textured paint containing fine granules to mimic real terracotta. Stir the paint well before application.
- Paint Evenly: Use a medium-sized brush to apply an even coat of paint over the entire pumpkin, including the stem. Use a smaller brush for precision for detailed areas like cut-out eyes or mouths.
- Cover All Areas: Ensure no bare spots are visible. Check the underside and edges for full coverage.
- Dry Thoroughly: Place the painted pumpkin in a well-ventilated area and let it dry completely. Depending on the paint, this may take 2-3 hours.
4. Apply a Second Coat of Paint
- Inspect the First Coat: Check if the first coat is dry and even. If there are any thin spots, lightly sand them with fine-grit sandpaper.
- Add Another Layer: Apply a second coat of terracotta paint to intensify the texture and color. Use the same technique as the first coat to ensure an even application.
- Focus on Crevices: Specialize on areas like the stem and carved details. These should be fully covered to achieve a uniform terracotta look.
- Dry Again: Allow the second coat to dry completely. For best results, this could take several hours or overnight.
5. Highlight with White Paint (Optional)
- Dry Brush Technique: To create a weathered effect, lightly dip a brush into white terracotta paint and dab off excess paint on a paper towel.
- Add Highlights: Brush along the pumpkin’s creases and raised edges to create subtle highlights. Focus on natural curves and indentations.
- Blend the Paint: Use a sanding block to soften the white paint, blending it into the terracotta base for a seamless, natural finish.
- Review the Effect: Step back and check the highlights. Adjust as needed to achieve your desired look.
6. Seal the Pumpkin (Optional for Durability)
- Use a Matte Sealant: Choose a clear sealant to preserve the paint finish. Avoid glossy sealants, as they can detract from the terracotta look.
- Apply Evenly: Spray or brush on the sealant in light, even layers. Allow each layer to dry before adding another.
- Protect for Outdoor Use: If the pumpkin will be displayed outdoors, ensure the sealant provides weather resistance.
7. Decorate and Display
- Fill the Pumpkin (Optional): If your pumpkin is hollow, consider using it as a vase or container. Add flowers, ribbons, or candles for extra charm.
- Arrange Creatively: Place the pumpkin in your desired location, such as a mantel, porch, or dining table. Mix and match sizes for a cohesive look.
- Enhance the Display: Pair your terracotta pumpkins with fall-themed decorations like leaves, gourds, or fairy lights for added impact.
- Maintain the Look: Periodically dust the pumpkins to keep them looking fresh throughout the season.
For a more detailed tutorial on DIY Pottery Barn-Inspired Terracotta Pumpkin, check out the video below:
Common Challenges I Faced
Let me share the tricky parts of my pumpkin-making journey and how I solved them:
- Is the paint peeling off? Sand lightly and use a primer first – this simple prep step saves hours of touch-ups later.
- Clumpy paint spots? Mix paint with water and grab a soft foam brush for smooth, even strokes.
- Are paint cracks showing up? Work at room temperature, use quality acrylics and let each coat dry fully.
These fixes turned my failed attempts into perfect pumpkins. Do you want any specific tips? I’d love to share what worked best during all my DIY trials!
Customization Ideas for Your DIY Pumpkin
Color Variations
I’ve found endless ways to change pumpkin colors. I mix white paint with water and brush it lightly for a whitewashed look.
Black pumpkins need 2-3 thin coats for full coverage. I mix orange and brown paint for terracotta to match real clay perfectly.
Embossing and Carving
Before painting, I like adding texture to foam pumpkins. Using a dull pencil, I press simple patterns into the surface. Small cuts and grooves create aged effects.
The key is keeping designs subtle – less is more with these details.
Incorporating Accessories
Small touches make pumpkins special. I wrap thin ribbons around stems or add burlap bows. Metallic paint works great for stem highlights.
Lace pieces glued near the base create a fancy trim that catches light beautifully.
Seasonal Adaptations
My pumpkins change with the seasons. For Halloween, I add small battery lights inside hollow ones, and I spray them with glitter paint at Christmas.
By spring, they get pastel makeovers. These tweaks help me use them longer.
Showcasing Your Creation: Display Ideas for DIY Terracotta Pumpkins
1. Windowsill Display
Line smaller pumpkins along a windowsill with seasonal greenery for a subtle yet festive look.
- Best Rooms/Where to Use This Idea: Living rooms, bedrooms, or kitchens with windows facing natural light.
- Complementary Decor Elements: Add string lights, small potted plants, or decorative berries for a layered look.
- Budget-Friendly Tips: Use faux greenery or repurpose branches and leaves from your garden to save costs.
2. Fireplace Hearth
Position larger pumpkins on the hearth, complemented by lanterns or tall candlesticks for a dramatic effect.
- Best Rooms/Where to Use This Idea: Living or family rooms with a visible fireplace.
- Complementary Decor Elements: Include cozy blankets, a fall garland, or pinecones around the hearth.
- Budget-Friendly Tips: Look for thrift store candlesticks or use LED candles for a cost-effective option.
3. Sideboard Accent
Use pumpkins to frame a mirror or artwork on a buffet or sideboard. Add dried wheat or eucalyptus stems for texture.
- Best Rooms/Where to Use This Idea: Dining rooms, entryways, or living rooms with a sideboard.
- Complementary Decor Elements: Pair with vases, wooden trays, or small decorative bowls for variety.
- Budget-Friendly Tips: To reduce expenses, gather dried stems or eucalyptus from local markets or nature walks.
4. Porch Steps
For a festive entrance, line terracotta pumpkins along your porch steps with potted mums, lanterns, or hay bales.
- Best Rooms/Where to Use This Idea: Outdoor porch areas or patio steps leading to the front door.
- Complementary Decor Elements: Add hay bales, potted chrysanthemums, and rustic lanterns with LED candles for extra charm.
- Budget-Friendly Tips: Use thrifted lanterns or repurpose planters for mums. For an affordable touch, collect hay from local farms.
5. Front Door Display
Arrange pumpkins of various sizes near the door, paired with a seasonal doormat and a fall wreath.
- Best Rooms/Where to Use This Idea: Front porch or entryway areas directly outside your home.
- Complementary Decor Elements: To enhance the look, incorporate a harvest-themed doormat, a hanging fall wreath, and small gourds.
- Budget-Friendly Tips: Create a DIY fall wreath using dollar-store supplies and paint pumpkins from previous seasons for a refreshed design.
6. Add Pumpkins to Kitchen Counter Corners
Mix pumpkins with dried herbs for a cozy, rustic kitchen vibe.
- Best Rooms/Where to Use This Idea: Kitchen counters, especially corners near windows or under cabinets.
- Complementary Decor Elements: For an enhanced look, add small jars of spices, wooden cutting boards, or a bowl of seasonal fruit.
- Budget-Friendly Tips: Use faux pumpkins and herbs from discount stores or dry fresh herbs from your garden.
7. Large Pumpkin Next to a Reading Chair
Pair the pumpkin with a soft blanket for a warm and inviting reading nook.
- Best Rooms/Where to Use This Idea: Living rooms, bedrooms, or any quiet reading corner in your home.
- Complementary Decor Elements: For extra comfort, add a side table with a lamp, a small stack of books, and a cozy throw pillow.
- Budget-Friendly Tips: Use a thrifted blanket or repurpose an existing one, and look for a faux pumpkin that you can reuse each year.
8. Entryway Table
Welcome guests with a display of pumpkins paired with a fall wreath and decorative pinecones.
- Best Rooms/Where to Use This Idea: Entryways or foyers with a console table.
- Complementary Decor Elements: Layer a small vase of seasonal flowers, a decorative mirror, or a rustic wooden tray.
- Budget-Friendly Tips: Collect pinecones from your yard and craft a DIY wreath using affordable supplies from a dollar store.
9. Shelf Styling
Pair pumpkins with stacked books, small plants, and framed fall-themed artwork for a seasonal shelf vignette.
- Best Rooms/Where to Use This Idea: Living rooms, bedrooms, or home offices with open or built-in shelves.
- Complementary Decor Elements: Add tiny string lights, decorative bookends, or small figurines for extra character.
- Budget-Friendly Tips: Use thrifted books, repurpose small pots for plants, and print free seasonal artwork to frame.
Wrapping It Up
Now you know all my secrets for making beautiful DIY pumpkins that look like their pricey cousins.
I started this project to save money, but it became something more – a fun way to add personal touches to my home decor.
Remember, your first pumpkin might not be perfect, and that’s okay! I had my share of paint mishaps before getting it right. Take your time, follow the steps, and soon you’ll have stunning pumpkins that fit your style and budget.
Ready to start? Grab your supplies and try making one this weekend. I’d love to see how your pumpkins turn out! Share a photo in the comments below, or ask me any questions if you get stuck.
Happy crafting!

