As someone who loves working with wood, I’ve tested different methods to make wood look like driftwood.
In this guide, I’ll show you three proven techniques using common household items like vinegar, tea, and paint.
These methods are safe, simple, and give excellent results. You’ll learn how to transform plain wood into pieces that look naturally aged by salt water and sun.
Let me walk you through each approach step by step.
Guide 1: Key West-style Driftwood Look
Materials Needed
Tools:
- Grinder, angle grinder, or Dremel with a wood tool.
- Paintbrush.
- Sandpaper.
Paint and Finishing Supplies:
- Turquoise blue paint.
- White latex or acrylic paint (preferably old or textured for weathering).
- Black paint (optional).
- Water.
Aging Solution:
- Steel wool.
- White distilled vinegar.
Safety Gear:
- Ventilated workspace (optional mask for fumes).
- Gloves (optional).
Additional Items:
- Plastic container.
- Paper towel or newspaper.
- Pre-cut wood pieces.
Step 1: Preparing the Wood
- Use a grinder, angle grinder, or Dremel to add organic lines and remove the “machine-made” look.
- Create small damages or streaks for an aged appearance.
Step 2: Mixing the Aging Solution
- Fill a plastic container with white distilled vinegar.
- Add steel wool to the vinegar.
- Let the mixture sit for 1-2 days to allow the steel wool to oxidize.
- Note: Perform this step outdoors or in a ventilated area, as it produces fumes and heat.
Step 3: Base Paint Application
- Mix old white paint with water to create a very diluted, thin wash.
- Apply the whitewash unevenly over the wood using a brush.
- Focus on creating texture by leaving some areas thicker and others thinner.
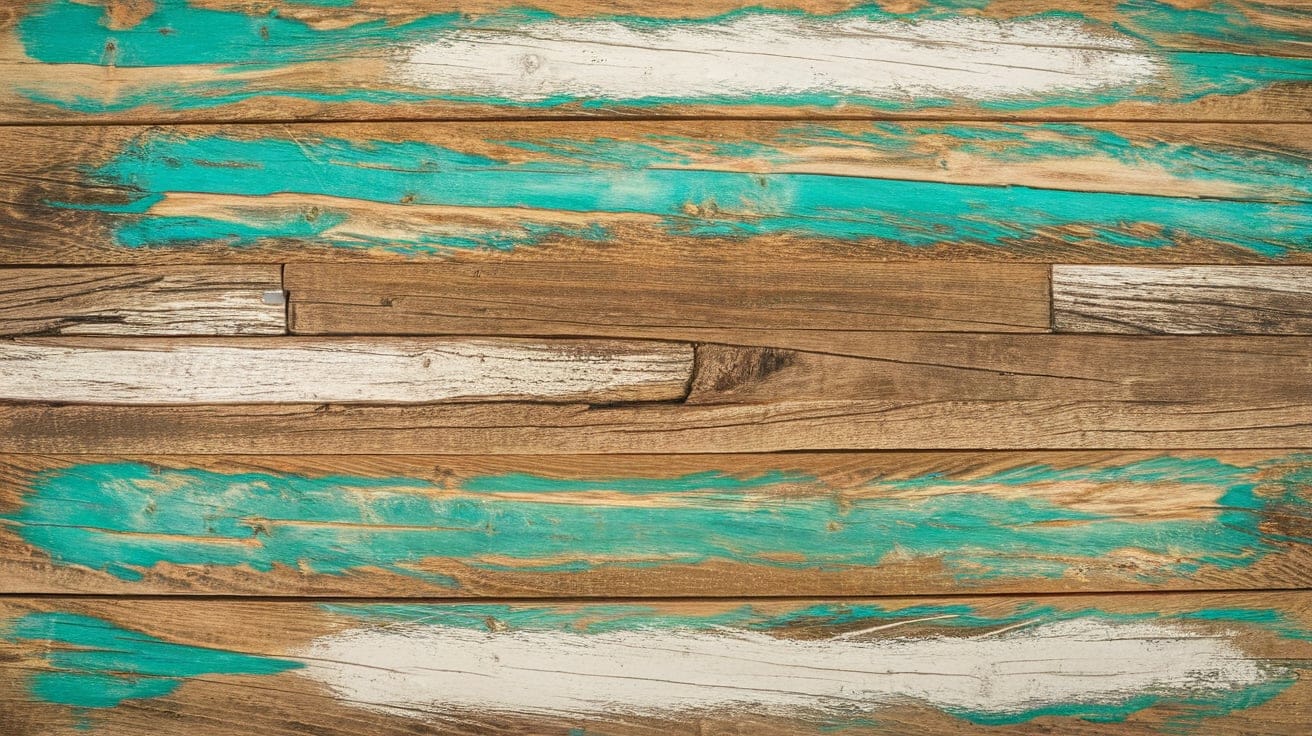
- Apply turquoise paint in small spots and streaks over the wood.
- Use paper towels or newspaper to blot excess paint and create texture.
- Let the paint dry for about an hour.
Step 4: Aging the Wood
- Apply the Aging Solution
- Brush the vinegar and steel wool solution over the dried, painted wood.
- Note: The solution will look clear initially but darken as it reacts with the wood.
- Allow the wood to dry for several hours or overnight.
Step 5: Refining the Look
- Once dry, use sandpaper or a grinder to remove paint from certain areas.
- Focus on creating highlights and lowlights for a more natural look.
- Apply another light whitewash layer to blend colors and achieve a driftwood look.
- Optionally, add more turquoise or blue paint for added vibrancy.
Step 6: Finishing Touches
- Use the treated wood to create the desired piece (e.g., a mirror frame).
- Seal the wood if required to preserve the look and protect it from wear.
Final Notes
- The aged look develops further over time as the solution reacts with the wood.
- Be cautious when handling the vinegar solution—it stains and emits fumes.
- Enjoy your finished project, and remember, imperfections enhance the driftwood aesthetic!
Guide 2: Driftwood Finish Using Glaze
Materials Needed
Glazing Products:
- Van Dyke Brown Glaze (or similar wood-toned glaze).
- Matte finish paint (e.g., antique white or accrue).
- Optional: Scumble or clear glaze medium (to make the glaze easier to manipulate).
Tools:
- 2-inch and 4-inch chip brushes.
- Rags or shop towels.
- A small plate or container for glaze.
Optional Supplies:
- Gilding wax (for accents, if desired).
- Additional colors like gray or black for layering (optional for driftwood effects).
Step 1: Prepare the Surface
- Choose a piece with a matte-finished base. For example, paint the surface with antique white or accrue paint and allow it to dry completely.
- Matte paint is porous and will absorb glaze effectively, contributing to the aged look.
Step 2: Apply the Glaze
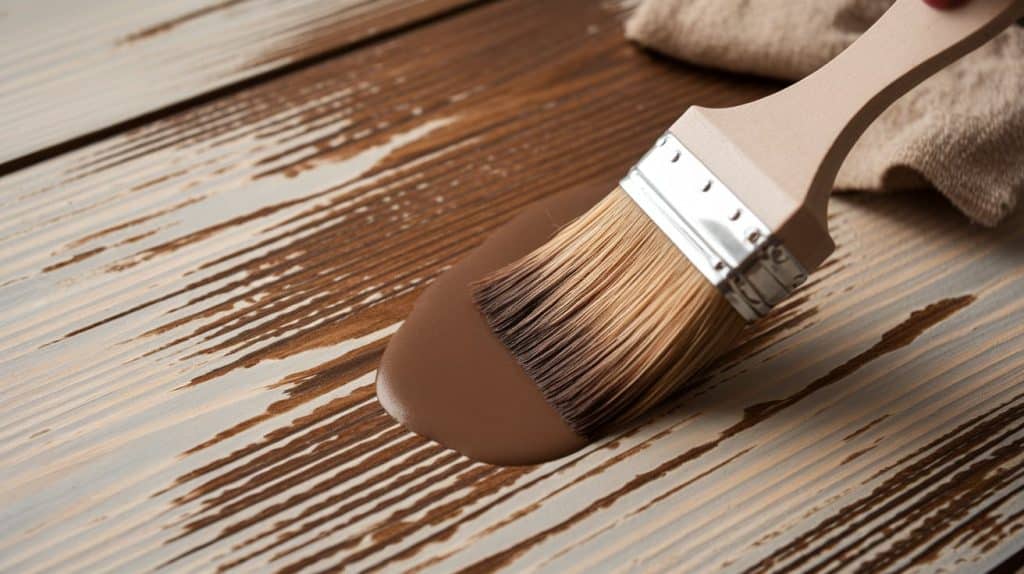
- Open the Van Dyke Brown Glaze and pour a small amount onto a plate or container.
- Dip a 2-inch or 4-inch chip brush into the glaze. Use the larger brush for bigger areas to work efficiently.
- Brush the glaze directly onto the painted surface. Focus on spreading the glaze randomly and unevenly to mimic natural woodgrain patterns.
Step 3: Manipulate the Glaze
- Use a shop towel or rag to wipe back the glaze, softening and blending it into the paint. Work in sections, brushing back the glaze to create light and dark contrast areas.
- Add more glaze to areas where you want darker tones or more definition. Keep the finish haphazard and organic for a realistic woodgrain effect.
Step 4: Adjust the Glaze (Optional)
- If the glaze is difficult to spread or too intense, mix it with scumble (clear glaze medium) to make it easier to manipulate.
- This step is optional and depends on the desired look.
Step 5: Layer Additional Colors (Optional)
- Let the brown glaze dry to create a more driftwood-inspired look, then layer light gray or black glaze on top.
- Use the same technique of brushing and wiping back to build texture and depth.
Step 6: Finishing Touches
- Optional: Add gilding wax to highlight certain areas or add accents for a more antique or elegant look.
- Allow the piece to dry completely.
Final Tips
This technique is ideal for creating an antique or driftwood-inspired look with a warm, aged finish.
- Work Quickly: Matte paint absorbs glaze quickly, so manipulate the glaze promptly to achieve the desired effect.
- Celebrate Imperfection: The goal is to create an organic, uneven finish that resembles natural woodgrain.
- Experiment with Layers: Multiple thin layers of glaze can create depth and dimension.
Guide 3: Aging Wood with Tea, Coffee, and Other Natural Stains

Staining Material
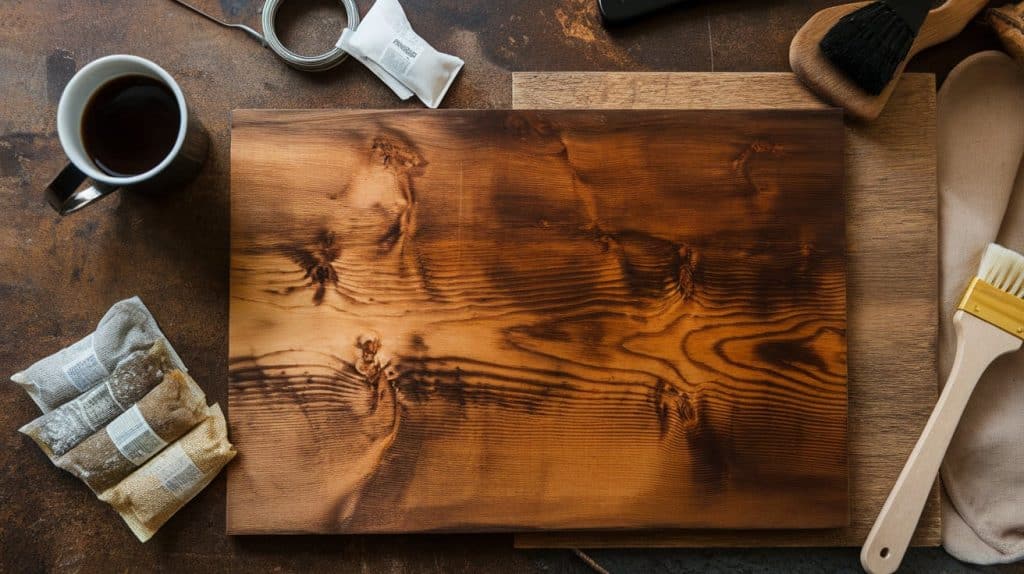
- Tea: Strongly brewed black tea can create warm brown tones.
- Coffee: Double-strength coffee provides a darker, richer color.
- Other Stains: Beet juice, turmeric, or onion skins for unique hues.
Instructions and Tips
1. Brew the Stain:
- Prepare strong tea, coffee, or another natural solution.
- Let it cool before use.
2. Apply the Stain:
- Brush or wipe the stain onto clean, dry wood.
- For deeper colors, apply multiple layers, allowing each to dry before the next.
3. Enhance the Effect:
- Pre-treat the wood with the vinegar-steel wool solution to intensify the weathered look before applying natural stains.
- Sand or distress the wood for added texture.
4. Seal the Finish: Once you achieve the desired look, seal the wood with a clear finish to protect the surface.
Advantages of This Method
- Non-toxic: Safe for use around children and pets.
- Accessible: Uses items readily available in most homes.
- Customizable: Allows for creative experimentation with different stains and layering techniques.
Advanced Tips and Troubleshooting for Driftwood Finish

Customizing the Color Tone
- Blend Colors: Mix different stains, glazes, or paints to achieve the exact hue that complements your decor. For example, combine gray and brown tones for a rustic driftwood look or add black glaze for deeper contrasts.
- Layering: Apply multiple thin layers of different colors, allowing each to dry before adding the next. This creates depth and mimics natural wood variations.
- Dilution: Dilute paints or stains with water to soften tones and achieve a subtler finish.
- Test First: Always test the color on a scrap piece of wood to ensure it matches your vision.
Common Mistakes to Avoid
1. Over-Sanding
- Problem: Removes too much material, leaving the surface too smooth or unnatural.
- Solution: Sand lightly and selectively, focusing on edges and high-use areas to mimic natural wear.
2. Uneven Application
- Problem: Glazes or stains appear blotchy or patchy.
- Solution: Apply products in small sections to maintain consistency. Use a damp rag or brush to blend the edges.
3. Skipping Prep Work
- Problem: Paint or stain doesn’t adhere properly or looks uneven.
- Solution: Clean the wood thoroughly and sand lightly to ensure the surface is ready for application.
4. Rushing the Drying Process
- Problem: Applying layers too quickly leads to streaks or uneven finishes.
- Solution: Allow each layer to dry fully before proceeding to the next.
Fixing Imperfections
1. Blotching
- Cause: Uneven stain absorption due to differences in wood grain or lack of pre-treatment.
- Fix: Sand the blotched area lightly and reapply a thin layer of stain. For future projects, use a wood conditioner or a glaze medium.
2. Streaks
- Cause: Uneven brush strokes or glaze application.
- Fix: Blend the streaks with a damp rag before the product dries. If dry, sand the area lightly and reapply the glaze or stain.
3. Too Dark/Light
- Fix for “Too Dark”: Sand the surface lightly or apply a diluted layer of a lighter color to soften the effect.
- Fix for “Too Light”: Add another layer of stain or glaze, focusing on darker tones.
4. Sticky Finish
- Cause: Insufficient drying time between layers.
- Fix: Allow the piece to air out in a well-ventilated area, and avoid adding more layers until fully dry.
Final Tip
Always embrace imperfections as part of the charm of aged or weathered finishes. Minor flaws can enhance the authentic look!
Summing Up
The vinegar-steel wool method gives deep tones, while tea and coffee create warm, natural shades.
The paint technique lets you add subtle color touches that remind me of beach finds.
What I love most is how these methods work together – you can mix and match them to create your perfect look.
Remember to take your time, test on scrap wood first, and most importantly, have fun with the process.
Frequently Asked Questions
Can You Make Wood Look Like Driftwood without Chalk Paint?
You can use vinegar with steel wool or tea and coffee stains. These natural methods create an aged look without paint.
How Long does it take to Achieve a Driftwood Look?
The basic process takes 2-3 days. One day is spent making the vinegar solution, another for painting and aging, and extra time is spent drying between steps.
Can I Apply a Driftwood Finish to Outdoor Furniture?
Yes, but you’ll need a good outdoor sealer to protect the finish from rain and sun. Pick wood types that handle outdoor conditions well.
How Do I Seal and Protect the Driftwood Finish?
Apply a clear, water-resistant sealer with UV protection. Use 2-3 thin coats, letting each dry fully before adding the next one.


