How to Build a Post and Beam Foundation?
Building on a slope? Need a foundation fast without renting heavy equipment? A post-and-beam foundation might be your answer.
This raised system works well for cabins, sheds, and additions where you want minimal site disruption and straightforward construction.
But getting it right means understanding frost depths, proper bracing, and code requirements before you dig your first hole.
This guide walks you through everything: when this foundation type makes sense, how to handle permits and inspections, what tools and materials you need, step-by-step building instructions, realistic cost and time estimates, and how to maintain your foundation for decades.
Let’s get started.
Post and Beam Foundation Basics
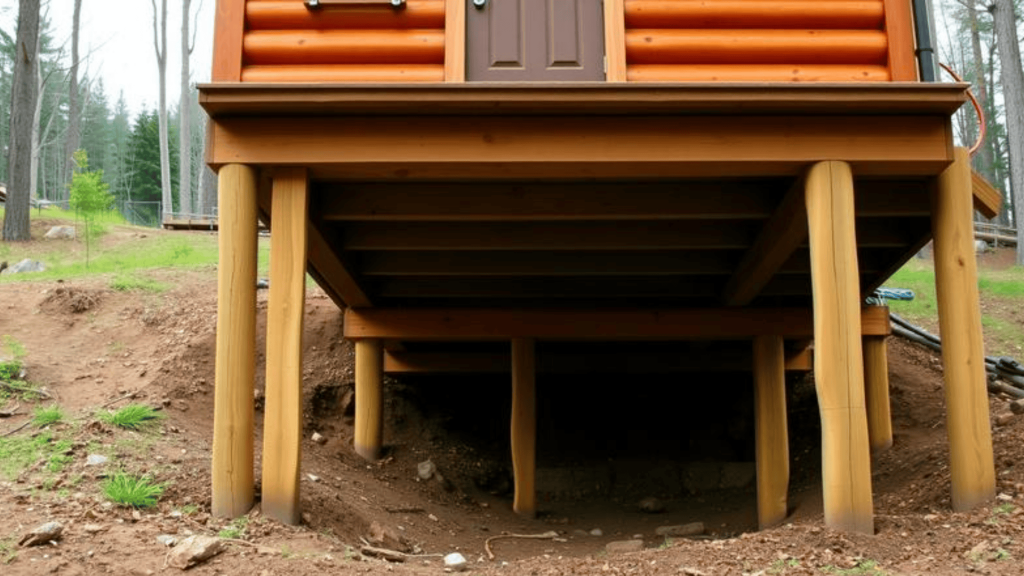
A post and beam foundation uses vertical posts anchored in concrete footings to support horizontal beams that form your building’s base.
This system differs from pier-and-beam (which uses wider concrete piers) and post-and-pier (which combines both elements), though all three elevate structures off the ground.
This foundation type works best for cabins on sloped terrain, seasonal structures, home additions, and remote locations where you want minimal soil disruption, easy installation without heavy equipment, and protection from moisture or flooding by keeping your building raised above ground level.
Code and Permits to Know Before Building
Before you start building your post-and-beam foundation, you need to understand local codes and site conditions that affect your project.
- Permits, Inspections, and When an Engineer is Needed: Most areas require building permits and inspections for footings and framing, and you’ll need an engineer for large structures, poor soil, or when local codes demand stamped plans.
- Frost Depth, Footing Depth, and Frost Heave Basics: Your footings must be below the frost line (12 to 48 inches deep, depending on climate) to prevent soil freezing from lifting and damaging your posts.
- Wind Uplift, Seismic Zones, and Lateral Bracing Requirements: High-wind and earthquake zones require metal brackets, diagonal bracing, and anchor bolts to prevent your structure from shifting or lifting during storms or seismic events.
- Flood Zones, Crawlspace Enclosures, and Flood Openings: Buildings in flood zones need an open crawlspace with proper flood vents to let water flow through and prevent structural damage during flooding.
Step-by-Step Guide to Build a Post and Beam Foundation
Before you start digging, it helps to have the full build process mapped out from layout to bracing. This step-by-step tutorial walks through each phase to ensure your post-and-beam foundation stays level, stable, and inspection-ready.
Tools and Materials Checklist for DIY Builds
| Category | What You Need |
|---|---|
| Tools | Post hole digger, shovel, tamper, 100 ft tape measure, string line, levels (4 ft and laser), stakes, batter boards, chalk line, wheelbarrow, concrete mixing tools, circular saw, drill/driver, impact driver, socket set, hammer, safety gear |
| Posts & Beams | Pressure-treated 6×6 or 8×8 posts, pressure-treated 2×8 or 2×10 beams, 2x4s for bracing |
| Concrete & Footings | 60-80 lb concrete mix bags, gravel base, rebar (#4 or #5), sonotube forms (8-12 inch), anchor bolts (1/2 or 5/8 inch) |
| Hardware | Galvanized post bases, joist hangers, beam saddles, hurricane ties, L-brackets, 16d nails, 3-4 inch structural screws, lag bolts, washers, nuts |
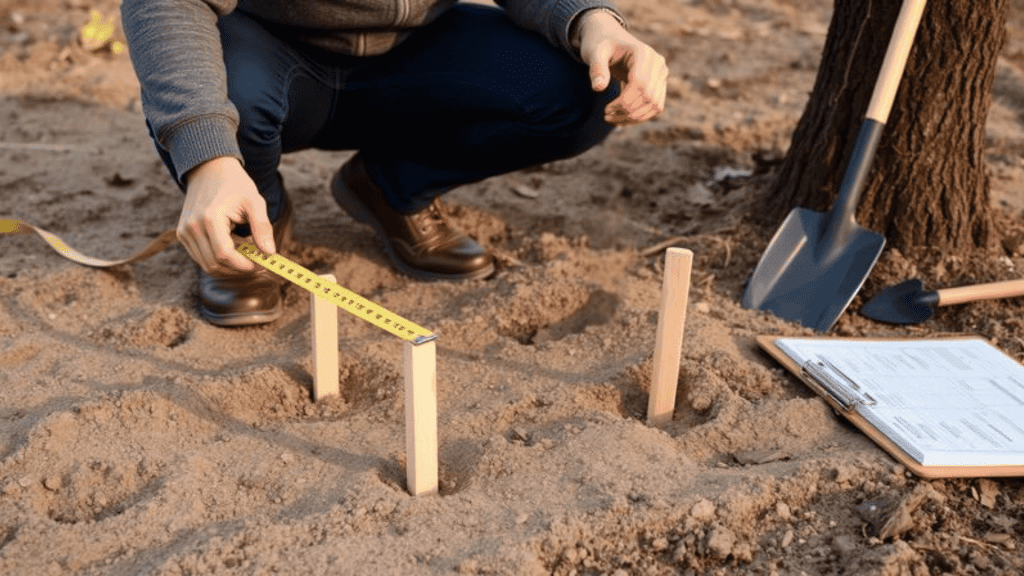
Step 1: Layout and Batter Boards
Start by marking your building corners with stakes, then measure the diagonals to confirm the building is square (they should be equal).
Set up batter boards 3 to 4 feet outside each corner using horizontal boards nailed to stakes. Stretch a string line between the batter boards to mark the exact post locations, and use a plumb bob to transfer these points to the ground.
Step 2: Digging and Base Prep
Dig holes at each marked location to the required depth (below the frost line plus 6 inches for gravel). Make holes at least 3 times the diameter of your post for proper footing size.
Add 4 to 6 inches of gravel at the bottom and tamp it down firmly to create drainage and a stable base for your concrete footings.
Step 3: Forms, Rebar, and Concrete Placement
Insert sonotube forms into each hole, keeping them level and extending 2 to 4 inches above ground. Place two pieces of rebar vertically in each tube and tie them together with wire to keep them centered.
Mix and pour concrete into forms, embedding J-bolts or anchor bolts in the center while the concrete is still wet, ensuring they protrude 2 to 3 inches and remain perfectly vertical.
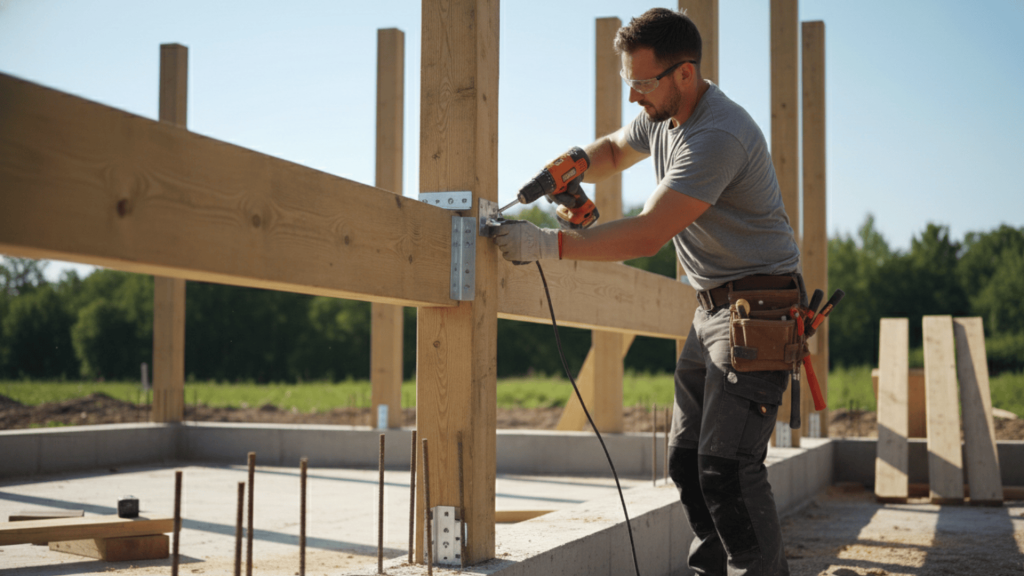
Step 4: Post Bases, Posts, and Leveling
After concrete cures for 24 to 48 hours, attach galvanized post bases to the anchor bolts using washers and nuts.
Set your posts into the bases and temporarily brace them with diagonal 2x4s to keep them plumb. Use a long level on multiple sides of each post, and adjust bracing until every post stands perfectly vertical.
Step 5: Beams, Fastening, and Alignment Checks
Measure and cut beams to span between posts, then lift them into position on top of the posts. Check that all beam tops are level with each other using a long straight edge and a level.
Secure beams to posts using structural screws, lag bolts, or metal brackets, making sure connections are tight and properly aligned before removing temporary bracing.
Step 6: Bracing for Racking and Uplift
Install diagonal bracing between posts using 2×4 or 2×6 lumber to prevent side-to-side movement (racking). Add hurricane ties or metal brackets at all beam-to-post connections to resist wind uplift.
In high wind or seismic areas, install X-bracing on at least two sides of your foundation for extra stability and lateral support.
Step 7: Preparing for Floor Framing
Install rim joists around the perimeter by fastening them to the outside of your beams using structural screws or nails.
Add interior beams or joists at 16- or 24-inch spacing (depending on your floor load requirements) using joist hangers.
Double-check all measurements, confirm everything is level and square, and inspect all connections before starting your floor decking installation.
How to Maintain and Inspect a Post and Beam Foundation
Regular maintenance keeps your post-and-beam foundation stable and functional for decades. Catching small problems early prevents expensive repairs and structural damage down the road.
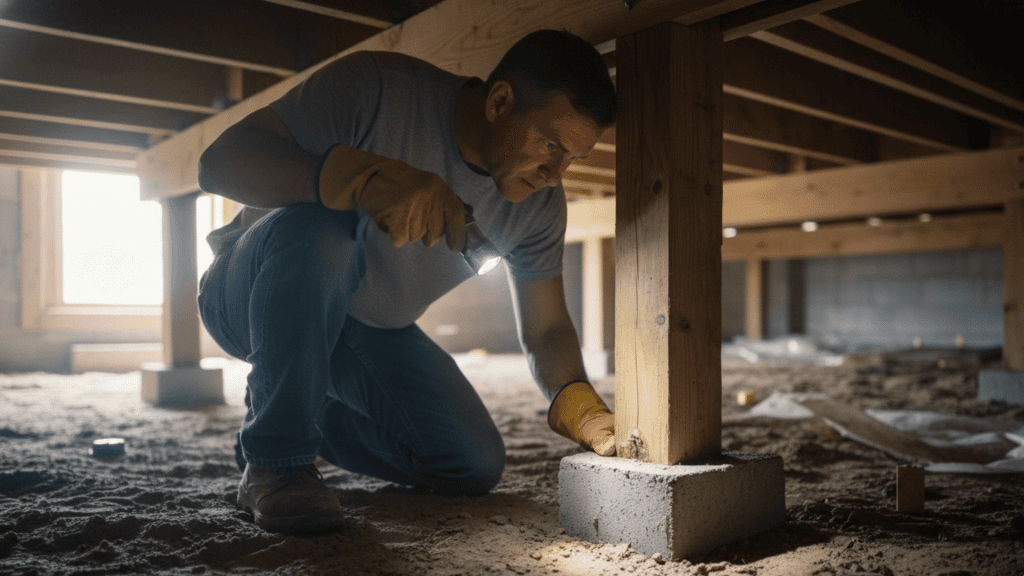
- Seasonal Checks: Settlement, Post Base Corrosion, Bracing Tightness – Inspect your foundation twice yearly (spring and fall) for post settling into soil, rust or corrosion on metal brackets and bases, loose bolts or screws in connections, and gaps between posts and beams that indicate movement.
- Signs of Movement: Floor Bounce, Doors Sticking, Gaps – Watch for bouncy or sagging floors when walking, doors and windows that suddenly stick or won’t close properly, visible gaps between walls and floors, cracks in interior drywall, or separation between siding boards.
- Re-Leveling Strategies Using Adjustable Bases Where Appropriate – Fix minor settling by shimming under posts with treated wood or composite shims, or install adjustable screw jack post bases that let you raise or lower posts without major reconstruction work.
- Moisture Management Refresh: Vapor Barrier Condition, Drainage Changes Over Time –Check that vapor barriers under the structure remain intact without tears or gaps, ensure gutters and downspouts direct water away from posts, verify grading still slopes away from the foundation, and clear any dirt or debris buildup around post bases that traps moisture.
How Much It Costs and How Long It Takes
Understanding the financial and time investments helps you plan your post-and-beam foundation project realistically and avoid surprises during construction.
Typical Cost Ranges and Time Expectations
| Project Size | Square Footage | DIY Cost | Contractor Cost | DIY Time (2 people) | Contractor Time |
|---|---|---|---|---|---|
| Small Shed | 100-200 sq ft | $500-1,500 | $1,500-4,000 | 2-3 days | 1-2 days |
| Medium Cabin | 400-600 sq ft | $2,000-5,000 | $6,000-15,000 | 5-7 days | 2-3 days |
| Large Cabin | 800-1,200 sq ft | $4,000-10,000 | $12,000-30,000 | 10-14 days | 4-6 days |
| Home Addition | 300-500 sq ft | $1,500-4,000 | $4,500-12,000 | 6-9 days | 3-4 days |
What changes the price: Rocky or poor soil increases digging costs, deeper frost lines require more concrete and larger footings, remote sites add delivery fees, steel posts cost 2-3 times more than treated wood, engineer requirements and seismic zones add $500-2,000, and difficult terrain needs equipment rental at $200-500 per day.
Time factors: Concrete must cure for 24-48 hours before continuing work; rain stops concrete pours; permit approval takes 1-4 weeks; and inspection scheduling adds 2-7 days between construction stages.
How Long Does a Post and Beam Foundation Last?
A properly built post-and-beam foundation typically lasts 20 to 40 years with pressure-treated wood posts, while concrete posts can last 50 years or more.
The actual lifespan depends heavily on wood quality, soil drainage, moisture exposure, and regular maintenance.
Posts in direct ground contact deteriorate faster than those set on concrete footings with proper drainage.
You can extend the life of the structure by using quality pressure-treated lumber rated for ground contact, ensuring good site drainage, keeping vegetation away from posts, and inspecting it annually for rot or insect damage.
Steel posts with proper rust protection can last 40 to 60 years, but cost significantly more upfront.
Wrapping It Up
A post-and-beam foundation offers a practical, cost-effective solution for cabins, additions, and structures in challenging terrain.
You now understand the basics, code requirements, building steps, costs, and maintenance needs to tackle this project confidently.
The key is proper planning: check your local frost depth, get the right permits, use quality materials, and don’t skip the bracing.
Ready to start building? Gather your tools, stake out your layout, and take it one step at a time. Have questions about your specific site conditions or need help troubleshooting a problem?
Drop a comment below. We’d love to hear about your project and help you build a solid, long-lasting foundation.