How to Dry Herbs at Home: 5 Easy Methods

Fresh herbs from your garden don’t last long, but dried herbs can preserve those flavors for months.
Drying herbs at home saves money compared to buying expensive store brands. You get better quality and know exactly what goes into your food, no mystery chemicals or preservatives.
The best herbs for drying include basil, rosemary, oregano, thyme, mint, sage, parsley, and dill.
Each method works better for different types. Low-moisture herbs like thyme air-dry easily. High-moisture herbs like basil need faster methods.
This guide covers five proven ways to dry herbs at home. You’ll find options that need no equipment and others that use modern tools.
Choose the method that fits your time, climate, and herb type for perfect results every time.
Why Dry Your Herbs?
Drying your herbs at home saves you money and keeps fresh flavors in your kitchen all year long.
Instead of buying expensive dried herbs from the store, you can preserve basil, rosemary, oregano, thyme, and mint from your garden or farmers market.
This simple process reduces food waste and gives you control over quality. You’ll know exactly what goes into your herbs, no preservatives or chemicals.
Plus, home-dried herbs often taste much better than store-bought versions that may have sat on shelves for months.
If you’d like to start with a specific herb, check out my detailed guide on how to dry lavender for a simple, fragrant example.
Harvest and Prepare Your Herbs
Start with fresh, healthy herbs and prepare them properly to ensure the best flavor and the most extended shelf life.
| Step | Quick Tip |
|---|---|
| Wash or Not | Rinse only if dirty; skip to keep oils intact. |
| Best Harvest Time | Morning, after the dew dries. |
| Drying Surface | Towel or colander, not plastic. |
| Cleaning | Shake off insects, pat dry. |
| Trimming | Remove damaged leaves, cut thick stems. |
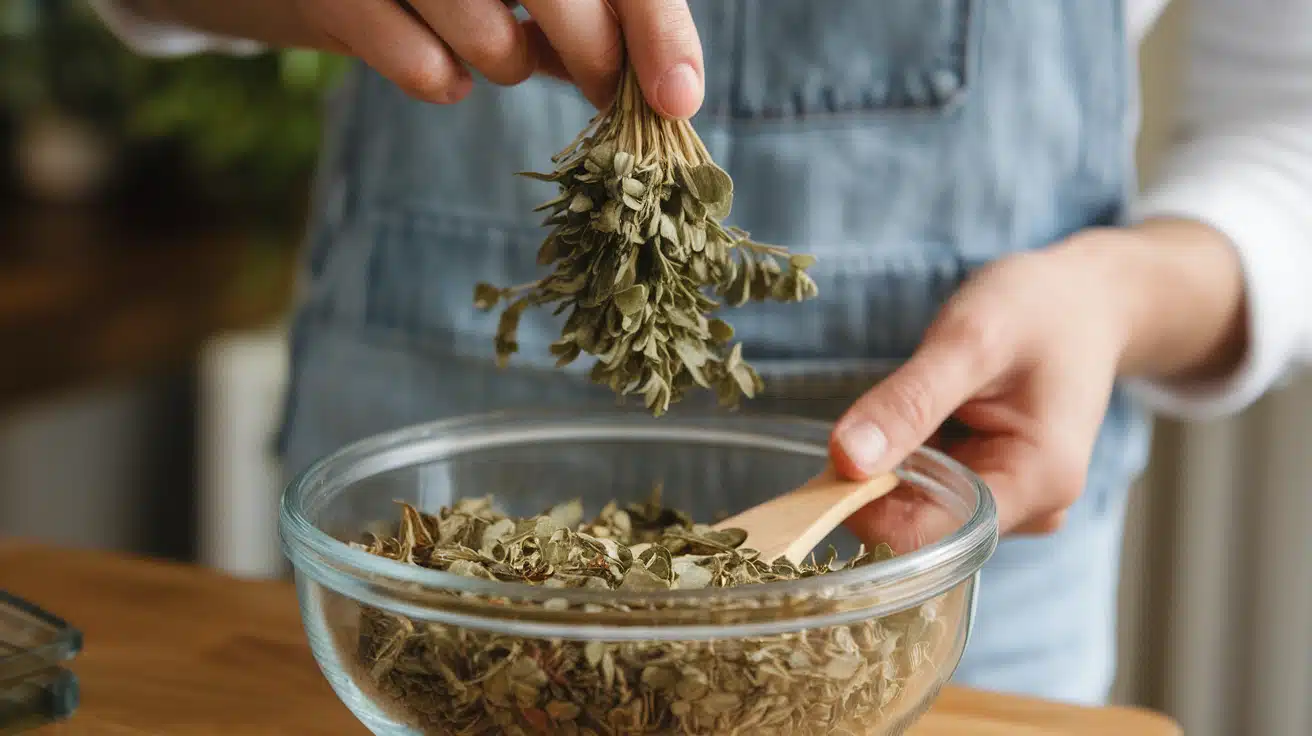
5 Foolproof Ways to Dry Herbs at Home
Preserve your garden’s flavor all year long with these simple, proven techniques for drying herbs, no special skills required.
Method 1: Air Drying
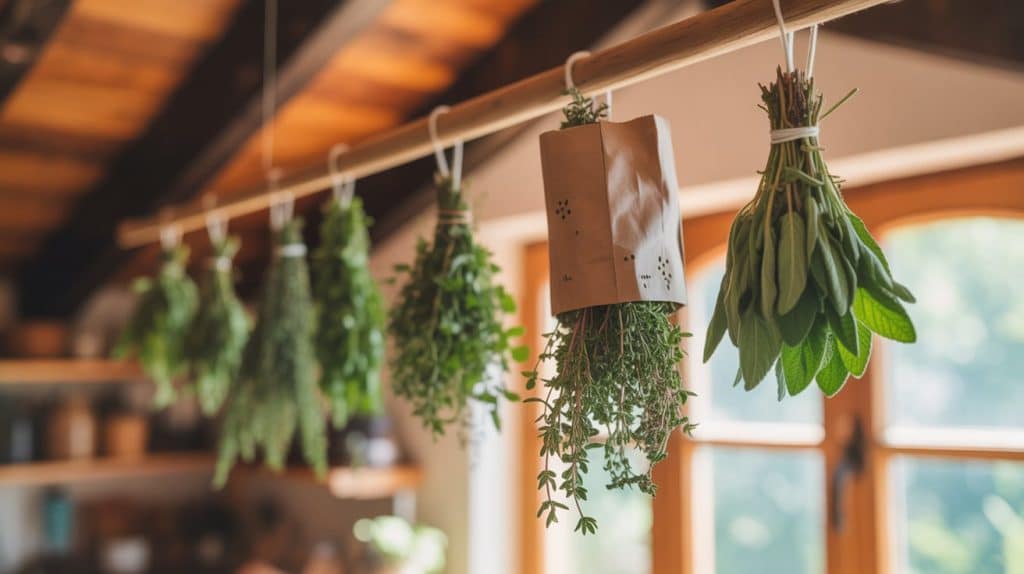
Air drying works best for low-moisture herbs like thyme, oregano, and sage. This old-school method costs nothing and preserves the natural oils that give herbs their intense flavors.
How to Air Dry Herbs:
Start by cutting your herbs in the morning when oils are strongest.
Clean off any dirt or bugs, then pat them dry with a paper towel.
Gather 4-6 stems into small bundles, ensuring they’re not too thick so air can reach the center. Tie each bundle tightly with a string or a rubber band.
The stems will shrink as they dry, so make your knots secure. Hang the bundles upside down in a warm, dry spot with good air flow. Attics, pantries, or covered porches work well.
For extra protection, slip a paper bag over each bundle. Poke a few holes in the bag for air flow. This catches any leaves that fall and keeps dust away.
Drying time: 1–2 weeks, depending on humidity and herb type.
| Pros | Cons |
|---|---|
| No equipment needed | Takes 1-2 weeks |
| Preserves natural aroma | Depends on weather |
| Free method | Needs dry climate |
| Works for most herbs | Takes up hanging space |
| Maintains herb oils | Can collect dust |
Check your herbs after one week. They’re ready when leaves crumble easily between your fingers and stems snap cleanly.
Method 2: Oven Drying
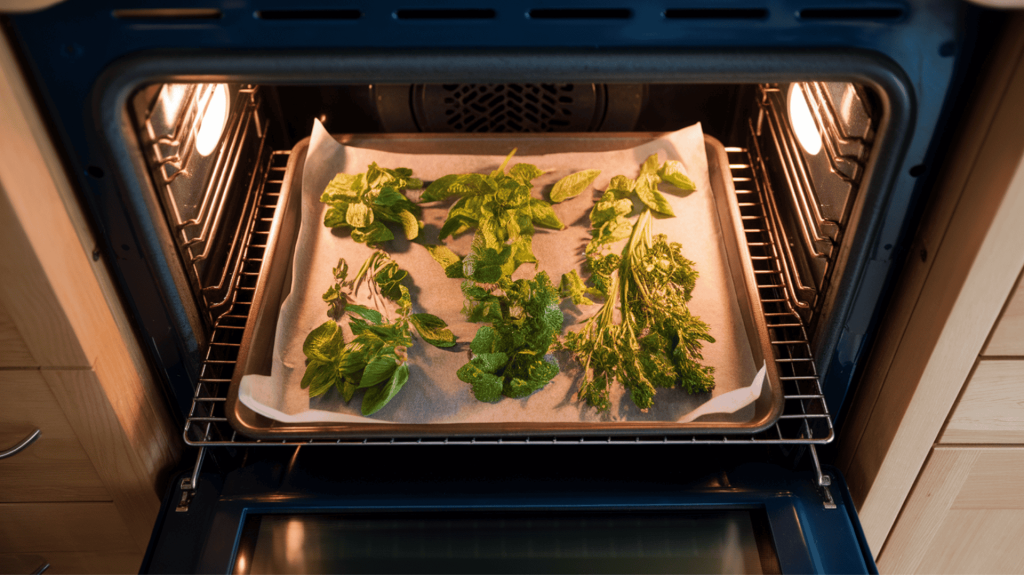
Oven drying works great for high-moisture herbs like basil, parsley, and mint that might rot before they air dry. This method gives you dried herbs in hours instead of weeks.
How to Oven Dry Herbs:
First, preheat your oven to its lowest setting. Most ovens go down to 170°F, but you want even lower – around 95–115°F (35–46°C).
If your oven doesn’t go that low, set it to “warm” or the lowest possible temperature. Wash your herbs gently and pat them completely dry. Remove any damaged leaves.
Pull leaves off thick stems, but keep thin stems attached to small herbs like thyme. Line a baking sheet with parchment paper. Spread herbs in a single layer – don’t overlap them or they won’t dry evenly.
Place the tray in your oven and keep the door slightly open. Use a wooden spoon to prop it open about 2 inches. This lets moisture escape so herbs dry instead of cooking.
Check every 30 minutes and flip the herbs halfway through. Different herbs dry at different speeds, so remove pieces as they finish.
Drying time: 1–4 hours, depending on herb type and moisture content.
| Pros | Cons |
|---|---|
| Much faster than air drying | Easy to overheat herbs |
| Works in any weather | Uses electricity |
| Good for wet climates | Requires constant watching |
| Handles high-moisture herbs | Can lose flavor if too hot |
| No hanging space needed | Risk of burning |
Your herbs are done when they crumble easily but don’t turn brown. If they look dark or smell burned, your oven was too hot.
Method 3: Microwave Drying
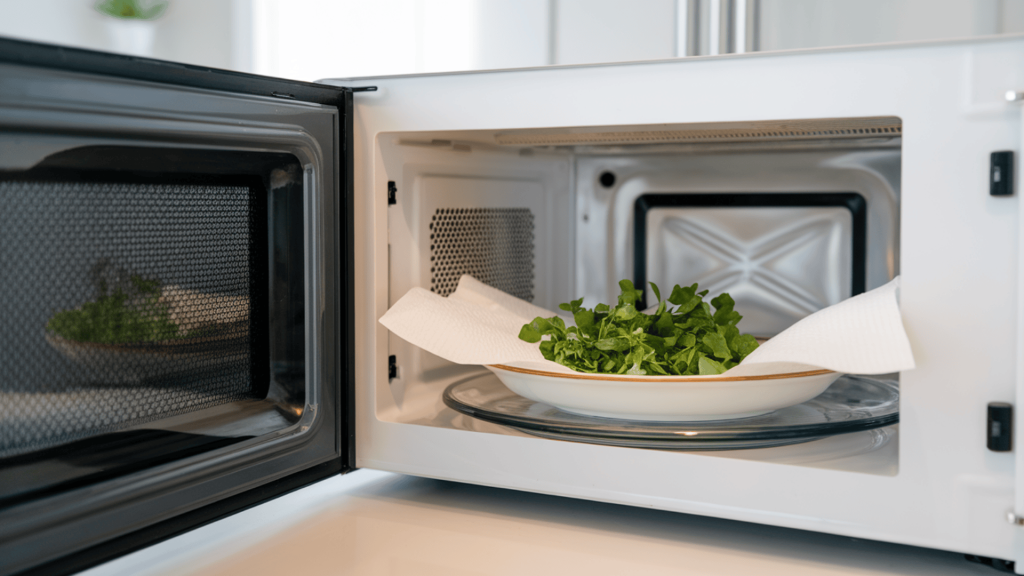
Microwave drying is the fastest way to dry herbs, perfect when you need dried herbs right now. This method works well for mint, basil, and oregano in small amounts.
How to Microwave Dry Herbs:
Start with completely clean, dry herbs. Pat them with paper towels to remove all water drops. Remove thick stems but keep thin ones attached.
Place a paper towel on a microwave-safe plate. Spread your herbs in a single layer on top – don’t pile them up. Cover with another paper towel to catch moisture and prevent herbs from flying around.
Set your microwave to medium power (50%). High power will cook your herbs instead of drying them. Start with 30 seconds for delicate herbs like basil, or 45 seconds for thicker leaves.
After each interval, lift the top paper towel and check your herbs. They should feel dry and crumbly when touched. If still soft, continue in 15-30 second bursts.
Observe – herbs can go from perfect to burned in seconds. Stop as soon as the leaves feel crisp.
Drying time: 1–3 minutes total, done in short bursts.
| Pros | Cons |
|---|---|
| Ready in minutes | Only works for small amounts |
| No special equipment | Easy to overcook |
| Works any time | May lose some flavor |
| Perfect for emergencies | Requires close attention |
| No prep time needed | Can create hot spots |
This method is ideal when you’re cooking and realize you need dried herbs immediately. Just remember – less is more with microwave power and timing.
Method 4: Sun Drying
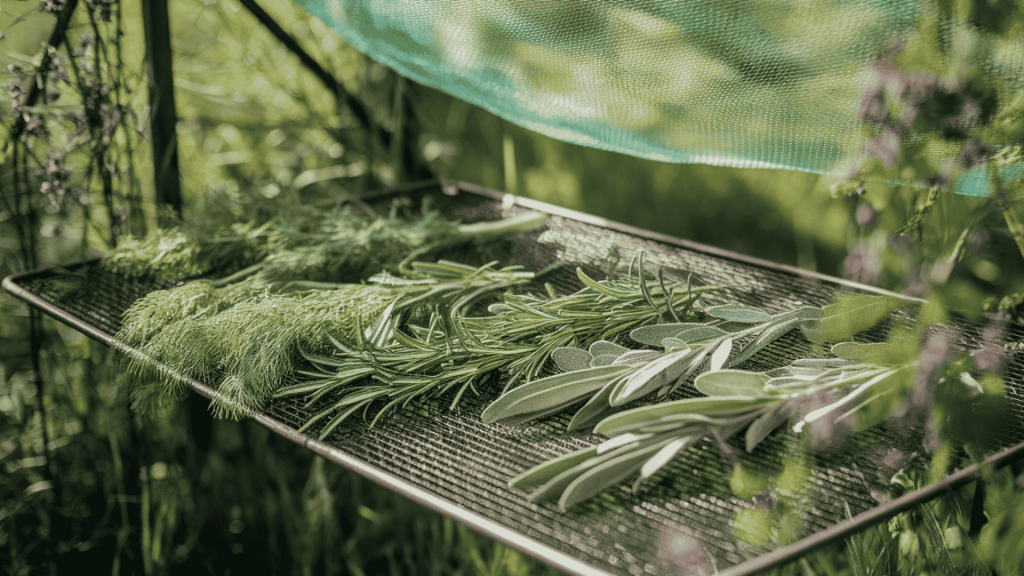
Sun drying is the oldest way to preserve herbs, using nothing but natural heat and air. This method works best for hardy herbs like rosemary and dill that can handle direct sunlight without losing their oils.
How to Sun Dry Herbs:
Pick a sunny spot that gets at least 6-8 hours of direct sunlight daily. Your patio, deck, or flat rooftop works well. You need low humidity and gentle breezes for the best results.
Clean your herbs and remove damaged leaves. Leave stems attached to keep herbs together. You can use drying screens, clean window screens, or shallow trays lined with cheesecloth.
Spread herbs in a single layer on your drying surface. Don’t crowd them; air needs to flow around each piece. Cover with fine mesh or cheesecloth to keep bugs away while letting the sun through.
Place your trays outside in the morning when the dew has dried. Bring them in at night to avoid moisture. Turn herbs once daily so both sides dry evenly.
Watch the weather closely. Rain or high humidity can damage your herbs and lead to mold growth. Have a backup plan ready.
Drying time: 2–3 days in good weather conditions.
| Pros | Cons |
|---|---|
| Completely free method | Only works in dry weather |
| No electricity needed | Takes several days |
| Natural process | The risk of mold in high humidity |
| Handles large batches | Bugs and dust problems |
| Gentle on herb oils | Need to watch the weather |
Sun drying works best in desert climates or during dry summer months if you live somewhere humid, stick with indoor methods to avoid spoiled herbs.
Method 5: Dehydrator Drying
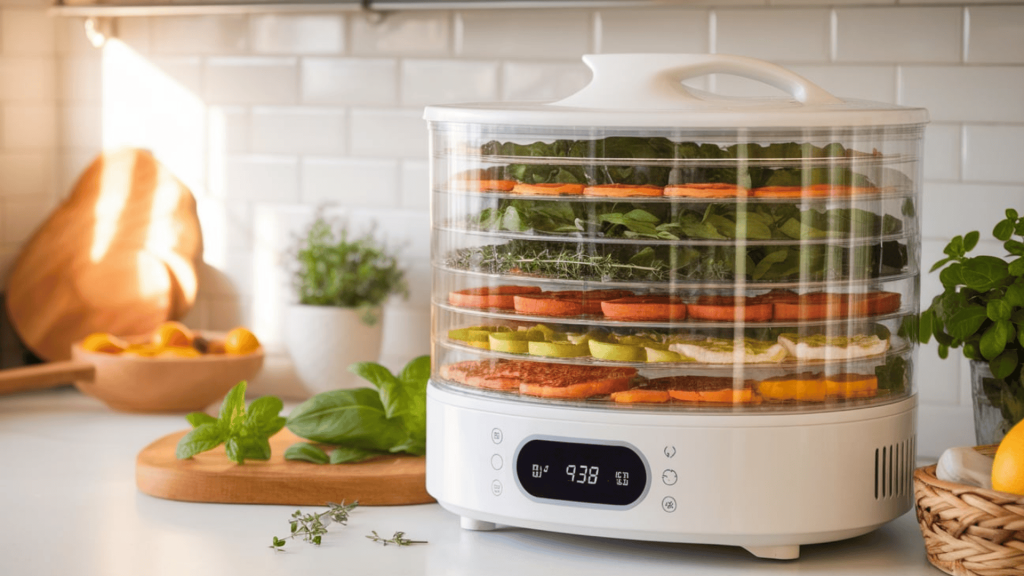
A food dehydrator gives you the most control and consistent results when drying herbs. This method works for all herbs and handles large harvests from your garden with ease.
How to Use a Dehydrator for Herbs:
Clean your herbs thoroughly and shake off excess water. Remove any brown or damaged leaves. For herbs with thick stems like basil, pull leaves off the stems. Keep thin-stemmed herbs like thyme whole.
Arrange herbs in a single layer on dehydrator trays. Don’t overlap or pile them up – each piece needs air circulation. Fill multiple trays if you have a big batch.
Set your dehydrator temperature between 95°F–115°F (35°C–46°C). Higher temperatures will cook your herbs instead of drying them. Most dehydrators have an herb setting that works perfectly.
Load your trays and turn on the machine. Check progress after 1 hour. Delicate herbs like basil may finish quickly, while thick leaves like sage take longer.
If your dehydrator doesn’t have a fan in each tray, rotate the trays every hour. This ensures even drying from top to bottom.
Drying time: 1–4 hours, depending on herb type and thickness.
| Pros | Cons |
|---|---|
| Perfect results every time | Need to buy equipment |
| Handles large amounts | Takes counter space |
| Set it and forget it | Uses electricity |
| Works in any weather | Initial cost investment |
| Even temperature control | Learning curve for timing |
Your herbs are ready when they crumble easily between your fingers. Store immediately in airtight containers to keep them fresh for months.
How to Store Dried Herbs for Maximum Freshness
- Airtight glass jars or vacuum-sealed bags: Use glass jars with tight lids or vacuum-sealed bags to keep air and moisture out.
- Labeling and dating: Write the herb name and drying date on each container so you know what you have and when to replace it.
- Ideal storage locations (dark, dry, cool): Store in a pantry, cupboard, or drawer away from heat, light, and humidity.
- Shelf life: 6–12 months: Most dried herbs stay potent for 6-12 months when stored properly, then start losing flavor.
Wrapping It Up
Drying herbs at home is easier than you think. Start with simple air drying if you’re new to this; it costs nothing and works great for most herbs.
Try the oven method when you need quick results. Each technique has its place depending on your herbs and timeline.
Begin with small batches to learn what works best in your kitchen. Label everything with dates so you can track freshness. Store your dried herbs in glass jars away from light and heat.
The money you save adds up quickly. More importantly, you’ll taste the difference fresh-dried herbs make in your cooking.
Pick your favorite method from this guide and start preserving your herb harvest today.
Need how-tos and hacks? Find more helpful tips and guides here.
Frequently Asked Questions
What Are the Best Ways to Dry Herbs?
Air drying for hardy herbs, oven drying for high-moisture herbs, and dehydrators for large batches give the best results.
What Herbs Should You Not Dry?
Avoid drying herbs with very high water content, like lettuce, watercress, and chives, as they lose flavor and turn mushy.
Is It Better to Dehydrate or Air-Dry Herbs?
Dehydrators give more consistent results and work faster, while air drying is free and preserves oils better in dry climates.
What Is the Best Way to Preserve Fresh Herbs?
Drying works best for most herbs, but freezing in ice cubes preserves delicate herbs like cilantro and parsley better.