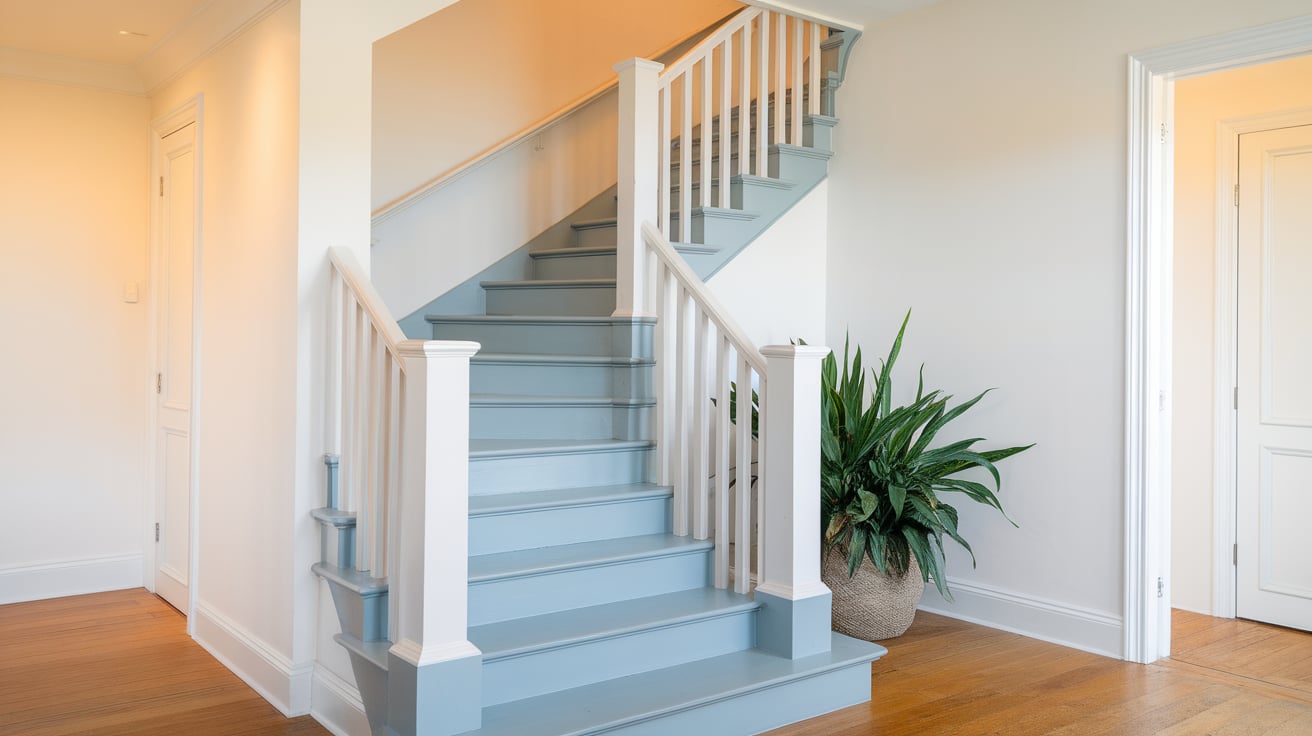
How to Paint Stairs: From Prep Work to Perfect Finish
Have you ever tried painting stairs? If you have, you know it’s no walk in the park. If you haven’t—well, buckle up, friend.
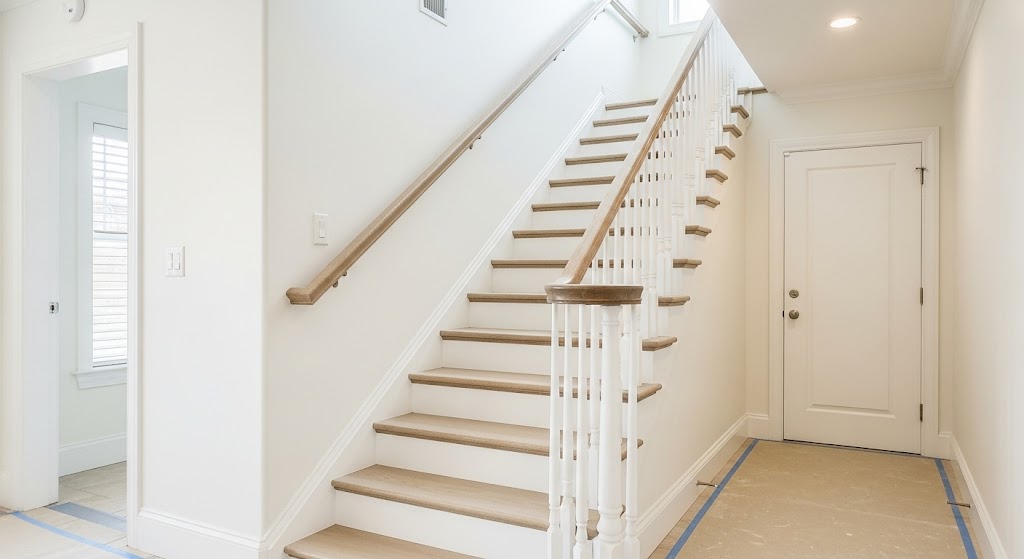
Stairs are easily the most challenging home painting project you’ll face. They’re high-traffic, oddly shaped, and the one area of your home you absolutely can’t block off completely while paint dries (unless you enjoy being trapped upstairs for days!).
However, here’s the thing—a freshly painted staircase can completely transform your home’s appearance and ambiance. That worn, scuffed pathway can become a stunning focal point or blend seamlessly into your décor.
I’ve painted more staircases than I care to count, and I’ve collected every hard-earned lesson along the way. Ready to skip the mistakes I made and achieve a gorgeous result? Let’s dive in.
What You’ll Need
Before you begin painting your stairs, gather all the necessary materials. Having the right supplies ready will make your project go smoothly. The table below lists essential items for a successful stair painting job.
| Tools | Materials |
|---|---|
| Regular paintbrushes (various sizes) | Quality paint (semi-gloss or satin finish) |
| Angled/goose neck brush | Painter’s tape |
| Extension poles (2-4ft, 4-8ft) | Tarps or carpet protection |
| 15mm microfiber roller covers | Latex plus silicone caulk |
| Roller frames and trays | Sandpaper or foam sanding blocks |
| Putty knife | Primer (if needed) |
| Foam sander with replaceable screen | Drop cloths |
| Small container for touch-up paint | Cleaning supplies |
Having these items ready before you start will save you time and prevent interruptions. You might not need every tool listed, but it’s better to have them available just in case.
Next, inspect your staircase for any necessary repairs before painting. Fix loose boards, fill holes, and sand rough spots. Clean the entire area thoroughly to remove dust and dirt that might affect your paint job.
How to Paint Your Stairs: A Simple Guide for Better Results
Learn the seven key steps to paint your stairs safely and get professional-looking results without the stress or expense of hiring someone.
Step 1: Remove Items and Get the Area Ready
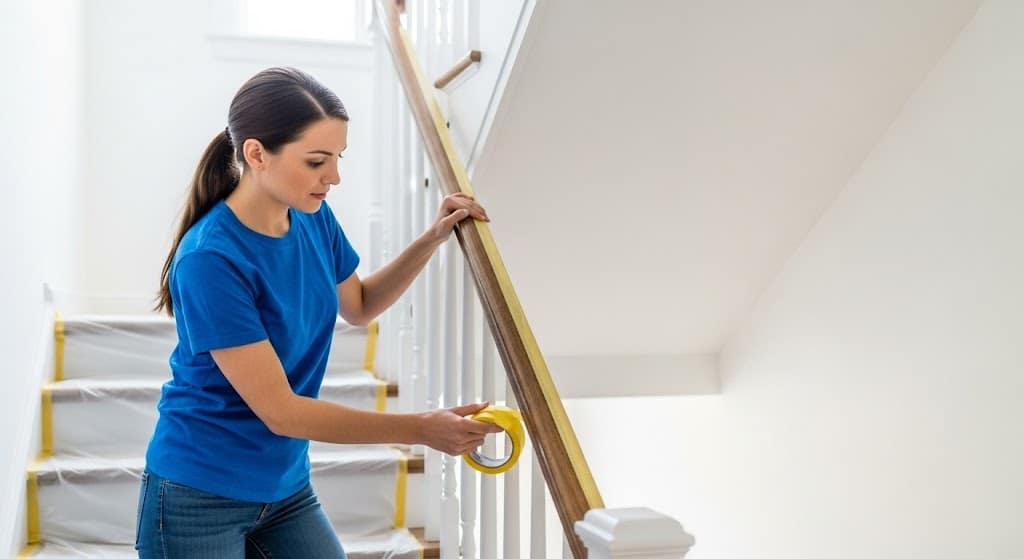
Take off handrails from the stairs before you start painting. This gives you clean edges and helps you reach all areas. Put down floor coverings to keep paint off your floors and carpets.
Clean the walls and ceiling near the stairs. This stops dust from falling into wet paint. Use painter’s tape in smart ways to make your work easier.
Step 2: Paint High Areas and Edges First
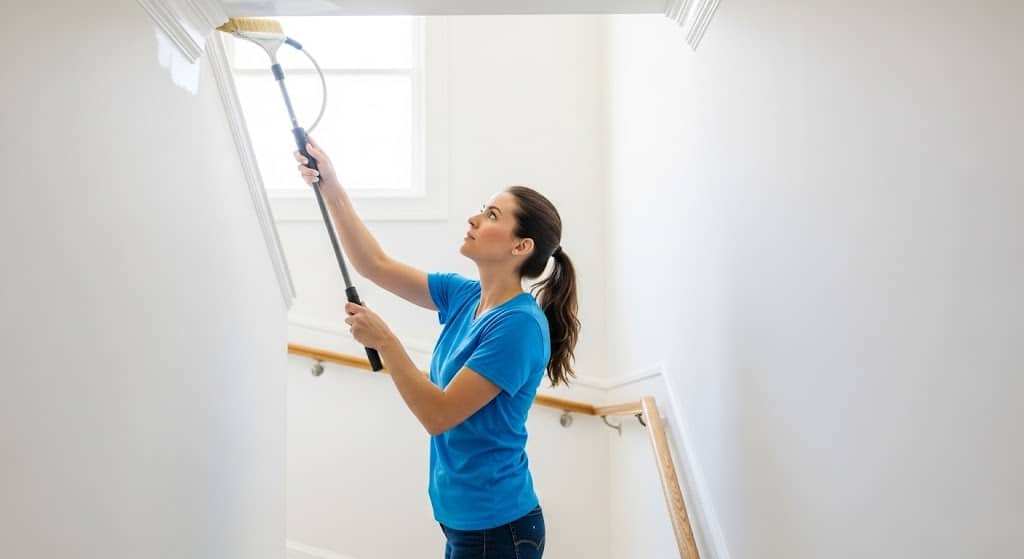
Start with the ceiling and top parts of walls. Use extension poles instead of standing on ladders on stairs. This keeps you safer and makes the work go faster.
Paint all the edges and trim first. Use a special goose neck brush for hard-to-reach spots. Make your edge cuts wide enough that you won’t need to get too close with rollers later.
Step 3: Apply Paint to Main Wall Areas

Load your roller with the right amount of paint. Too much causes drips. Too little means more work. Use gentle pressure when rolling to get smooth results.
Roll in different patterns to spread paint evenly. Use special moves at corners to get paint into tight spots. Keep a wet edge as you work to avoid line marks.
Step 4: Fix Problems as You Find Them
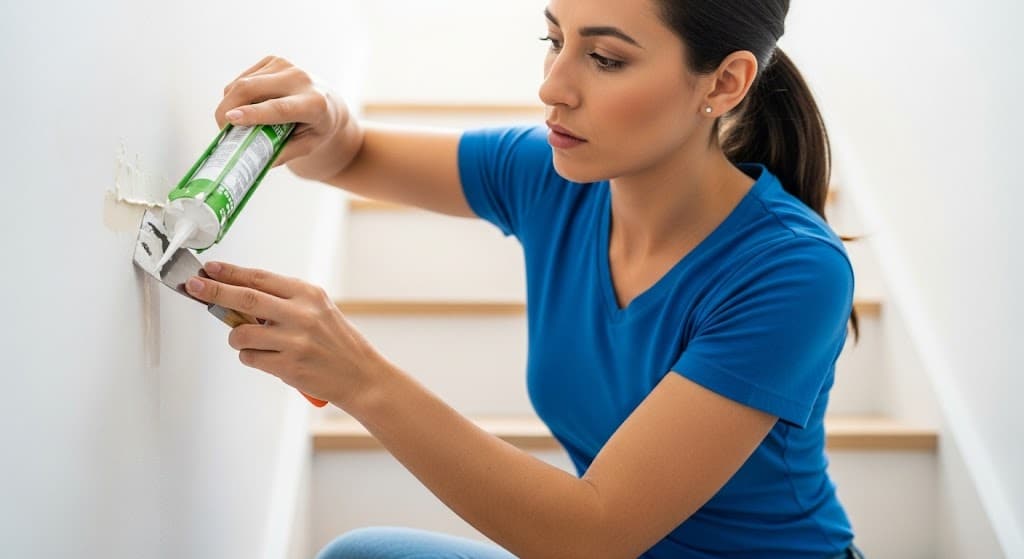
Look for holes and marks as you paint. Fill them with caulk that you can paint over quickly. Use a putty knife to make repairs smooth and even with the wall.
Let filled spots dry before you paint over them. Most quick fillers dry in about an hour. Sand them lightly to blend with the wall surface.
Step 5: Sand Between Paint Coats
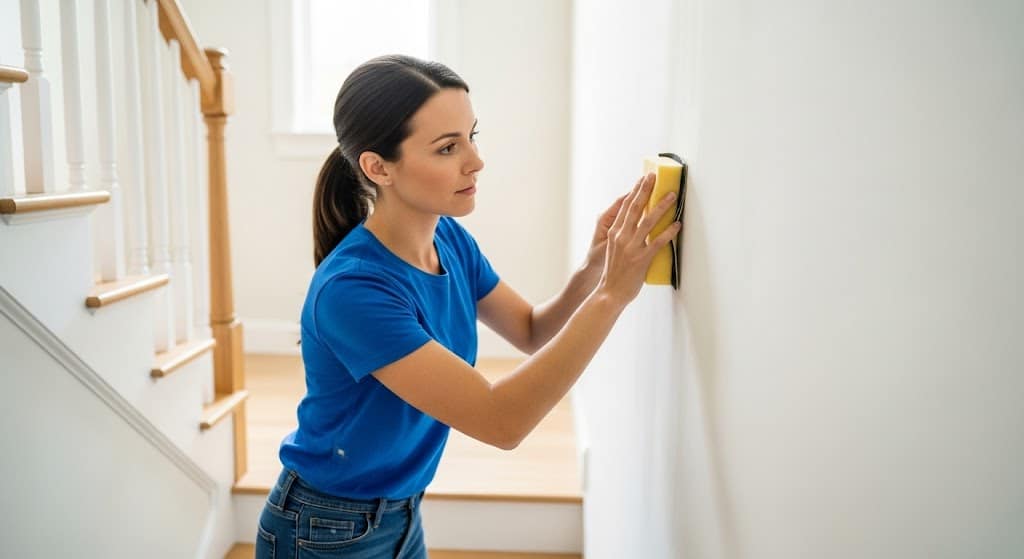
Use a foam sanding block between coats of paint. This makes each layer smoother than the last. Sand gently to avoid damaging your first coat of paint.
Focus on spots where dust or pet hair might have stuck in the paint. Some colors like reds and blues need more sanding care to look good.
Step 6: Final Steps for a Good Finish
Check your work when paint seems dry. Some paints take longer to dry than others. Try not to paint on very humid days as this slows drying time.
Put handrails back carefully after paint is fully dry. Fill any new holes from reinstalling hardware. Touch up these spots to match the rest of your paint job.
Bonus Tips and Tricks
1. Keep a wet edge while painting: Overlap each stroke with the previous one before paint dries to prevent visible lines. Work in small sections on stairs and avoid long breaks between areas.
2. Test paint color in a hidden spot: Apply paint to a small area under a step or in a corner first. Check how it looks in different lighting before painting the entire staircase.
3. Paint early in the day: Morning painting allows more drying time before evening humidity rises. This helps paint set properly and creates a stronger finish.
4. Seal tape edges with a putty knife: Press down painter’s tape firmly with a putty knife to prevent paint bleed. This extra step creates professional-looking, crisp lines between colors.
5. Remove tape while paint is slightly wet: Pull tape off before paint fully dries to avoid tearing the paint film. Remove at a 45-degree angle for the cleanest edge.
6. Save touch-up paint in a labeled jar: Store some paint in a small container with the color name, brand, and date. This makes future repairs quick and easy for high-traffic stair areas.
7. Work from top to bottom: Start at the top of your staircase and move downward. This prevents you from stepping on or touching wet paint as you exit the area.
Conclusion
Painting your stairs doesn’t need to be overwhelming. With the steps we covered, you can turn worn-out stairs into a fresh focal point in your home. Remember to prepare well, use the right tools, and work safely from top to bottom.
Take your time with each stage of the process. Rushing leads to mistakes that are hard to fix later. Your care will show in the finished results.
The best part? You’ll save money while gaining skills and pride in your work. Each time you walk up your beautifully painted stairs, you’ll enjoy that sense of accomplishment.
When your project is complete, step back and admire your work. Those newly painted stairs will brighten your home and add value too. Well-done stairs can last for years with occasional touch-ups.