I used to dread going into my crawl space, the musty smell, visible moisture, and that constant worry about what damage was happening beneath my home.
What if I told you that for under $1,000, you could change that problematic crawl space into a clean, controlled environment that actually protects your home?
Most homeowners think crawl space encapsulation requires expensive professional installation.
The truth is, with the right materials and step-by-step approach, you can tackle this project yourself and save thousands while gaining complete control over moisture, air quality, and energy efficiency in your home.
I’m going to walk you through exactly how I encapsulated my crawl space, including the mistakes I made, so you can avoid them and get it right the first time.
What Is Crawl Space Encapsulation?
Crawl space encapsulation is a method that seals your home’s crawl space to control moisture and improve indoor air quality.
This process involves installing a vapor barrier system that covers the floor, walls, and sometimes the ceiling of your crawl space.
Crawl space encapsulation creates a controlled environment beneath your home. The system uses thick plastic sheeting, typically 6-20 mil polyethylene, to seal off the crawl space from outside moisture and air.
This barrier prevents ground moisture from entering your home and stops outside air from flowing through the space.
Key components of encapsulation include:
- Vapor barrier installation – Heavy-duty plastic covers all surfaces
- Sealing air leaks – Gaps around pipes, vents, and rim joists get sealed
- Moisture control – Dehumidifiers may be added for extra protection
- Insulation updates – Wall insulation replaces floor insulation in many cases
The encapsulation process recasts your crawl space into a semi-conditioned area. This means the space becomes part of your home’s thermal envelope rather than an uncontrolled zone.
The result is better moisture control, improved air quality, and increased energy efficiency throughout your home.
Complete Step-By-Step Guide to Crawl Space Encapsulation
This guide covers the essential steps to properly seal and ventilate your crawl space for long-term moisture control.
Materials Needed:
| Material | Specification | Purpose |
|---|---|---|
| Styrofoam Insulation | 2-inch thick, R4 per inch | Insulates rim joists and creates a walking surface |
| Crawl Space Liner | 10-mil reinforced polyethylene, 12-foot wide | Creates a vapor barrier to seal the crawl space |
| Double-Sided Tape | Heavy-duty adhesive | Initial attachment of liner to the walls |
| White Sealing Tape | Vapor barrier tape | Seals seams, penetrations, and wall connections |
| Exhaust Fan | 120 CFM capacity | Removes moisture-laden air from crawl space |
| Vent Kit | Exterior mounting kit | Safely exhausts air outside the home |
| Spray Foam | Expanding foam sealant | Seals remaining gaps and penetrations |
Tools Needed:
| Tool | Purpose |
|---|---|
| Utility Knife | Cuts the insulation and liner to size |
| Measuring Tape | Ensures accurate measurements for materials |
| Sheet Good Calculator | Optimizes material usage and reduces waste |
| Humidity Gauge | Monitors moisture levels in crawl space |
| Bucket and Cup | Removes standing water if needed |
Step 1: Install Ventilation System
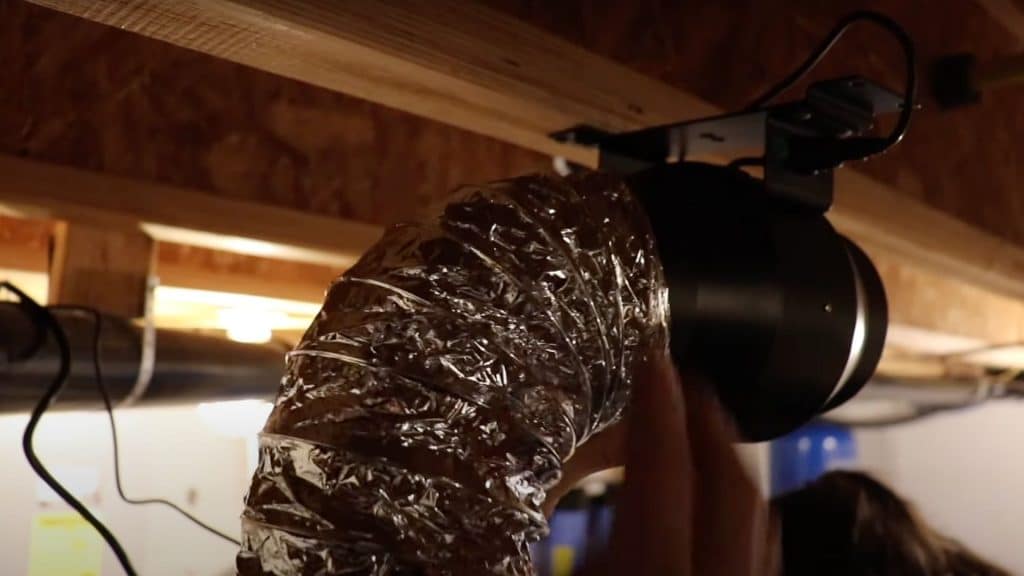
Mount a 120 CFM exhaust fan to remove moisture-laden air from the crawl space. Install intake vents on the opposite side to draw conditioned air from the house.
This creates controlled airflow that prevents humidity buildup and maintains air quality.
Pro Tip: Install exhaust fan on north side to avoid wind interference that could overpower the fan.
Step 2: Install Rim Joist Insulation
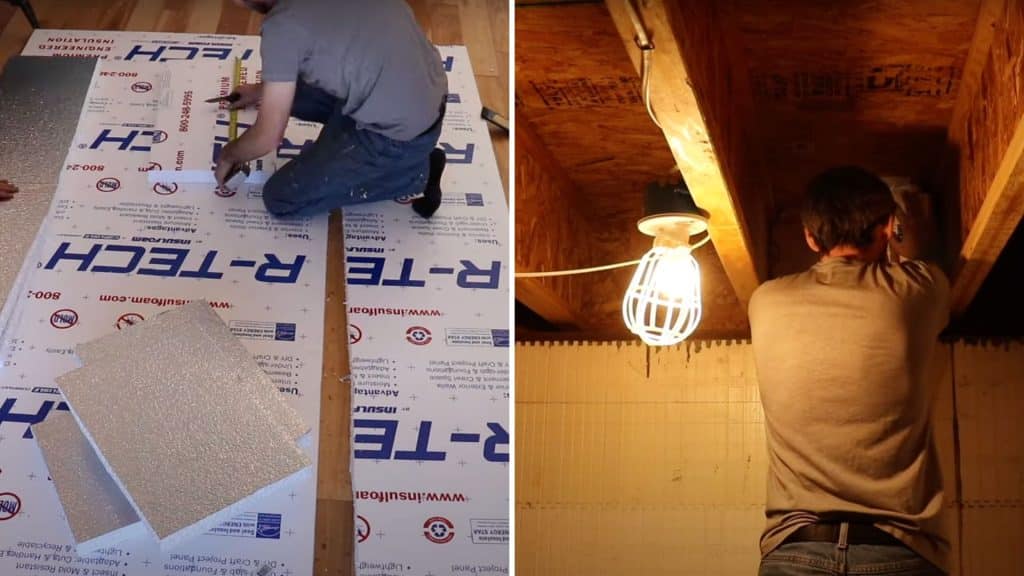
Cut Styrofoam insulation boards to fit between floor joists. Use 2-inch-thick R4 per inch foam boards for a total R16 insulation value. Notch corners slightly and pressure-fit foam pieces with foil side facing out. This creates a thermal barrier between the crawl space and the living area above.
Pro Tip: Measure joist spacing accurately – standard 19.2″ spacing requires 20″ wide cuts for proper pressure fit.
Step 3: Prepare Ground Surface
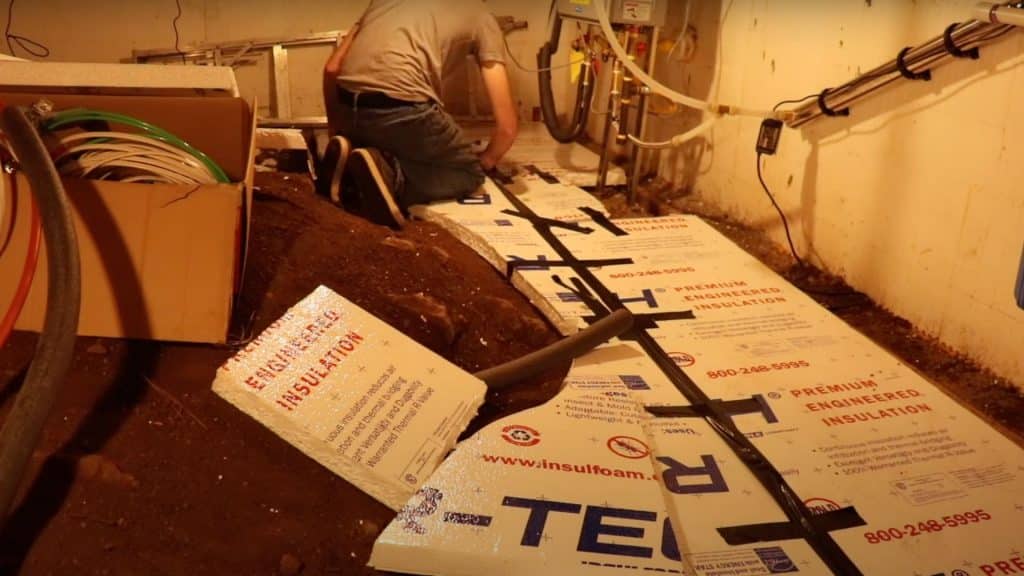
Place leftover Styrofoam sheets on the crawl space floor in high-traffic areas near the water heater and utilities. This creates a stable walking platform and prevents rocks from puncturing the vapor barrier. Focus on areas where you’ll need regular access for maintenance.
Pro Tip: Mark utility locations before laying foam to ensure easy access panels for future repairs.
Step 4: Apply Double-Sided Tape
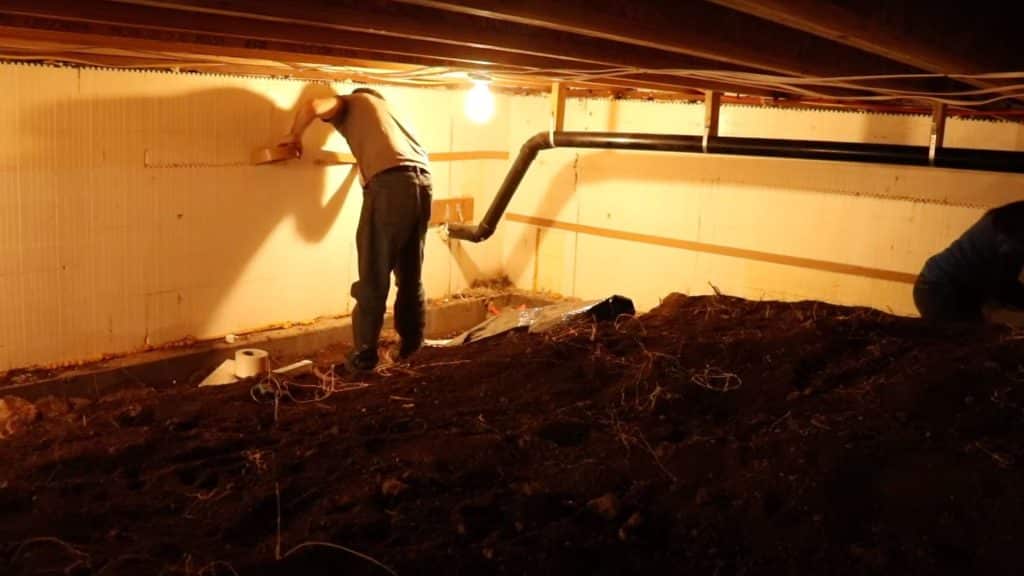
Attach double-sided adhesive tape along foundation walls where the vapor barrier will connect. Clean wall surfaces first for better adhesion. This tape provides an initial hold while installing the reinforced crawl space liner system.
Pro Tip: White tape works better than double-sided tape on ICF walls – consider using it as primary adhesive method.
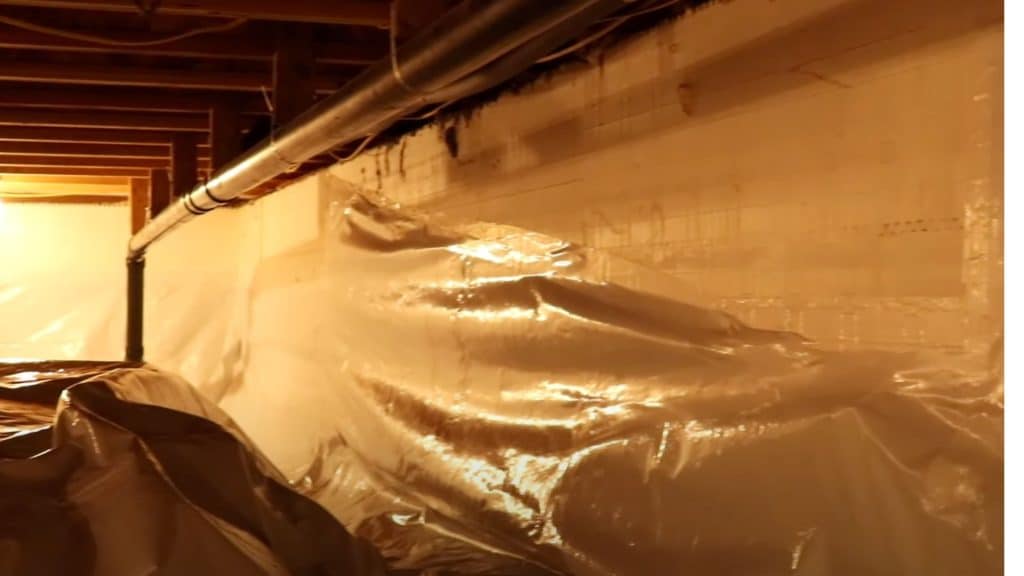
Step 5: Install Vapor Barrier Liner
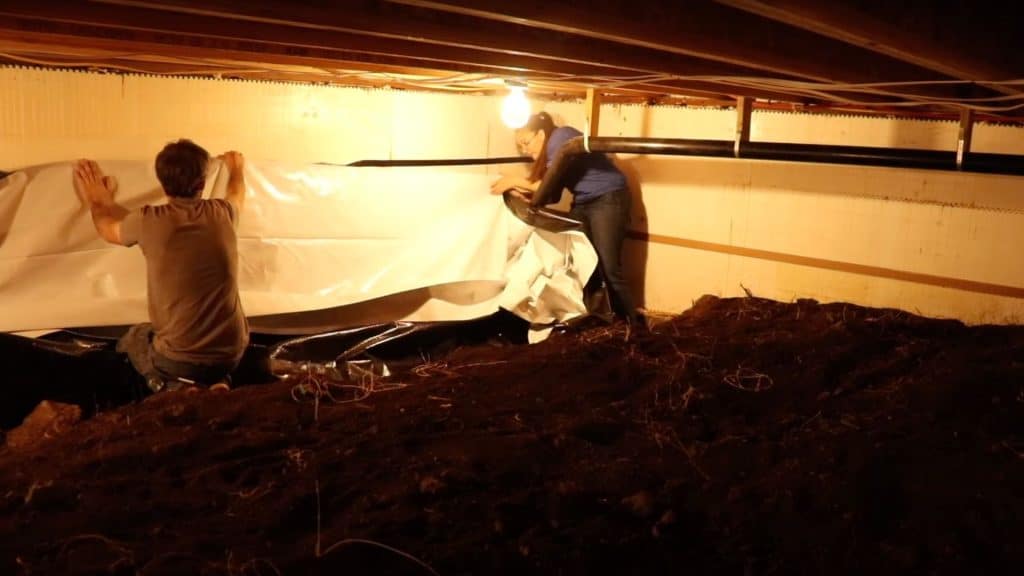
Roll out 10-mil reinforced crawl space liner with white side facing up for easy moisture detection. Start from the center and work outward to prevent air bubbles. Overlap seams by 6 inches and extend liner up walls approximately 6 inches.
Pro Tip: Use 12-foot wide rolls to minimize seams and reduce potential leak points in your system.
Step 6: Seal All Seams and Penetrations
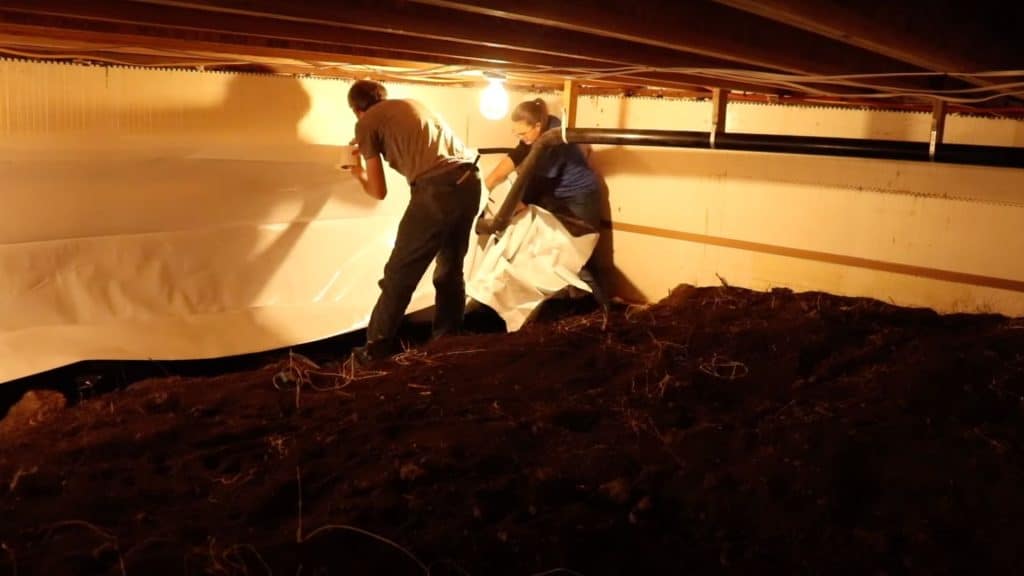
Use white sealing tape to secure all liner seams, wall connections, and penetrations around pipes or utilities. Work methodically from the center outward, ensuring a complete air seal. Double-tape wall connections for extra security against moisture infiltration.
Pro Tip: Take time with corners – they’re hardest to seal but most critical for preventing air leaks.
Step 7: Monitor and Maintain System
Check humidity levels regularly – target 40-50% relative humidity. Seal any remaining penetrations with spray foam. Monitor for water spots on the white liner surface. Run the ventilation system continuously for optimal moisture control and air quality.
Pro Tip: Place the humidity gauge away from water sources for accurate readings – sitting in water gives false high readings.
Video Tutorial
Special thanks to Poots Pastures for providing valuable insights in their video, which I referenced while creating this guide.
DIY vs. Professional Costs: Crawl Space Encapsulation
Professional crawl space encapsulation can cost $3,000-$8,000 for an average home, while DIY projects typically run $800-$2,500, depending on crawl space size and material quality.
| Component | DIY Cost | Professional Cost | Savings |
|---|---|---|---|
| Vapor Barrier (10-mil) | $200-$400 | $800-$1,200 | $600-$800 |
| Rim Joist Insulation | $150-$300 | $500-$800 | $350-$500 |
| Ventilation Fan & Kit | $100-$200 | $400-$600 | $300-$400 |
| Sealing Tape & Materials | $50-$100 | $200-$300 | $150-$200 |
| Labor (DIY = Your Time) | $0 | $1,500-$4,000 | $1,500-$4,000 |
| Total Project Cost | $500-$1,000 | $3,400-$6,900 | $2,900-$5,900 |
DIY crawl space encapsulation can save $3,000-$6,000 compared to professional installation, but requires significant time investment and assumes responsibility for proper installation and long-term performance
Mistakes to Avoid in Crawl Space Encapsulation
Avoid these critical errors that can compromise your encapsulation system’s effectiveness and lead to moisture problems, air leaks, and wasted money.
1. Inadequate Sealing at Penetrations: Failing to properly seal around pipes, electrical lines, and utility penetrations allows moisture and air infiltration into your crawl space.
2. Using the Wrong Tape for Seams: Double-sided tape often fails on foundation walls. White vapor barrier tape provides superior adhesion and long-term sealing performance.
3. Insufficient Ventilation Planning: Installing exhaust fans without proper intake vents creates negative pressure and reduces system efficiency for moisture control and air quality.
4. Skipping Ground Protection: Not placing protective material under the vapor barrier in high-traffic areas leads to punctures from rocks and debris damage.
5. Poor Corner Sealing Technique: Rushing corner installations creates air leaks. Take extra time to fold, tape, and seal corners properly for a complete moisture barrier.
6. Ignoring Humidity Monitoring: Failing to track moisture levels prevents early detection of system problems and compromises long-term crawl space health maintenance.
Conclusion
DIY crawl space encapsulation isn’t just about saving money; it’s about taking control of your home’s health and comfort.
With the right materials and these proven steps, you can change that damp, musty crawl space into a clean, controlled environment that protects your investment.
Remember, the key to success lies in proper sealing, adequate ventilation, and ongoing monitoring. Take your time with corners and penetrations; these details make the difference between a system that works and one that fails.
Your crawl space affects everything from your energy bills to your family’s air quality.
By tackling this project yourself, you’re not just saving thousands of dollars; you’re gaining valuable knowledge about your home’s most important systems.
Ready to start your encapsulation project?