Foundation settlement happens to every home over time. But when your house starts separating from itself due to ongoing foundation movement, you need immediate action.
Helical piers offer a proven solution for stabilizing foundations that can’t support traditional push piers. These screw-like supports transfer your home’s weight to stable soil layers deep underground.
You install them by screwing sections into the ground until they reach adequate resistance. The process connects directly to your foundation through steel brackets.
With proper planning and technique, you can complete this foundation repair yourself. This guide provides a step-by-step installation guide for helical piers.
You’ll learn the tools, safety requirements, and professional techniques necessary for achieving long-lasting results.
Helical Pier Solutions for Foundation Settlement
Foundation problems don’t fix themselves. When soil shifts beneath your home, traditional repair methods often fail to provide a lasting solution.
Helical piers work differently than concrete piers or steel push piers. They create their support by screwing into stable soil layers.
How Helical Piers Work:
- Function like a giant screw anchor
- Multiple helical plates along the shaft grab soil during installation
- Create exceptional holding power that increases with depth
- Steel brackets transfer your foundation’s load directly onto the pier system
Professional contractors typically install helical piers, but experienced DIYers can handle smaller projects with confidence. The key lies in understanding soil conditions and load requirements.
You’ll need proper equipment and careful attention to installation pressures.
Step-by-Step Guide to Helical Pier Installation
Learn the detailed process of installing helical piers to stabilize foundations and prevent settlement.
Tools and Materials Required
| Category | Item | Purpose |
|---|---|---|
| Main Equipment | Hydraulic drive head | Powers pier installation |
| Torque motor | Provides controlled rotation | |
| Lift cylinders | Raises the foundation when needed | |
| Pier Components | Lead sections with helical plates | Primary foundation support |
| Extension sections | Additional depth capacity | |
| Steel brackets | Connects piers to the foundation | |
| Support Materials | Carbon fiber staples | Prevents lateral movement |
| Plywood sheets | Protects landscaping | |
| Concrete anchors | Secures brackets | |
| Safety Gear | Hard hats | Head protection |
| Safety glasses | Eye protection | |
| Work gloves | Hand protection |
Step 1: Site Preparation and Foundation Access
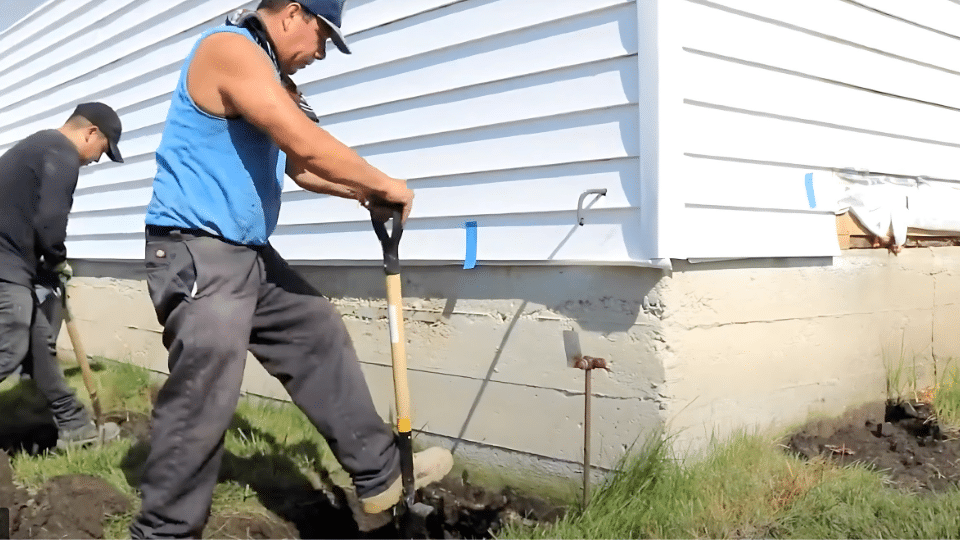
Clear all vegetation and debris from foundation areas where piers will be installed. Excavate soil around the foundation to expose the footing completely. Lay plywood sheets over the grass to prevent equipment damage.
Materials needed in this step:
- Excavation tools
- Plywood protection sheets
- Measuring tape and marking spray
Instructions:
- Clear vegetation and debris from work areas
- Excavate the foundation to expose the footing completely
- Install plywood protection over landscaping
- Mark precise pier locations according to engineering plans
Step 2: Installing Lead Sections with Helical Plates

Position your hydraulic drive head over the first pier location. Attach the lead section to the drive motor using proper coupling connections. Begin screwing the lead section into the soil using steady, controlled pressure.
Materials needed in this step:
- Lead section with helical plates
- Hydraulic drive head
- Torque monitoring equipment
Instructions:
- Position the drive head over the marked pier location
- Attach the lead section to the drive motor securely
- Begin installation with steady downward pressure
- Monitor and record torque readings continuously
- Continue until reaching the required depth or torque
Step 3: Adding Extension Sections for Required Depth
Connect extension sections to lead sections through mechanical couplings. Continue adding extensions until you achieve proper bearing capacity. For residential foundations, most installations require a depth of 25-30 feet.
Materials needed in this step:
- Extension sections
- Coupling hardware
- Torque wrench for connections
Instructions:
- Stop installation when the lead section reaches full depth
- Attach the first extension section using a mechanical coupling
- Resume installation, maintaining proper torque levels
- Add additional extensions as needed for soil conditions
- Verify all connections are secure before continuing
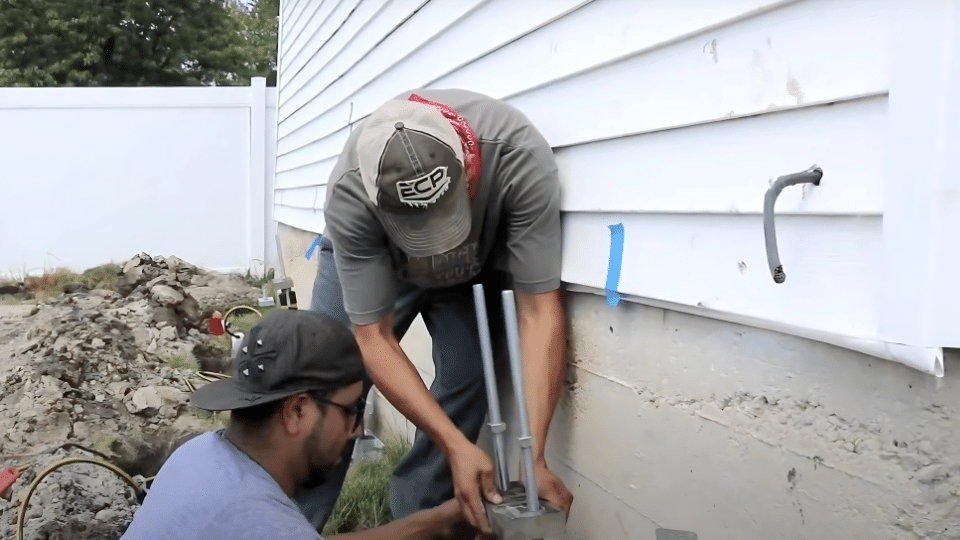
Step 4: Bracket Installation and Load Transfer
Position steel brackets under the foundation footing and bolt directly to the concrete. The bracket must extend completely under the footing for maximum support. Use concrete anchors rated for structural applications.
Materials needed in this step:
- Steel foundation brackets
- Concrete anchor bolts
- Hydraulic lift cylinders (if required)
- Torque specifications chart
Instructions:
- Position the bracket assembly under the foundation footing
- Ensure complete contact between the bracket and the concrete
- Install structural anchor bolts through bracket holes
- Torque all connections to the specified values
- Test bracket stability before loading
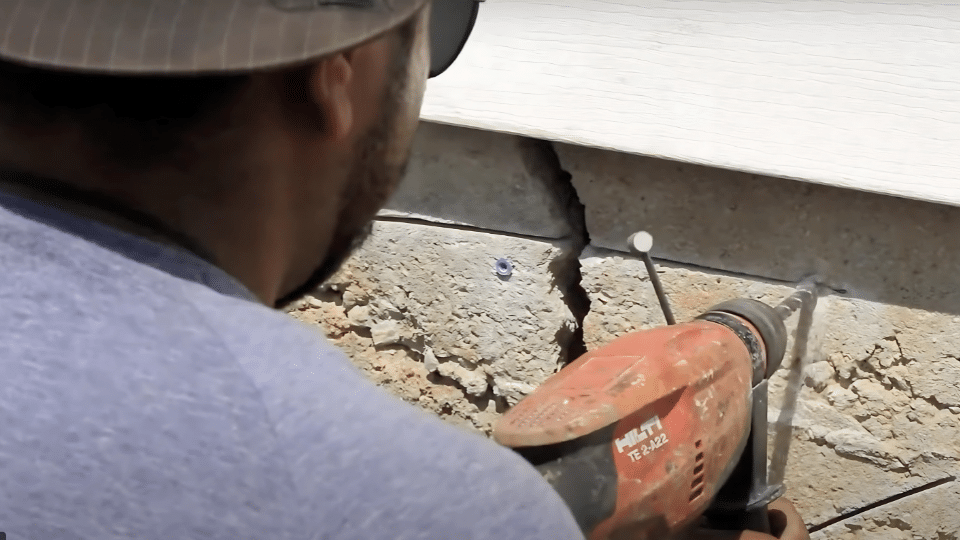
Step 5: Final Connections and Carbon Fiber Reinforcement

Connect brackets to pier systems using grade 8 bolts. Apply proper torque values to ensure joints won’t loosen over time. Install carbon fiber staples across foundation cracks using structural adhesive.
Materials needed in this step:
- Grade 8 connection bolts
- Carbon fiber staples
- Structural adhesive
- Torque wrench
Instructions:
- Connect brackets to pier assemblies using structural bolts
- Apply specified torque values to all connections
- Install carbon fiber staples across foundation cracks
- Apply structural adhesive according to the manufacturer’s directions
- Allow proper curing time before loading the system
Video Tutorial
Special thanks to The Real Seal, LLC, for providing valuable insights in their video, which I referenced while creating this guide.
Essential Tips for Successful Helical Pier Installation
Key tips to ensure a smooth and effective helical pier installation for foundation stabilization.
1. Foundation Load Calculations and Pier Spacing
Calculate the total building weight and divide by the planned pier locations. Each pier must support its share of the foundation load. Most helical piers support 15,000 to 35,000 pounds, depending on size and soil conditions.
Space piers closer together in areas with higher loads. Corners and beam bearing points require additional support.
2. Soil Testing and Site Evaluation
Conduct soil tests before starting your project. Simple penetration tests reveal soil density at various depths. Understanding soil conditions helps determine proper pier size and installation depth.
Look for signs of previous soil movement around your foundation. Settlement cracks, tilted walls, or sticking doors indicate ongoing soil problems.
3. Safety Considerations and Code Compliance
Foundation work requires strict attention to safety protocols. Shore all excavations deeper than 4 feet. Never enter unprotected excavations regardless of depth.
Wear appropriate personal protective equipment, including hard hats, safety glasses, and steel-toed boots. Check local building codes before starting your project.
4. Quality Control and Installation Testing
Record torque readings at each pier location for future reference to monitor installation quality throughout your project. Consistent torque values indicate proper installation.
Test pier connections after installation but before loading. Check all bolts for proper torque values. Document your installation with photographs and measurements.
5. Maintenance Schedule and Long-term Care
When properly installed, helical pier systems require minimal maintenance. Inspect visible components annually for signs of corrosion or damage. Check connection bolts for looseness and retorque immediately if needed.
Monitor foundation settlement using simple measurement techniques. Keep pier locations marked for future reference.
Common Installation Mistakes to Avoid
| Mistake | Consequence | Prevention |
|---|---|---|
| Inadequate soil testing | Poor pier performance | Conduct a thorough site evaluation |
| Incorrect pier spacing | Uneven foundation support | Follow engineering calculations |
| Improper torque values | Connection failure | Use calibrated torque equipment |
| Skipping bracket bolts | Load transfer problems | Install all specified fasteners |
| Rushed installation | Quality control issues | Allow adequate time for proper work |
| Ignoring local codes | Legal and safety problems | Obtain required permits |
| Poor excavation safety | Serious injuries | Follow OSHA excavation standards |
| Inadequate documentation | Future maintenance problems | Keep detailed installation records |
When to Call Professional Help?
Large commercial buildings often exceed the typical capabilities of DIY projects. Multiple-story structures create complex loading conditions that need engineering analysis.
Unusual soil conditions present special challenges. Bedrock close to the surface requires specialized drilling equipment. Complex structural problems may indicate issues beyond foundation settlement.
Final Thoughts
When performed correctly, helical pier installation offers an effective solution for foundation settlement problems. Using proper techniques and equipment, you can complete smaller residential projects.
The key lies in thorough planning, quality materials, and careful attention to installation details. Proper soil evaluation ensures you select appropriate pier sizes and spacing for your specific conditions.
Following safety protocols protects you and others during the installation process. Quality control measures help ensure long-lasting results that protect your investment in the foundation.
Keep in mind that complex projects often require professional assistance to achieve optimal results. Document your installation thoroughly for future maintenance and reference.
With proper installation and care, helical piers provide decades of reliable foundation support for your home.
Frequently Asked Questions
How Much Does It Cost to Install a Helical Pier?
Helical pier installation costs range from $150-$400 per pier for DIY projects, while professional installation runs $1,200-$1,500 per pier.
Can you install Helical Piers yourself?
Yes, experienced DIYers can install helical piers for smaller residential projects with proper equipment and safety precautions.
How Deep Should Helical Piers Be?
Helical piers typically require 25-30 feet depth for residential foundations, depending on soil conditions and load requirements.
What Are the Disadvantages of Helical Piers?
Main disadvantages include high upfront costs, need for specialized equipment, and potential installation challenges in rocky soil conditions.