Have you ever wondered why some concrete structures develop holes that look like a honeycomb pattern?
This common construction defect affects buildings, bridges, and infrastructure projects worldwide, creating both safety and financial concerns.
Construction professionals face this challenge regularly during their projects. The problem can appear suddenly after removing formwork, leaving builders scrambling for solutions.
Understanding how to handle this issue separates experienced contractors from newcomers. Quick identification and proper response prevent minor problems from becoming major structural failures.
I’ll guide you through the complete process of identifying, preventing, and repairing this concrete defect. You’ll learn practical techniques that save time, money, and ensure your projects meet safety standards.
What Is Concrete Honeycombing?
Concrete honeycombing refers to the formation of voids or air pockets within hardened concrete. These spaces appear as clusters of holes that resemble a honeycomb pattern.
The condition occurs when the concrete mix fails to fill all spaces around reinforcement bars. Coarse aggregates are separated from the cement paste during the placement process. This separation leaves empty spaces where concrete should be solid.
Honeycombing typically appears on vertical surfaces, such as walls and columns. The problem becomes visible once the formwork is removed. Small holes may connect to form larger cavities within the concrete structure.
This defect compromises the concrete’s load-bearing capacity. It also exposes steel reinforcement to moisture and chemicals. The result is a weaker structure that may fail under normal loads.
Why Is Concrete Honeycombing a Problem?
Concrete honeycombing poses significant structural and safety concerns, impacting building performance. The voids weaken the concrete’s ability to safely carry loads.
This defect also exposes steel reinforcement to harmful elements. Water and chemicals enter through the holes, causing long-term damage to the structure.
Key Problems:
- Reduces structural integrity: The compromised concrete reduces the structure’s ability to safely carry loads, increasing the risk of failure.
- Exposes steel reinforcement: Moisture entering through honeycomb voids accelerates the corrosion process, weakening the reinforcement.
- Allows water penetration: Moisture seeps into the structure, causing freeze-thaw damage and internal deterioration.
- Creates maintenance issues: Repair costs increase significantly over the building’s lifespan.
- Threatens safety standards: The weakened structure may fail under standard stress loads, posing significant safety risks to occupants.
- Reduces building lifespan: Structures deteriorate faster due to ongoing water damage and steel corrosion.
When moisture infiltrates honeycombing voids, the steel reinforcement is subjected to accelerated rusting, which causes it to expand and crack the surrounding concrete. If not addressed, this corrosion can lead to further structural damage.
What Causes Honeycombing in Concrete?
Multiple factors during concrete placement create conditions that lead to honeycombing defects. Understanding these causes helps construction teams prevent this costly problem before it occurs.
1. Improper Concrete Mix Design
Mix proportions play a crucial role in preventing honeycombing. High water-cement ratios cause the segregation of materials.
Insufficient cement paste fails to properly bind the aggregates. Oversized aggregates cannot flow around reinforcement bars easily.
2. Inadequate Vibration
Proper vibration removes air bubbles from fresh concrete. Under-vibration leaves voids throughout the mix. Over-vibration separates aggregates from cement paste. Workers must use correct vibration techniques and timing.
3. Poor Placement Techniques
Dropping concrete from excessive heights causes segregation. Placing concrete in thick layers prevents proper consolidation. Rapid pouring creates air pockets in the mix. Workers should consistently follow proper placement procedures.
4. Formwork Issues
Tight formwork spacing restricts concrete flow. Poorly sealed joints allow cement paste to leak out. Insufficient formwork cleaning leaves debris that blocks the flow of concrete. Clean and well-designed formwork prevents most honeycombing problems.
5. Weather Conditions
Hot weather accelerates concrete setting time. Cold weather slows down the curing process. High winds increase water evaporation from the concrete surface. Extreme temperatures significantly impact the workability and final strength of concrete.
How Can You Prevent Concrete Honeycombing?
Preventing honeycombing starts with proper planning before concrete placement begins. Success depends on using correct techniques during the mixing, pouring, and vibration processes.
- Mix Design Optimization: Start with proper concrete mix proportions. Use adequate cement content for workability. Select appropriate aggregate sizes for your project. Test mix designs before full-scale placement.
- Proper Placement Techniques: Place concrete in manageable layers of 12-18 inches. Avoid dropping concrete from heights above 5 feet. Use chutes or pumps for controlled placement. Work systematically from one end to the other.
- Effective Vibration Methods: Use internal vibrators for deep sections. Apply vibration immediately after placement. Maintain consistent vibration patterns throughout. Stop vibrating when air bubbles stop rising to the surface.
- Quality Control Measures: Inspect formwork before concrete placement. Clean all surfaces thoroughly. Check reinforcement spacing and clearances. Monitor concrete temperature and slump regularly.
- Skilled Workforce: Train workers on proper placement techniques. Supervise critical concrete pours closely. Provide adequate tools and equipment. Establish clear communication protocols on site.
How to Fix Concrete Honeycombing After It Happens?
Successful honeycombing repair depends on following the right sequence of steps. Proper timing during the repair process ensures strong, long-lasting results.
Tools and Products You’ll Need
Gather all the necessary tools and materials to effectively prevent and repair honeycombing at every stage of the process.
Essential Repair Materials:
- High-strength expanding cement
- Clean water
- Wire brush
- Vacuum cleaner
- Compressed air
Application Tools:
- Putty knife
- Small pointed trowel
- Mixing container
- Mouse sander with 80-grit sandpaper
- Clean water for the trowel
Step 1: Surface Preparation
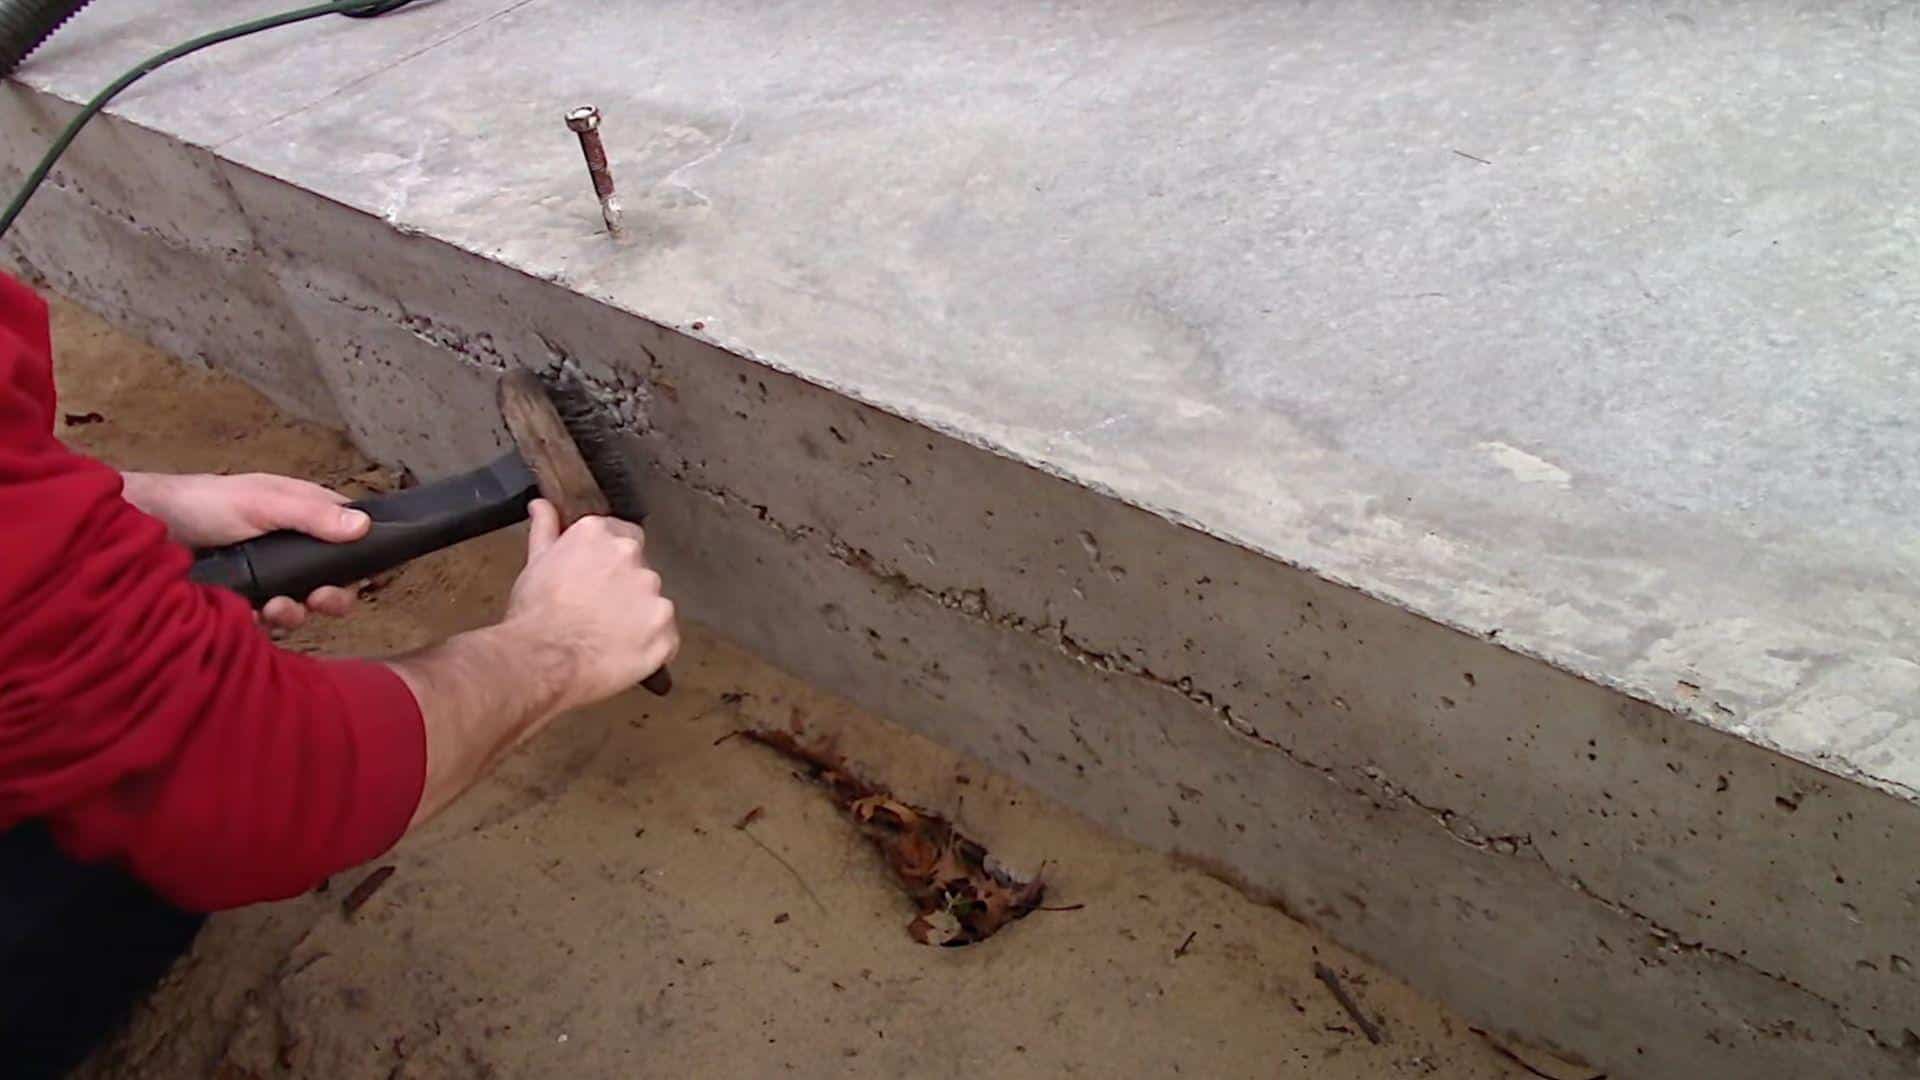
Start by ensuring the concrete pad is completely dry. Clean all affected areas using a wire brush to remove loose debris.
Use a vacuum to collect particles as they loosen up. Loose material prevents proper adhesion between old and new concrete.
Step 2: Deep Cleaning
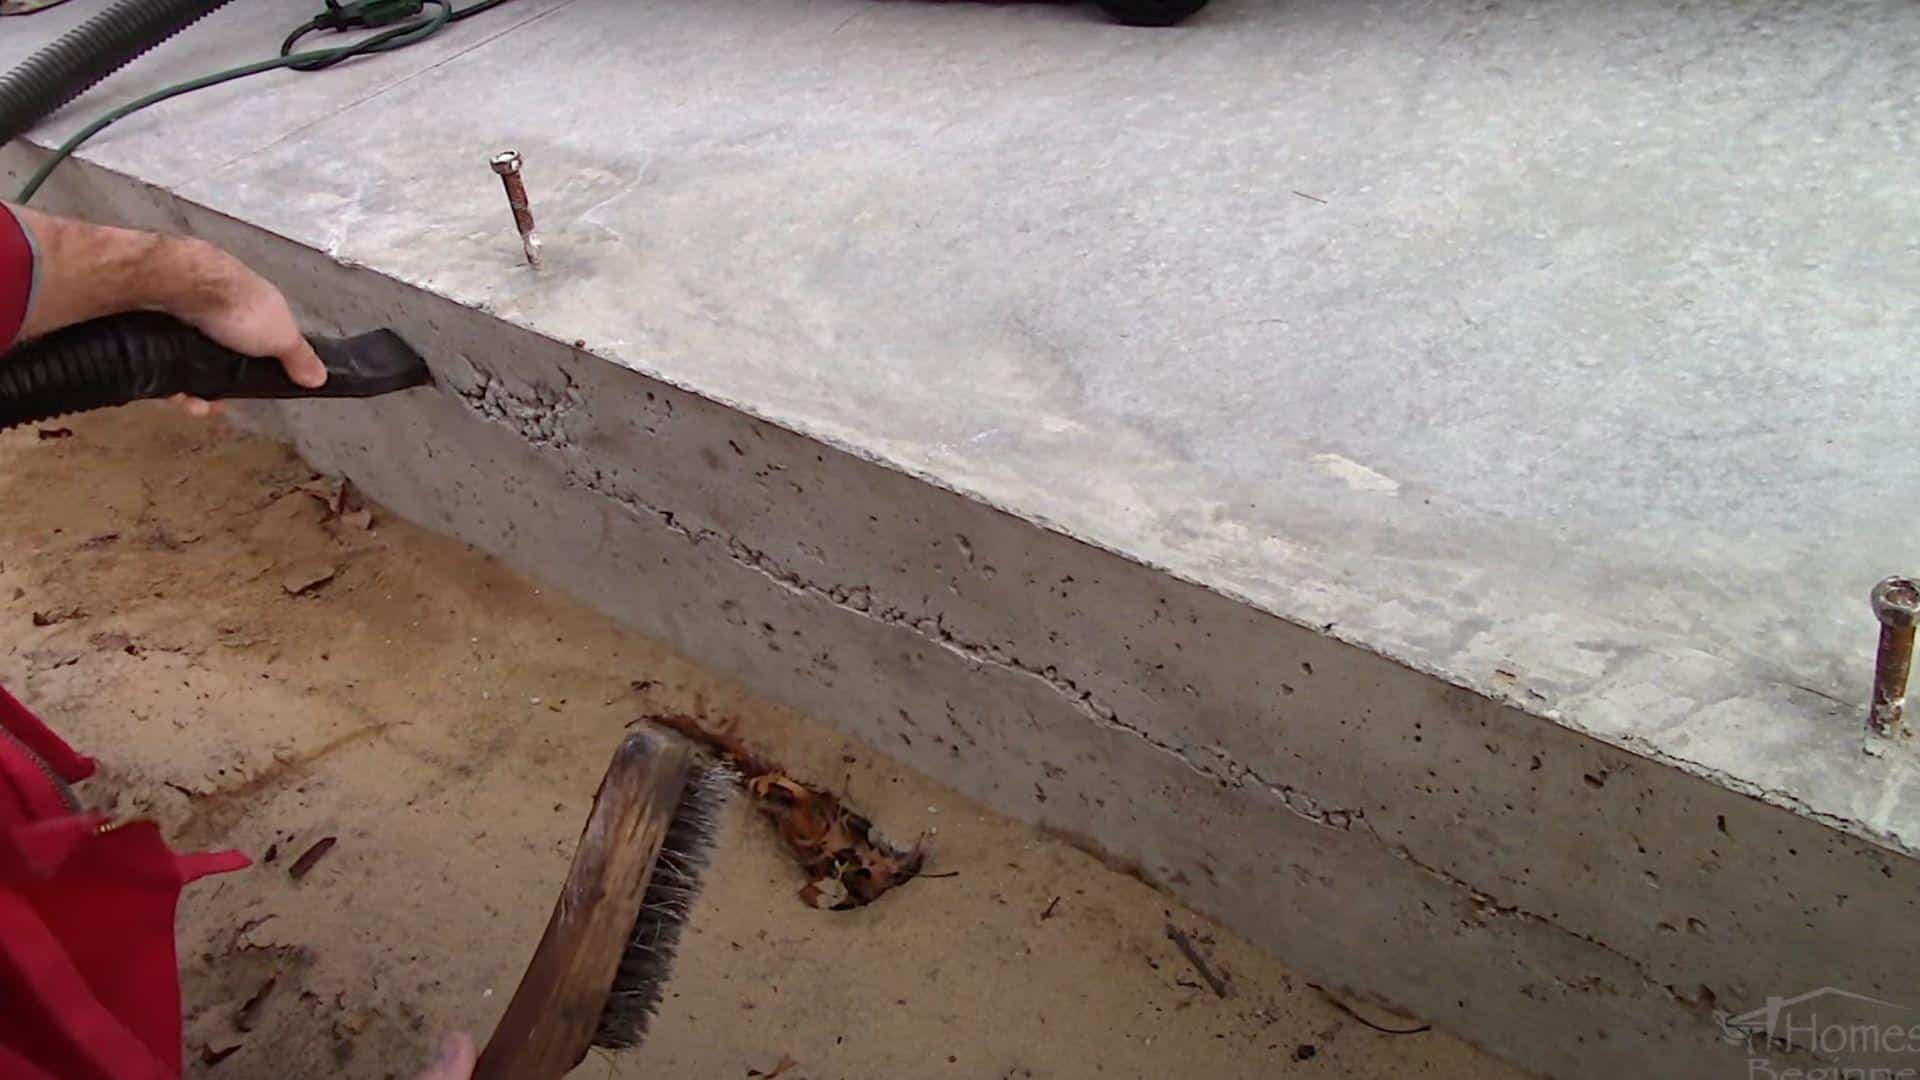
Use compressed air to blow out any remaining sand or debris from the pockets. This step removes particles that may have fallen into deeper areas.
Clean surfaces are essential for strong bonding between the repair material and the existing concrete.
Step 3: Mix the Repair Material
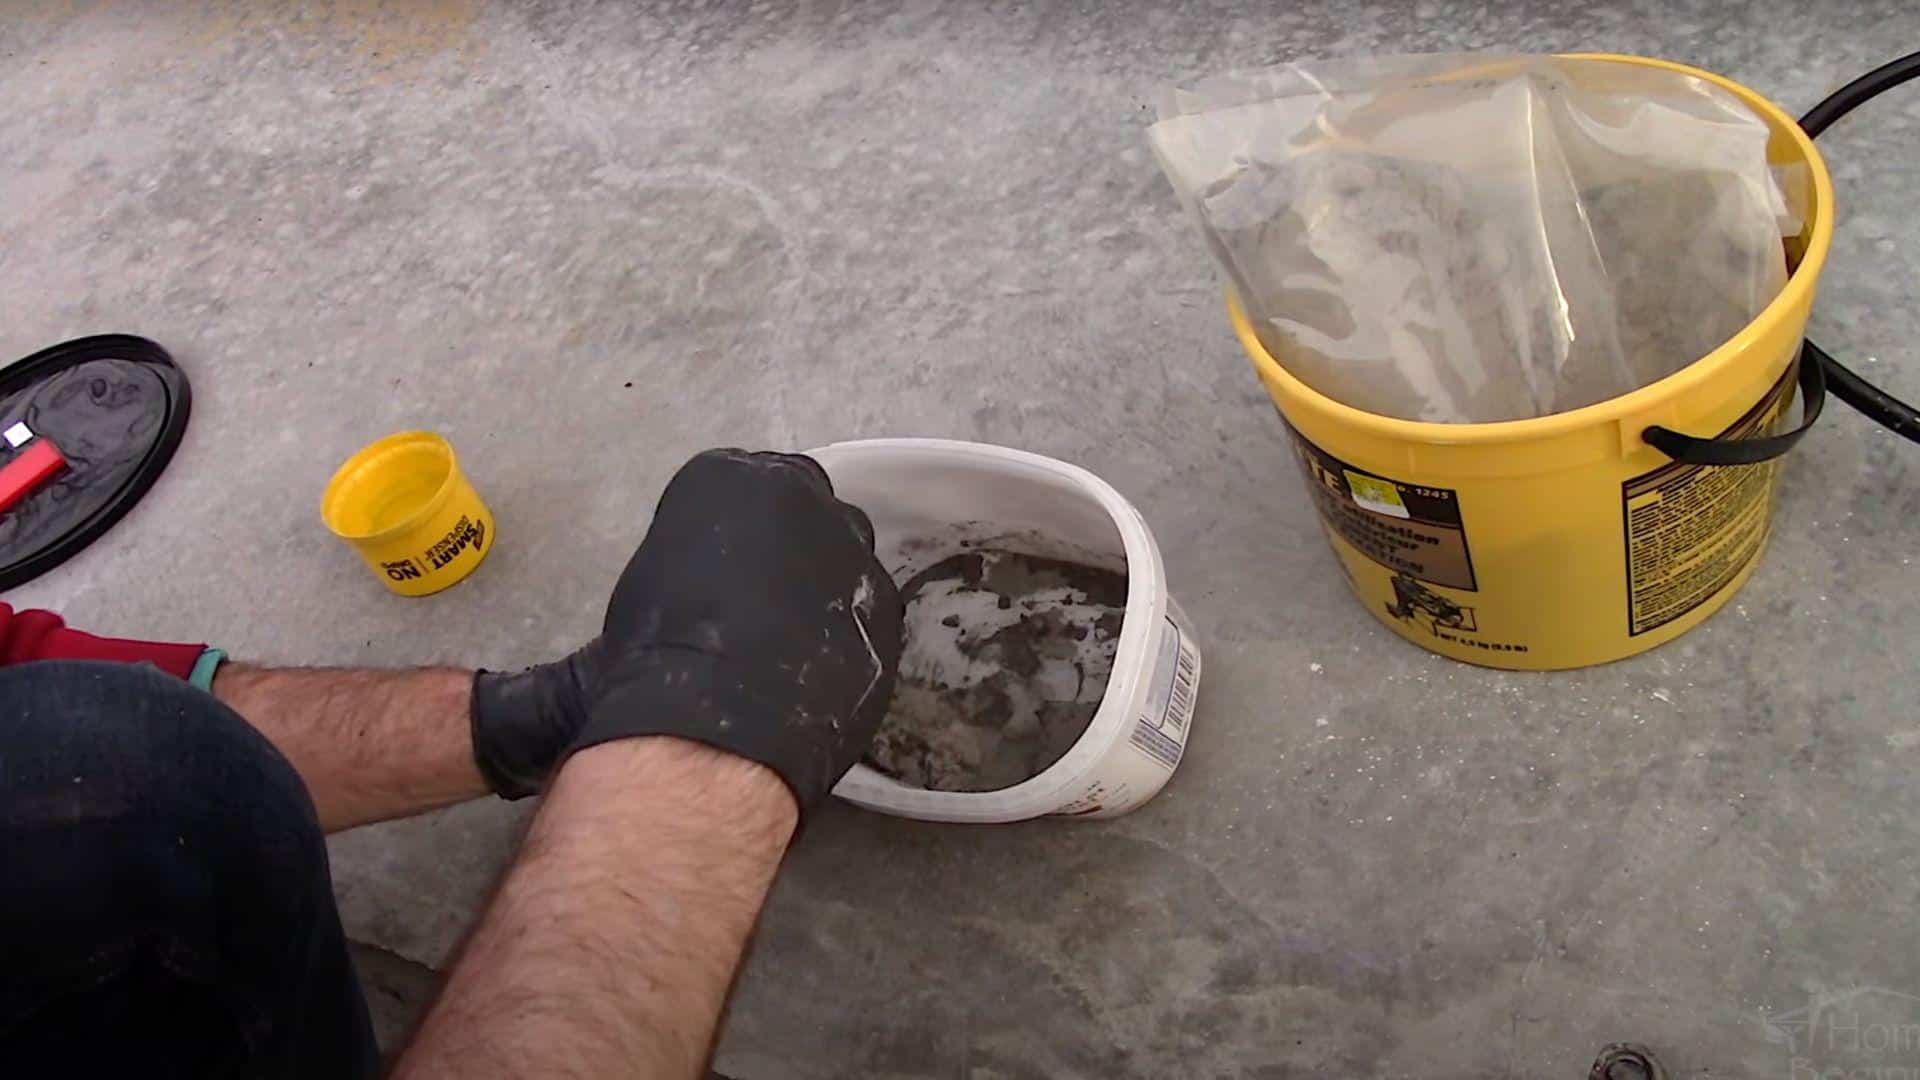
Pour the desired amount of high-strength expanding cement into your mixing container. Add water slowly according to product specifications. Mix thoroughly using a putty knife until you achieve the right consistency.
Step 4: Check Mixture Consistency
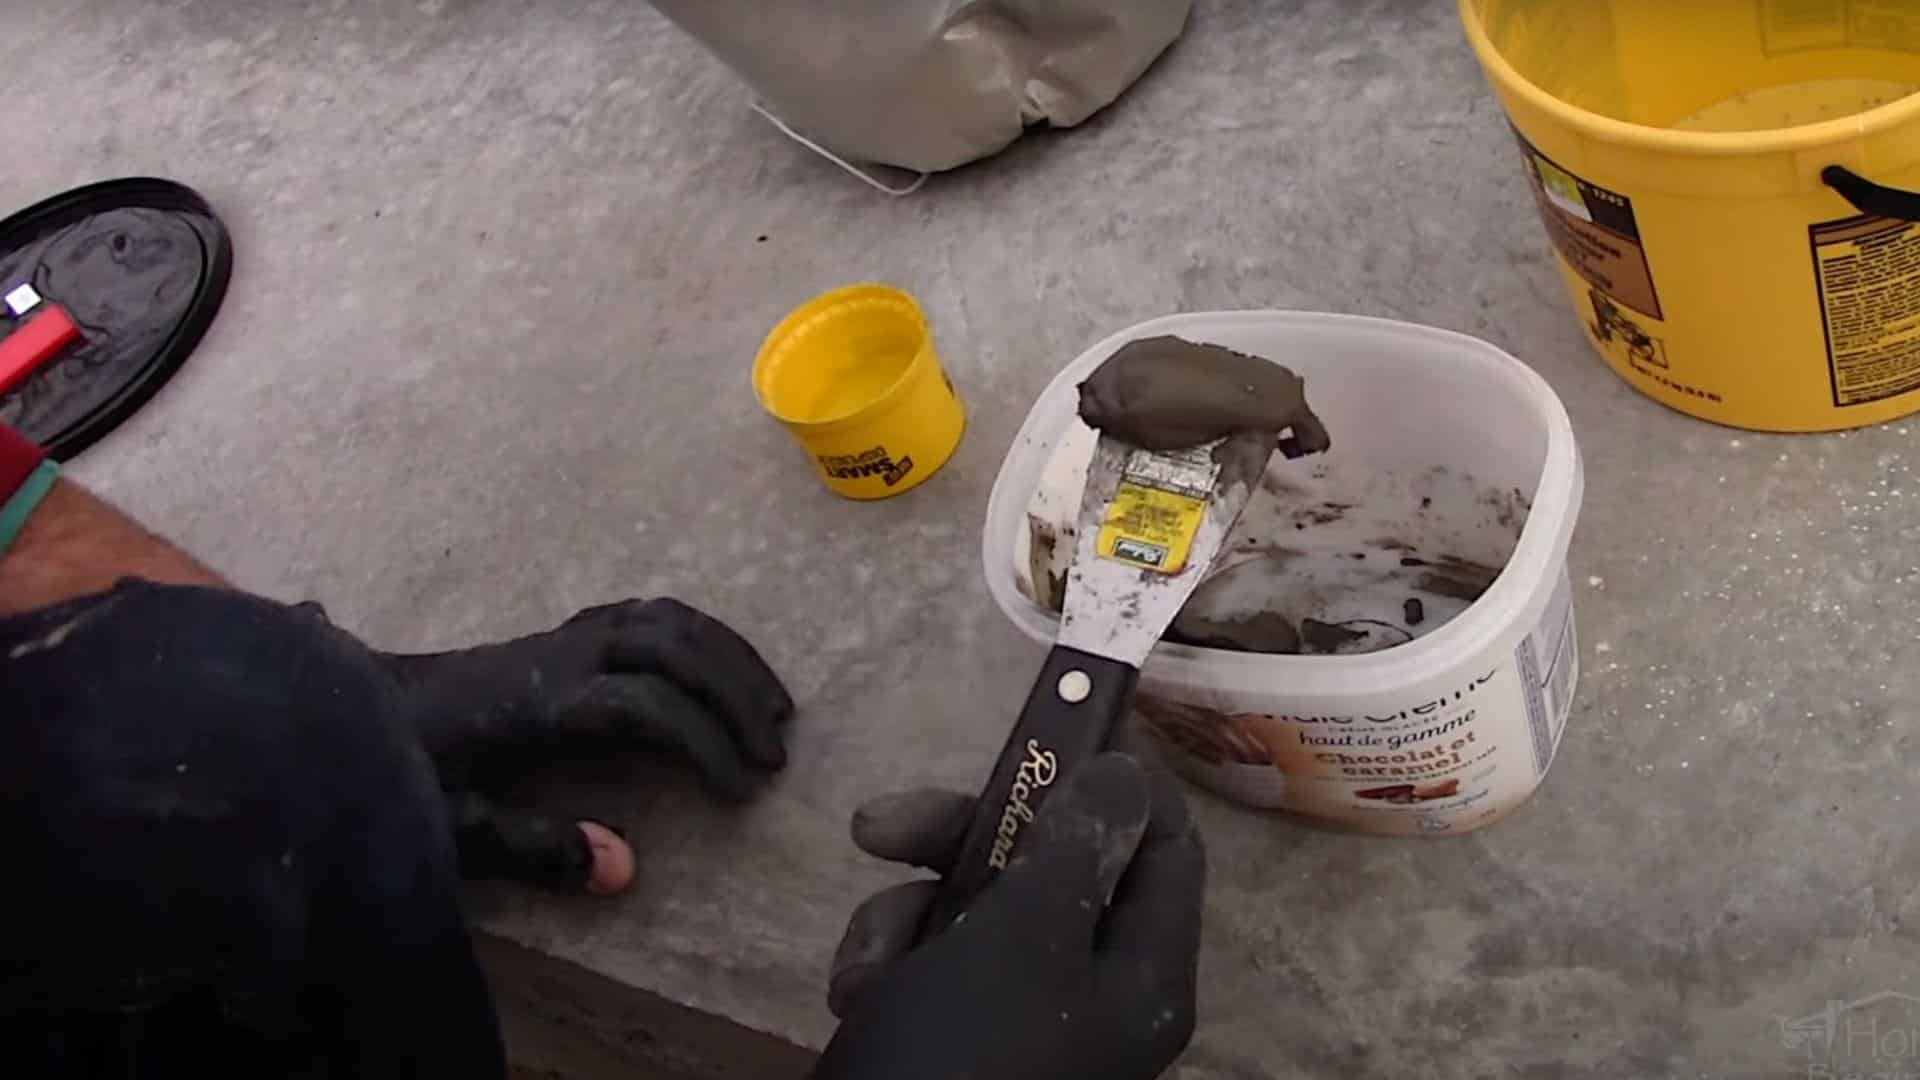
The mixture should hold its shape for a few seconds before slowly moving. Too thick means it won’t fill holes easily or leave smooth finishes. Too runny means it won’t hold on vertical surfaces or achieve full strength.
Step 5: Apply the Repair
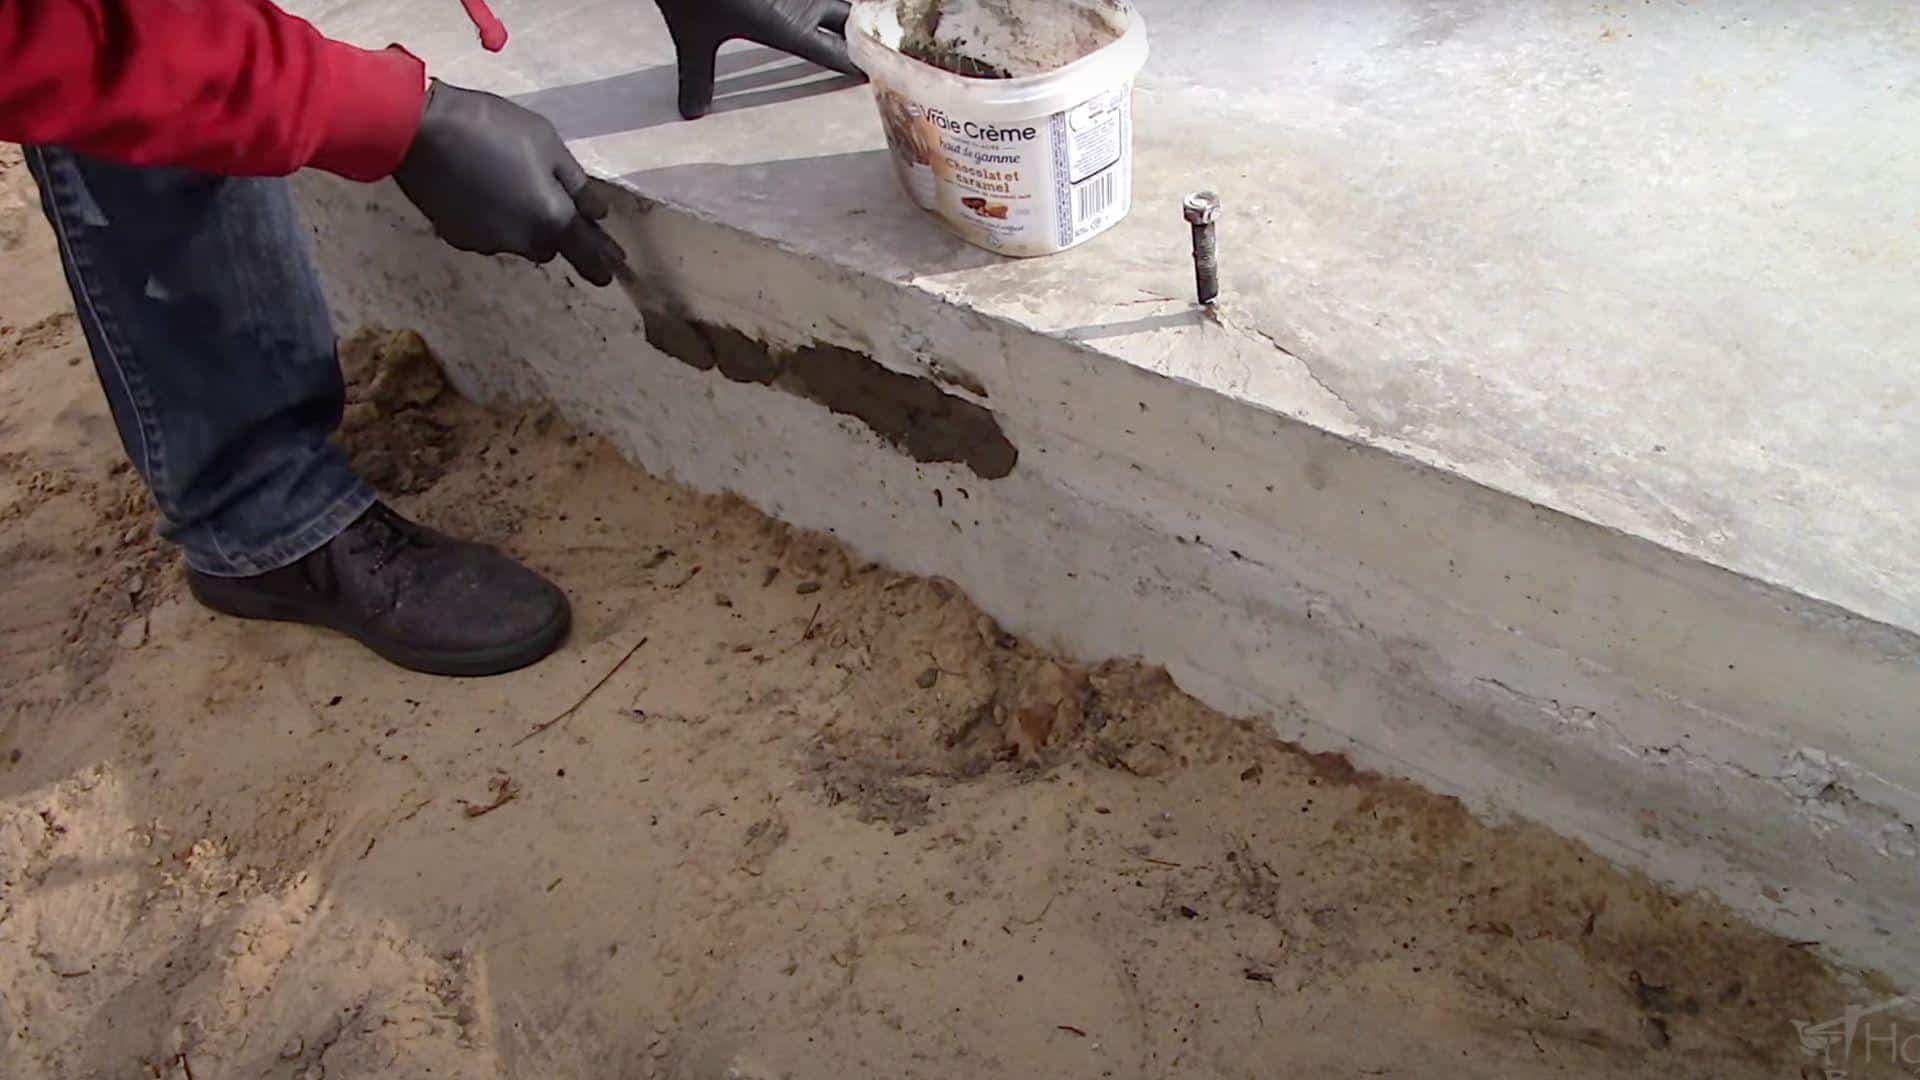
Work in 2-3 foot sections to stay ahead of the quick-setting time. Use your putty knife to force the cement mixture into the honeycombing pockets. Apply small amounts at a time to avoid waste. Push the mixture deep into holes to ensure complete filling.
Step 6: Smooth the Surface
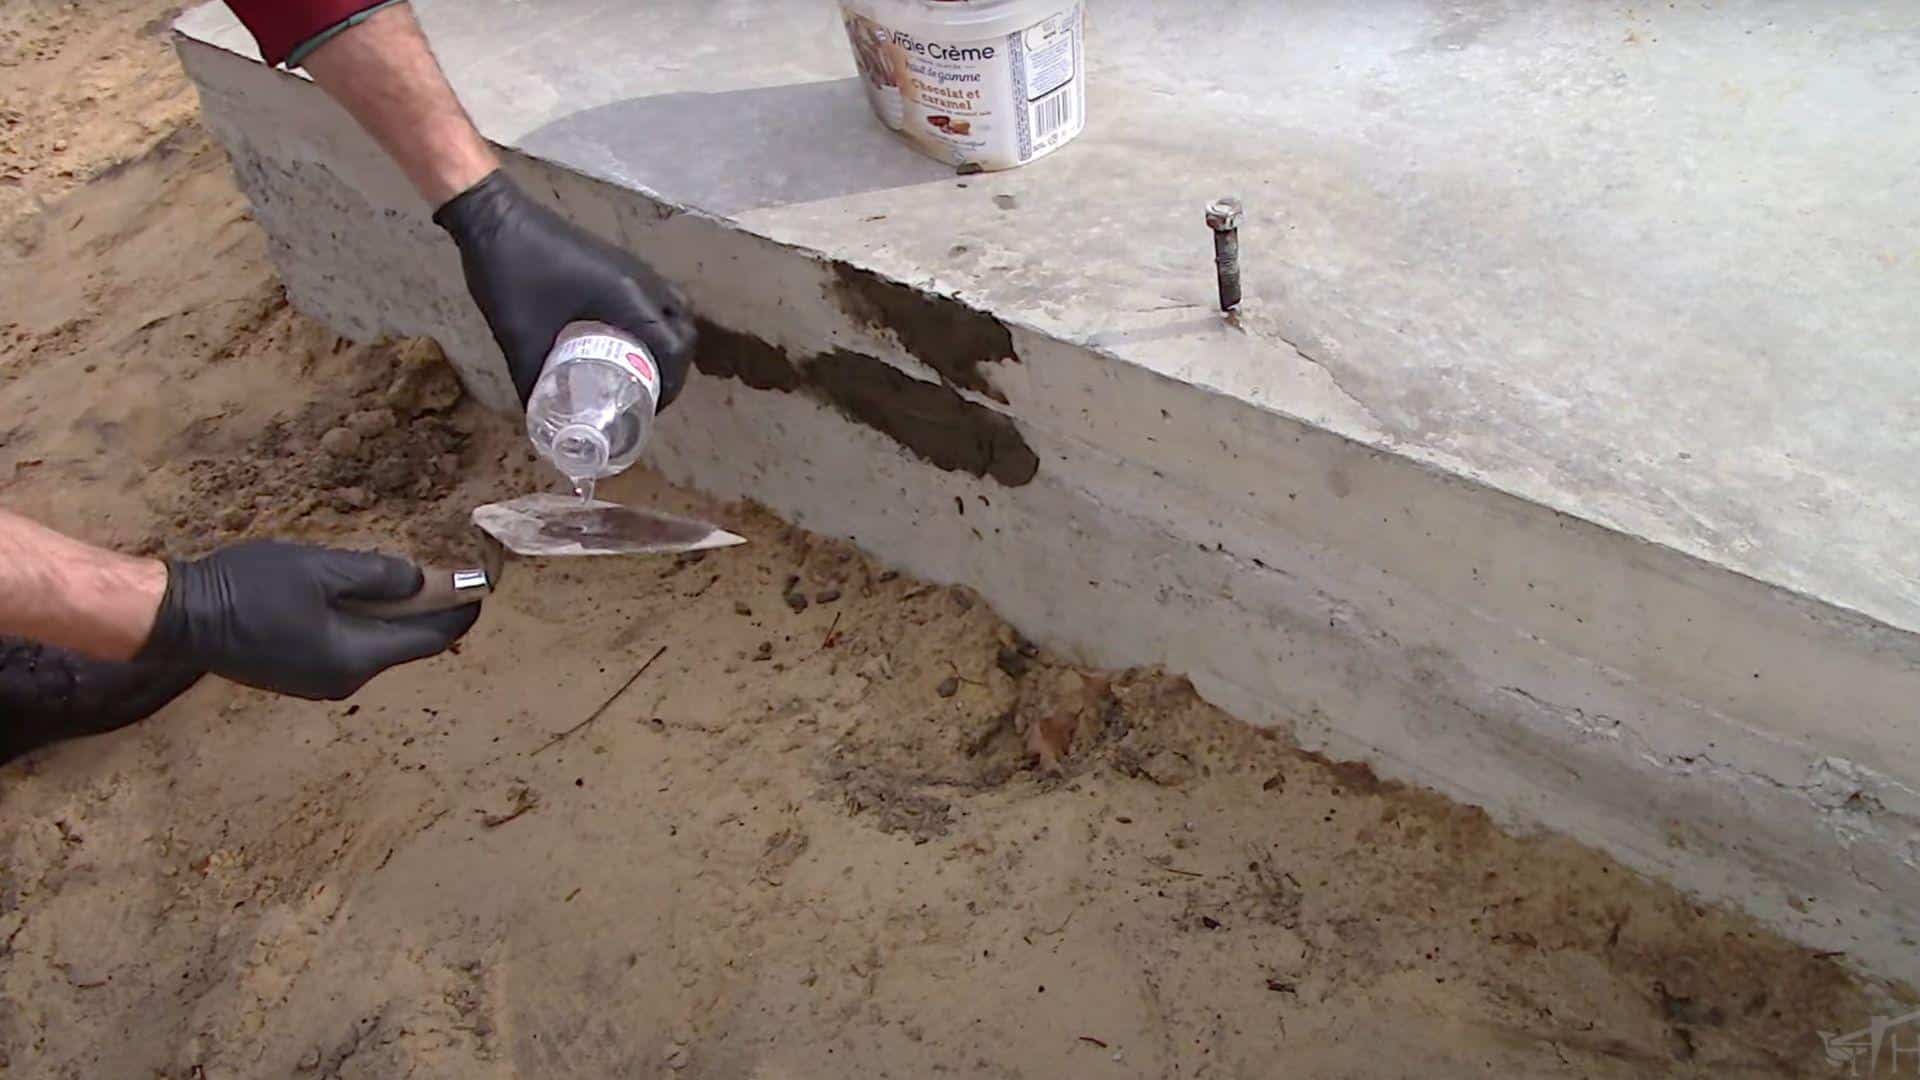
Use a clean, wet pointed trowel to smooth out the repair. Work the mixture across the surface to fill any missed spots. The wet trowel prevents cement from sticking and helps achieve a clean finish.
Step 7: Allow Proper Curing
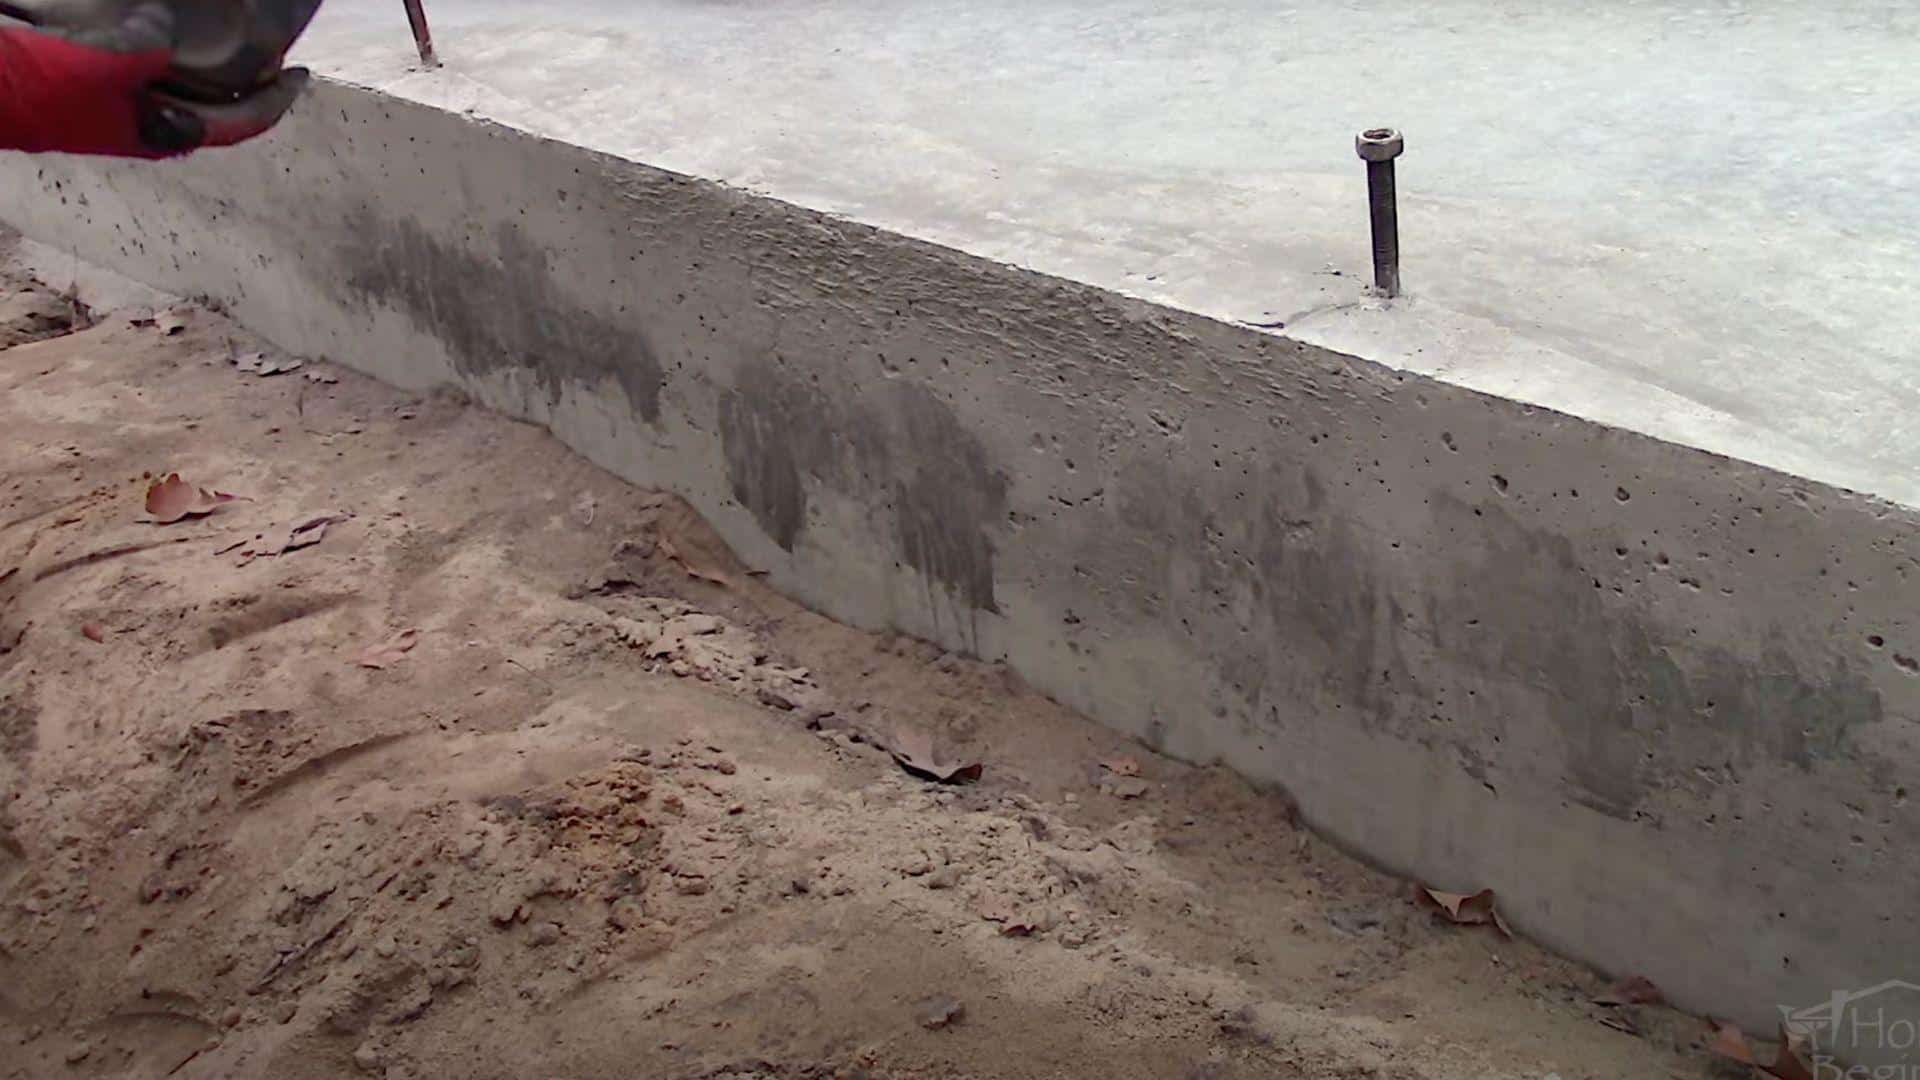
Let the repair cure for 24 hours before handling. The mixture achieves full strength in 28 days. Colors will lighten as water evaporates from the surface.
Step 8: Final Finishing
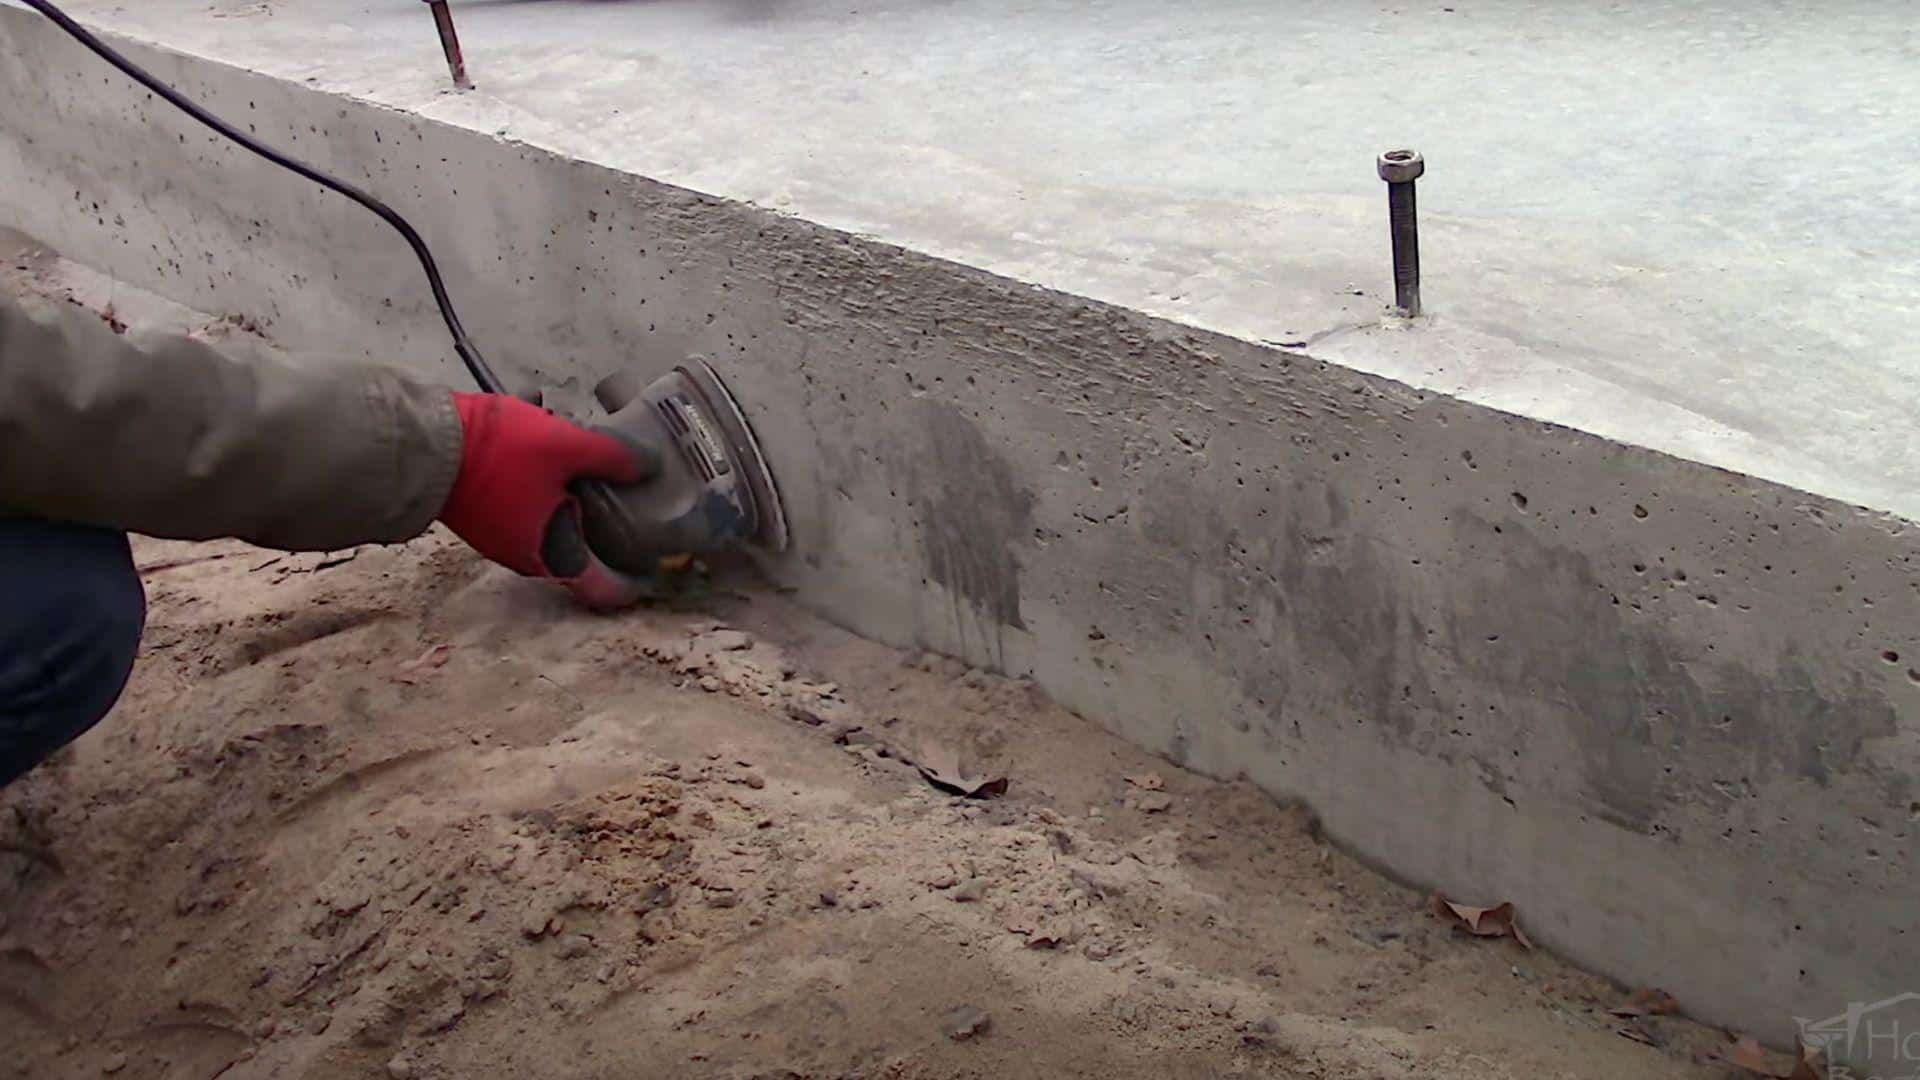
After one week, use a mouse sander with 80-grit sandpaper to smooth any rough areas. Sweep off dust before applying any surface finishes. Clean surfaces ensure proper adhesion of protective coatings.
Video Tutorial
Check out the video for more insights! Watch a step-by-step demonstration of how to prevent and fix the honeycombing in concrete.
By – Homes for Beginners
When to Seek Professional Help for Honeycombing Issues?
Some honeycombing problems are too complex for basic repair methods. Deep voids that extend through the entire thickness of the concrete require expert assessment.
Structural elements like columns and beams require professional evaluation. Exposed reinforcement in critical areas creates immediate safety concerns.
When to Call Professionals:
- Structural damage – Load-bearing columns, beams, or foundations affected.
- Extensive coverage – Multiple areas show honeycombing damage.
- Deep penetration – Voids extend through the concrete thickness.
- Critical locations – High-rise buildings or bridge structures.
- Insurance requirements – Certified repairs are needed for warranty.
- Complex repairs – Extreme weather or confined space conditions.
Seek help early when honeycombing appears in structural elements. Delaying professional intervention increases repair costs and safety risks.
Conclusion
Concrete honeycombing remains a preventable problem with proper planning and execution during construction projects. Understanding the causes helps construction teams avoid costly mistakes and structural failures.
Prevention through good mix design and placement techniques costs significantly less than expensive repairs later. Quality control during concrete placement prevents most honeycombing issues from occurring in the first place.
When honeycombing does occur, prompt action prevents further structural damage and safety concerns. Professional help ensures repairs meet safety standards and building code requirements effectively.
What are your experiences with concrete honeycombing issues? Share your thoughts in the comments below or ask questions about specific situations you’ve encountered on your construction projects.
Frequently Asked Questions
How Much Honeycomb Is Acceptable in Concrete?
No specific limit exists for acceptable honeycombing in concrete structures. Keep honeycomb effects minimal or avoid them completely to maintain structural integrity and concrete strength.
How to Check Carbonation in Concrete?
Use phenolphthalein as a revealer for testing carbonation levels. High pH concrete (>10) turns bright pink, while low pH concrete (
How to Remove Carbon Stains from Concrete?
Apply acid or alkaline cleaner liberally to affected areas. Scrub the surface thoroughly, rinse with clean water, and allow to dry completely.