Water in your basement is more than just an inconvenience; it poses a threat to your home’s value and your family’s health.
Moisture leads to mold growth, structural damage, and costly repairs that nobody wants to face.
Many homeowners believe that waterproofing requires expensive excavation around their foundation, but interior solutions offer a more cost-effective approach.
This guide explains how interior basement waterproofing works, when it’s most effective, and its essential limitations that you should be aware of.
You’ll learn a simple DIY steps process that can handle minor moisture problems, along with clear signs indicating when professional help is necessary.
By the end, you’ll understand whether interior waterproofing is right for your specific situation and budget.
What Is Interior Basement Waterproofing?
Interior basement waterproofing refers to methods applied from the inside of the basement to control moisture and prevent water damage.
Homeowners typically consider internal waterproofing when they notice damp walls, musty odors, or minor water seepage but want to avoid the high cost and disruption of exterior excavation.
This approach works by managing water that has already entered the basement area, using sealants, coatings, drainage systems, and vapor barriers to redirect moisture away from living spaces.
While not as comprehensive as exterior solutions, interior waterproofing offers a more accessible and budget-friendly option for addressing moderate moisture problems without major landscaping or structural work.
Before choosing an interior method, review our detailed basement waterproofing tips to learn the essential dos and don’ts that ensure long-term protection.
Common Causes of Water Intrusion
- Hydrostatic pressure – Underground water pushes against foundation walls when soil becomes saturated after heavy rain or snow melt.
- Cracks in foundation walls or floor – Concrete naturally develops small cracks over time, creating entry points for water to seep through.
- Poor drainage/grading – Water pools around your home’s foundation when soil slopes toward the house instead of away from it.
- Window wells or pipe penetrations – Areas where utilities enter your basement or window wells collect water and create weak spots for leaks.
Types of Interior Basement Waterproofing Methods
| Method | Description | Best For | Limitations |
|---|---|---|---|
| Waterproofing Paints & Sealants | Quick-fix coatings applied to walls | Minor moisture, DIY tasks | Not for active leaks |
| Hydraulic Cement for Cracks | Seals small cracks and joints | Temporary crack repair | Not a long-term fix |
| Vapor Barriers & Wall Liners | Plastic/foil sheets block wall moisture | Prevents vapor, paired with other systems | Won’t stop liquid water |
| Interior Drain Tile + Sump Pump | Drains water under the foundation to a sump | High groundwater, recurring leaks | Professional installation recommended |
| Epoxy/Polyurethane Crack Injections | Injected into cracks to seal deep leaks | Foundation wall leaks | Not for widespread seepage |
Effectiveness of Interior Basement Waterproofing
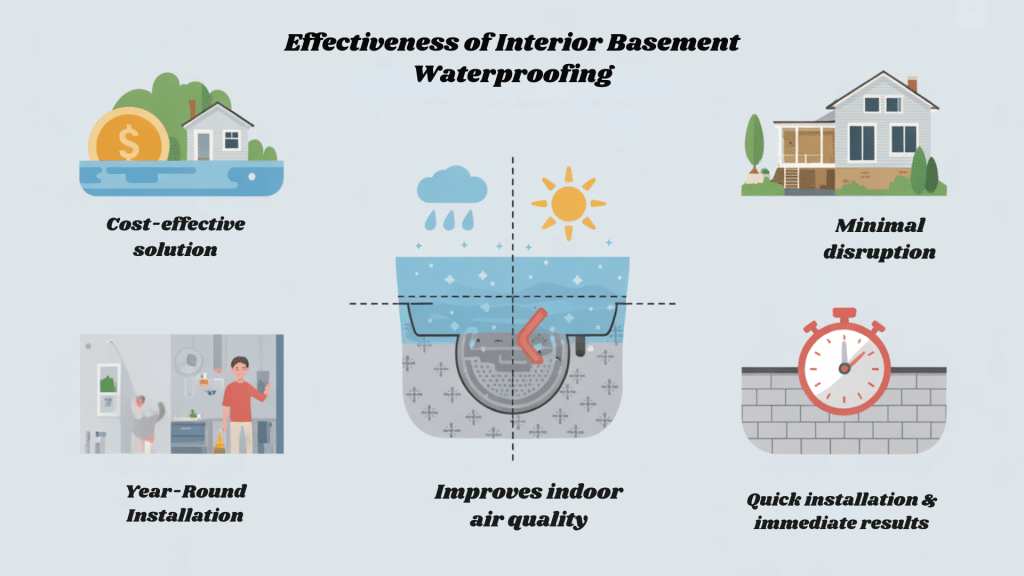
Interior basement waterproofing can effectively manage moisture and leaks from inside. Still, it doesn’t stop water at its source, making it best suited for minor seepage and as part of a complete waterproofing strategy.
1. Cost-Effective Solution
Interior waterproofing costs significantly less than exterior methods because it eliminates the need for expensive excavation work.
You won’t need to hire heavy machinery to dig around your foundation or pay for soil removal. Most homeowners save thousands of dollars by choosing interior systems over exterior alternatives.
The materials themselves are also more affordable and readily available at most home improvement stores.
2. Minimal Disruption
Installation occurs entirely within your basement, so your landscaping remains intact throughout the process.
You won’t have to worry about damaged driveways, sidewalks, or flower beds that often occur with exterior work.
Your family can continue normal daily activities while the work progresses. There’s no need to relocate outdoor furniture or worry about contractor equipment damaging your yard.
3. Year-Round Installation
Interior waterproofing can be installed at any time, regardless of the weather conditions outside. Rain, snow, or freezing temperatures won’t delay your project like they would with exterior excavation.
This flexibility allows you to address moisture problems promptly, rather than waiting for ideal weather conditions.
Winter installations are particularly convenient since basements maintain consistent temperatures year-round.
4. Improves Indoor Air Quality
Interior systems help control basement humidity levels, significantly reducing mold and mildew growth.
Better air circulation prevents musty odors from spreading throughout your home’s living spaces.
Your family will breathe cleaner air, especially important for those with allergies or respiratory conditions. The improved environment also protects stored items from moisture damage and decay.
5. Quick Installation & Immediate Results
Most interior waterproofing projects can be completed within 1-3 days, depending on the size of the basement. You’ll see immediate improvements in moisture control once the system is activated.
Unlike exterior methods that may take weeks to complete, interior solutions provide rapid relief. The quick turnaround means less disruption to your daily routine and faster peace of mind.
Limitations of Interior-Only Waterproofing
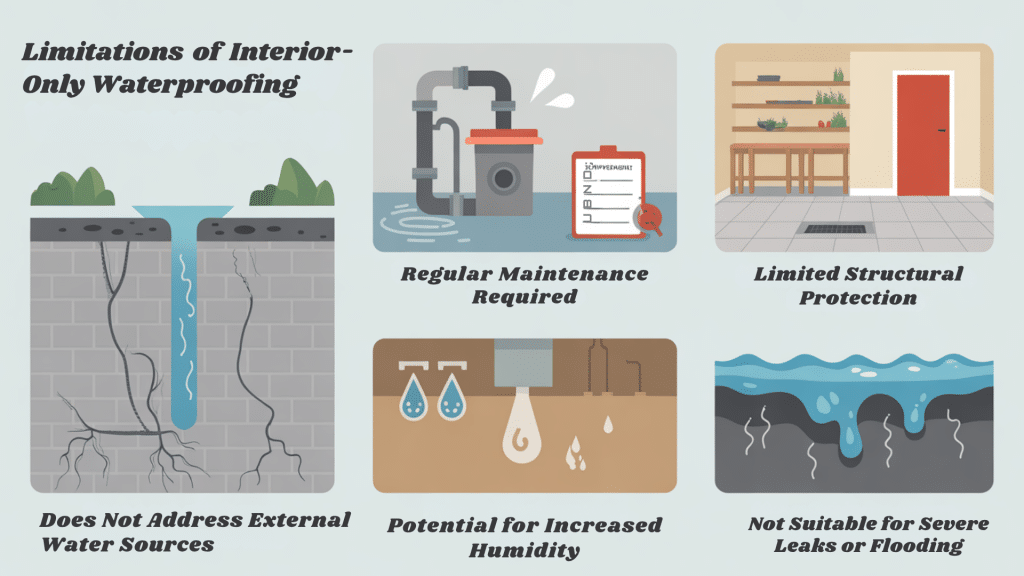
Interior-only waterproofing addresses water after it enters, but doesn’t prevent exterior water intrusion, making it less effective for severe leaks or structural issues.
1. Does Not Address External Water Sources
Interior methods only manage water after it has already entered your basement space. The system won’t reduce hydrostatic pressure from saturated soil pushing against your foundation walls.
Root causes, such as poor yard drainage or broken gutters, remain unresolved with interior-only solutions. Water will continue trying to find its way inside, potentially overwhelming your interior system over time.
2. Regular Maintenance Required
Sump pumps need annual testing and occasional replacement to prevent failure during heavy storms. Interior drainage systems can become clogged with debris, requiring periodic cleaning and inspection.
Backup power systems must be regularly checked to ensure they function properly during power outages. Without proper maintenance, even the best interior systems can fail when you need them most.
3. Limited Structural Protection
Interior waterproofing doesn’t strengthen your foundation walls or prevent soil pressure from causing new cracks.
Existing structural issues, such as bowing walls or settling problems, won’t be addressed by interior methods. The foundation remains vulnerable to freeze-thaw cycles and ground movement that can worsen over time.
Your home’s structural integrity depends on addressing these external forces, not just managing interior moisture.
4. Potential for Increased Humidity
Poorly installed vapor barriers can trap moisture between the wall and the barrier material. This trapped moisture may increase humidity levels in some regions of your basement.
Inadequate ventilation combined with interior waterproofing can create condensation problems on cold surfaces. Without proper air circulation, you might exchange one moisture problem for another.
5. Not Suitable for Severe Leaks or Flooding
Large-scale water intrusion requires exterior solutions that prevent water from reaching your foundation.
Interior systems can become overwhelmed during heavy flooding or when multiple entry points fail simultaneously.
Foundation failures, such as major cracks or settling issues, require structural repairs that interior methods cannot provide.
Combined interior and exterior approaches are often necessary for homes with severe water problems.
Step-by-Step: How to Waterproof Basement Walls Inside
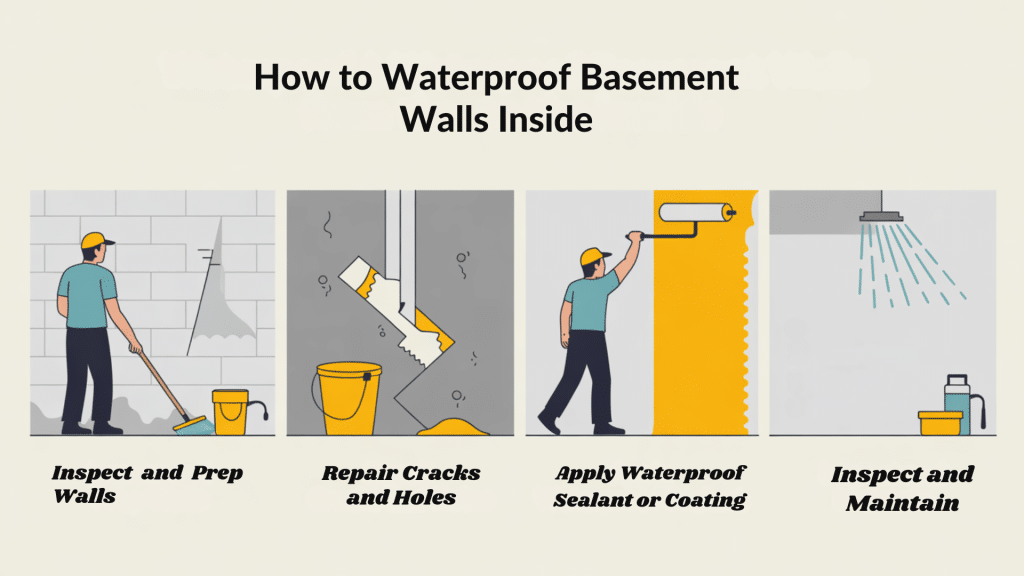
A simple, practical guide to sealing basement walls from the inside, protecting your home from moisture and minor leaks.
Step 1: Inspect and Prep Walls
Examine your basement walls carefully for signs of moisture, water stains, white powdery residue, or visible cracks.
Clean all wall surfaces thoroughly using a wire brush and vacuum to remove dirt, dust, and loose debris. Allow the walls to dry completely before proceeding.
This may take 24-48 hours, depending on the humidity levels. Mark any problem areas with chalk so you can address them specifically during the repair phase.
Step 2: Repair Cracks and Holes
Fill small cracks and holes using hydraulic cement, which expands as it cures to create a watertight seal.
Mix the cement according to package directions and apply it with a putty knife, pressing firmly into each crack.
For larger cracks, use a concrete crack filler or polyurethane sealant for better flexibility and durability. Allow all repairs to cure for the recommended time before moving to the next step.
Step 3: Apply Waterproof Sealant or Coating
Choose a high-quality masonry waterproofing paint or sealant explicitly designed for basement walls. Apply the first coat using a brush or roller, working from top to bottom in smooth, even strokes.
Allow the first coat to dry completely, as instructed by the manufacturer, before applying the second coat. Two coats provide better protection and ensure complete coverage of the entire wall surface.
Step 4: Inspect and Maintain
Check your completed work for any missed spots, pinholes, or areas that require touch-ups before the sealant has fully cured.
Test the sealed surface by spraying it lightly with water to ensure proper coverage and adhesion. Schedule regular inspections every 6 months to check for new cracks or signs of moisture penetration.
Keep extra sealant on hand for quick repairs when needed to maintain the effectiveness of your waterproofing system.
When to Call a Professional?
While DIY waterproofing is effective for minor moisture issues, certain situations require professional expertise and specialized equipment.
Recurring water problems that persist despite your DIY efforts often indicate underlying issues that require professional diagnosis and specialized solutions.
High humidity or flooding situations often require comprehensive drainage systems, vapor barriers, and moisture control equipment that exceed the typical capabilities of DIY projects.
Integrated drainage plus sump setups involve complex plumbing, electrical work, and proper grading that require licensed contractors to ensure safety and code compliance.
Professional waterproofing contractors can also offer warranties and ongoing maintenance services that protect your investment in the long term.
Conclusion
Interior basement waterproofing offers a practical and budget-friendly solution for minor moisture issues, eliminating the need for exterior excavation.
While it won’t address root causes like poor drainage, it provides immediate relief and improved air quality for many homeowners.
The DIY process works well for small leaks and seepage. However, regular maintenance is crucial for long-term success.
For severe water problems or complex drainage systems, professional help ensures proper installation and lasting protection.
Consider your specific situation honestly. Interior waterproofing might be the perfect first step, but don’t hesitate to call experts when needed. Your dry, healthy basement is worth the investment.
Have you tried interior waterproofing in your basement? Share your experience in the comments below to help other homeowners make informed decisions.