Staring at an uneven concrete slab that’s causing doors to stick and creating trip hazards around your home?
Most homeowners think fixing a sloped or sunken concrete slab means expensive demolition and complete replacement. But there’s a better way that can save you thousands of dollars and weeks of construction mess.
Professional contractors employ proven techniques to level concrete slabs without damaging them. These methods work for driveways, patios, garage floors, and basement slabs. You can get a perfectly flat surface that lasts for decades.
This guide will show you exactly how to level your concrete slab using professional methods. You’ll learn when to use self-leveling compound, foam injection, or grinding techniques. Plus, we’ll cover the tools you need and common mistakes to avoid.
Ready to fix that uneven concrete once and for all?
Types of Methods for Leveling Concrete Slabs
Before choosing your approach, it is essential to understand the various leveling methods available. Each technique is most effective in specific situations and slab conditions.
• Self-Leveling Compound Method: Best for indoor floors with minor dips and low spots up to 1 inch deep. This liquid mixture spreads automatically to create a smooth, flat surface. Works well for basement floors, garage slabs, and areas before installing new flooring.
• Foam Injection (Mudjacking) Method: Perfect for outdoor slabs that have sunk or settled unevenly. High-density foam is injected under the concrete to lift and permanently support it. Most effective for driveways, patios, and walkways with settlement issues.
• Concrete Grinding Method Used when you need to remove high spots rather than fill low areas. Professional grinders smooth out bumps, ridges, and uneven sections. Best for slabs with minor height variations across the surface.
• Slab Jacking with Mechanical Lifting: Suitable for severely sunken slabs that need significant lifting. Uses car jacks and support systems to raise the concrete before installing permanent support materials underneath.
• Overlay Resurfacing Method: Applied when the existing slab has multiple problems, including cracks, stains, and uneven areas. A thin concrete overlay covers the entire surface to create a completely new, level finish.
Choose your method based on whether your slab needs lifting, filling, or surface smoothing. Indoor projects typically use self-leveling compound, while outdoor settlement problems require foam injection or mechanical lifting techniques.
Step-by-Step Guide to Level a Sunken Concrete Slab
Follow these proven methods to quickly and effectively restore your sunken concrete slab and help prevent future settling issues from recurring.
Tools Required:
| Tool | Purpose |
|---|---|
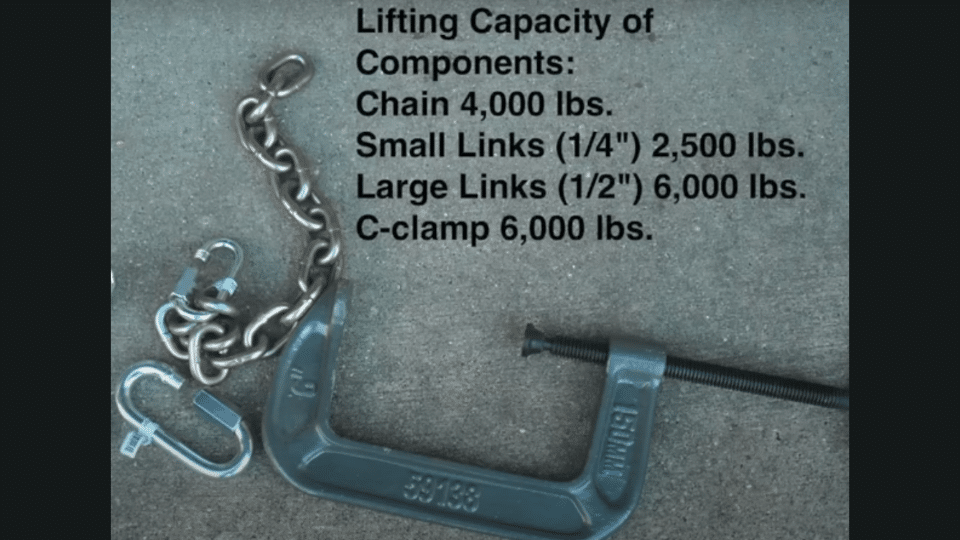
| Heavy-duty C-clamps (6-inch) | Attach the lifting mechanism to the concrete slab |
| Standard car jacks (2) | Provide lifting power for the slab |
| 10-foot-long 4×4 post | Create a stable lifting beam |
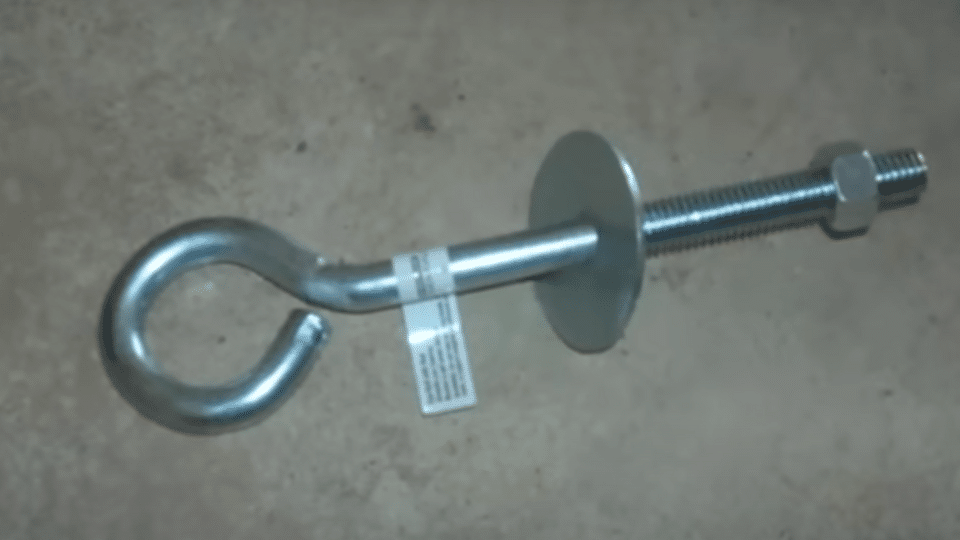
| Large heavy-duty eye bolts (2) | Connect the chain to the wooden post |
| Chains | Link C-clamps to the lifting system |
| Shovel | Dig access area next to the slab |
Materials Required:
| Material | Quantity | Purpose |
|---|---|---|
| High-density foam blocks (25 PSI rated) | As needed | Permanent support under the raised slab |
| Cement blocks | 2-4 pieces | Stable base for car jacks |
| Scrap 2×8 boards | 2-3 pieces | Distribute the jack weight on the ground |
| 4×4 blocking wood | 1 piece | Safety support when the slab is raised |
Step 1: Prepare the Work Area and Measure
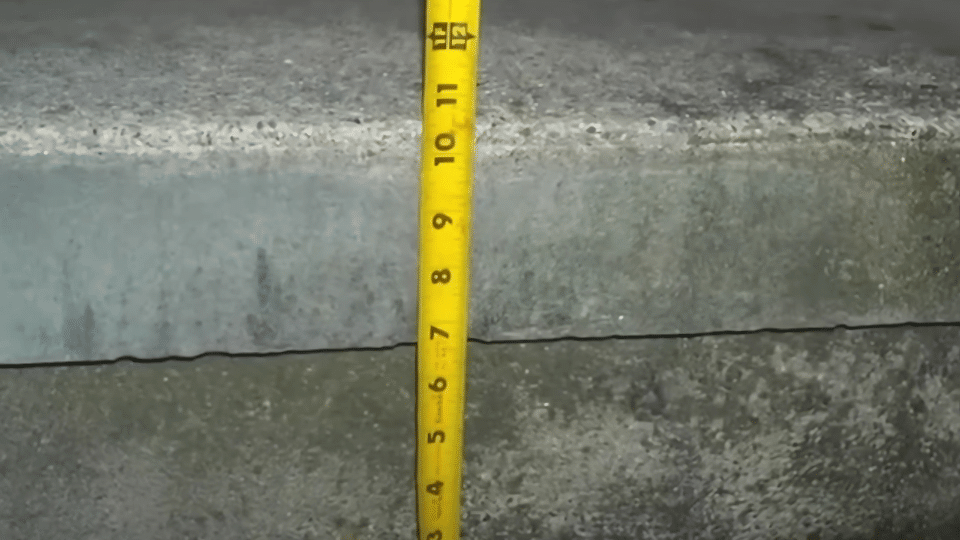
Start by digging down next to the sunken slab to determine its exact thickness and create working space.
Clear away dirt and debris from the area where you’ll place your lifting equipment.
Measure the slab thickness to ensure your C-clamps will fit properly around it.
- Dig access holes next to the slab edges.
- Measure slab thickness (typically 4-6 inches).
- Clear debris from the lifting area.
Keep in Mind: Never work alone on this project – always have someone nearby in case of emergency.
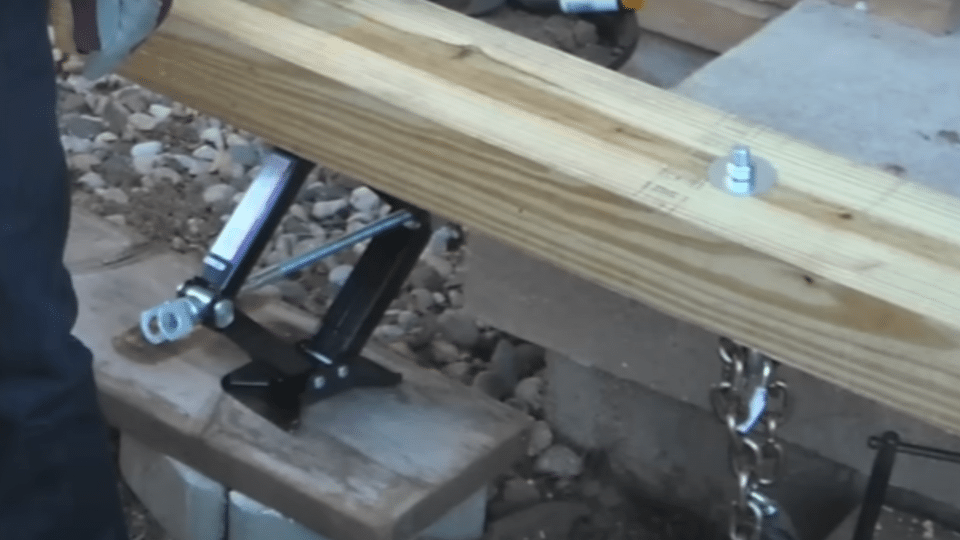
Step 2: Set Up the Lifting System
Install the eye bolts into your 4×4 post and position the car jacks on stable cement blocks with 2×8 boards underneath for weight distribution.
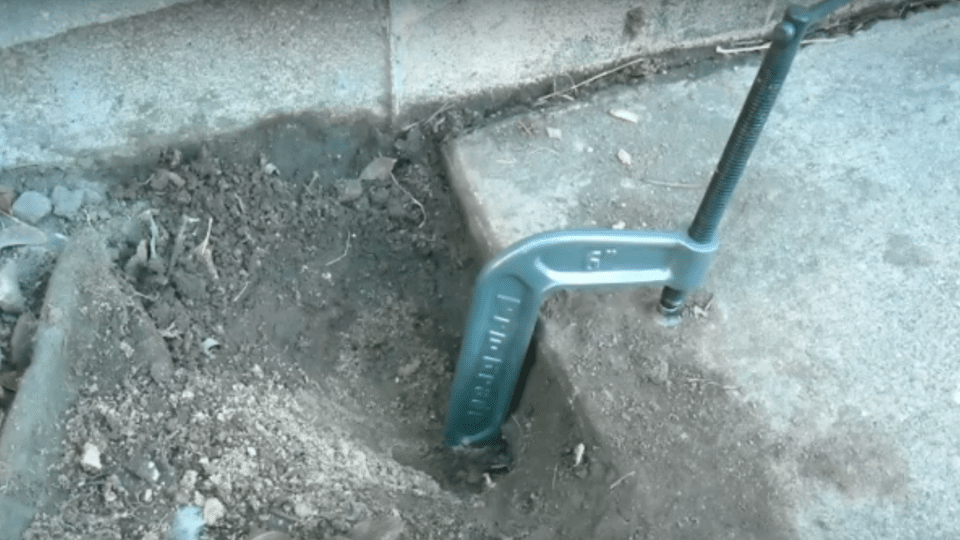
Attach the C-clamps to the slab edges and connect them to the lifting post using chains.
Make sure all connections are tight and secure before proceeding.
- Position car jacks on stable cement blocks with 2×8 base boards.
- Install eye bolts in the 4×4 post and attach chains.
- Clap C-clamps securely to slab edges.
Keep in Mind: Use only heavy-duty equipment rated for more weight than your slab to prevent equipment failure.
Step 3: Raise the Slab Slowly
Operate both car jacks simultaneously at the same rate to lift the slab evenly.
Raise the slab approximately 6 inches to create enough space for inserting the foam support material.
Work slowly and check that the lifting system remains stable throughout the process.
- Raise both jacks slowly at the same rate.
- Lift the slab 6 inches to create working space.
- Monitor the lifting system for stability.
Keep in Mind: Never rush the lifting process – slow and steady prevents accidents and equipment damage.
Step 4: Insert Safety Blocking
Once the slab is raised to the desired height, immediately place a 4×4 block under the slab as a safety support.
Release some tension on the jacks while keeping the slab supported by the safety block.
This prevents the slab from falling if the jacks fail during foam installation.
- Place a 4×4 safety block under the raised slab.
- Release partial tension on the jacks while maintaining support.
- Ensure the slab is securely blocked before proceeding.
Keep in Mind: Never place your hands under the raised slab – always use tools to position materials.
Step 5: Install High-Density Foam Support
Slide high-density foam blocks under the slab in 3-foot sections or smaller pieces. Place 4 inches of foam at the low end and 2 inches at the center to create proper support distribution. Work carefully to position all foam pieces without putting your hands under the slab.
- Insert foam in 3-foot sections or smaller pieces.
- Place 4 inches of foam at the low end, 2 inches at the center.
- Use tools to position foam – never use hands under the slab.
Keep in Mind: High-density foam rated at 25 PSI will support 50 times the weight of your slab when properly installed.
Step 6: Lower the Slab and Complete the Job
Slowly lower the car jacks at the same rate until the slab rests completely on the foam support.
Remove all lifting equipment and safety blocks once the foam fully supports the slab.
Check that the slab is level and stable before finishing the project.
- Lower Jack slowly and simultaneously.
- Remove all equipment once the slab rests on the foam.
- Verify the slab is level and stable.
Keep in Mind: The foam will compress slightly under load, so expect minor settling over the first few days.
Video Tutorial
For a visual tutorial, refer to this video by John Cantwell (TitleTownJake)
Tips to Prevent Concrete Slab Leveling Mistakes
Achieving professional results with your concrete leveling project requires attention to these key details, which can significantly impact your final outcome.
- Maintain proper room temperature – Keep the area between 50-70°F during application and curing to ensure the leveling compound sets correctly and doesn’t cure too fast or too slow.
- Work in manageable sections – Pour and spread the compound in small areas to maintain a wet edge and prevent the material from drying unevenly or creating visible seam lines.
- Apply primer on porous surfaces – Use a concrete primer on old or porous slabs to prevent the leveling compound from being absorbed too quickly, which can cause pinholes and weak spots.
- Use reference points for thickness – Set screws or stakes at your desired final height every 5-6 feet to guide your application and ensure consistent thickness across the entire surface.
- Keep mixing equipment clean – Clean buckets and mixing tools immediately after each batch to prevent dried compound from contaminating future mixes and affecting the final finish quality.
Follow these proven tips and you’ll achieve a smooth, level surface that looks like a professional contractor did it.
Troubleshooting Common Issues
Here’s how to identify and resolve the most common issues that arise during concrete slab leveling projects.
| Problem | Causes | Solutions |
|---|---|---|
| Uneven or streaky surface after drying | • Compound dried too quickly. • Inconsistent mixing. • Poor application technique. |
• Sand down high spots with 80-grit sandpaper. • Apply a thin second coat if needed. • Use proper squeegee technique next time. |
| Bubbles or air pockets in the compound | • No primer used on porous concrete. • Mixing too vigorously. • Trapped air during application. |
• Use the spike roller immediately after pouring. • Apply primer before the next application. • Mix at a slower speed to reduce air bubbles. |
| The compound hardens too quickly | • The room temperature is too high. • Compound mixed too thick. • Working in direct sunlight. |
• Cool room to 60-70°F before starting. • Add slightly more water to the next batch. • Cover windows or work in shade. |
| The compound doesn’t set properly | • The room temperature is too cold. • Too much water added. • Expired or contaminated product. |
• Increase room temperature above 50°F. • Remove soft compound and reapply. • Check expiration dates on all bags. |
These solutions will help you achieve a smooth, professional finish even when problems occur during your leveling project.
Conclusion
Leveling a concrete slab doesn’t have to be overwhelming when you follow the right steps and use proper techniques. Whether you choose self-leveling compound for indoor floors or foam lifting for outdoor slabs, success depends on careful preparation and attention to detail.
Remember always to prime porous surfaces, maintain proper room temperature, and work in manageable sections to avoid common mistakes.
The key to professional results is taking your time at each stage. Rushed work causes uneven surfaces and costly repairs. With the right tools, materials, and patience, you can create a durable and level concrete surface.
Ready to tackle your uneven concrete slab? Start with proper preparation, and you’ll be amazed at the professional results you can achieve on your own.
Frequently Asked Questions
What Is the Easiest Way to Level a Concrete Slab?
Self-leveling compound is the easiest method for minor issues. Pour it over the existing surface and it spreads evenly.
Can You Pour Self-Leveling Concrete Over Existing Concrete?
Yes, you can pour self-leveling concrete over existing slabs if the surface is clean, stable, and properly prepared.
Can You Repair an Uneven Concrete Slab?
Yes, uneven concrete slabs can be fixed using self-leveling compound, grinding, or mudjacking depending on severity.