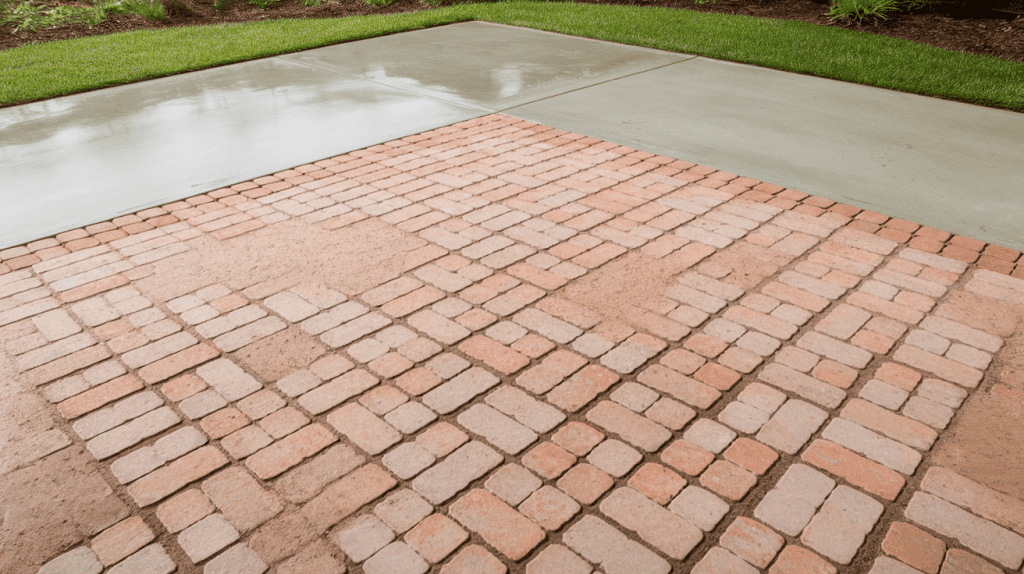
Is your concrete patio worn, gray, and plain? You’re not alone. Many homeowners get tired of looking at cracked, stained concrete that makes outdoor spaces look old and uninviting.
Good news—you can fix this without breaking up all that concrete. Putting pavers over your existing patio saves time, money, and effort while giving it a brand-new look.
This guide walks you through each step of laying pavers over a concrete surface. You’ll learn how to plan your project, prepare your surface, choose materials, handle tricky spots, and finish with a patio that looks like it was always meant to be there. Let’s turn that dull concrete into an outdoor space you’ll love to use again.
For a comprehensive guide on extending your patio with pavers, check out our DIY Paver Patio Extension guide.
Why Put Pavers Over Concrete?
Older patios can look worn and dated over time. Putting pavers over concrete offers many practical and financial benefits that make it an attractive option for homeowners.
- Cost-Effective Solution: Installing pavers over existing concrete saves you significant money compared to complete concrete removal. By working with your existing base, you cut demolition expenses while still getting a beautiful new surface.
- Quick Style Upgrade: Pavers instantly transform the look of your outdoor space. You can choose from various colors, textures, and patterns that complement your home’s exterior. This gives you design flexibility that plain concrete cannot match.
- Faster Installation Process: Working over existing concrete speeds up the project timeline considerably. You skip the demolition phase and move straight to installation. Most projects finish in days rather than weeks.
- Increased Property Value: A well-designed paver patio adds both curb appeal and functional outdoor living space. Quality pavers often last longer than concrete surfaces and can handle weather changes better. This means your investment continues to look good for years to come.
Steps to Make a Paver Over a Concrete Patio
Follow these detailed steps to lay pavers over a concrete foundation, from planning the layout to adding the finishing touches, for a stunning, professional-looking result that enhances your outdoor space.
Before starting your project, gather these tools and materials:
Tools Required:
| Tool | Purpose |
|---|---|
| Level | To ensure the pavers are laid evenly and straight. |
| String Line | To keep the pavers aligned and level. |
| Wet Saw or Angle Grinder with Diamond Blade | For cutting pavers to fit, especially for curved edges. |
| Jackhammer | For removing damaged concrete sections (optional). |
| Shovel | For moving materials like sand or debris. |
| Trowel | For applying mortar or leveling sand. |
| Sand Screed | To level the sand base before laying pavers. |
| Compactor |
To compact the sand base and pavers to secure them. |
Materials Required:
| Material | Purpose |
|---|---|
| Concrete Pavers | Main material for covering the patio surface. |
| Belgian Blocks (optional for borders) | Used for creating decorative borders or edging. |
| Bedding Sand | Creates a stable base layer for the pavers. |
| Polymeric Sand | Fills joints between pavers and hardens for stability. |
| Mortar Mix (if building a retaining edge) | Used for securing the retaining wall or footer in place. |
| Rebar (if creating a footer) | Reinforces the footer to secure the retaining edge. |
Step 1: Plan Your Project
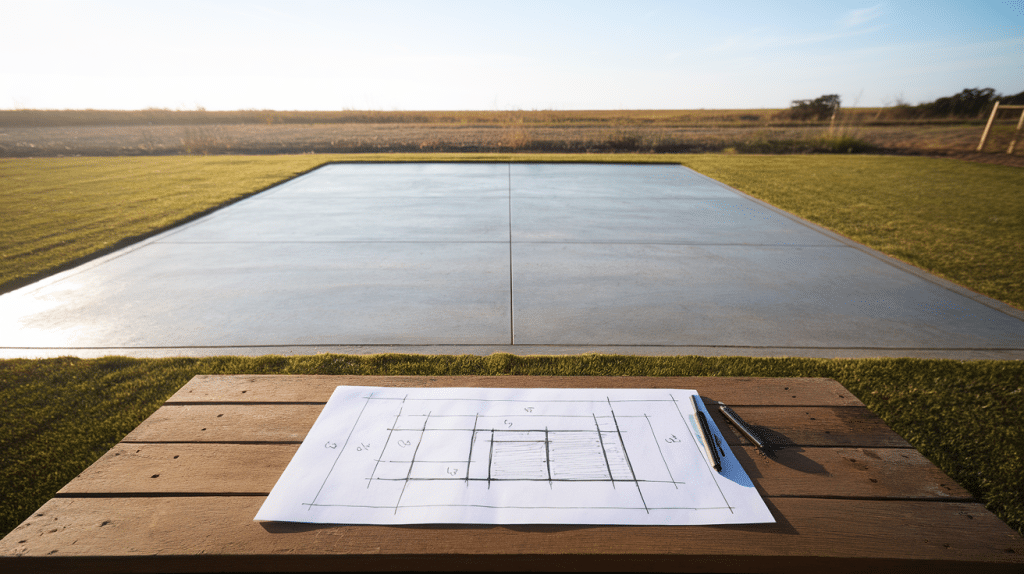
Planning is the first step in any patio project. Measure your patio space carefully, noting any odd angles or curves. Draw a scale plan on paper or use a simple sketching tool to map out your design.
Calculate the number of pavers you’ll need based on your measurements, adding 5-10% extra for cuts and potential mistakes. Ensure that your concrete base is level and stable enough to support the build. Plan for proper drainage that slopes away from your house to prevent water issues.
Pro tip: Test-fit pavers in a small section to help you visualize the pattern and flow before committing to the full layout.
Step 2: Check Your Concrete Base
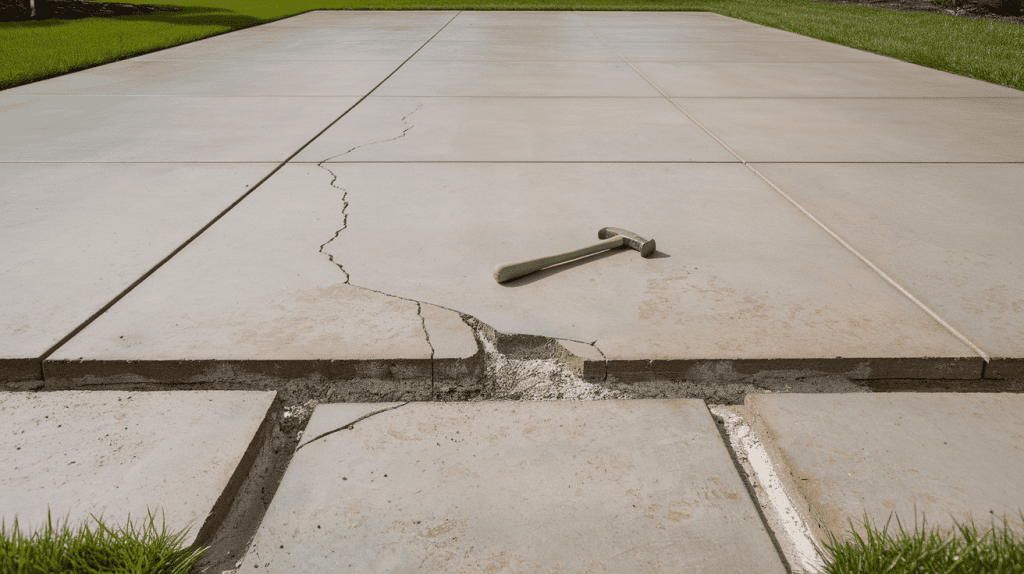
Your concrete base must be solid before you begin the project. Walk around your patio and look closely for large cracks, heaving sections, or areas that have shifted. Verify that the concrete has a proper slope for water drainage, typically around 1/4 inch per foot away from your house.
Examine the edges to make sure they’re stable and won’t crumble when you add the extra weight of pavers. If you encounter significant problems, you’ll need to address them first by removing damaged concrete sections with a jackhammer, clearing out any root systems that could cause future issues, and resolving drainage problems before proceeding.
Pro tip: Tap your concrete with a hammer in different spots – hollow sounds may indicate voids underneath that need to be addressed.
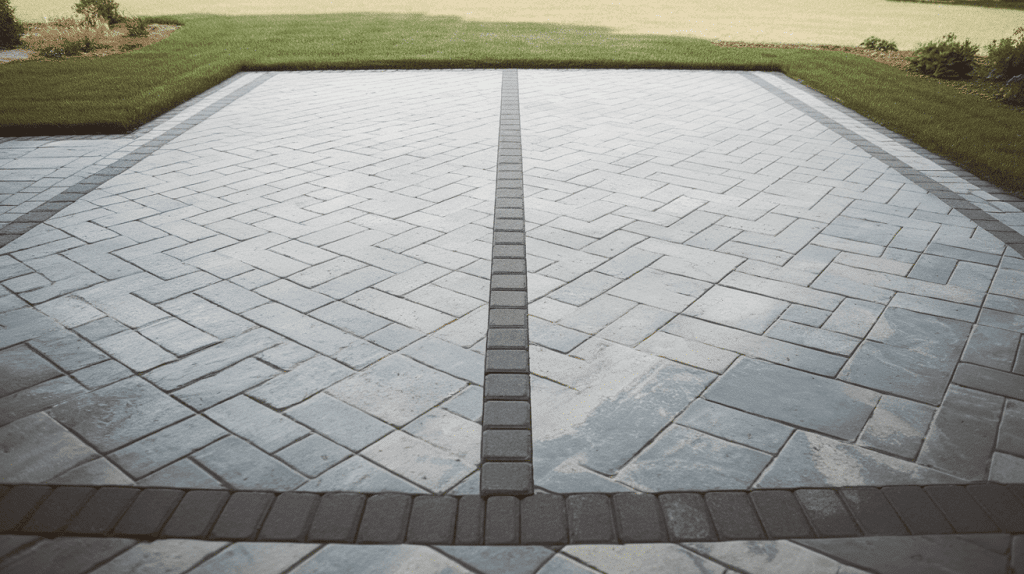
Step 3: Create a Border
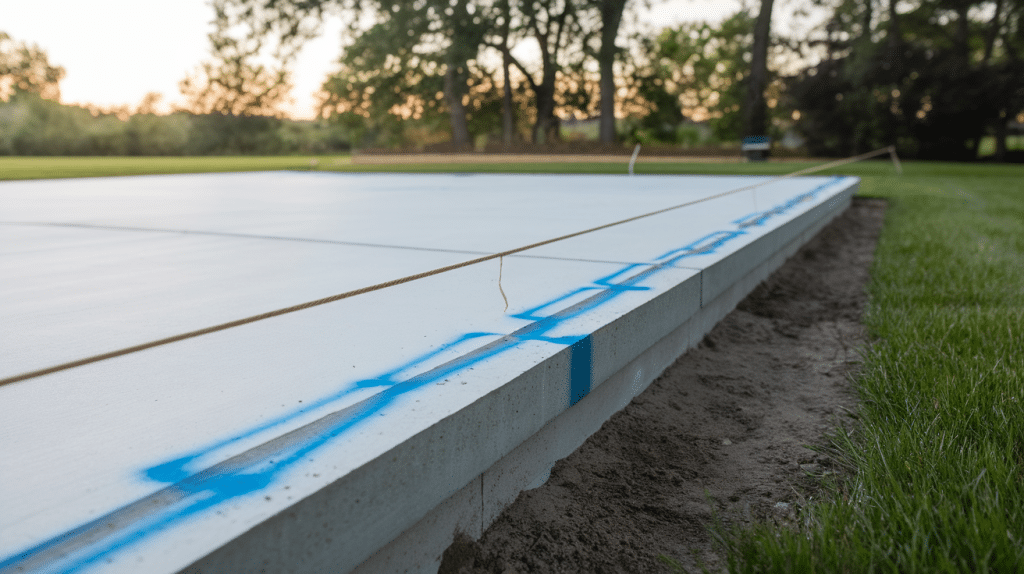
A solid border keeps your pavers from shifting and gives your patio a clean, finished look. Start by marking where your border will go using spray paint or chalk lines. If needed, create a small concrete footer around the edges to provide a stable base for your border materials.
Use string lines pulled tight to ensure your border stays perfectly level and straight as you work. Set border pavers or Belgian blocks in mortar, pressing firmly to create good contact with the base. Ensure the border height allows sufficient room for your sand layer and pavers to fit perfectly flush with the top of your border when complete.
Pro tip: When creating curved borders, use smaller pavers that are easier to arrange in arcs, or cut standard pavers at slight angles to form smooth curves.
Step 4: Add Sand Base
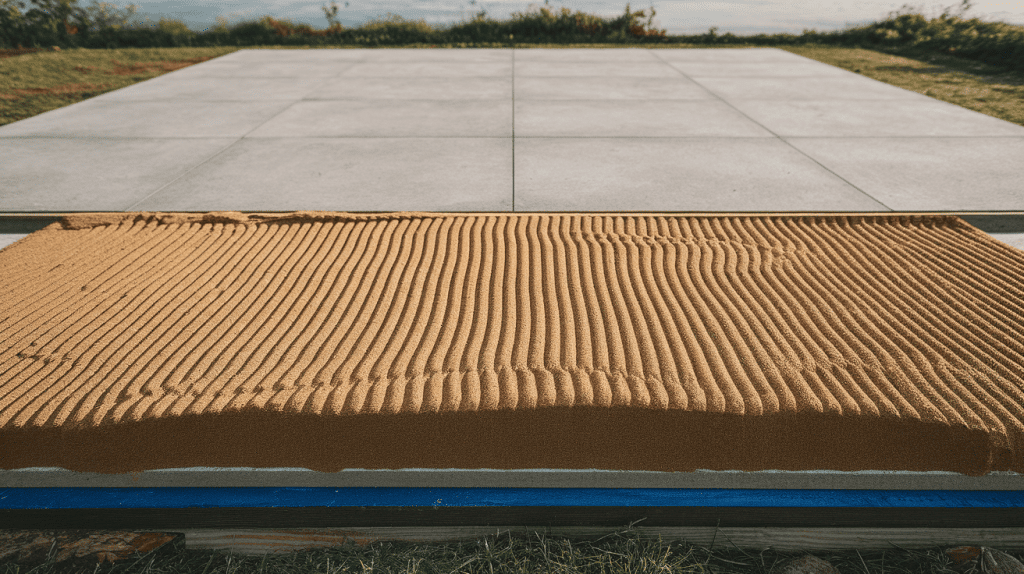
The sand layer creates a flat surface that helps level out minor imperfections in your concrete base. Begin by filling any gaps or joints between concrete sections with sand, making sure they’re filled to provide even support.
Spread 1-2 inches of bedding sand over your concrete surface, working in manageable sections so the sand stays in place as you work. Level the sand carefully using a screed board pulled across the surface in a sawing motion. Work in small sections at a time to keep the sand perfectly level, as large areas can be challenging to manage alone.
Pro tip: Lightly mist the sand with water after screeding to help it settle, but avoid soaking it completely as this can create low spots when it dries.
Step 5: Lay Your Pavers
Now, for the main event: laying your pavers onto your prepared base. Start from a corner or fixed edge of your patio to give yourself a straight reference line. Place pavers in your chosen pattern, carefully setting each one into the sand bed. Keep joints between pavers tight and even for a clean look, using spacers if needed to maintain consistent gaps.
Use a rubber mallet to gently tap the pavers into place, ensuring they are level with the surrounding pieces. Cut edge pieces with a wet saw as needed, fitting them neatly against borders or obstacles. Check the level frequently as you go to catch and fix any high or low spots before they become bigger problems.
Pro tip: Always work while standing on your already-laid pavers, not on the prepared sand bed, to avoid creating dips or uneven areas in your carefully leveled base.
Step 6: Cut Pavers to Fit
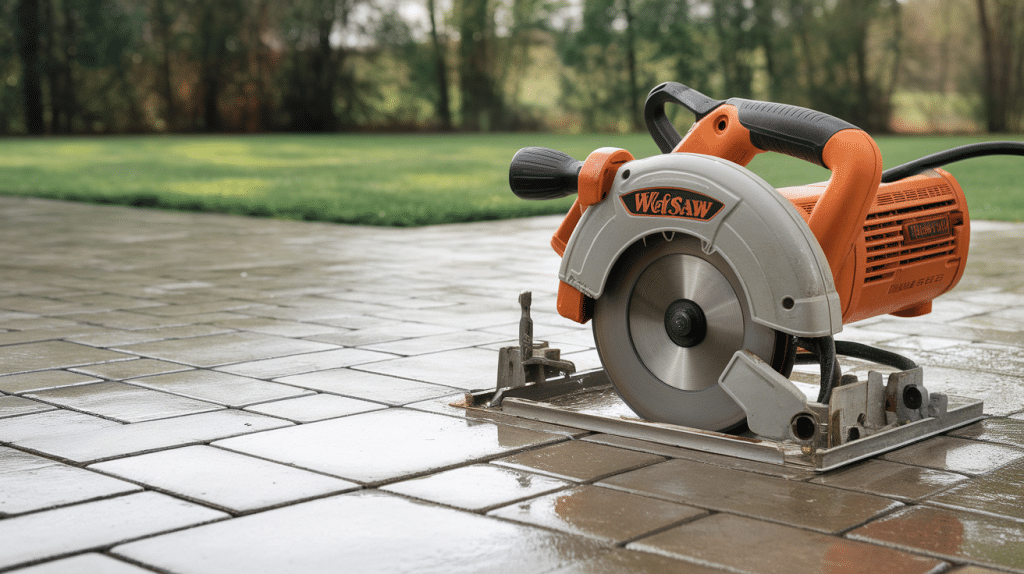
Most patio projects need cut pavers to fit properly around edges and obstacles. Measure each space that requires a custom-fit paver carefully, taking joint spacing into account as well. Mark your cut line clearly on the paver with a pencil or chalk line that won’t wash away during the cutting process.
Use a wet saw with a diamond blade for clean, straight cuts through the thick paver material. For small cuts or curves that a wet saw can’t handle, an angle grinder with a diamond blade works well. Always test-fit each cut piece before setting it permanently to ensure it fits properly in its intended space.
Pro tip: Cut pavers face-down to minimize chipping on the visible surface, and always wear eye protection and a dust mask when cutting stone or concrete.
Step 7: Add Polymeric Sand
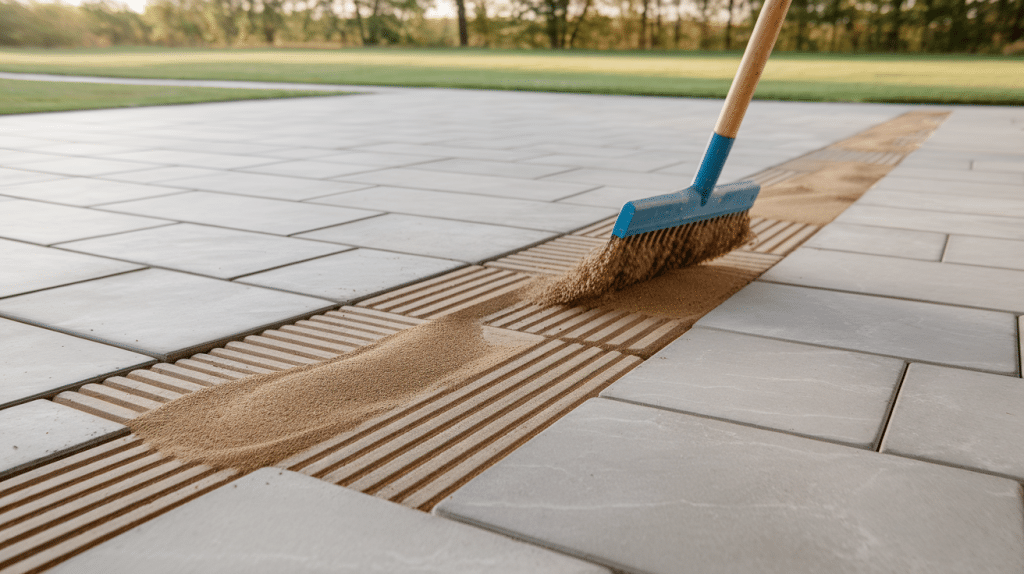
Polymeric sand keeps pavers in place and stops weeds from growing between them. Before applying sand, check that all pavers and joints are completely dry, as moisture can cause the polymeric material to activate prematurely. Sweep the sand across your patio surface, making sure it fills all the joints.
Use a plate compactor or hand tamper to vibrate and settle the pavers firmly into the sand bed, which also helps work the sand deeper into the joints. Add more sand as needed after compacting until all joints are filled. Follow the package directions carefully to activate the polymeric binding, which typically involves misting the surface with water.
Pro tip: Use a leaf blower on low setting to remove all sand from paver surfaces before wetting, as any remaining granules can permanently stain your pavers once activated.
Step 8: Final Touches
Finish your patio with these last essential steps to make it truly complete. Clean any remaining sand residue from paver surfaces using a broom and a light spray of water, being careful not to disturb your newly filled joints. Add landscape features around your new patio, such as plants, decorative stones, or a fire pit, to enhance the overall look of your outdoor space.
Consider applying a quality paver sealer to protect against stains, enhance colors, and extend the life of your new surface. Add outdoor lighting along pathways or around the patio edge to highlight your new space and make it usable after dark.
Pro tip: Wait at least 48 hours after applying polymeric sand before sealing your pavers to ensure the sand has fully cured and your patio is completely dry.
Video Credit
Special thanks to Ron Budman for providing valuable insights in their video, which I referenced while creating this guide. For a visual representation of these steps, refer to the video.
Common Problems and Solutions
Even the most careful plans can encounter snags when working on your patio project. Here are the most common issues and how to fix them:
1. Drainage Problems
- Create proper slope: Ensure a slight slope (1/4 inch per foot) away from your house.
- Add drainage channels: Install at low points where water might collect
- Monitor after rain: Check for pooling and fix problem areas early
2. Uneven Settling
- Use more sand: Fill low spots completely before laying pavers
- Compact thoroughly: Use proper compaction before adding the final polymeric sand
- Level check: Use a long straight board to find dips before finishing
3. Edge Pavers Coming Loose
- Strengthen restraints: Create deeper, concrete edge footings
- Use larger borders: Install bigger border pavers set firmly in mortar
- Reinforce corners: Pay extra attention to corners where shifting often starts
Pro tip: Take photos of your project at each stage, especially noting where utilities or drainage features are installed before they’re covered up for future reference.
The Bottom Line
Your old concrete patio doesn’t have to stay boring forever. Installing pavers over existing concrete gives you a fresh outdoor space without the cost and mess of complete removal.
This project works because it builds on what you already have. Your concrete becomes the foundation for something better. The process takes planning and patience, but the results speak for themselves.
Your patio is more than just a surface – it’s where summer memories happen. It’s your outdoor kitchen, your morning coffee spot, and where friends gather on weekends. A beautiful patio increases your home’s value and creates a space you’ll actually want to use.
Ready to start? Measure your space this week. Visit your local store for paver samples. Take photos of your current patio to track your progress.
What will your new outdoor space look like? Let me know in the comments below.
Frequently Asked Questions
How Long Does It Take to Pave Over a Concrete Patio?
For a medium-sized patio, expect 2-3 days of active work. Weather conditions and your experience level will affect timing. Plan for a whole weekend project.
How Much Does It Cost to Pave Over Concrete?
Material costs typically range from $5 to $ 15 per square foot, depending on the quality of the pavers. This method saves money by avoiding the costs of complete concrete removal and disposal.
Will Pavers Last as Long as Concrete?
With proper installation, pavers typically last 25 years or more and offer better repair options. Individual pavers can be replaced without disturbing the entire patio surface.