Do you want to install pavers but feel stuck on how to prepare the ground? Many homeowners find this first step the most challenging part of the entire process.
Getting the ground flat and solid is crucial to ensuring your paver project lasts for years without sinking or cracking. A bumpy base leads to wobbly pavers that collect water and encourage the growth of weeds.
This guide will show you the exact steps to smooth and level your ground the right way. You’ll learn which tools to use, how to mark your area, and the best way to compact soil for a firm base.
By the end, you’ll have the skills to set up a perfect base for your new patio, path, or driveway – saving you time and money on fixes later.
Step-by-Step Guide to Leveling Ground for Pavers
Leveling the ground properly is the foundation of a durable and even paver installation. Follow this step-by-step guide to ensure a smooth, stable surface that will last for years.
Tools and Materials You’ll Need
Here is a table that lists the tools and materials you’ll need for leveling ground for pavers:
| Tool/Material | Purpose/Usage |
|---|---|
| Shovel | Used for digging and removing existing soil or grass. |
| Rake | Helps to spread and level materials like gravel or sand. |
| Measuring tape | Used to measure the area and ensure accurate dimensions. |
| Level (spirit or laser) | Ensures that the ground is perfectly level or has the proper slope. |
| Compactor | Compact the gravel or base material to create a stable foundation. |
| Gravel or crushed stone | Used as a base layer to provide stability and drainage. |
| Sand (polymeric or leveling sand) | Used to level the surface after gravel compaction and as a base for pavers. |
| Stakes and string | Used to mark the boundaries and maintain straight edges. |
| Safety gear (gloves, eye protection) | Protects you from debris, sharp objects, and dust. |
Step 1: Preparing the Site for Ground Leveling
The first step to a solid paver base is proper site prep. This means clearing the area completely and making careful measurements to plan your project. Good prep work now will save you headaches later when you’re laying the actual pavers.
Clear the Area:
- Remove all plants, sticks, stones, and old materials from your planned paver space.
- Dig out any tree roots that might cause bumps or shifts in your pavers later.
- Set up string lines with stakes to mark the exact outline of your paver area.
Pro Tip: Allow about 6 inches of extra space around your planned paver area to provide room for edge restraints, which prevent pavers from shifting outward over time.
Step 2: Removing the Old Surface
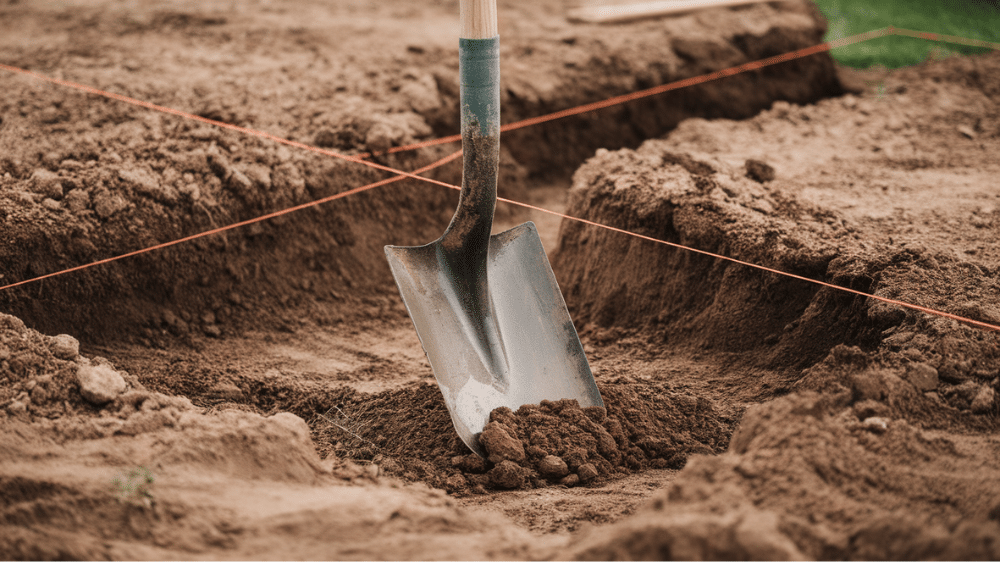
Removing the existing surface is hard work, but vital to success. You need to dig deep enough to create a stable base for all your materials, which will support your pavers and prevent them from sinking.
Excavation Process:
- Dig down 7-9 inches total (including the height of your pavers).
- Keep the bottom of your digging area as flat as you can while you work.
- Save good topsoil for garden use and dispose of poor-quality dirt.
Pro Tip: When digging, use a string level across your space to check your progress and make sure you’re digging to a consistent depth throughout the entire area.
Step 3: Adding and Compacting Gravel or Crushed Stone
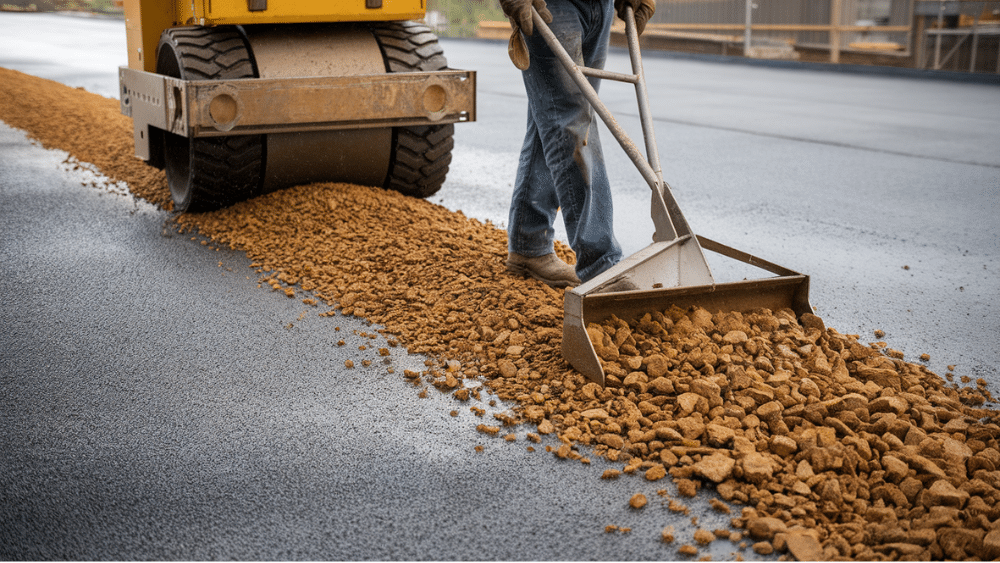
The gravel base provides your pavers with strength and lasting support. This is not a step to rush through or skimp on—a solid base means pavers that stay put for years to come.
Lay the Gravel Base:
- Add gravel in 2-inch layers rather than all at once for better packing.
- Water each layer lightly before compacting to help the stones settle together.
- Make sure your gravel extends to the edges of your planned paver area.
Pro Tip: Use ¾-inch crushed stone with sharp edges rather than rounded river rocks, as angular stones lock together better when compacted.
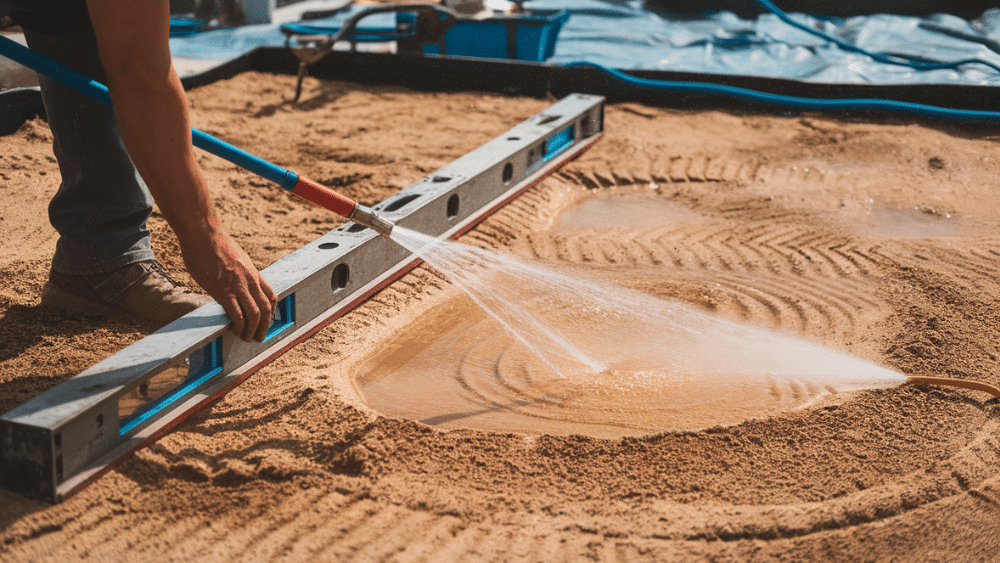
Step 4: Leveling the Surface with Sand

Sand creates the smooth, even bed that your pavers will sit on. It needs to be perfectly level but not packed down, allowing pavers to settle slightly when first placed.
Spread Sand:
- Choose coarse, sharp sand made for paver bases, not play sand or beach sand.
- Lay down level pipes or boards as guides, and use them with a straight 2×4 to screed the sand flat.
- Keep the sand layer thin—approximately 1 inch is sufficient.
Pro Tip: Don’t walk on your screeded sand! If you must step on it, smooth it again with your screed board before laying pavers.
Step 5: Final Checks and Adjustments
Before laying a single paver, you need to confirm your base is properly sloped and level. This last check can catch issues that would be much harder to fix once pavers are in place.
Level the Surface:
- Use a long level on a straight board to check across multiple points of your sand bed.
- Look for any dips or bumps that are more than ⅛ inch off from your planned level.
- Check both side-to-side and front-to-back to ensure total flatness.
Pro Tip: Use a garden hose to spray water on your prepped area gently—this will quickly reveal where water pools, helping you spot low spots that require more sand.
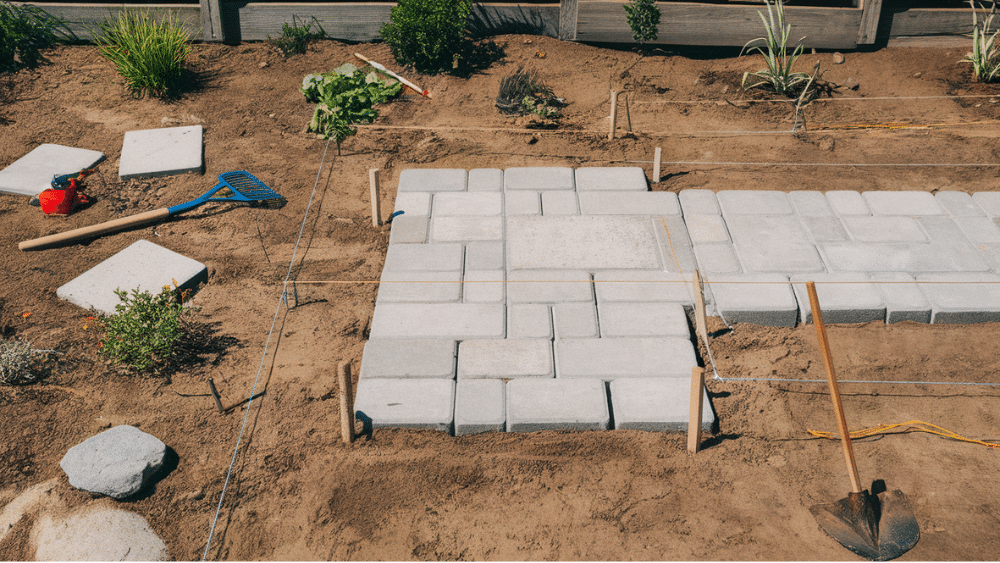
Step 6: Installing the Pavers
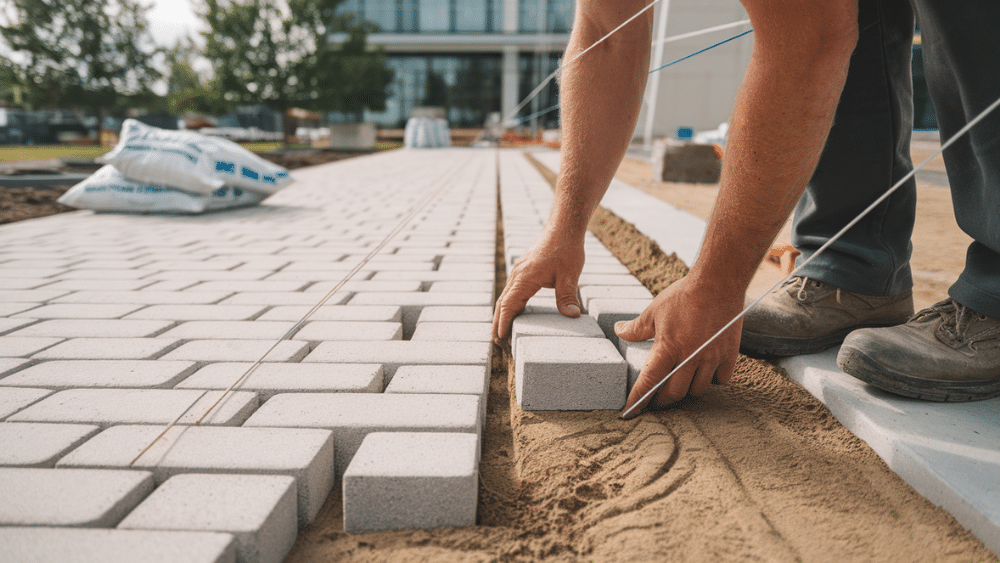
With your base fully prepped, the fun part begins—laying your pavers in your chosen pattern. Work with care and the results will last for many years with little upkeep.
Lay the Pavers:
- Start at a corner or along a straight edge and work outward in your chosen pattern.
- Place each paver with a slight drop rather than sliding it, to avoid disrupting the sand bed.
- Use string lines across the top to keep your rows straight as you work.
Pro Tip: Keep a few bags of sand nearby to add to any spots that seem too low as you place pavers—it’s easier to adjust now than to pull up pavers later.
Importance of Leveling Ground for Pavers
A flat, even base is the foundation of any good paver project. When you skip proper leveling, you’ll likely face costly fixes down the road. The time spent on this step pays off with a smooth, long-lasting result.
A properly leveled surface ensures that pavers remain stable and don’t shift over time. When pavers are installed on uneven ground, foot traffic and weather cause them to shift out of place.
- It helps avoid uneven surfaces, which can cause trips and falls for people walking on your path or patio.
- Good leveling prevents water pooling, which can lead to soil erosion under pavers.
- Proper base prep stops pavers from sinking into soft spots in the ground after rain or snow.
- Level ground makes the actual paver laying process much faster and simpler.
Most failed paver projects can be traced back to poor ground preparation, rather than the pavers themselves. Think of leveling as your chance to get things right from the start.
A solid base also means less weed growth between pavers and fewer ants or bugs making homes under your new surface. With the right approach to leveling, your paver project will stand strong for many years with minimal upkeep.
Conclusion
Proper ground leveling is the hidden hero of paver projects. When done right, your pavers stay flat and strong for years. Skip this step, and you’ll soon face wobbles, cracks, and water issues.
By following these six steps—site prep, surface removal, gravel base, sand leveling, final checks, and careful installation—you’ve set yourself up for success.
Take your time with each phase, check your work frequently, and avoid rushing. Remember that the base matters more than the pavers themselves.
A good foundation prevents weeds, keeps bugs away, and stops pavers from shifting. Ready to start your project? Gather your tools and enjoy the process—the results will be worth every bit of effort!