Are you building a deck and wondering how much space to leave between your pressure treated boards?
Getting the spacing wrong can lead to serious problems. Too little space traps moisture and causes wood rot. Too much space creates gaps that collect debris and look unprofessional.
Many homeowners make costly mistakes because they don’t understand how pressure-treated lumber behaves after installation.
The right spacing helps your deck drain properly, prevents warping, and extends its lifespan by years. You’ll avoid costly repairs and enjoy a deck that looks great for decades.
This guide will show you the exact measurements contractors use, plus why different board widths need different spacing rules. You’ll also learn how weather and wood moisture content affect your spacing decisions.
Continue reading to learn the proven spacing techniques that will ensure the success of your deck project.
Pressure‑treated lumber starts out moist—typically up to 50 % water content—so it’s crucial to know the right time to stain a new pressure‑treated deck once the wood has adequately dried.
Why Deck Board Spacing Matters?
Proper spacing between deck boards prevents water damage and extends your deck’s life significantly. When boards sit too close together, water gets trapped and cannot drain away properly.
This trapped moisture creates the perfect conditions for wood rot, mold growth, and structural damage that costs thousands to repair.
Key benefits of correct spacing include:
- Water drainage – Gaps allow rainwater to flow through instead of pooling on the surface
- Wood movement – Boards expand and contract with temperature changes, and spacing prevents buckling
- Air circulation – Better airflow keeps the underside of your deck dry and healthy
Pressure-treated lumber contains high moisture levels when first installed. As it dries out over months, the wood shrinks and moves. Without proper gaps, boards can warp, crack, or push against each other.
Good spacing also makes cleaning easier since debris falls through instead of collecting on top. Most building codes require specific spacing measurements to ensure safety and structural integrity. Getting this right from the start saves money and prevents headaches later.
KDAT vs. Wet-Treated Lumber: What Gap Should You Leave?
The right spacing depends on your lumber type and moisture content when installed.
1. Kiln-Dried After Treatment (KDAT) Lumber
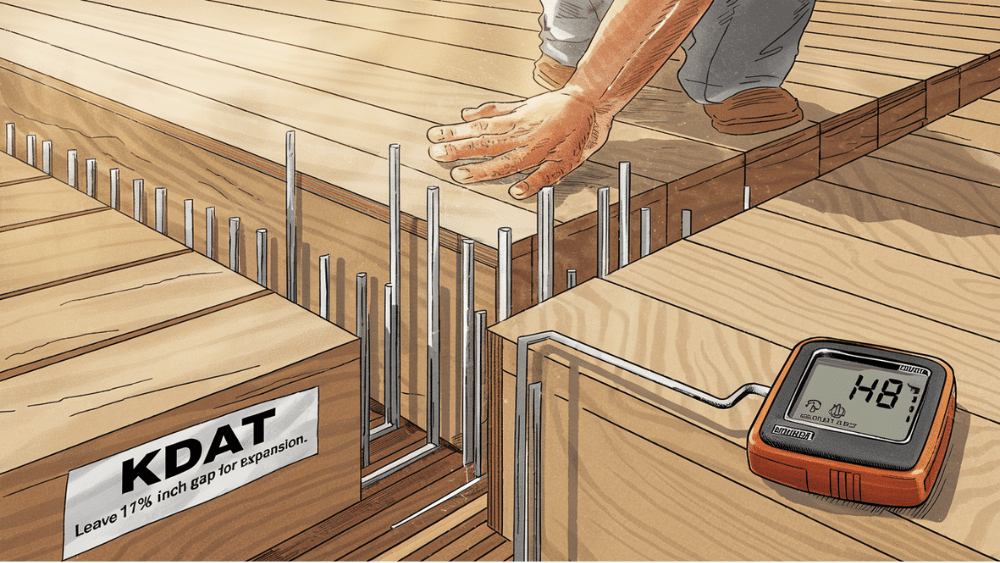
KDAT lumber has already been dried to low moisture levels after treatment. This type of wood will expand slightly when exposed to humidity and rain. You need to leave room for this expansion to prevent boards from buckling or warping against each other.
- Use a 1/8-inch spacer tool between each board during installation
- Check moisture content with a meter – KDAT should read 15% or less
- Install during dry weather conditions for best results
- Allow extra expansion space in humid climates
Remember: KDAT costs more but gives you predictable spacing results.
2. Wet-Treated Lumber
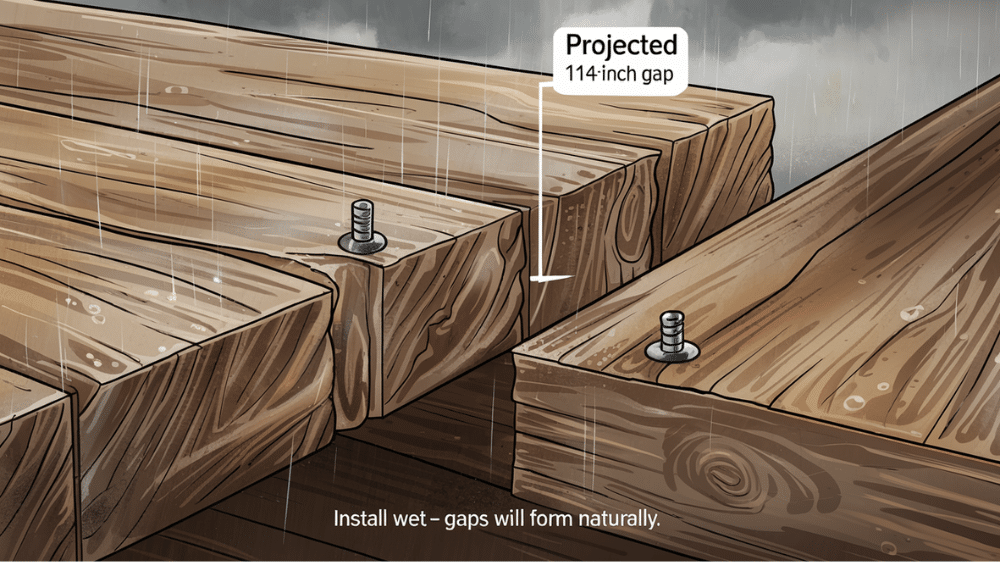
Fresh pressure-treated lumber contains high moisture from the treatment process. This wood will shrink as it dries over several months. Installing boards tightly together compensates for the natural shrinkage that occurs later.
- Install boards with no gaps – push them tightly together
- Expect 1/8 to 1/4-inch gaps to form naturally as wood dries
- Wait 6-12 months for full shrinkage to complete
- Use galvanized fasteners to prevent staining during drying
Remember: Wet lumber is cheaper but requires patience as gaps form slowly.
General Rule: What’s a Safe Deck Board Gap for Most Climates?
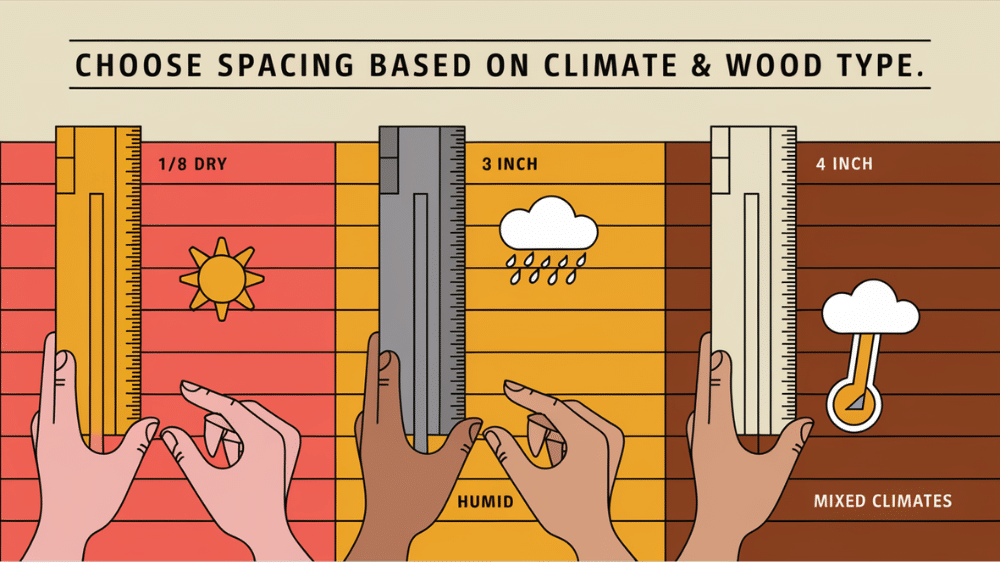
Most deck installations work best with 1/8 to 1/4-inch spacing, regardless of lumber type. This range handles most climate conditions and wood movement. Consider your local weather patterns and seasonal temperature swings when choosing exact spacing.
- Use 1/8-inch gaps in dry climates with minimal humidity changes
- Choose 1/4-inch gaps in areas with high humidity or extreme weather
- Test your climate zone requirements with local building codes
- Measure twice and use consistent spacing tools throughout the installation
Remember: When in doubt, 3/16-inch spacing works well for most situations.
Understanding Pressure-Treated Wood
Pressure-treated lumber uses chemical preservatives forced deep into wood fibers to resist rot, insects, and weather damage for decades.
You’ll find two main types at lumber yards: KDAT (kiln-dried after treatment) lumber costs more but has low moisture content and stays stable after installation, while wet-treated lumber costs less but contains high moisture levels that cause significant shrinkage over 6-12 months.
This moisture difference is crucial for spacing decisions – wet lumber shrinks up to 1/4 inch in width as it dries, naturally creating gaps between boards, while KDAT lumber expands slightly when exposed to humidity and needs intentional spacing from the start.
Understanding your lumber type helps you choose the right installation approach and prevents costly spacing mistakes.
5 Factors Influencing Optimal Spacing
1. Climate Humidity Levels – High humidity areas require wider gaps (1/4 inch) because wood absorbs more moisture and expands significantly, while dry climates need smaller gaps (1/8 inch) since wood movement is minimal and boards may shrink slightly.
2. Board Width and Thickness – Wider boards (6-inch vs 4-inch) move more dramatically with moisture changes and need larger gaps to prevent buckling, while thicker boards (1.5-inch vs 1-inch) hold more moisture and require extra spacing allowance.
3. Seasonal Installation Timing – Installing during dry summer months when wood has less moisture content requires wider initial gaps to accommodate future expansion, while wet season installation needs tighter spacing since boards will shrink as they dry out.
4. Building Code Requirements – Local codes often specify minimum and maximum gap sizes (typically 1/4 to 3/8 inch maximum) for safety reasons to prevent high heels or small objects from falling through, overriding personal spacing preferences.
5. Wood Moisture Content at Installation – Fresh wet lumber (above 25% moisture) should be installed tight together since it will shrink substantially, while pre-dried lumber (below 20% moisture) needs intentional gaps since minimal shrinkage will occur after installation.
What Are the Best Tools for Consistent Deck Board Gaps?
Getting consistent gaps requires the right tools and proven methods. Professional contractors use specific techniques to ensure every board maintains proper spacing throughout the entire deck installation.
| Tool/Technique | Purpose | How to Use | Best For | Cost Range |
|---|---|---|---|---|
| 8-Penny Nails | Create 1/8″ gaps | Place nail between boards during installation, remove after fastening | KDAT lumber, tight budgets | Under $5 |
| 16-Penny Nails | Create 1/4″ gaps | Use nail thickness as spacing guide, slide along board length | Wet lumber, humid climates | Under $5 |
| Plastic Spacers | Consistent gaps | Insert between boards, leave in place permanently | All lumber types, professional look | $15-25 |
| Wood Spacer Strips | Custom gap sizes | Cut strips to exact width needed, reuse throughout project | Non-standard spacing requirements | $10-20 |
| Moisture Meters | Check wood readiness | Insert pins into board ends, read percentage display | Determining lumber type and spacing needs | $25-100 |
| Chalk Line | Maintain straight rows | Snap line across joists before board installation | Keeping boards aligned during spacing | $15-30 |
| Measuring Tape | Verify gap consistency | Check spacing every 3-4 boards during installation | Quality control and code compliance | $10-25 |
| Gap Gauges | Multiple size options | Metal or plastic tools with preset gap measurements | Professional installations, multiple projects | $20-40 |
Top 5 Deck Spacing Mistakes (and How to Avoid Them)
1. Ignoring Wood Movement Patterns – Failing to account for natural shrinkage in wet lumber or expansion in dry lumber leads to buckling boards, gaps that are too wide, or boards pushed tightly together that warp and split over time.
2. Using Inconsistent Gap Sizes – Random spacing creates an unprofessional appearance and can cause structural problems where some boards have room to move while others are constrained, leading to uneven stress and potential board failure.
3. Skipping Manufacturer Instructions – Each lumber brand may have specific spacing recommendations based on their treatment process and wood species, and ignoring these guidelines voids warranties and can result in premature deck failure.
4. Not Considering Local Climate Conditions – Installing with spacing suitable for dry climates in humid areas (or vice versa) causes boards to move beyond their intended range, creating safety hazards from gaps that are too wide or structural damage from insufficient expansion room.
5. Installing Without Moisture Content Testing – Assuming all pressure-treated lumber behaves the same way without checking actual moisture levels leads to wrong spacing decisions, especially when mixing different lumber batches or types in the same project.
Conclusion
Proper spacing for pressure-treated deck boards makes the difference between a deck that lasts decades and one that needs costly repairs within years.
The key is understanding your lumber type: install KDAT boards with 1/8-inch gaps to allow for expansion, while wet-treated lumber should go in tight since natural shrinkage will create the spacing you need. Climate, board width, and local building codes all influence your final spacing decision.
Getting this right prevents water damage, wood rot, and structural problems that cost thousands to fix. Your deck will drain properly, look professional, and handle seasonal weather changes without warping or buckling.
Ready to start your deck project? Measure your lumber’s moisture content first, choose the right spacing tools, and follow the guidelines we covered. Take time to plan your spacing strategy before you install the first board.
What spacing challenges have you faced with your deck projects? Share your experience in the comments below.