Your outdoor Adirondack chairs are fading, chipping, and looking worn after months of exposure to sun and rain. You love their classic design, but the weathered appearance is detracting from the overall appeal of your entire patio.
What if you could restore them to look brand new while adding your style?
Fresh paint doesn’t just protect your investment – it recasts tired furniture into stunning focal points that boost your home’s curb appeal.
Painting Adirondack chairs is simpler than you think. With the right techniques, basic tools, and quality exterior paint, you can achieve professional-looking results that last for years.
Ready to give your chairs a makeover? This complete guide walks you through every step, from preparation to final coat, ensuring your painted chairs become the envy of the neighborhood.
Why Paint Adirondack Chairs?
Painting your Adirondack chairs serves multiple practical and aesthetic purposes, extending their lifespan and enhancing your outdoor space.
Protection from Weather Elements Paint acts as a protective barrier against rain, snow, and UV rays. Without proper protection, wood can crack, warp, or fade over time. A quality paint coat prevents moisture from seeping into the wood fibers.
Enhanced Curb Appeal Fresh paint instantly updates tired-looking furniture. You can match your chairs to your home’s exterior colors or create a striking contrast that draws attention to your seating area.
Cost-effective maintenance: painting costs significantly less than replacing entire chairs. Regular paint maintenance can extend furniture life by 5-10 years, saving you hundreds of dollars in replacement costs.
Personalization Options Paint allows you to express your style through color choices. Whether you prefer classic white, bold blues, or earthy greens, painting lets you customize your outdoor furniture to reflect your personality.
Key Benefits
- Prevents wood rot and decay
- Reduces splintering and rough surfaces
- Increases the resale value of outdoor furniture
- Makes chairs easier to clean and maintain
Step-By-Step Guide to Painting Adirondack Chairs
Follow these simple steps to give your outdoor chairs a fresh, protective finish that will last for years.
Tools Needed
| Tool | Purpose |
|---|---|
| Screwdriver | Tighten loose screws in chair joints |
| Adjustable wrench | Secure bolts and hardware |
| 180-grit sandpaper | Smooth surface for paint adhesion |
| Tack cloth or clean rag | Remove sanding dust |
| Paint brushes or rollers | Apply paint evenly |
| Drop cloth | Protect the work surface from spills |
Materials Needed
| Material | Purpose |
|---|---|
| Soap and water | Clean the chair surface before painting |
| Wood glue | Fix loose joints without visible hardware |
| Wood filler | Patch small cracks and dents |
| Epoxy | Fill larger holes and damage |
| High-quality exterior paint | Provide a weather-resistant finish |
| Primer (if needed) | Seal bleeding woods like redwood or cedar |
| Water-based polyurethane (optional) | Add extra protection to high-wear areas |
Step 1: Clean and Prepare
Start by washing your Adirondack chair thoroughly to remove all dirt, debris, and grime. This cleaning step is crucial because paint won’t stick properly to dirty surfaces.
After washing, allow the chair to dry completely before moving to the next step. Make sure no moisture remains on any part of the chair, as wet wood can cause paint adhesion problems later.
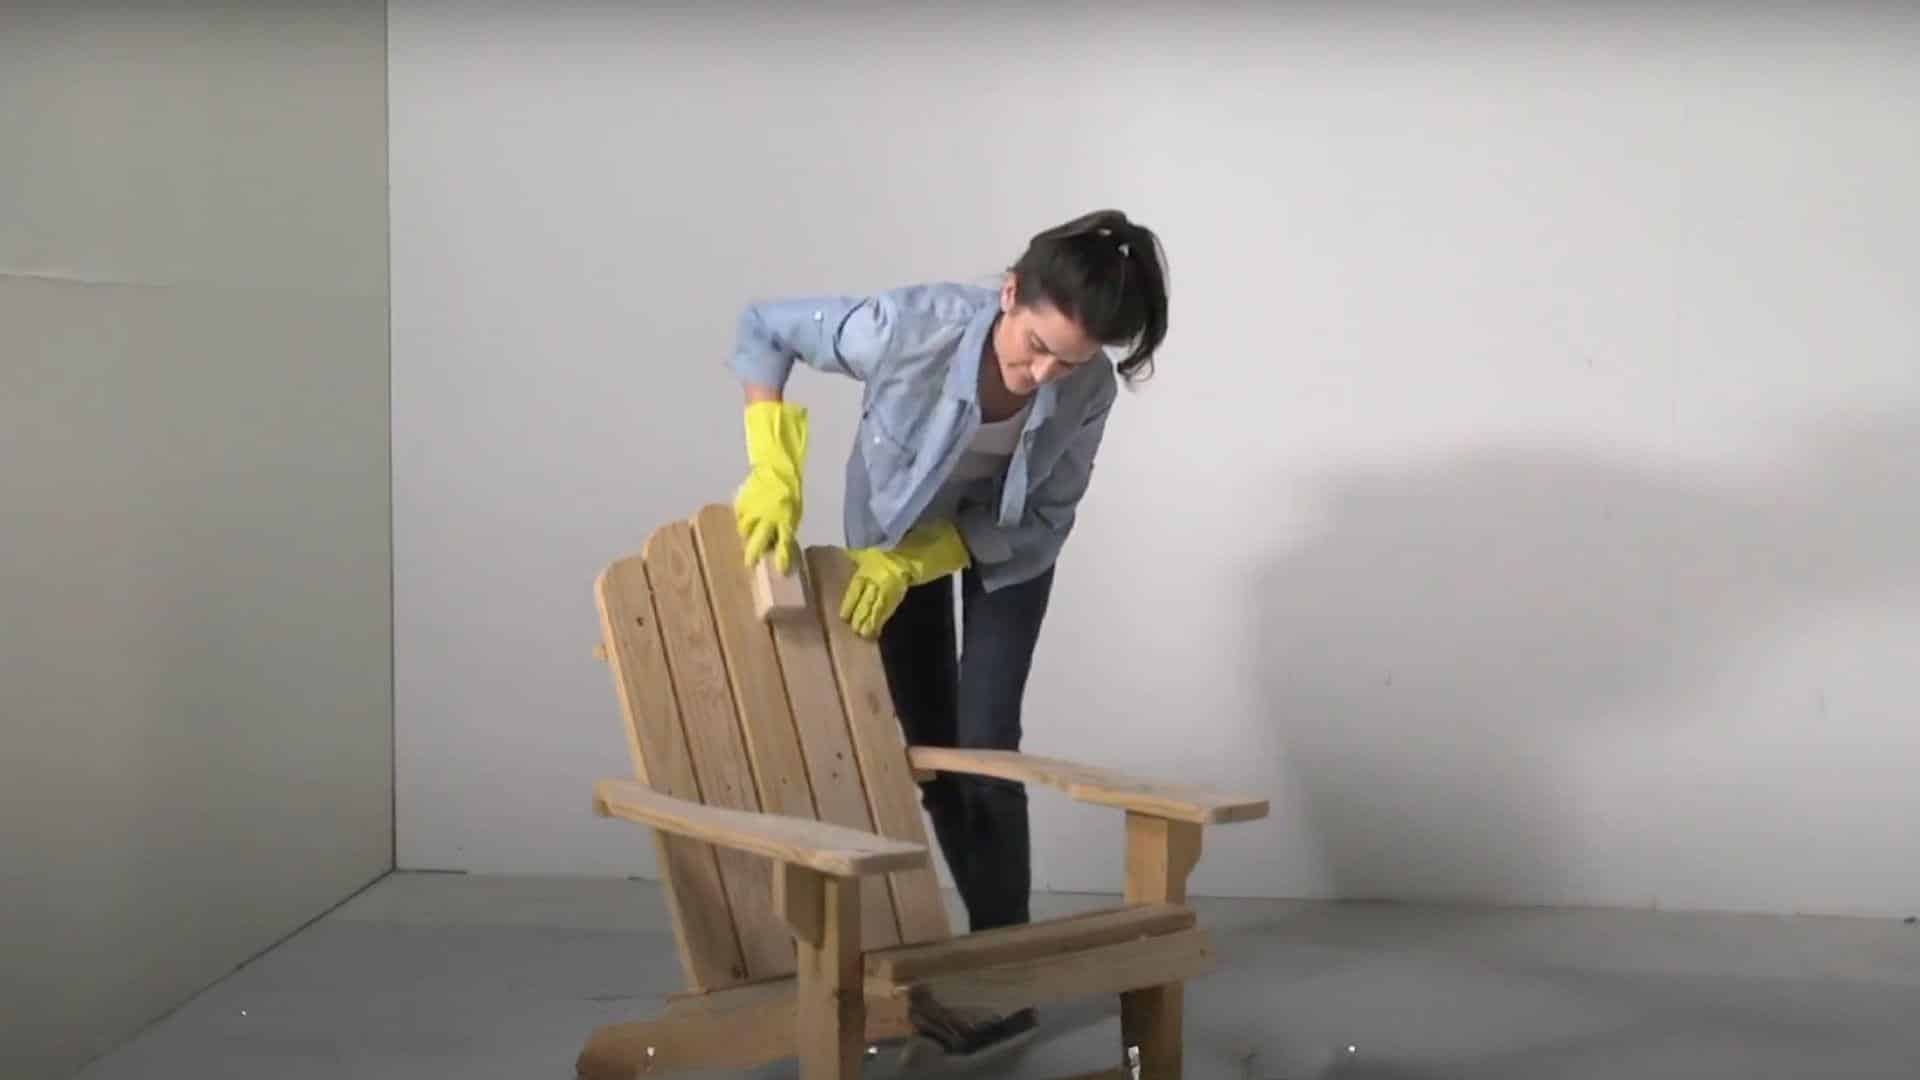
Step 2: Check and Tighten
Place the chair upside down on a protective drop cloth. Carefully wiggle all parts, including arms, legs, seat, and back, to identify loose joints.
Use a screwdriver or adjustable wrench to tighten any loose screws or bolts you find. This step ensures your chair remains sturdy and prevents paint from cracking due to loose joints that may move over time.
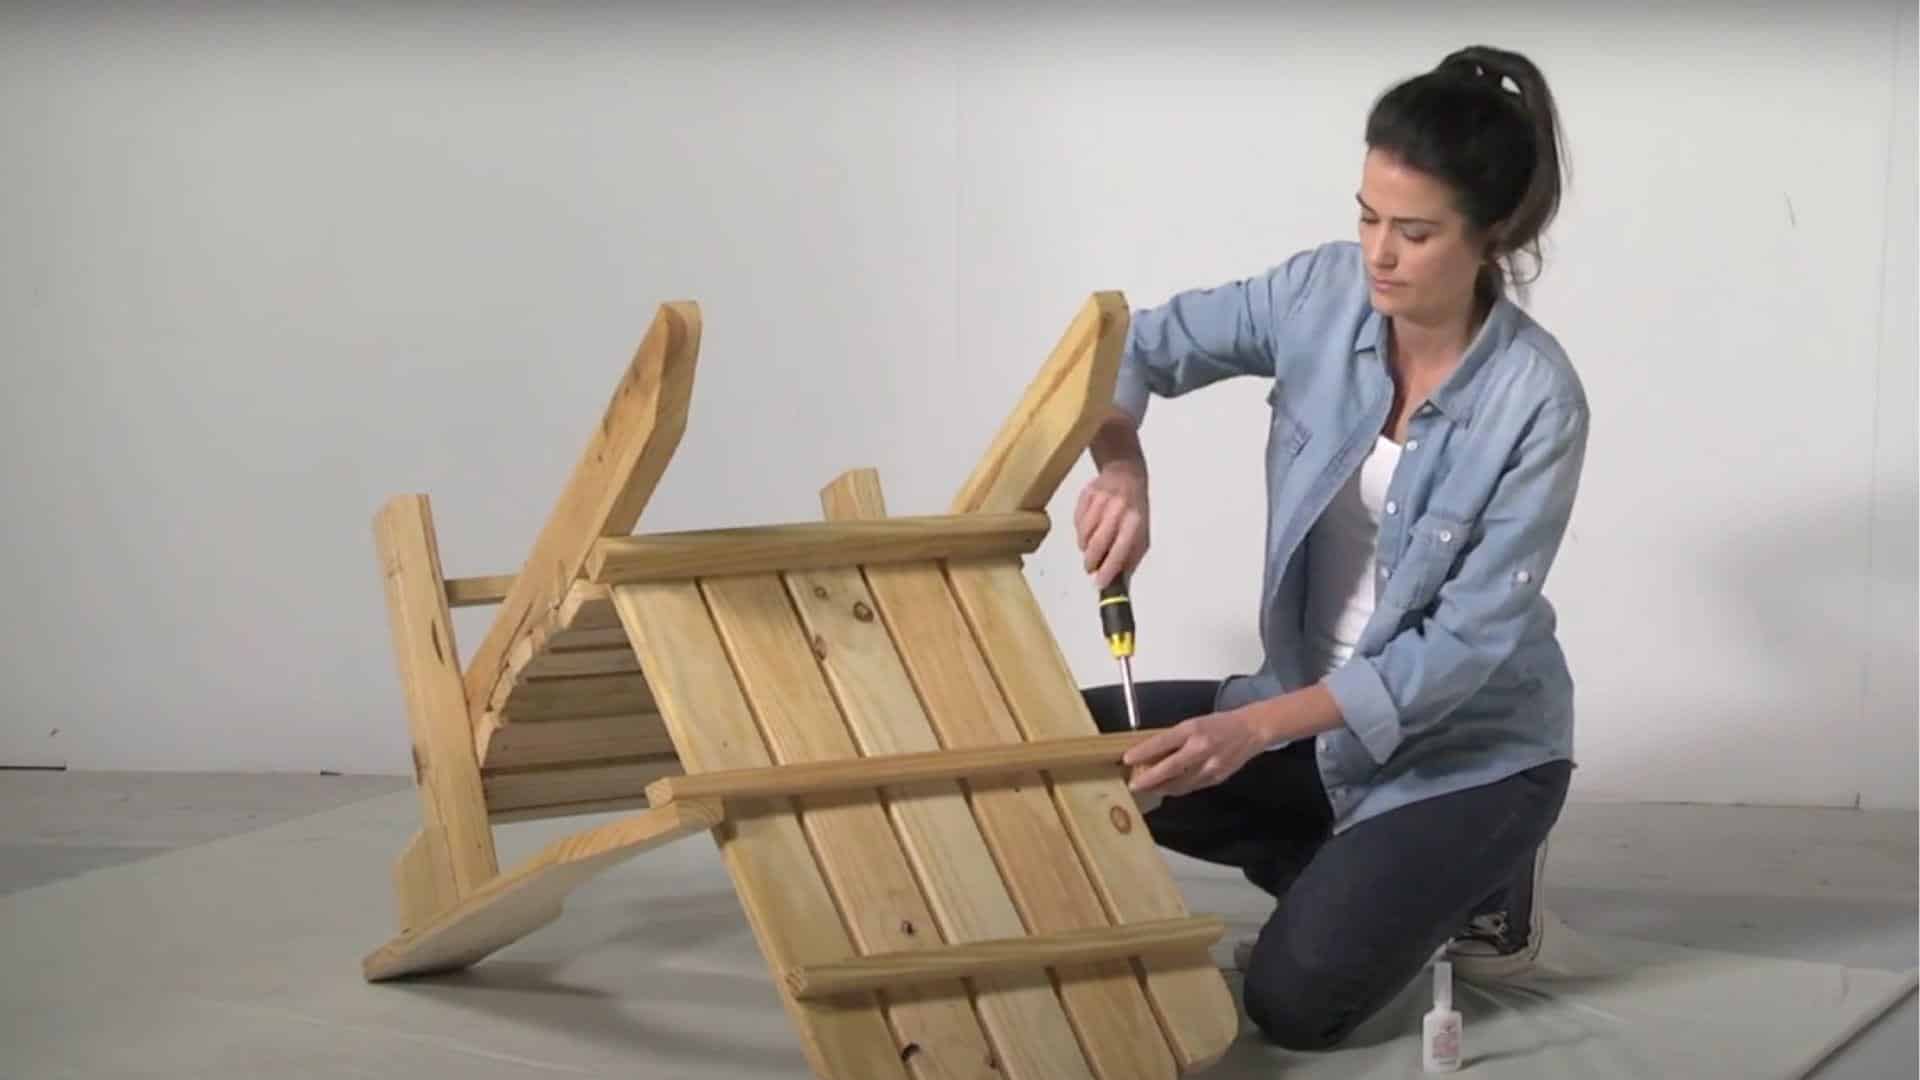
Step 3: Repair Damage
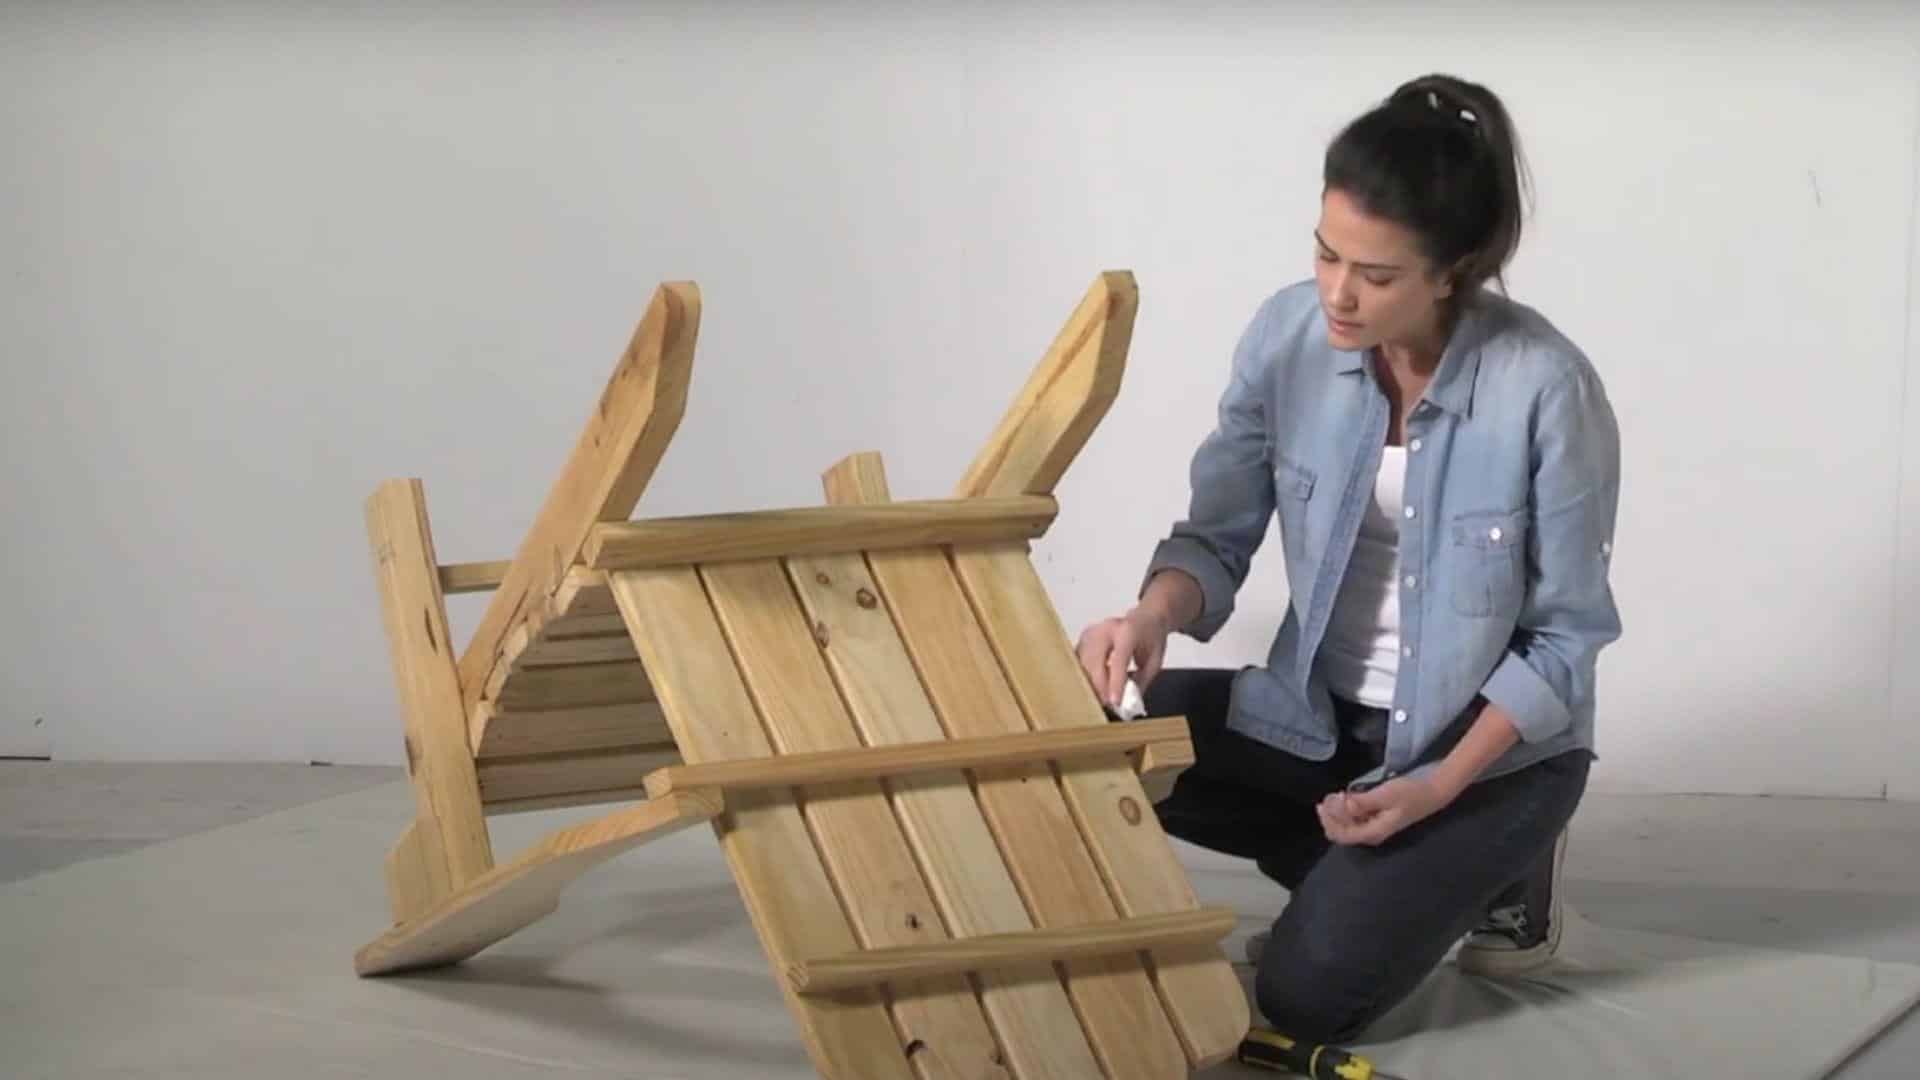
Apply a few drops of wood glue to loose areas that don’t have visible screws or bolts. Fill any cracks, dents, or small holes with suitable wood filler, then smooth it level with the surface.
For larger holes or significant damage, use epoxy filler instead. Allow all repairs to cure completely according to the manufacturer’s instructions before proceeding to the next step.
Step 4: Sand the Surface
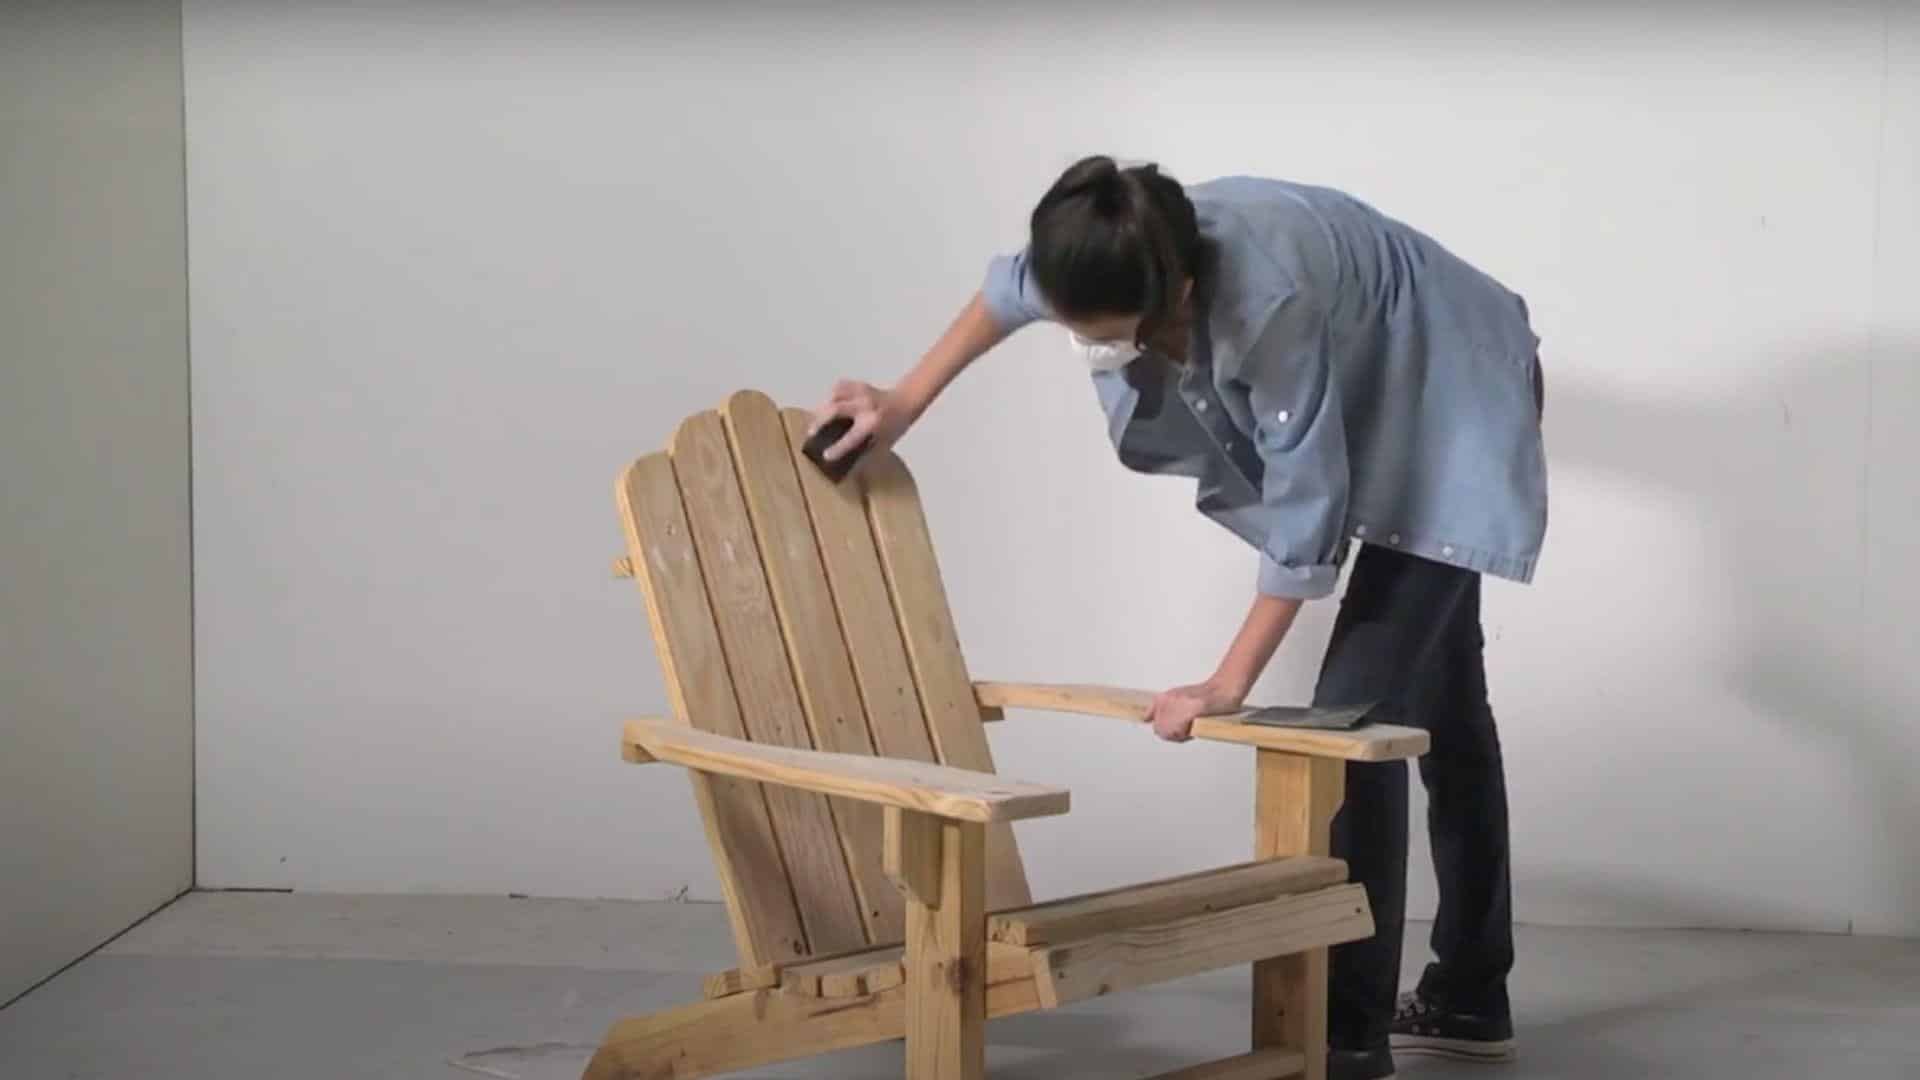
Using 180-grit fine sandpaper, lightly sand the entire surface of the chair. This process smooths rough areas and creates better paint adhesion.
Pay special attention to this step if you plan to use semi-gloss or gloss paint, as these finishes will accentuate any surface imperfections. Sand with the wood grain direction when possible for the smoothest results.
Step 5: Remove Dust
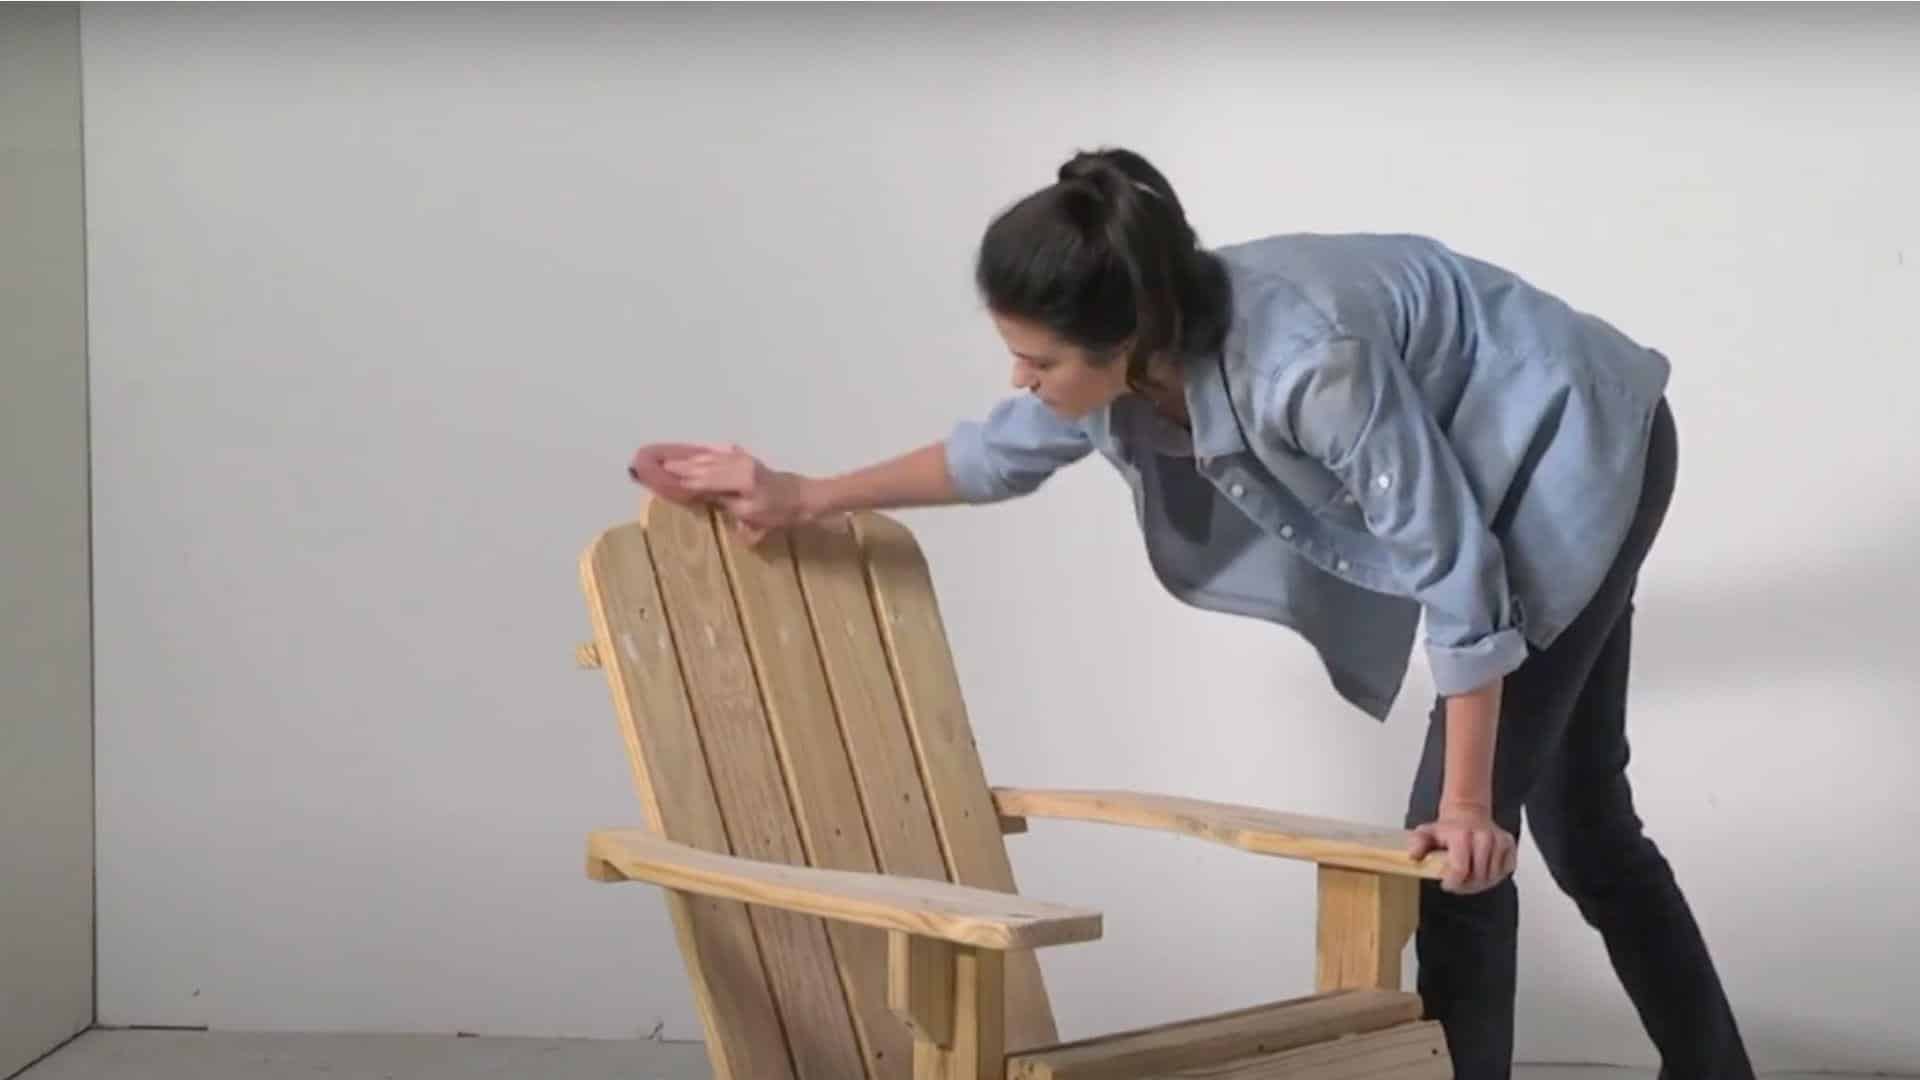
After sanding, thoroughly wipe down all surfaces using a tack cloth or clean, lint-free rag. Remove every bit of sanding dust from all crevices, joints, and flat surfaces.
Any remaining dust particles will create a rough, bumpy finish once painted. Take your time with this step to ensure a professional-looking result when painting is complete.
Step 6: Paint First Coat
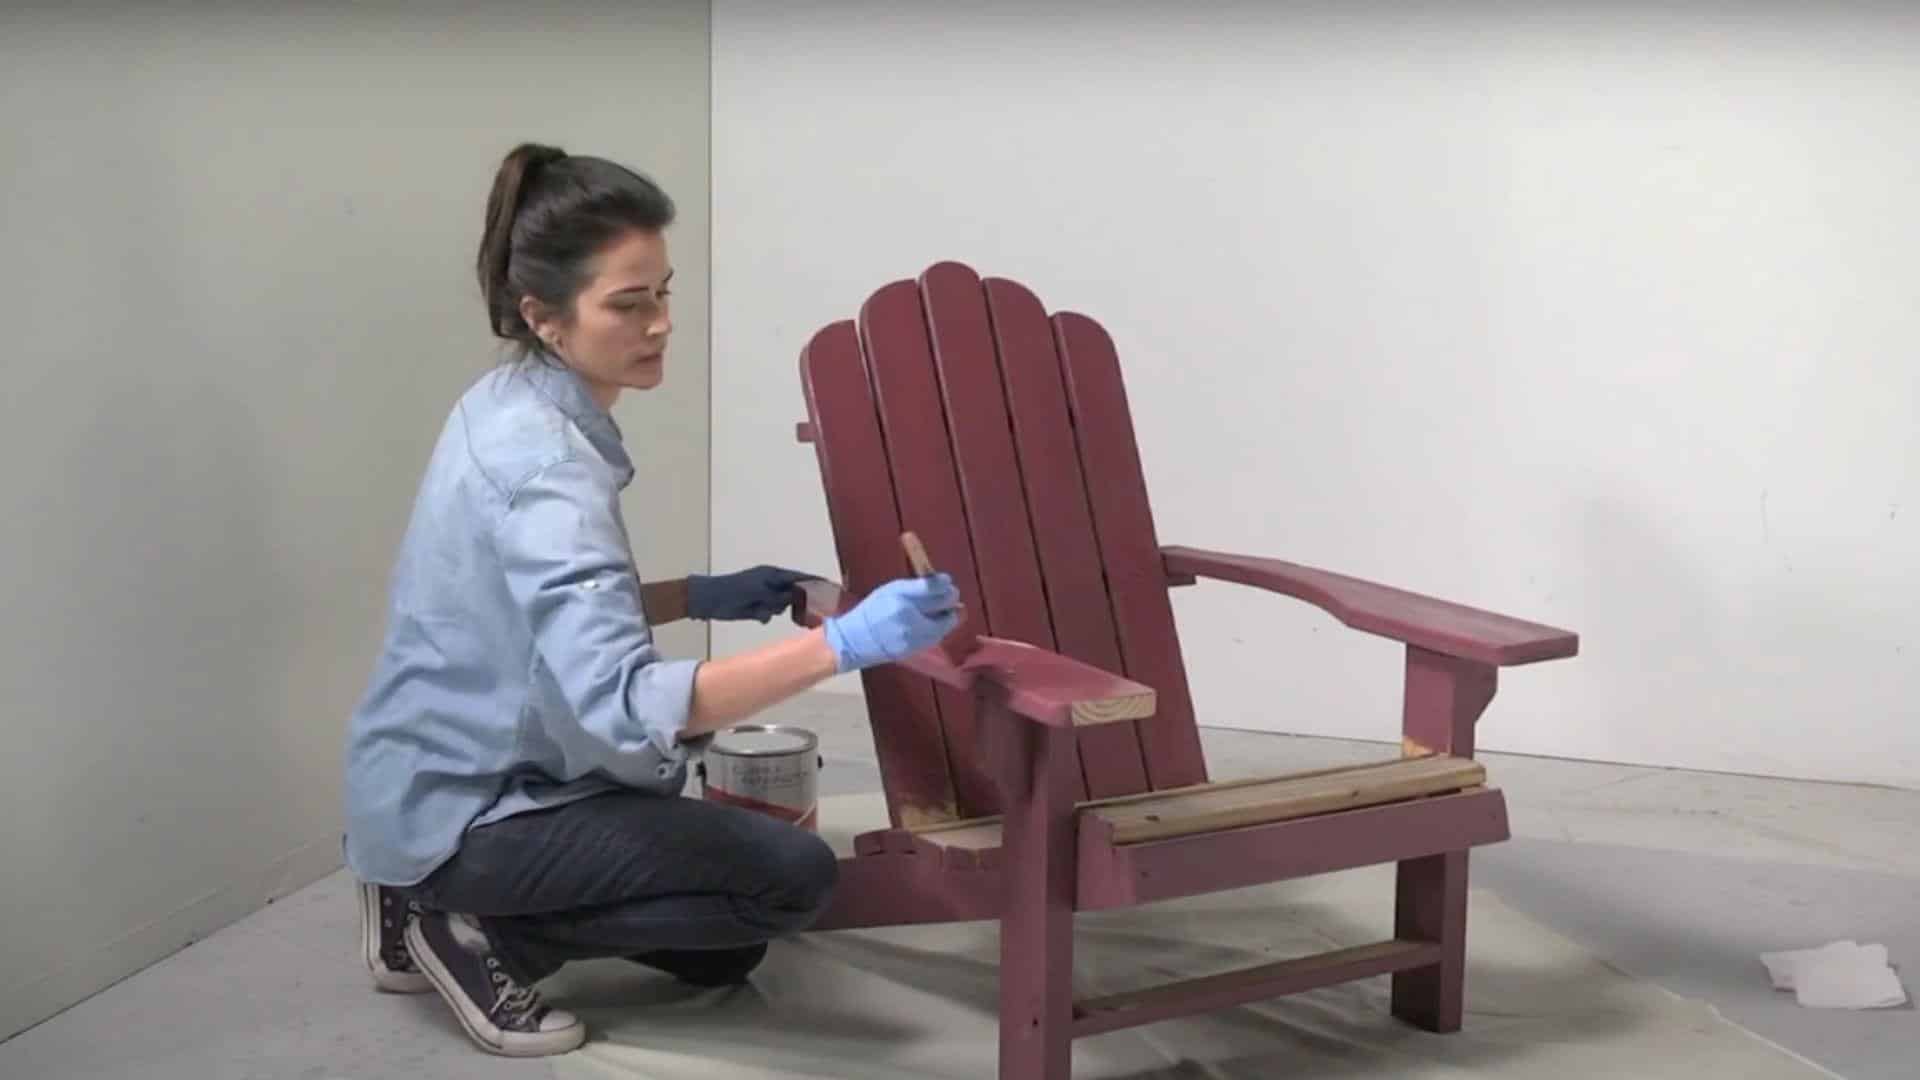
Keep the chair upside down and begin painting the underside of the seat, armrests, and legs first. Once these areas are arid, flip the chair over and paint the remaining visible surfaces.
Always start from the top and work your way down. This method prevents drips from falling onto freshly painted areas below.
Video Tutorials
I want to give credit to Ace Hardware for their informative video, which served as a reference for this guide.
Safety Tips for Painting Adirondack Chairs
- Work in a Well-Ventilated Area – Always paint outdoors or in spaces with good airflow to avoid inhaling paint fumes and ensure proper drying conditions.
- Wear Protective Gear – Use work gloves during sanding and repair work. Consider safety glasses when sanding to protect your eyes from dust particles.
- Handle Tools Carefully – Keep screwdrivers and other sharp tools out of reach from your body. Store them safely when not in use to prevent accidents.
- Read Product Labels – Always follow manufacturer instructions on paint, primer, and wood filler containers for safe handling and proper application techniques.
- Dispose of Materials Properly – Don’t pour paint or solvents down drains. Take leftover materials to local hazardous waste disposal facilities for safe removal.
- Allow Proper Drying Time – Don’t rush the process. Allow each coat to dry completely before handling to prevent smudging and ensure optimal results.
Avoid These Mistakes When Painting Adirondack Chairs
| Common Mistake | Solution |
|---|---|
| Skipping the cleaning step before painting | Always wash the chair thoroughly with soap and water, then let it dry completely for proper paint adhesion. |
| Not sanding the surface properly | Use 180-grit sandpaper to smooth the entire chair surface, ensuring a smooth finish and improved paint adherence. |
| Forgetting to remove sanding dust | Wipe all surfaces with a tack cloth or a clean rag to remove dust that causes a rough texture. |
| Painting over loose joints without fixing | Check and tighten all screws, bolts, and loose areas with wood glue before applying paint. |
| Using the wrong paint type for the location | Select high-quality exterior paint for outdoor chairs and interior paint for indoor furniture use only. |
| Applying paint too thick in a single coat | Apply thin, even coats and let dry completely between applications for a smooth, professional-looking finish. |
| Not priming bleeding woods like cedar | Use an appropriate primer on redwood or cedar to prevent wood stains from bleeding through paint. |
Conclusion
Painting your Adirondack chairs is one of the most rewarding home improvement projects you can tackle. With proper preparation, the right tools, and high-quality exterior paint, you can transform weathered furniture into attractive outdoor pieces that last for years.
Remember the key steps and avoid common mistakes, such as skipping prep work or rushing between coats. These simple techniques will yield professional results while saving you hundreds of dollars compared to buying new chairs.
Your freshly painted Adirondack chairs will not only protect your investment but also become the centerpiece of your outdoor space. The satisfaction of completing this project yourself makes every relaxing moment in your chair even more enjoyable.
Ready to start your chair makeover? Grab your supplies and begin changing your outdoor furniture today!
Frequently Asked Questions
Is It Better to Paint or Stain Adirondack Chairs?
Paint offers better weather protection and a wider range of color options, while stain maintains a natural wood appearance but requires more frequent reapplication for outdoor use.
What Kind of Paint Do You Use on Wooden Chairs?
Use high-quality exterior acrylic or latex paint designed for outdoor wood furniture. Choose semi-gloss or satin finish for durability and easy cleaning.
Is It Better to Spray Paint or Brush Paint Wood Chairs?
Brush painting offers better control and coverage for detailed chair surfaces, while spray painting provides a smoother finish but requires more preparation work.