Have you ever tried hanging a heavy mirror or shelf on plasterboard, only to watch it crash down hours later?
Most people don’t realize that regular screws pull straight through hollow walls, leaving unsightly holes and potentially damaging your belongings.
However, with the right hollow wall anchors and proper technique, you can mount almost anything securely on plasterboard walls. I’m talking about TV brackets, floating shelves, bathroom fixtures, and even heavy artwork that stays put for years.
In this guide, I’ll walk you through the step-by-step process of installing hollow wall anchors safely, so your next DIY project stays firmly attached to the wall where it belongs.
What Are Hollow Wall Anchors?
Hollow wall anchors are specialized fixings designed to hold items on walls that have space behind them securely. Unlike solid walls, where you can drill directly into brick or concrete, hollow walls, such as plasterboard, require anchors to spread the load across a wider area.
These clever fixings work by expanding behind the wall once you push them through. When you tighten the screw, the anchor opens up like an umbrella on the back side of the wall. This creates a firm grip that won’t pull through the plasterboard.
Why Regular Screws Don’t Work
If you screw into hollow plasterboard, it will pull straight out under any weight. The plasterboard is too thin and soft to hold screws on its own. Hollow wall anchors solve this problem by creating a much larger contact area behind the wall.
Common Uses of Hollow Wall Anchors
- Perfect for mounting framed artwork, family photos, and decorative mirrors on plasterboard walls.
- Ideal for wall-mounted shelves in kitchens, bathrooms, and living rooms.
- Essential for securing flat-screen TV wall mounts and speaker brackets to plasterboard walls.
- Perfect for installing towel rails, soap dispensers, toilet roll holders, and kitchen utensil racks.
Step-By-Step Guide to Use Hollow Wall Anchors
This guide outlines a safe and effective six-step procedure for mounting objects on plasterboard using hollow wall anchors.
Tools Required:
| Tools | Description |
|---|---|
| Drill (cordless drill or drill driver) | Creates holes in plasterboard and drives screws into anchors |
| Drill bits | Makes precise holes sized for the hollow wall anchors |
| Pencil or pen | Mark’s exact positions where holes need to be drilled |
| Level | Ensures items are mounted straight and aligned properly |
Materials Required:
| Materials | Description |
|---|---|
| Hollow wall anchors (toggle bolts/cavity wall fixings) | Expands behind plasterboard to create strong fixing points |
| Screws | Secures items to the anchors and activates the expansion mechanism |
| Plasterboard/drywall | The wall surface is being drilled into |
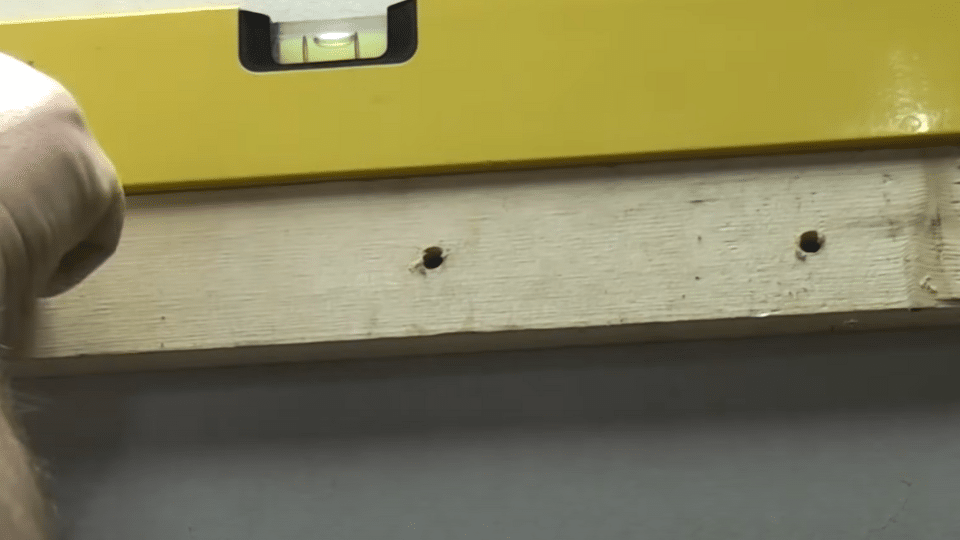
Step 1: Position and Mark Your Item
Hold your item against the wall where you want to mount it. Use a level to ensure it’s straight, then mark the screw hole positions with a pencil or pen by pressing through the mounting holes.
Select the correct hollow wall anchor size based on the thickness of your plasterboard.
Safety Note: Always wear safety glasses when drilling to protect your eyes from dust and debris.
Step 2: Drill the Anchor Holes
Drill holes at your marked positions using the appropriate drill bit size for your anchors. Make sure the holes are straight and clean.
The hole should be just large enough for the anchor to pass completely through the plasterboard.
Quality Tip: Use a sharp drill bit for cleaner holes that won’t damage the plasterboard edges.
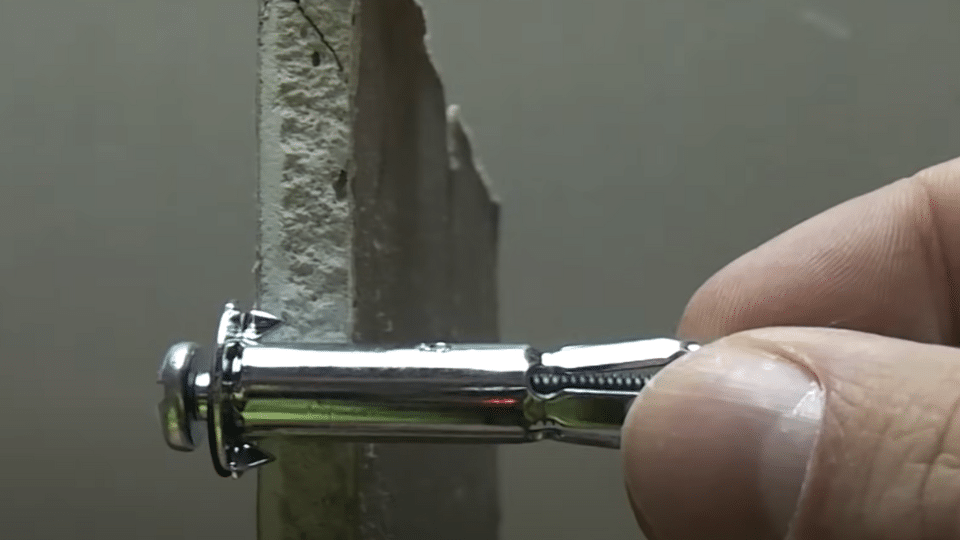
Step 3: Insert and Secure the Anchors

Push the hollow wall anchor through each drilled hole until it’s completely through the plasterboard. The small teeth on the anchor should bite into the surface to prevent spinning.
Then tighten the screw clockwise to expand the anchor behind the wall.
Helpful Hint: Listen for a slight “pop” sound when the anchor goes through this indicates it’s fully inserted.
Step 4: Mount Your Item
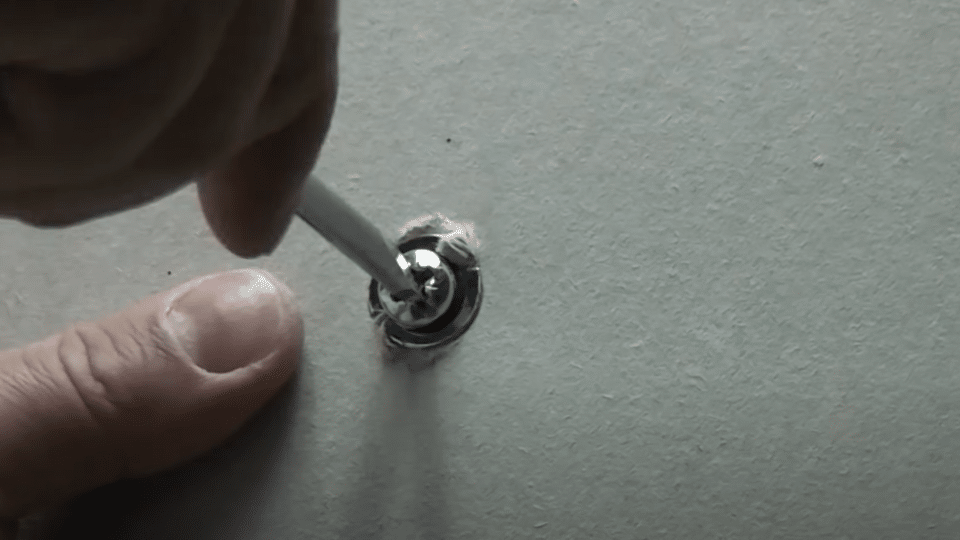
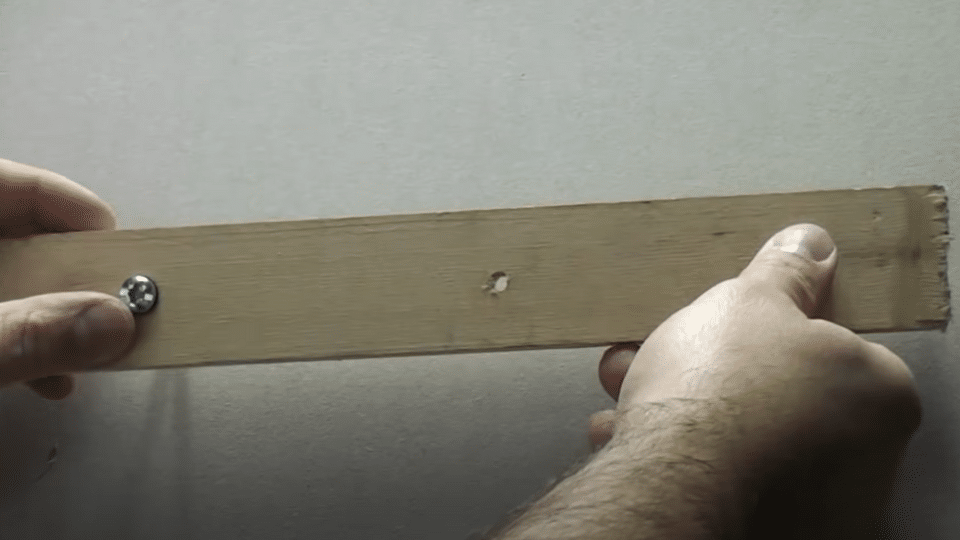
Remove the screws from the expanded anchors (the threaded part stays in the wall). Position your item over the anchor points and screw back into the permanent threads left by the anchors.
The anchors create lasting mounting points.
Efficiency Tip: Keep removed screws organized in a small container to avoid losing them during installation.
Step 5: Test the Installation
Test the mounted item by gently pulling or shaking it to ensure it’s secure. The anchors should hold firmly without any movement or looseness in the wall.
Check that everything feels solid and stable before use.
Best Practice: Check the mounting again after a few days to ensure everything remains tight and secure.
Video Tutorial
I want to acknowledge Ultimate Handymanfor the insightful video, which was a key reference in putting this guide together.
Types of Hollow Wall Anchors
Different types of hollow wall anchors are designed to handle varying loads and wall conditions. Choosing the right anchor ensures both the strength and longevity of your wall-mounted installation.
| Type | Description | Best For |
|---|---|---|
| Toggle Bolts | Metal anchors with a spring-loaded wing that opens inside the wall | Heavy items |
| Molly Bolts | Metal sleeves that expand when the screw is tightened | Medium-weight items |
| Plastic Expansion Anchors | Expand slightly inside the hole | Light items |
| Self-Drilling Anchors | No pre-drilling needed, screws directly into drywall | Convenience, light-duty |
Understanding anchor types helps you match the proper hardware to your specific task, preventing failures and achieving secure, reliable mounting every time.
Post-Installation Cleanup Tips
A clean finish makes your work look professional and protects your walls from damage. Here’s how to tidy up after installing hollow wall anchors.
1. Remove Drilling Debris
Use a small brush or vacuum cleaner to clear away plaster dust from around each hole. Dust can make your wall look messy and may interfere with the application of paint or wallpaper later. A clean, dry cloth works well for wiping surfaces, too.
Quick Fix: A small paintbrush is ideal for removing dust from tight corners and crevices.
2. Fix Minor Wall Damage
Minor chips or cracks around holes happen during drilling. Fill these spots with ready-mixed wall filler using a putty knife. Smooth it level with the wall surface and let it dry completely before painting or decorating over it.
Time Saver: Keep a small tube of wall filler handy for quick touch-ups during any DIY project.
3. Clean the Work Area
Wipe down your mounted item and the surrounding wall with a damp cloth to remove fingerprints and dust. This final step makes your installation look neat and finished. Check that no tools or screws are left behind.
Professional Touch: A clean installation not only looks better but also helps you spot any issues that need attention.
4. Dispose of Waste Properly
Collect any leftover packaging, broken drill bits, or damaged anchors. Put plaster dust and small debris in your household waste. Store any unused anchors and screws in a labeled container for future projects.
Smart Storage: Keep leftover fixings in a clear container with the package instructions attached for easy reference later.
Common Mistakes and Recommended Solutions
Proper use of hollow wall anchors is essential for a secure and damage-free installation. Avoiding common mistakes ensures safety, stability, and a professional finish.
| Mistake | Recommended Solution |
|---|---|
| Using the wrong size drill bit | Always match the drill bit size to the anchor packaging instructions |
| Skipping stud/cable check | Use a stud finder or cable detector before drilling |
| Over-tightening screws | Tighten only until secure and resistance is felt |
| Ignoring wall thickness | Measure wall thickness and select a suitable anchor type and length |
| Failing to test the load | Gently test the item’s security and recheck after a few days |
| Using the wrong anchor type | Refer to the anchor specifications for weight rating and surface compatibility. |
| Improper anchor alignment | Use a level and mark hole positions carefully before drilling |
| Reusing damaged holes | Patch old holes with filler and drill a fresh, properly-sized hole nearby |
By avoiding these common mistakes and following the recommended solutions, you can ensure a strong, safe, and long-lasting mount that protects both your belongings and your wall structure.
Wrapping It Up
Installing hollow wall anchors safely doesn’t have to be complicated when you follow the proper steps. By selecting the correct anchor type, checking for hidden cables, and drilling precise holes, you can confidently mount heavy items on plasterboard walls.
The key is taking your time with each step, from accurately marking positions to thoroughly testing the final installation. Remember, a secure mount today means no fallen items or wall damage tomorrow. Your family photos, shelves, and TV brackets will appreciate the extra care.
Ready to tackle your next wall-mounting project?
Begin by gathering the necessary tools and anchors tailored to your specific needs. Do you have questions about anchor selection or installation techniques?
Drop a comment below, I’d love to help you get it right the first time.
Frequently Asked Questions
When Should You Not Use Drywall Anchors?
Don’t use drywall anchors when mounting items that weigh more than 75 pounds, on crumbling walls, or when studs are available for direct screwing.
How Much Weight Can Drywall Hold without Anchors?
Drywall alone holds almost no weight maybe 5-10 pounds maximum before screws pull out and damage the wall completely.
How Big Is the Pilot Hole for a Drywall Anchor?
The pilot hole size typically matches the anchor diameter, ranging from 1/4 inch to 1/2 inch. Always check the anchor packaging for exact measurements.