Do you love watching birds flutter about in your yard? Many homeowners feel joy when colorful birds visit their outdoor spaces. Building a bird feeder might be just what you need to increase these visits.
Birds often struggle to find food, especially during cold months when natural sources become scarce. A homemade feeder gives them a reliable food source while letting you enjoy more birdwatching from your window.
With just a few basic tools and common materials, you can build a feeder in a single afternoon.
This blog shows you how to create a sturdy feeder that will stand up to the weather while attracting many birds to your garden.
Why Build a Bird Feeder?
Making your own bird feeder brings many rewards beyond just seeing birds in your yard. When you create a feeder at home, you save money compared to store-bought options that often cost three or four times more for the same basic function.
Your homemade feeder can be perfectly suited to your space and needs. You might want a small window feeder for a city apartment or a larger platform style for a country garden. By building it yourself, you control every aspect of the design.
The birds in your area have specific feeding habits. Some prefer hanging feeders, while others like open platforms. With a DIY approach, you can modify your design based on which birds actually visit, making changes until you find what works best.
How to Select the Best Spot for Your Feeder?
Finding the perfect location for your bird feeder involves considering both the birds’ needs and your viewing pleasure. Here are the key factors to think about when choosing where to place your new feeder:
1. Safety from Predators
Position feeders at least 10 feet away from bushes where cats might hide. Place feeders near trees that provide quick escape routes for birds when they feel threatened. This balance of open space and nearby cover creates an ideal safety zone.
2. Weather Protection
Choose a spot with some shelter from strong winds to prevent the feeder from swinging too much. Good positions include the east side of your house or near (but not directly under) tree cover. The location should offer partial shade during hot days.
3. Visibility for Birdwatching
Select a location visible from your favorite window so you can enjoy watching birds throughout the day. The best spots are often within 15-20 feet of the house, allowing you to see details of the birds without needing binoculars.
4. Accessibility for Refilling
Place the feeder where you can easily reach it for regular cleaning and refilling. This makes maintenance more convenient, which helps ensure you’ll keep up with it. Consider winter conditions, too – a feeder that requires trudging through deep snow might get neglected.
Steps to Build a Simple Bird Feeder
Essential Tools and Materials Needed:
Before starting your bird feeder project, gather these tools and materials. Everything listed is commonly available at hardware stores or might already be in your home workshop.
| Tools | Materials |
|---|---|
| Handsaw or jigsaw | Wooden boards (cedar or pine recommended) |
| Sandpaper (medium and fine grit) | Clear plastic sheet (from food containers) |
| Measuring tape | Wood screws (1-inch and 2-inch) |
| Pencil | Wood glue (waterproof) |
| Drill with various bit sizes | Small tree branches (for perches) |
| Screwdriver | Ice cream sticks or small trim pieces |
| Safety goggles | Hanging hardware (eye hooks or chain) |
| Work gloves | Weather-resistant paint (optional) |
For a basic feeder, you’ll need about 3-4 feet of wooden boards and a piece of plastic roughly 8×10 inches. The exact amounts depend on your chosen design and size.
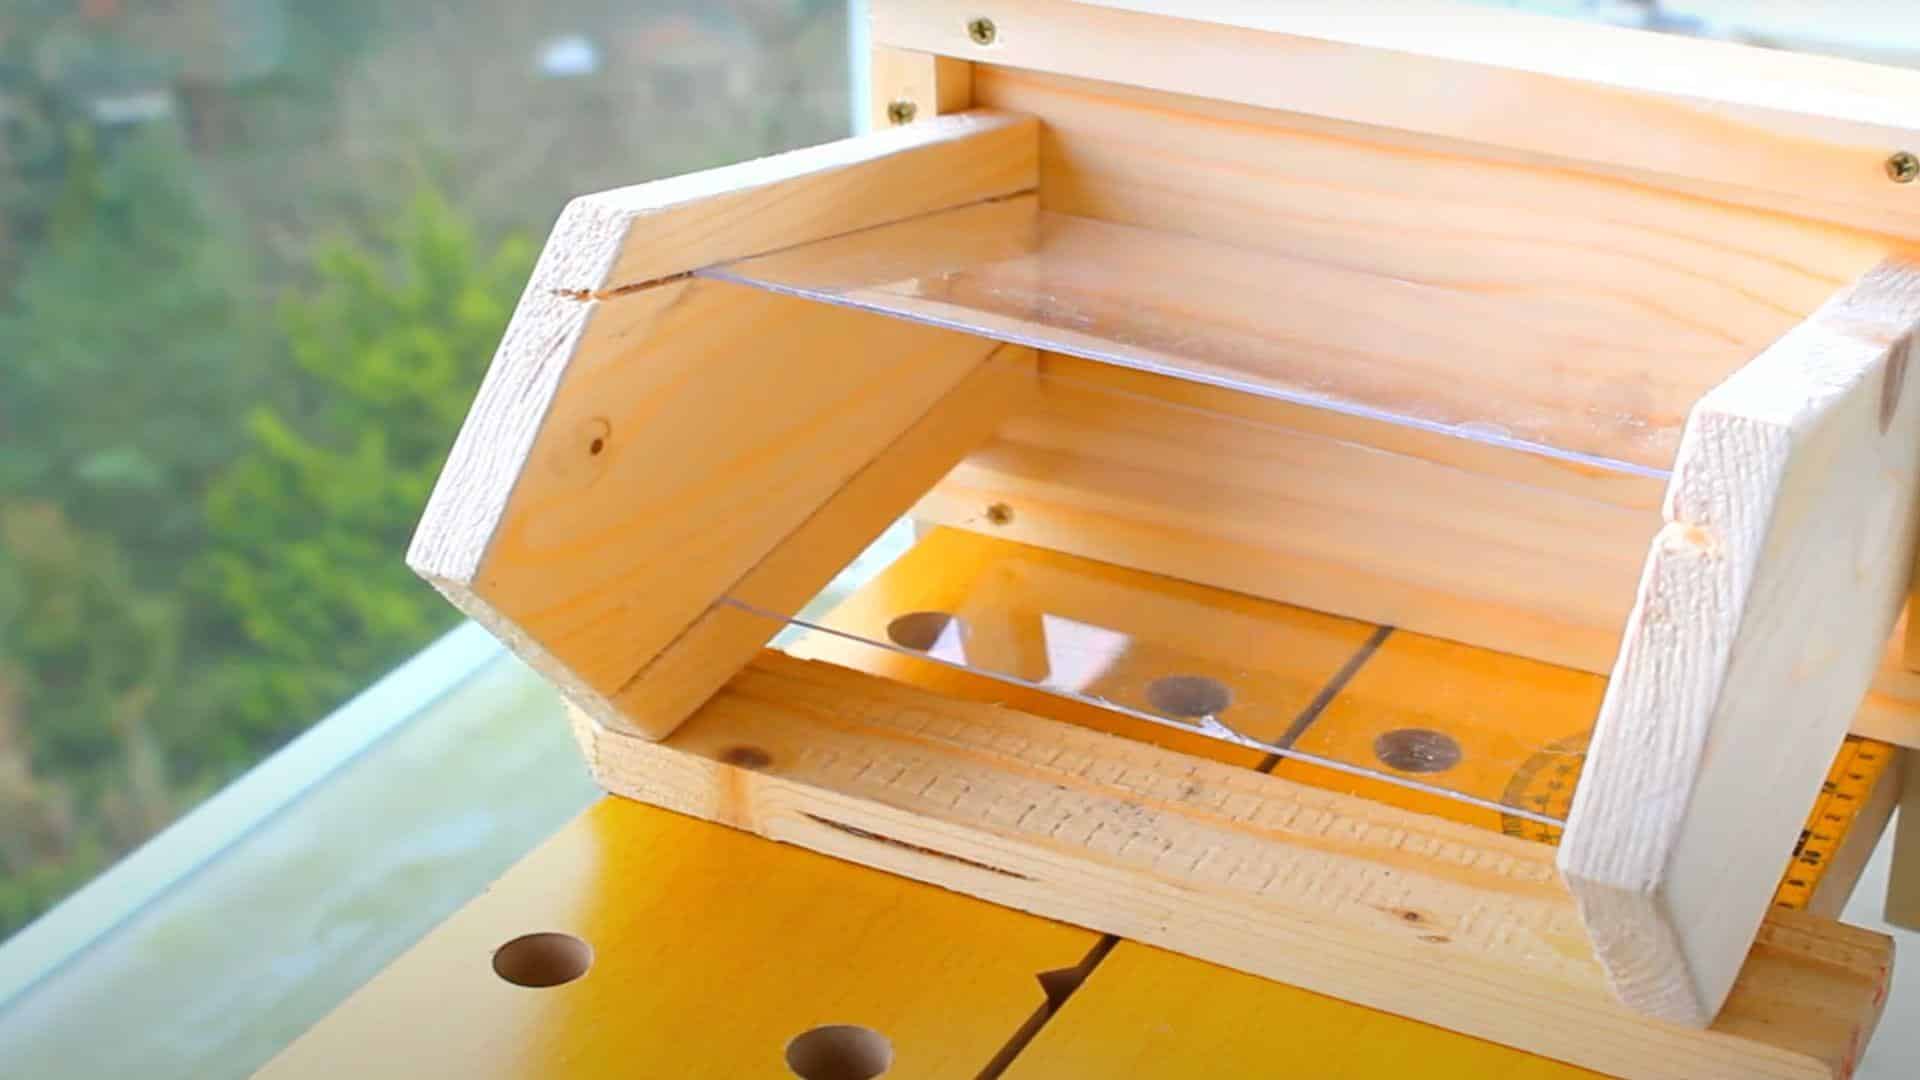
Step 1: Prepare the Plastic Windows
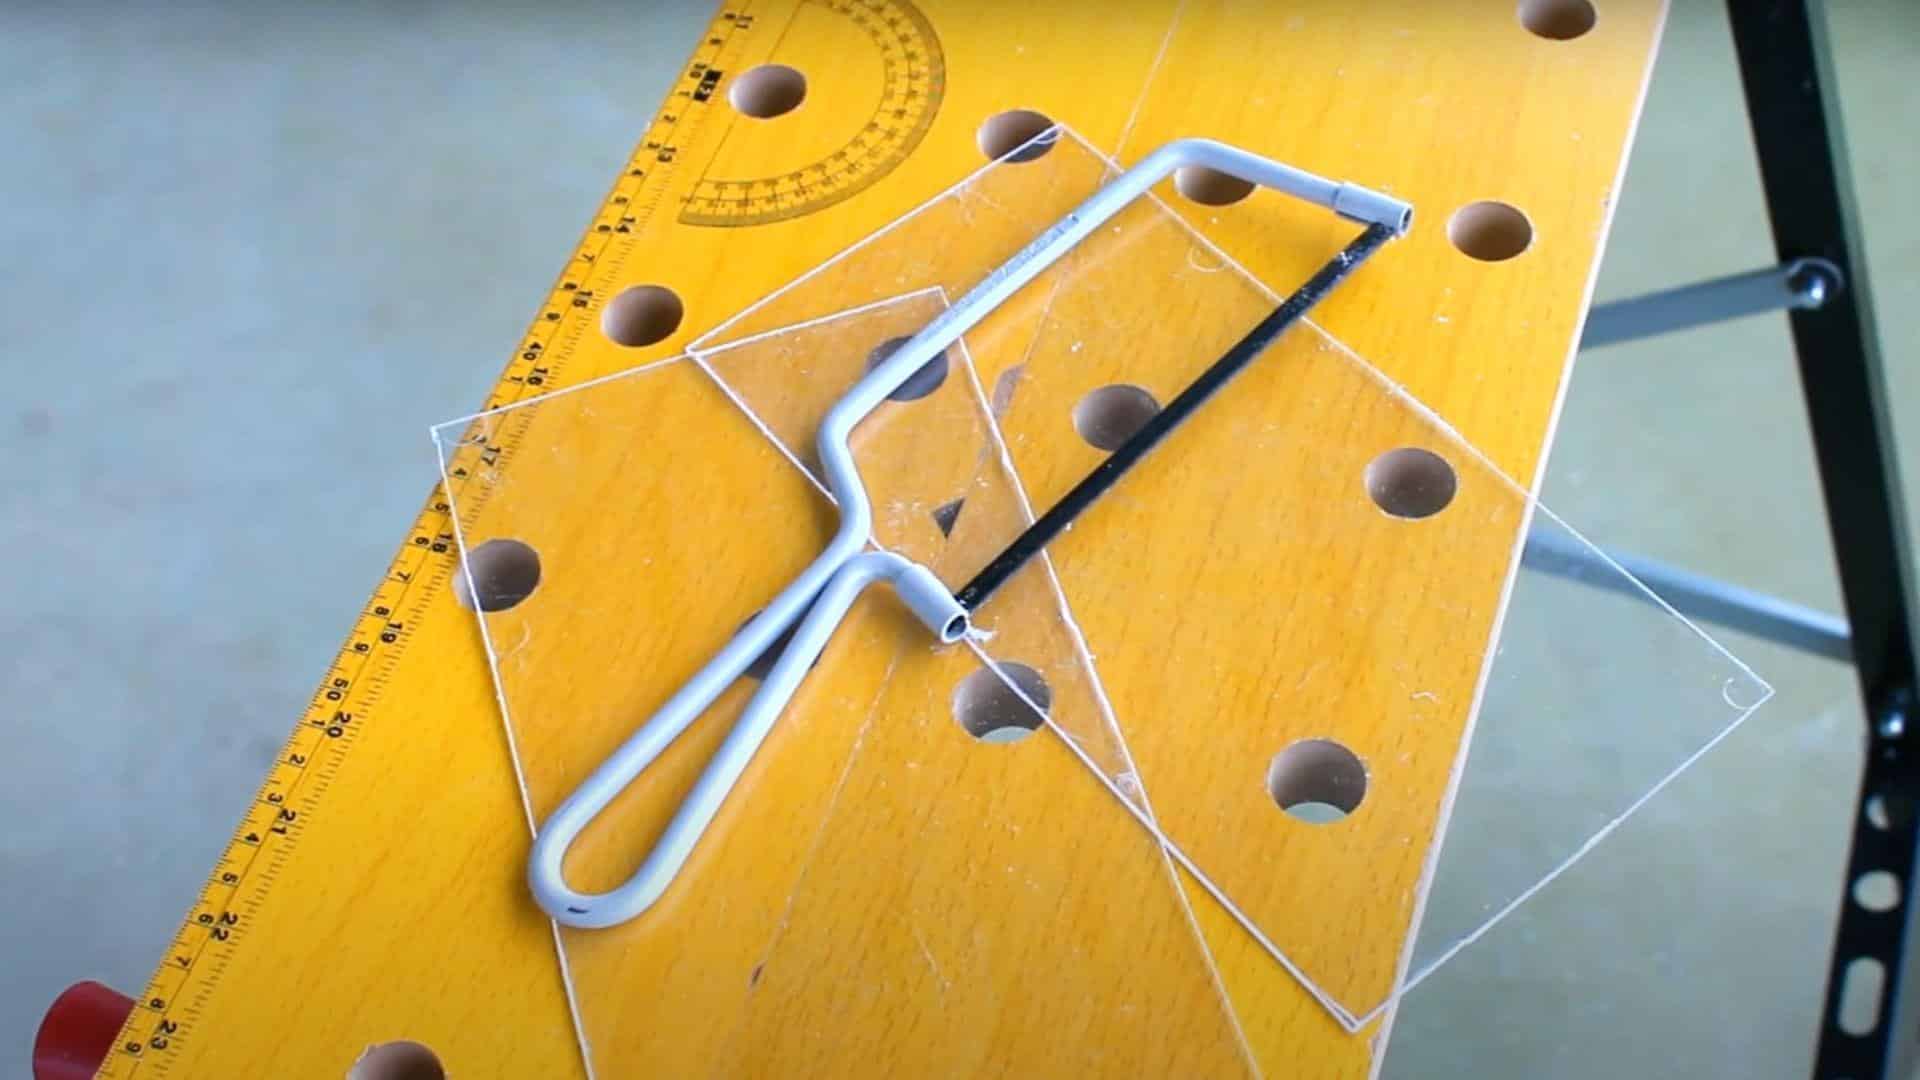
Cut two rectangular pieces from a clear plastic container. Old food packaging works well for this purpose. The plastic should be sturdy enough to hold its shape but clear enough for you to see the seed level inside.
After cutting, sand the edges smooth to prevent sharp points that could harm birds. Wash the plastic thoroughly to remove any food residue before using it in your feeder.
Step 2: Make Side Walls
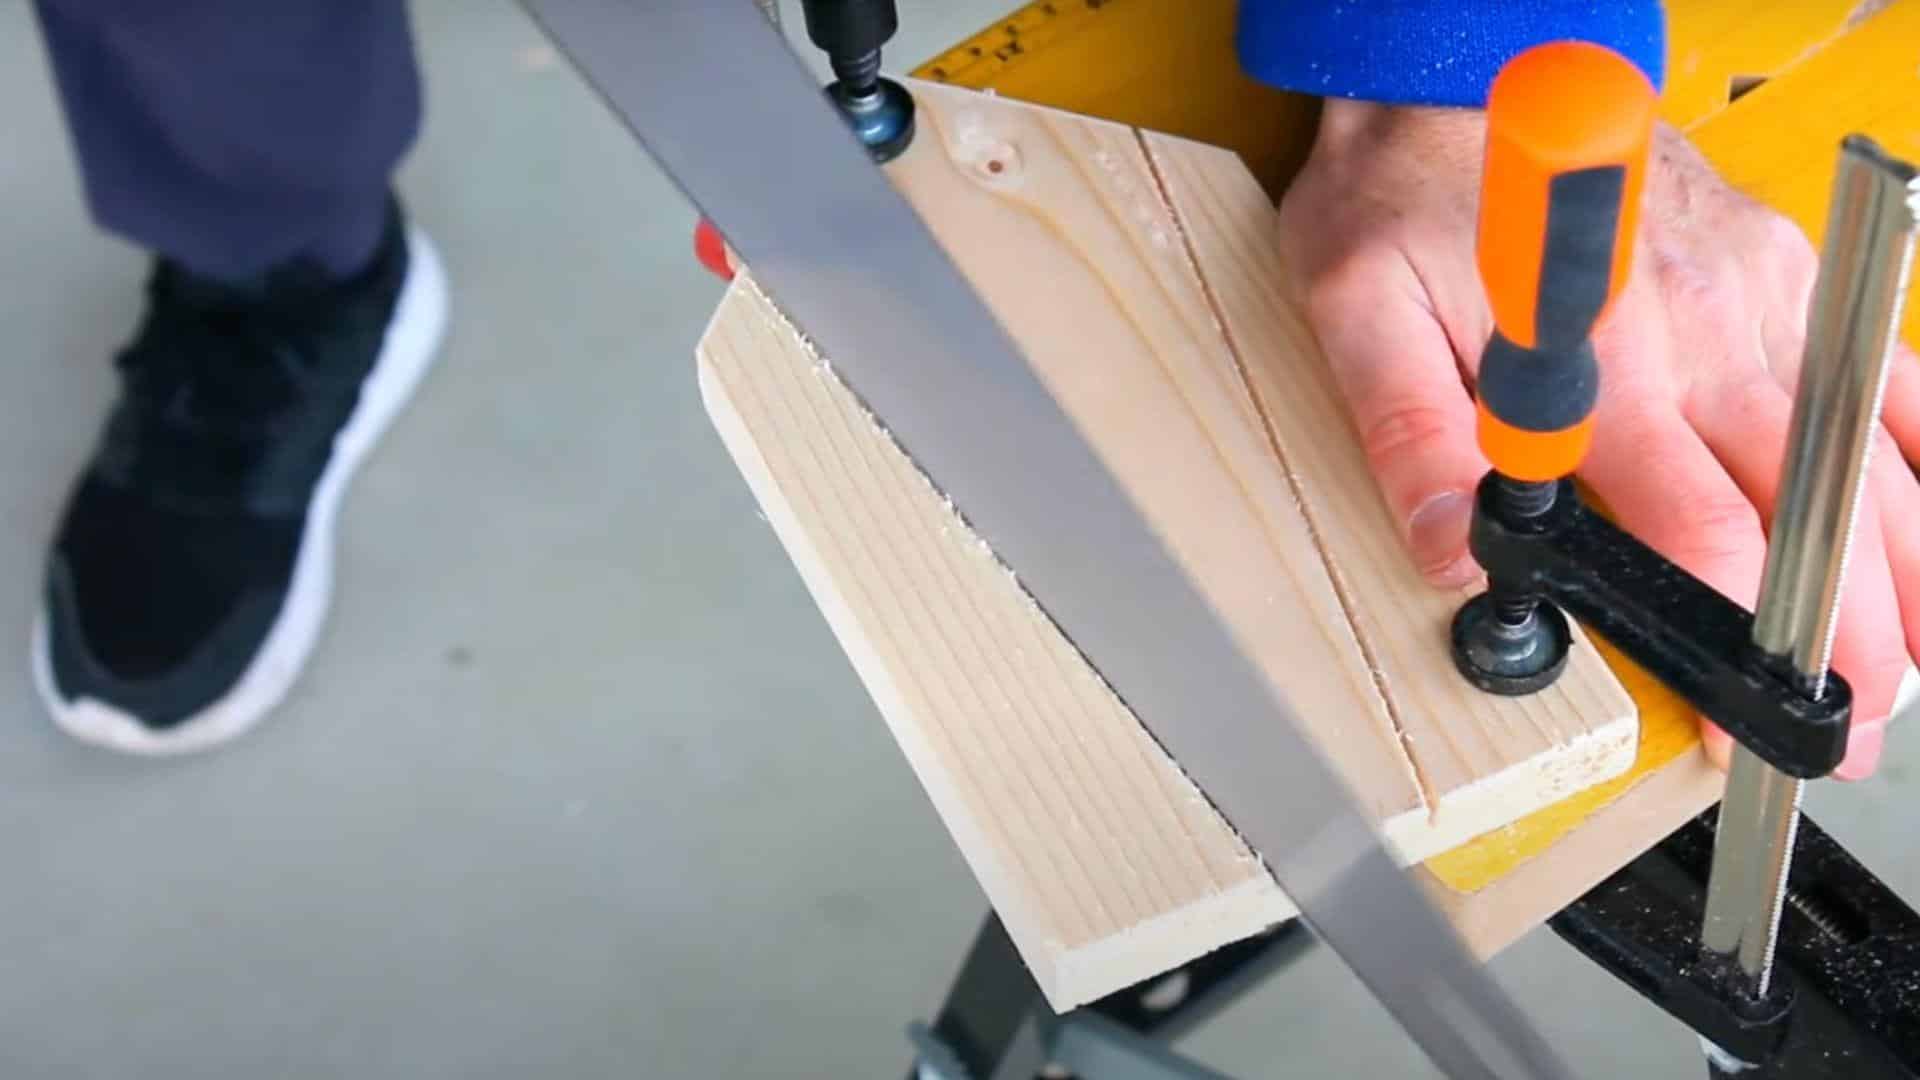
Cut two wooden boards to the same size for your side walls. These pieces will form the main structure of your feeder and should be between 6-8 inches high.
Cut the top edge at a 45° angle to support the roof pitch. Create a narrow groove on the inside face of each wall to hold the plastic windows. Sand all surfaces smooth, paying special attention to edges where birds might perch.
Step 3: Cut and Assemble the Roof
The roof protects seeds from rain and snow while adding style to your feeder. It needs to extend beyond the walls to provide adequate coverage.
Cut two wooden pieces slightly wider than your side walls and join them at the top. The roof panels should overlap the side walls by at least one inch on all sides to keep water from reaching the seed area.
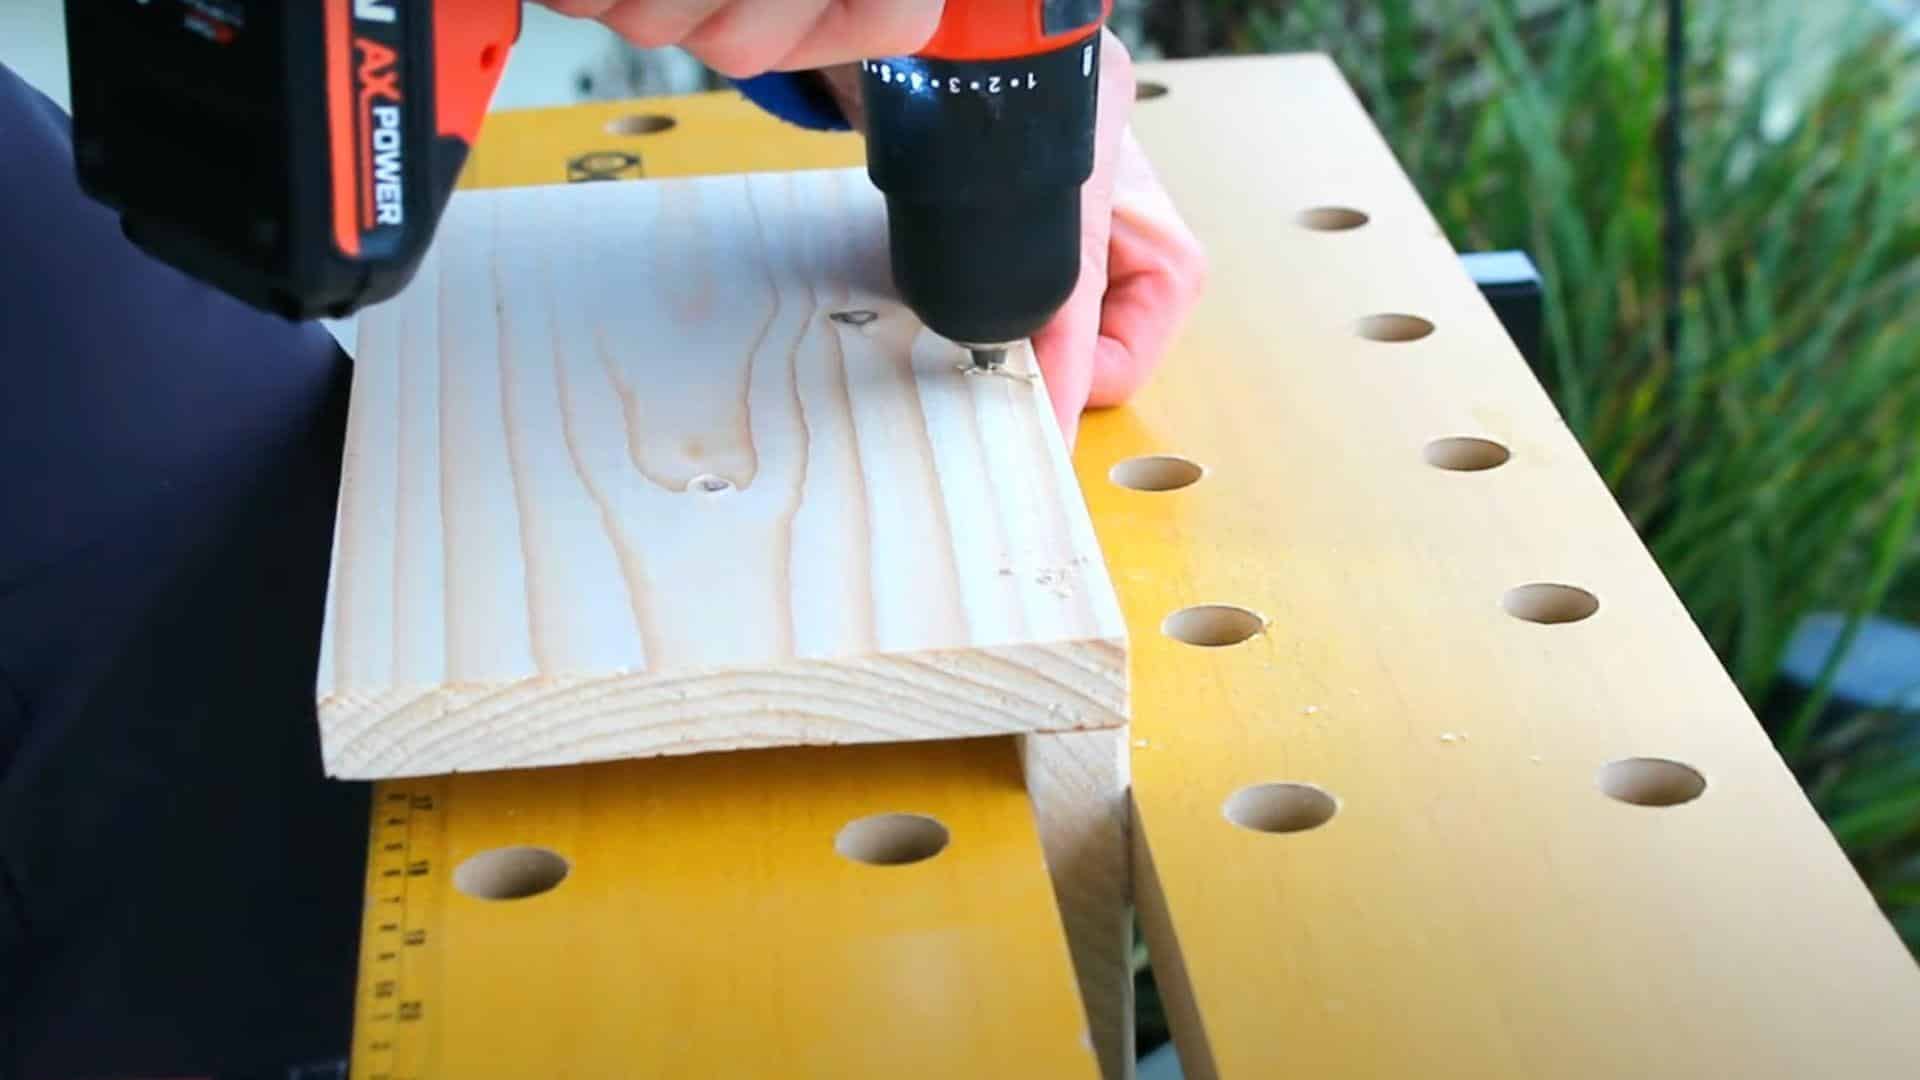
Step 4: Build the Base and Rails
The base serves as both a foundation and a feeding platform. It needs to be solid and slightly larger than the area defined by your side walls.
Cut a rectangular piece of wood for the base platform. Drill several small drainage holes to prevent water accumulation. Attach thin wooden strips around the edges to keep seeds from falling off.
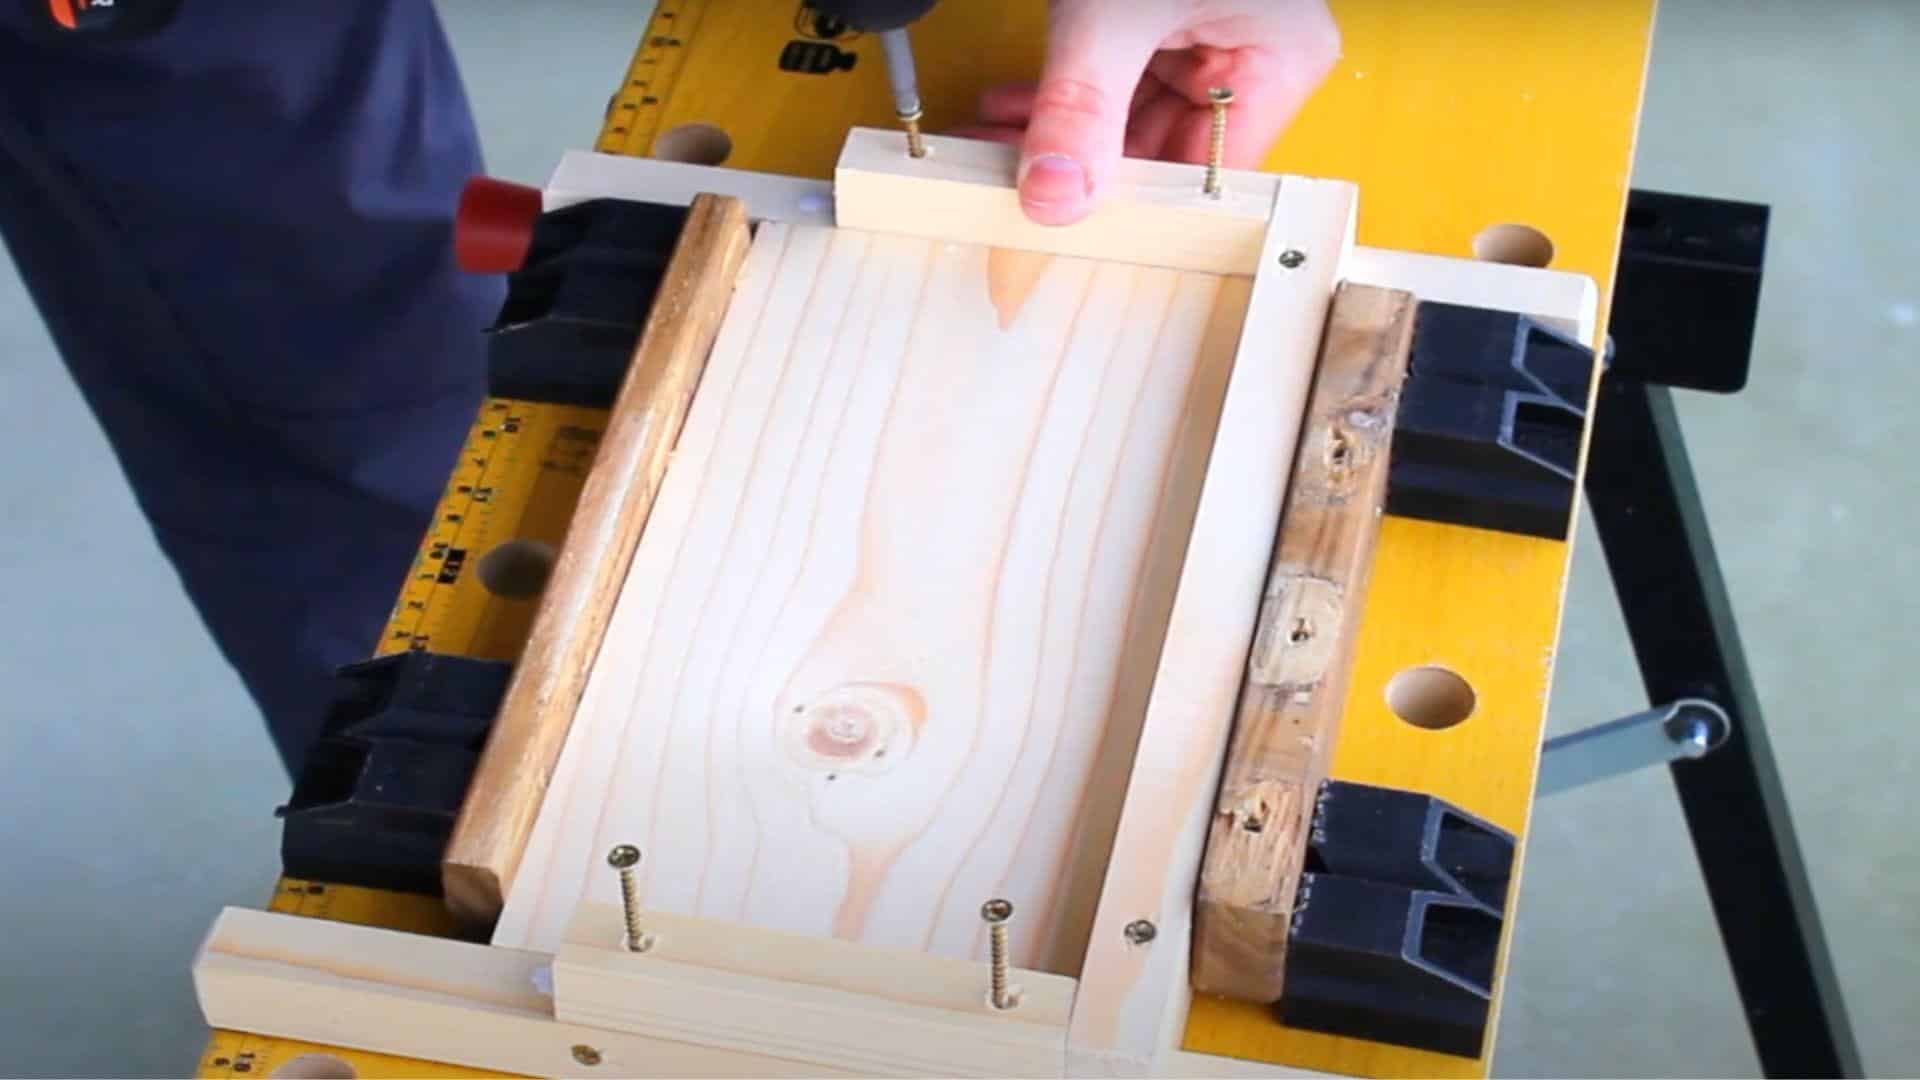
Step 5: Install Windows and Side Walls
This assembly step brings the main parts of your feeder together. Work carefully to ensure everything fits properly and creates a stable structure.
Slide the plastic windows into the grooves you created in the side walls. Apply a small amount of waterproof glue to secure them, then attach the assembled walls to your base using wood screws for strength.
Step 6: Add Seed Guide and Perches
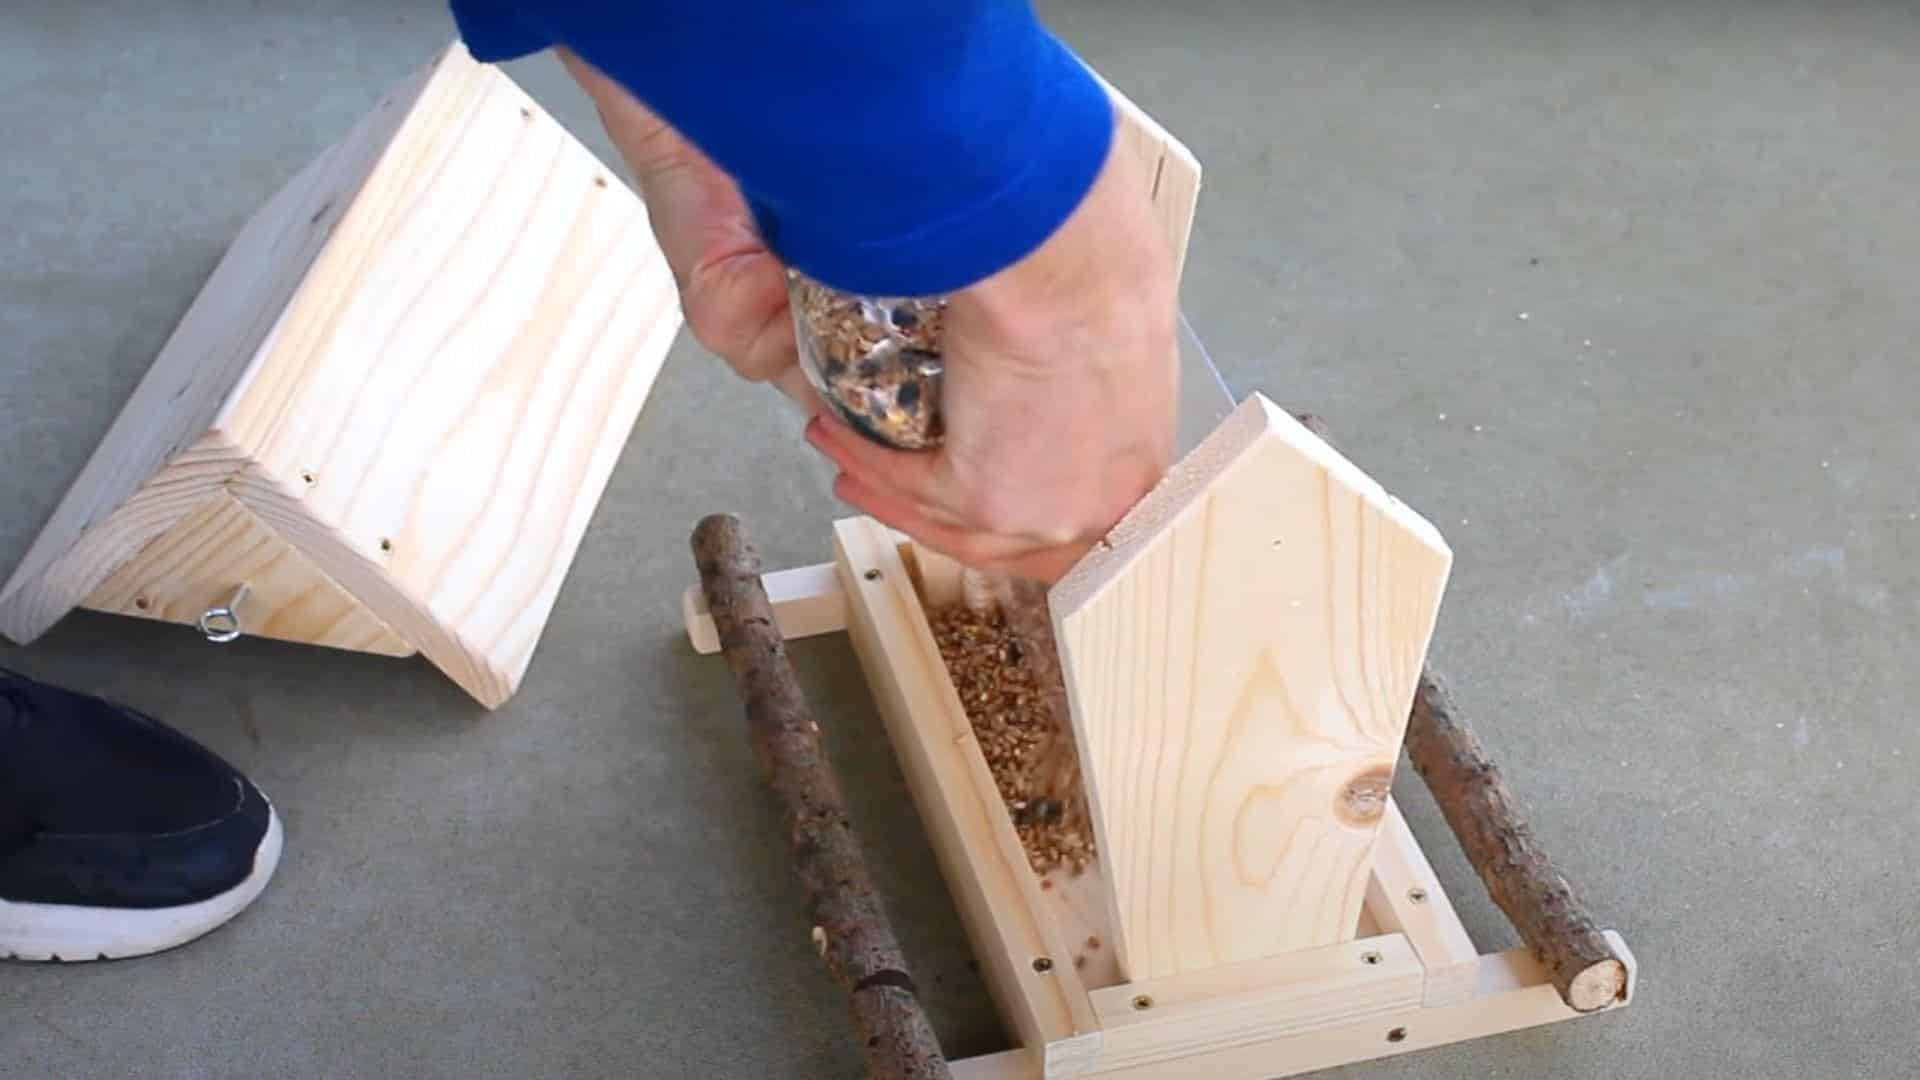
The seed guide helps funnel seeds down to where birds can reach them. This prevents waste and makes your feeder more efficient over time.
Cut a small triangular piece of wood and secure it inside the feeder at an angle. This ridge will direct seeds toward the edges, where birds can easily access them while perched.
Select small branches about the thickness of a pencil for natural perches and insert them into pre-drilled holes.
Step 7: Attach Roof and Hanging Hardware
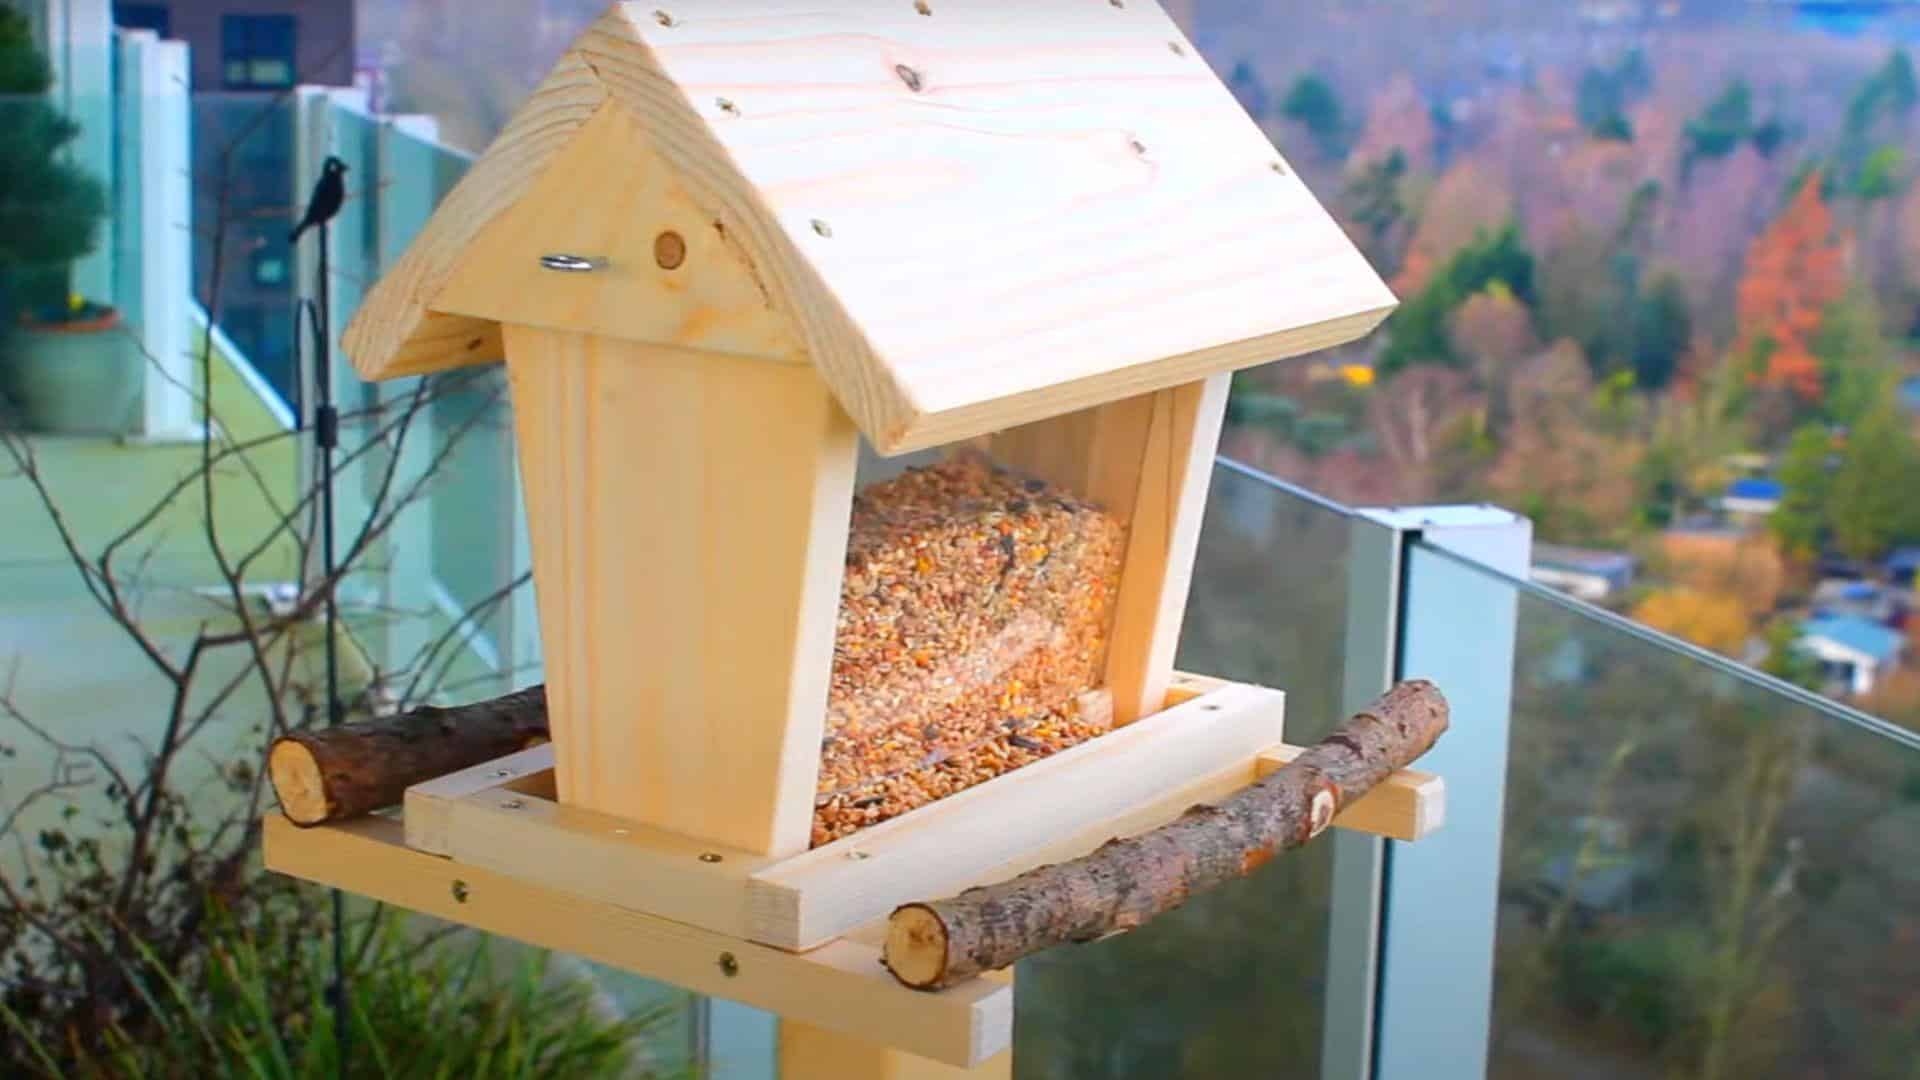
The final assembly step completes your feeder and prepares it for installation in your yard. Take care with this step to ensure your feeder will hang properly.
Attach the roof assembly to the top of your side walls using screws. Make sure the roof overhang is equal on all sides for maximum protection.
Screw eye hooks into the top center of the roof for hanging and test the balance before adding seeds.
Video Tutorial
For more tips and step-by-step guidance, check out the video tutorial that inspired this blog.
By – Nature Yardlife
Seasonal Maintenance and Cleaning Tips
Proper maintenance keeps your bird feeder working well and the birds healthy. Regular cleaning prevents disease spread and extends your feeder’s life.
- Empty and clean your feeder every two weeks during warm months and monthly during winter
- Use a solution of one part bleach to nine parts water for thorough disinfection.
- Scrub all surfaces with a brush, paying special attention to corners and crevices.
- Rinse thoroughly with clean water and allow to dry completely before refilling.
- Check for loose screws, cracks, or damaged parts during each cleaning
- Inspect the hanging hardware for wear and replace it if needed
- Remove wet seeds immediately, as they can grow mold that harms birds
Common Mistakes to Avoid When Building Feeders
Even simple feeder designs can go wrong if you make these common errors. Watch out for these pitfalls during your building process.
- Using the wrong materials: Avoid pressure-treated wood or toxic paints that can harm birds.
- Inadequate drainage: Without proper drainage holes, seeds rot, and mold grows quickly
- Poor roof design: A roof with too little overhang won’t protect seeds from rain
- Unstable construction: Loose joints or weak attachments lead to feeders falling apart
- Difficult to clean: Complex designs with hard-to-reach corners make cleaning challenging.
- Too-small feeding area: Birds need enough space to feed without fighting
- Slippery perches: Smooth, thin perches make it hard for birds to grip and eat comfortably
Conclusion
Building your own bird feeder brings birds closer to your home while giving you a fun weekend project. These steps create a functional feeder that meets birds’ needs and looks good in your yard.
Remember the key points: use safe materials, create proper drainage, make cleaning easy, and place your feeder thoughtfully. The right spot balances visibility, safety, and accessibility for both you and the birds.
Regular maintenance keeps your feeder working well year-round. Clean it often, check for damage, and make small repairs as needed. This care ensures birds stay healthy while visiting.
Your homemade feeder not only saves money but also helps local birds find food. Start building, and soon you’ll enjoy watching feathered visitors right outside your window.
Frequently Asked Questions
What Is the Best Wood to Use for A Bird Feeder?
Cedar, pine, and redwood work best for bird feeders. These woods resist weather damage, remain light enough to hang, and contain no harmful chemicals that could hurt birds.
What Is the Best Material to Put Under a Bird Feeder?
Pavers make an ideal base under feeders. They create a solid, easy-to-clean surface that prevents seed waste from disappearing into the grass and makes regular cleanup simple with just a broom.
When Should You Not Put out Bird Seed?
Avoid putting out bird seed during spring and summer in bear country. Bears can damage feeders and become dependent on them. Otherwise, year-round feeding is fine with proper feeder maintenance.