Getting the perfect fit for Roman shades can feel like a tricky task. Many homeowners worry about making measurement mistakes that lead to ill-fitting window treatments and wasted money.
When shades don’t fit right, they look sloppy and won’t function properly, leaving you frustrated with your purchase.
The good news is that measuring for roman shades is actually quite simple when you follow the right steps. With proper techniques, you can get exact measurements that ensure your shades will look perfect and work smoothly.
In this guide, you’ll learn the exact process for measuring both inside and outside mount Roman shades, common pitfalls to avoid, and tips to ensure your measurements are spot-on every time.
Steps to Measure for Roman Shades
Tools You’ll Need:
Before we start, let’s gather a few simple tools. You’ll need :
- Good tape measure (metal ones work best for accuracy)
- a pen or pencil to write down your numbers,
- notepad to keep track of all your measurements.
That’s it! No fancy tools needed for this home project.
Inside Mount Measurements
Inside mount shades sit within your window frame, giving your windows a clean, tidy look. Many folks prefer this style because it shows off beautiful trim and takes up less wall space. Let me guide you through measuring for this type.
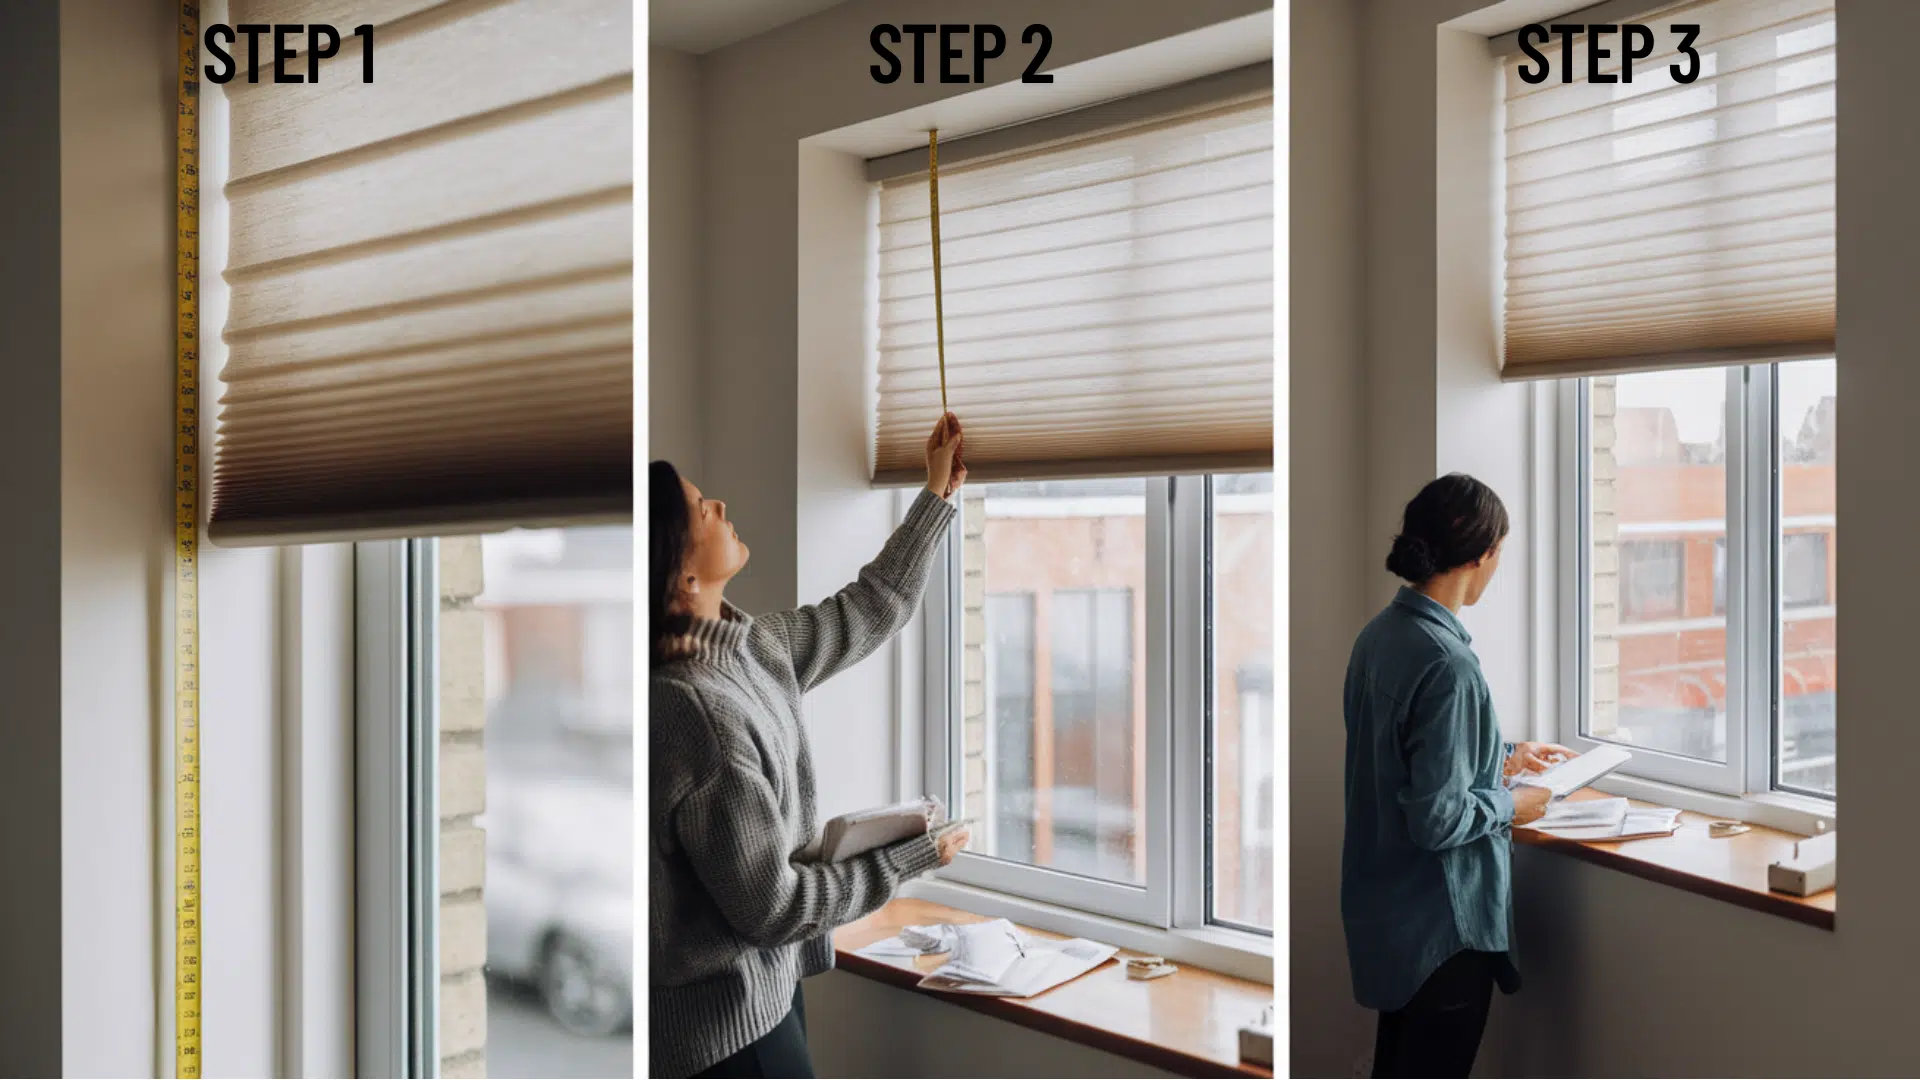
Step 1: Measure the Width
Finding the right width is your first task. Take your tape measure and stretch it across your window opening from the inside left to the inside right of your window frame. Try to be as exact as possible, down to the nearest 1/8 inch.
Small errors can make a big difference in how your shades fit! Write this number down clearly on your notepad.
Here’s a helpful tip: when you order your shades, the maker will automatically take off 1/4 inch from both sides.
This small change ensures your shade will move up and down without catching on the sides. You don’t need to do this math yourself – provide your exact measurement.
Step 2: Measure the Length
Now let’s find out how long your shades should be. Place your tape measure at the top inside of the window frame and extend it all the way down to the window sill. Again, try to be accurate to the nearest 1/8 inch.
Jot down this measurement right next to your width. The length is important for making sure your shade covers the entire window without being too short or dragging on the sill.
Step 3: Double-Check Your Measurements
Before you move on, take a moment to review your numbers. Remember that when ordering, you’ll list the width first, then the length. It’s easy to mix these up, which could lead to shades that don’t fit your windows.
A quick double-check now saves headaches later! If possible, measure each dimension twice to confirm your numbers.
Outside Mount Measurements
Outside mount shades hang on the wall above and around your window. This style is perfect if you want to make windows look bigger or if you need more complete light blocking.
They’re also great for windows with shallow frames that can’t fit inside mounts. Let’s go through how to measure for these.
Step 1: Decide Where Your Shade Will Go
The first step is figuring out the ideal spot for your new shades. Unlike inside mounts, you have more freedom here. Think about how much of the wall around your window you want your shade to cover.
Most people like their shades to extend past the window opening to block more light. Take a moment to think about where you want the edges to sit before you start measuring.
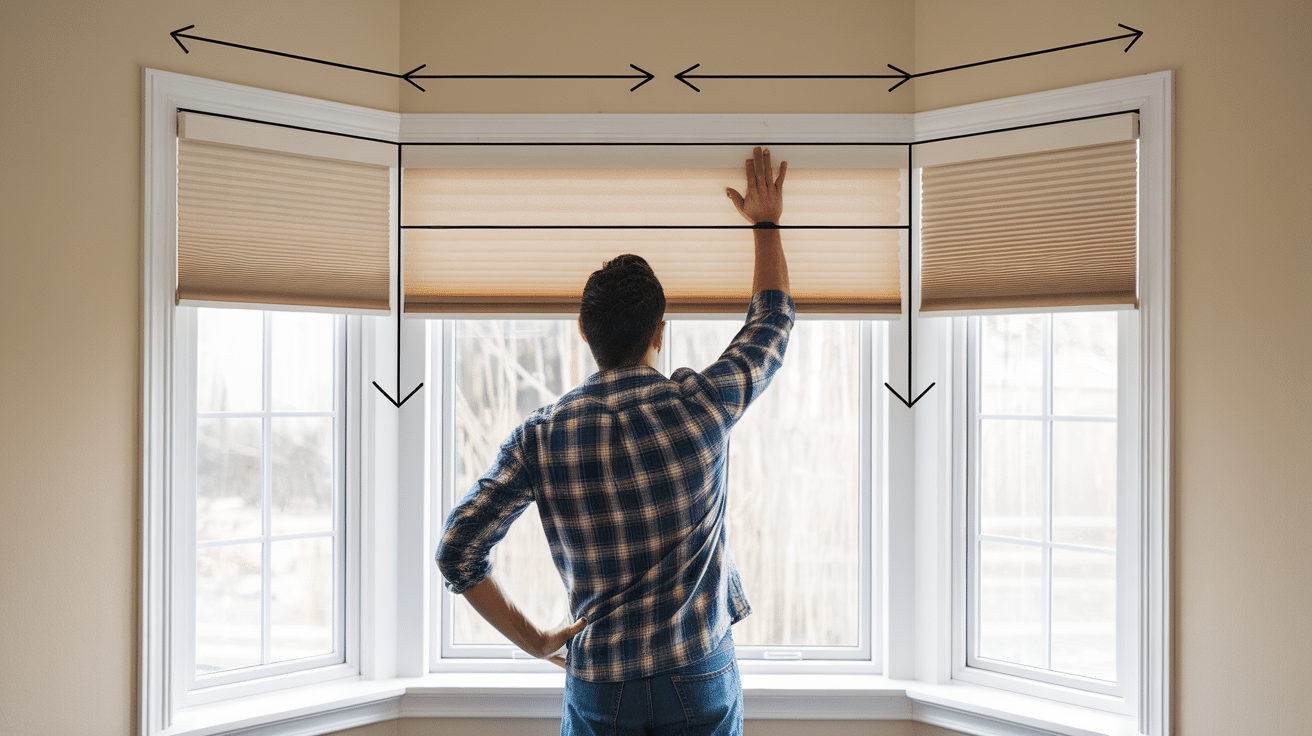
Step 2: Measure the Width
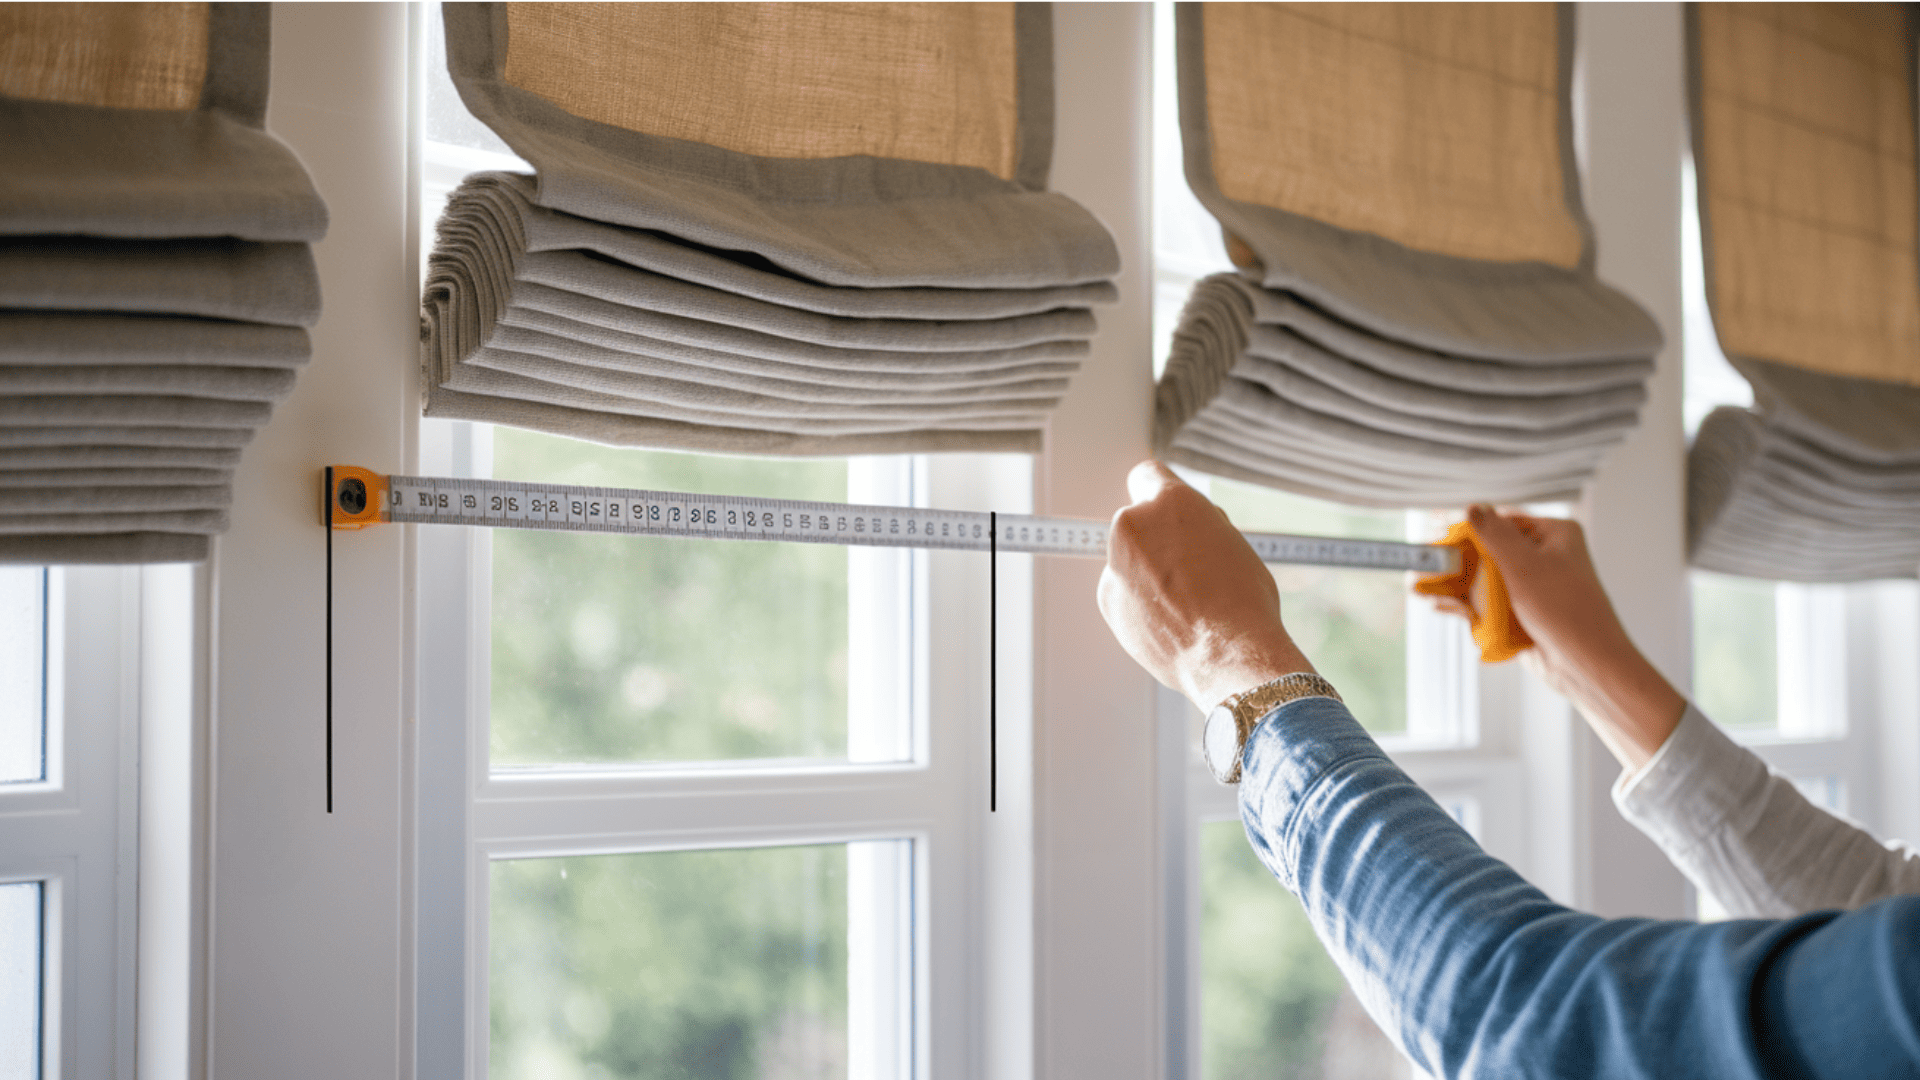
For windows without trim, the process is straightforward. Measure the width of your window opening from edge to edge.
Then add 1.5 inches to each side, giving you a total of 3 extra inches beyond your window width. This extra space helps block light from sneaking in around the edges. Write down this final number as your width measurement.
If your window has trim, you’ll approach it differently. Measure from the outer edge of the left trim all the way to the outer edge of the right trim.
Then, just like before, add 1.5 inches to each side for a total of 3 extra inches. This ensures your shade covers both the window and the trim completely. Make a note of this measurement as your final width.
Step 3: Measure the Length
For the length, you’ll want to start by marking a spot about 8-9 inches above your window opening. This height allows room for mounting hardware and gives a nice visual balance. From this mark, measure down to where you want the bottom of your shade to end.
If your window has trim, a good rule of thumb is to extend the bottom of the shade about 1.5 inches below the trim. This creates a clean look and helps block light from the bottom edge. For windows without trim, extend the measurement about 1.5 inches below the window opening. Write down this full-length measurement next to your width.
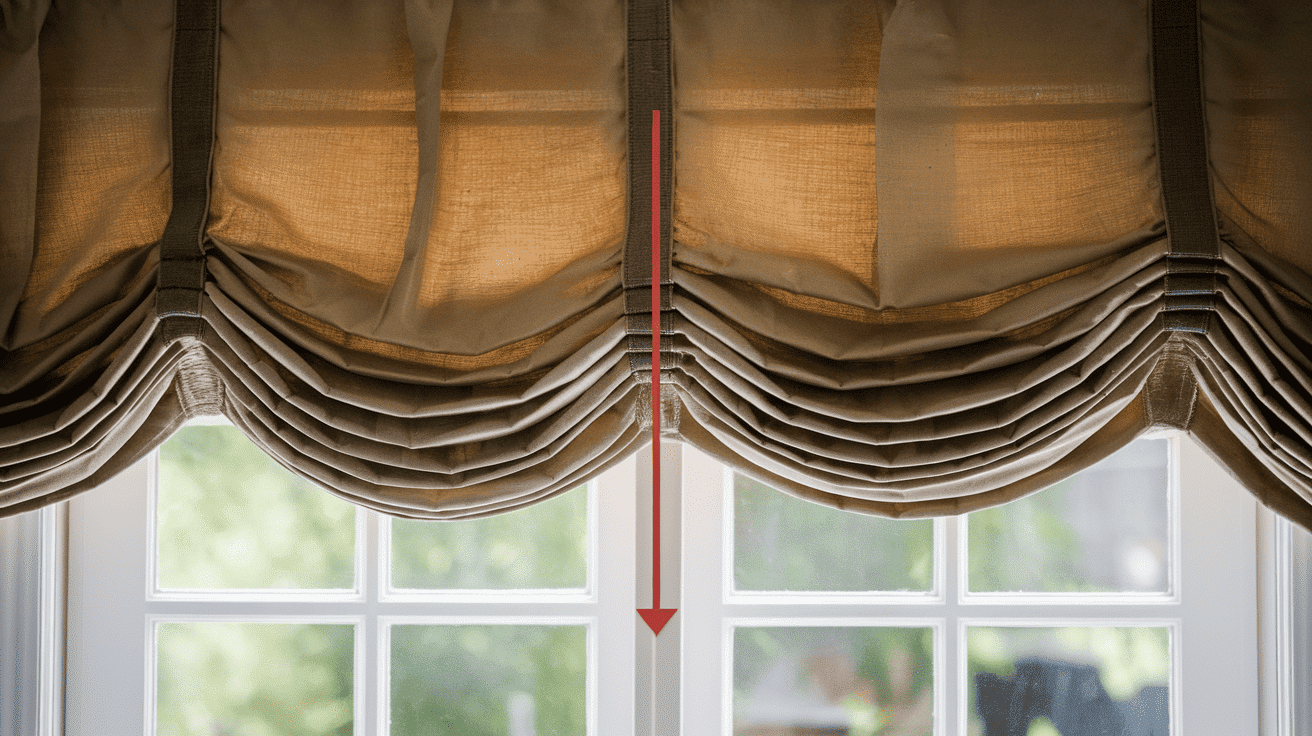
Step 4: Consider the Stack Height
One thing many people forget about is the stack height. When you raise your roman shade completely, the fabric will fold into neat pleats at the top. For most classic roman shades, this stack will be about 11-12 inches high.
Keep this in mind when planning your measurements, especially if you want a clear view when the shade is open or if there’s something directly above your window that might get in the way.
Pro Tips for Perfect Measurements
Use a Metal Tape Measure: Cloth tapes can stretch and give false readings. Metal tape measures stay rigid and provide more exact numbers.
Measure Twice, Order Once: Double-check all measurements before placing your order. This small step can save you from costly mistakes.
Take Photos: Snap pictures of your windows with the measurements written down. This helps when ordering online or talking with window treatment pros.
Consider Fabric Width: Some fabrics come in limited widths. For wide windows, you might need to plan for seams or multiple shades.
Think About Controls: Decide if you want right or left-side controls for your shade before ordering. This affects how you plan your window coverage.
Conclusion
Now you know the exact steps to take to ensure that Roman shades fit your windows perfectly. Taking the time to measure carefully will prevent you from being disappointed by ill-fitting window treatments.
Remember the key points: measure width first, then length, be exact to 1/8 inch, and note the differences between inside and outside mounts.
So what makes this important? Well-fitted roman shades not only look better but also work better for light control and privacy in your home. They add a clean, finished touch to any room.
What next? Use your measurements to order your shades with confidence. When they arrive, be sure to follow the installation instructions for best results.
Have questions about your specific windows? Leave a comment below, and we’ll help you find the right solution.
Frequently Asked Questions
Should I Use an Inside or Outside Mount for My Roman Shades?
Inside mounts work well when you have good window depth and want to show off your trim. Outside mounts are better for shallow windows, when you want to make windows look bigger, or when you need more complete light blocking.
How Much Window Depth Do I Need for an Inside Mount?
Most fabric roman shades need at least 1.5 inches of depth for an inside mount. Check with your specific manufacturer, as requirements can vary slightly.
What if My Window Isn’t Perfectly Square?
This is common in many homes. For inside mounts, measure the width at three points (top, middle, bottom) and use the smallest measurement. For the height, measure at the left, middle, and right, and use the longest measurement.
How High Should I Mount My Outside Mount Roman Shade?
The standard is 8-9 inches above your window opening. This looks nice and leaves room for the fabric to stack when raised.