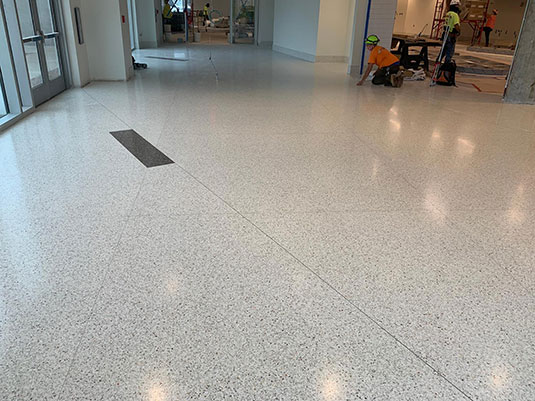
How to Install Terrazzo Tiles
Terrazzo tiles add a touch of elegance and durability to any space, making them a popular choice for modern homes and commercial spaces. Their unique blend of marble, quartz, and other materials creates a stylish, long-lasting surface that enhances floors, walls, and countertops.
If you’re planning to install terrazzo tiles, understanding the right techniques and materials is essential. This guide will walk you through the step-by-step process.
1. Gather Necessary Tools and Materials
Before installing terrazzo tiles, gather all the necessary tools and materials. You will need:
- Tiles (choose the right size and design)
- Tile adhesive (thin-set mortar or epoxy)
- Notched trowel (for spreading adhesive)
- Tile spacers (to keep even gaps)
- Grout (to fill spaces between tiles)
- Sponge and bucket (for cleaning)
- Sealer (to protect the tiles)
- Measuring tape and level (to keep tiles straight)
Having everything ready makes installation easier and prevents delays. Make sure you buy extra tiles in case of breakage. Wear protective gear such as gloves and a mask while you are working in an area that has adequate ventilation. Proper preparation helps ensure a smooth and professional-looking finish.
2. Prepare the Surface
A clean, level surface is key to a successful installation. Start by removing dust, dirt, and old flooring. If the floor is uneven, use a self-leveling compound to create a smooth base.
Check for moisture, as terrazzo tiles need a dry surface to bond properly. If installing over concrete, let it fully cure before adding tiles.
In order to improve the adhesive’s ability to stick, you may need to use a primer. Taking time to prepare the surface properly prevents issues like loose tiles or uneven flooring later.
3. Apply Adhesive and Lay Tiles
Spread a thin, even layer of adhesive using a notched trowel. Work in small sections so the adhesive doesn’t dry out. Start laying tiles from the center of the room, pressing them firmly into place. Use tile spacers to keep gaps even.
Check alignment with a level to avoid uneven tiles. If a tile needs adjustment, do it before the adhesive sets. Continue this process until all tiles are placed. Let them sit undisturbed for at least 24 hours to fully bond the adhesive.
4. Allow Tiles to Set and Apply Grout
Once the tiles are firmly set, remove the spacers and prepare the grout. Apply grout using a rubber float, pressing it into the gaps. Wipe off excess grout with a damp sponge before it dries.
Allow the grout to cure for about 24 hours. Avoid walking on the tiles during this time. If needed, apply a second layer to fill any gaps. Once the grout is fully dry, wipe the tiles clean with a dry cloth. Proper grouting ensures a strong, durable finish.
5. Clean and Seal the Tiles
The final step is cleaning and sealing the terrazzo tiles. Use a pH-neutral cleaner to remove dust and residue. Avoid harsh chemicals that could damage the surface.
Once dry, apply a sealer to protect the tiles from stains and moisture. Choose a sealer that enhances the natural shine of terrazzo. Let it dry completely before using the floor. Regular maintenance, like sweeping and mopping, helps keep terrazzo tiles looking new for years.
Achieve a Successful Terrazzo Tile Installation
Installing terrazzo tiles properly ensures a stunning and long-lasting finish. By following the right steps, you can create a durable and elegant space. Take your time, use quality materials, and maintain your tiles well to enjoy their beauty for years to come!


