Want a designer dresser without the designer price tag? You’re not alone. Most people end up choosing between quality they can’t afford or affordable pieces that fall apart in months.
I’ve found a better way. With basic tools and materials found at any hardware store, you can convert even the most dated dresser into a stunning custom piece that looks professional and lasts for years.
Whether working with a thrift store bargain or breathing new life into a family heirloom, these proven techniques will give you results that look custom-built at a fraction of the cost.
Are you ready to convert the ordinary Dresser into the extraordinary? Let’s get started!
Why Update Your Dresser?
Old dressers often have better construction than new ones. Made from solid wood with dovetail joints, these pieces can last for decades with proper care.
A makeover not only saves money but also gives you a custom piece that fits your home perfectly.
Older furniture brings value that modern items sometimes lack. The materials used in past decades were often thicker and more durable. Solid oak, maple, and cherry wood resist wear and damage better than pressed wood options found today.
Fixing up an old dresser allows you to choose colors and finishes that match your existing décor. You can select hardware that suits your taste, from simple knobs to fancy pulls.
Reusing furniture helps the planet, too. Each item kept from landfills reduces waste, and the process uses fewer resources than making new items from scratch.
With basic tools and some time, you can turn a worn dresser into a statement piece. Even small changes, like new paint or updated handles, can make a big difference in its appearance.
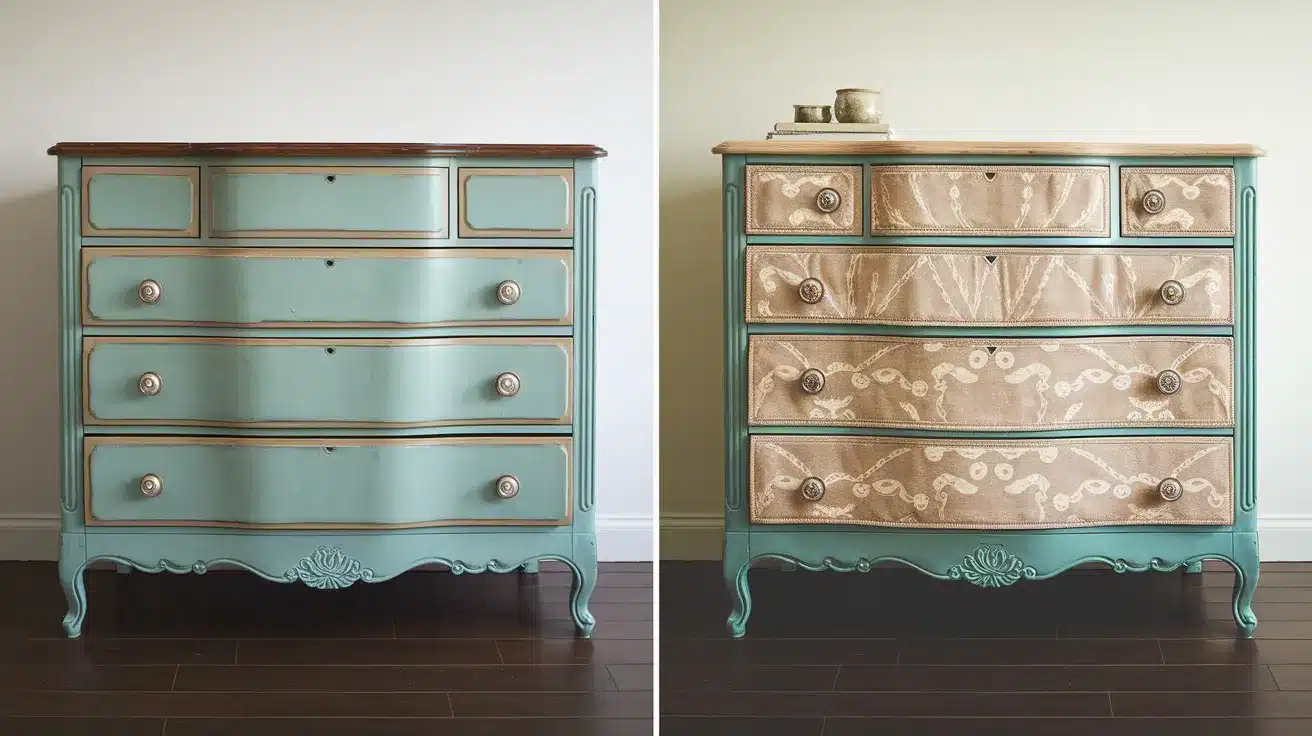
Before and After Dresser Makeover
1. From Dated to Modern Chic

Before: A dresser with a dark, glossy wood finish and outdated hardware.
After: Start by sanding down the surface. Apply a crisp white or light gray paint. Replace old pulls with new minimalist hardware like simple bar pulls or knobs. For extra style, add geometric wallpaper to the drawer fronts.
Tips:
- Clean the surface well before painting
- Use a primer for better paint adhesion
- Apply thin coats of paint for a smooth finish
- Let each coat dry fully before adding another
2. From Plain to Bohemian
Before: A plain, stained dresser with simple knobs.
After: Paint the dresser in a bright color such as teal, mustard yellow, or coral. Create a vintage look by lightly sanding edges after painting. Add unique knobs made of ceramic, glass, or antique-style pulls. Consider adding stenciled patterns or fabric using decoupage methods.
Tips:
- Test your color on a hidden spot first
- For distressing, focus on edges and corners
- Mix different knobs for an artistic look
- Seal with a clear coat for lasting results
3. From Heavy to Farmhouse

Before: A dresser with a heavy, dark finish.
After: Apply chalky white or cream paint and gently sand some areas to show bits of wood underneath. Add rustic hardware like iron pulls or bin pulls. For extra farmhouse charm, consider adding wooden slat panels to the sides or top.
Tips:
- Rough up the surface before painting for better adhesion
- Use chalk paint for an easier finish
- Wax coating helps protect the distressed look
- Hand-rub the wax for a smooth finish
4. From Laminate to Fresh

Before: An inexpensive laminate dresser.
After: Start with a bonding primer (must-have for laminate). Apply your chosen paint color. Update with new hardware. Try adhesive paper to create faux wood grain or add patterns.
Tips:
- Don’t skip the bonding primer step
- Light sanding helps primer stick to slick surfaces
- Allow extra drying time between coats
- Use a small roller for a smooth finish on flat areas
5. From Scratched to Smooth

Before: A wood dresser with scratches, marks, and a worn finish.
After: Sand all surfaces thoroughly. Repair dents with wood filler. Apply a fresh stain in a rich, updated color like warm walnut or cool gray. Seal with a clear protective topcoat. Complete with new hardware.
Tips:
- Fill scratches before sanding
- Sand in the direction of the wood grain
- Remove all dust between steps
- Apply stain with a cloth for even coverage
6. Two-tone Beauty

Before: A single-color dresser with a basic design.
After: After sanding and cleaning, paint the dresser frame in a neutral white. Paint the drawers in a bold contrast color. Add new hardware in a modern style for a finished look.
Tips:
- Use painter’s tape for clean lines between colors
- Allow the first color to dry fully before taping
- Choose colors that work with your room scheme
- Try metal or clear acrylic pulls for a modern touch
7. Coastal Style

Before: Dresser with simple design.
After: Paint the dresser in a pale blue or green shade. Lightly sand the edges to create a weathered look. Add rope or seashell drawer pulls. Finish with a matte sealant to protect the new finish.
Tips:
- Look for actual shells to use as knobs
- Sand randomly for natural-looking wear
- Consider a wash technique for a faded beach look
- Add subtle details like thin stripes on drawer edges
Common Pitfalls to Avoid During Your Dresser Makeover
| Mistake | Why It Happens | Quick Fix |
|---|---|---|
| Skipping prep | Rushing to get started | Always sand and clean thoroughly |
| Ignoring bleed-through | No or wrong primer | Use shellac-based primer on older wood |
| Overlooking drawer issues | Focusing only on looks | Test, sand, and wax slides before painting |
| Mixing wrong products | Not checking labels | Match paint and topcoat types; test first |
| Rushing dry time | Impatience | Wait as directed; longer if humid |
| Thick paint coats | Trying to speed up | Use thin, even layers |
| Wrong brush or roller | Grabbing what’s nearby | Use proper brush type; foam rollers for smoothness |
| Skipping sealer | Thinking paint is enough | Seal with wax or poly, depending on the use |
Alternate Ideas to Personalize Your Makeover
-
Line the drawers with wallpaper or vintage book pages for a fun surprise inside.
-
Use decals or stencils on the drawer fronts or sides to add personality.
-
Create a two-tone finish by leaving parts of the natural wood exposed.
-
Repurpose your dresser into a bathroom vanity, buffet, or entryway console.
-
Blend styles by painting the frame and staining the drawers for a rustic-meets-modern look.
Conclusion
Transforming an old dresser isn’t just about saving money it’s about creating something uniquely yours that tells a story in your home. With the techniques we’ve shared, you now know to see potential where others might only see outdated furniture.
Remember that the most successful makeovers begin with thorough preparation and patience. Take your time with sanding and priming, as these foundational steps will determine the longevity of your finished piece.
Choose quality materials that match your lifestyle, chalky finishes for farmhouse charm, durable enamels for high-traffic areas, or rich stains to highlight the beautiful wood grain.
We hope this guide has inspired you to look at that worn dresser with fresh eyes and the confidence to transform it.
Frequently Asked Questions
1. Can I Mix Paint and Stain on the Same Dresser?
Yes, mixing paint and stain is a great way to add contrast. Many people paint the frame and stain the drawers or top surface.
2. What Kind of Paper Works Best for Lining Drawers?
You can use peel-and-stick wallpaper, scrapbook paper, or even old book pages. For best results, apply with Mod Podge or double-sided tape.
3. How Do I Stencil a Design without It Bleeding?
Use a dry stencil brush and dab lightly. Remove excess paint before applying and secure the stencil tightly in place.