Hidden beneath your home lies a forgotten world of stone and shadow. For years, you’ve avoided those ancient basement walls, locking away their secrets behind a creaking door. But what mysteries might those silent stones reveal if given the chance to speak?
When you descend those stairs, do you feel the weight of time pressing in? Those dark, cool stones have witnessed decades—perhaps centuries—of history. They stand guard, holding stories no living person remembers.
These walls aren’t merely structural; they’re time capsules from another era. They whisper tales of the past. They hold value beyond measure. And with proper care, they’ll continue their silent watch long after we’re gone.
The transformation begins with understanding their secrets—addressing their tears of moisture, cleaning away the dust of ages, and bringing their true character into the light.
What Are Stone Basement Walls?
Stone basement walls are foundations made from natural stones stacked and mortared together to form the base of older homes. These walls typically date back to the 18th, 19th, and early 20th centuries, when builders used locally available materials before concrete became widely used.
Unlike modern concrete foundations that form a solid, waterproof barrier, stone basement walls consist of individual rocks fitted together with mortar. They have distinctive features, including:
- Uneven surfaces with natural textures and colors
- Visible mortar joints between stones
- Varying thickness, usually between 12-24 inches
- Natural drainage properties that allow some moisture movement
Stone basement walls bring history and character to homes but require specific maintenance approaches that differ from concrete foundations. Understanding these differences helps homeowners make smart choices about care and improvements.
Step-by-Step Guide to Restoring Stone Basement Walls
Now that you understand stone basement walls and their unique properties let’s begin the hands-on process of restoration. With the right approach, you can bring out the natural beauty of your stone walls while improving their function.
Step 1: Preparation and Safety Measures
First, gather all the tools you’ll need for the job:
- A chisel for removing old mortar
- Quality mortar mix suitable for stone walls
- A trowel for applying the new mortar
- A shop vacuum for cleaning debris
- Safety glasses to protect your eyes
- Thick work gloves to protect your hands
- A dust mask to avoid breathing in particles
Good airflow is a must when working in basement spaces. Open windows if you have them, or use fans to move air in and out of the area. Poor air quality during restoration work can cause health issues, so don’t skip this step.
Take time to examine your walls carefully. Look for large cracks, significant water damage, or signs of structural issues. If you spot major problems, it’s best to call in a professional before continuing.
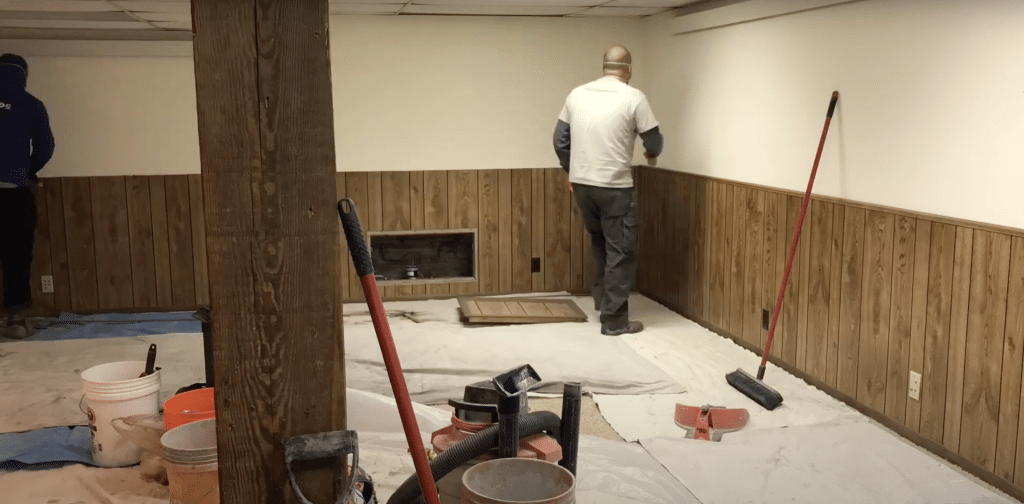
Clear the work area of furniture and cover anything that remains with drop cloths to protect from dust and debris. You’ll want plenty of space to move around as you work on the walls.
Step 2: Removing Old and Crumbling Mortar
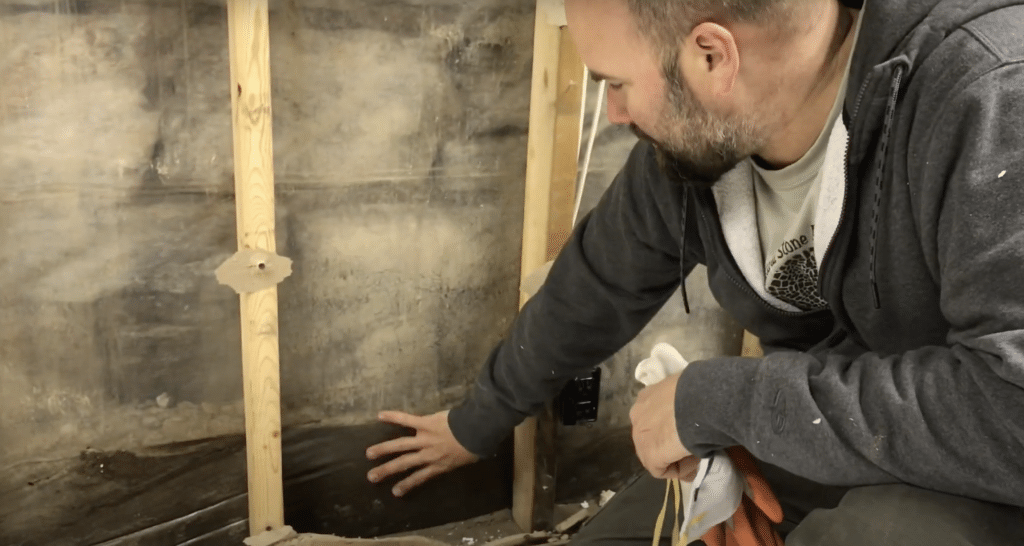
Use a hammer and chisel held at an angle to chip away loose mortar, then clean with a wire brush to remove smaller bits from the joints. Work carefully to protect the stones themselves.
Vacuum all dust and debris with a shop vacuum’s narrow attachment, then lightly spray with water to remove final particles. The wall should be damp but not soaking wet before new mortar application.
Allow the wall to dry until just slightly damp. This creates ideal conditions for proper bonding. This careful prep work ensures that your new mortar will stick well and extend the life of your repair.
Step 3: Tooling and Finishing the Joints

After the mortar sets for 30 minutes, use a soft brush with light strokes to smooth the joints. This removes excess from stone faces and creates a clean look between stones.
Choose a jointing tool that fits your style—concave for water-shedding joints or flat for traditional looks. Use steady pressure for even results across the wall.
Help mortar cure by misting with water several times daily for three days. Cover with plastic between mistings to slow drying, which makes the mortar stronger and more lasting.
Step 4: Mixing and Applying New Mortar

Choose lime-based mortar for older homes to let walls breathe and move or cement-based mortar for newer walls that need more water protection. Match what was used originally when possible.
Mix small batches to peanut butter thickness, let rest for 10 minutes, then briefly mix again for best results.
Use a pointing trowel to press mortar firmly into joints from bottom to top. Fill, smooth when partially set, and brush away excess before it fully hardens.
Step 5: Sealing and Waterproofing

Choose silicate or siloxane sealers that let walls breathe while stopping water. Apply them with a sprayer or brush from bottom to top in even patterns for full coverage without shine.
First, prevent white mineral buildup by fixing moisture sources. Fix gutters, improve outside drainage, and ensure the ground slopes away from your foundation.
After repairs dry, use a clear masonry waterproofer for basic protection. For major water issues, combine drainage fixes, waterproofing paint, and floor channels leading to a sump pump.
Video Tutorial
For a detailed video, kindly check out Basement Stone Wall Restoration by The Land.
Long-Term Maintenance Tips for Stone Basement Walls
Maintaining stone basement walls doesn’t need to be complicated, but it does require attention. Regular care prevents small issues from becoming costly repairs. Here are three key areas to focus on:
1. Routine Inspection and Cleaning: Check your stone walls with a flashlight each season, especially after heavy rains. Look for new cracks, loose stones, or crumbling mortar, and mark problem spots with chalk for later repair.
2. Controlling Moisture and Preventing Leaks: Keep moisture levels between 30% and 50% by using a dehumidifier or opening windows on dry days. If water regularly collects in your basement, consider installing a sump pump with perimeter drains.
3. When to Repoint and Refresh Mortar: Depending on your climate, plan to refresh your mortar every 25-50 years. However, watch for earlier signs like crumbling joints, gaps deeper than ½ inches, or walls that feel damp during dry weather.
Common Mistakes to Avoid
These mistakes can lead to wasted time, money and potentially more damage. Here are the key errors to watch out for:
- Using modern cement instead of proper mortar for old stone walls leads to cracks and damage because cement is too hard and doesn’t let the wall move naturally.
- Skipping proper preparation by not fully cleaning out old mortar and dust before applying new material results in weak repairs that fail quickly.
- Rushing the curing process by letting mortar dry too quickly can cause weak joints to crack. Always keep the new mortar damp for several days.
- Sealing walls before fixing outside water issues traps moisture inside the wall, making problems worse instead of better.
- Ignoring the wall-floor joint where many leaks start allows water to continue entering even after wall repairs are complete.
Conclusion
Taking care of stone basement walls might seem like a big job, but the steps we’ve covered make it manageable for most homeowners.
By properly removing old mortar, mixing and applying new material correctly, finishing joints with care, and sealing against moisture, you’ll extend your wall’s life by decades.
Regular checks and quick fixes prevent small issues from becoming major problems. Remember that patience pays off—rushing repairs often leads to redoing the work later.
Your stone walls have likely stood for generations, and with proper care, they’ll continue to provide a solid foundation for many more.
Whether you tackle this project yourself or hire help for parts of it, understanding the process helps you make better choices for your home.