Have you seen those beautiful wooden slat walls in home magazines and online? They add texture and warmth to any room, but the price tag can cause serious sticker shock. I faced this same problem when looking to update my bedroom.
I found that building my own slat wall cost less than 30% of pre-made options while giving me full control over the design. The satisfaction of creating something both beautiful and useful with my own hands was worth every minute spent.
In this guide, I’ll walk you through each step of making your own wooden slat wall. You’ll learn how to select materials, cut and prepare the slats, and install your finished wall with professional results.
DIY Slat Wall – Materials
| Material | Quantity | Purpose |
|---|---|---|
| 3×2 CLS timber | 18 pieces (for a 3.5m wall) | Used for creating the slat structure |
| 9mm MDF sheets | 3 sheets | Provides backing and support for the slats |
| Black fabric | 8m | Enhances the aesthetic by covering gaps |
| Wood stain (light oak) | As needed | Adds color and protection to the wood |
| Wall plugs and screws | As needed | Secures the structure to the wall |
| Small oval nails | As needed | Used to attach MDF and fabric securely |
DIY Slat Wall – Tools
| Tool | Purpose |
|---|---|
| Table saw | Cuts timber and MDF sheets to size |
| Electric hand planer | Smooths and evens out timber edges |
| Sander | Sands wood for a polished finish |
| Pin nailer or hammer | Attaches slats with precision |
| Drill | Drills holes for wall plugs and screws |
| Laser Level | Ensures level alignment of slats |
| Clamps | Holds pieces in place while working |
| Dust mask | Protects against dust inhalation |
| Tape measure | Measures cuts and placements accurately |
| Nail punch | Countersinks nails for a neat finish |
Step-by-Step Guidance for Building a Wooden Slat Wall
Step 1. Planning and Preparation

Measure your wall space. Buy enough 3×2 CLS timber to create the slats needed. For the project shown, 18 pieces were used for a 3.5m wall, yielding 70 slats after cutting.
Step 2. Cutting the Timber

Set up your table saw to cut the 3×2 CLS into four equal strips. Each strip will be approximately 38mm wide by 12mm thick. Wear a dust mask during this process for safety.
Step 3. Smoothing the Edges

Use an electric hand planer on one face of each slat to create a smooth finish. Work slowly to avoid creating uneven areas where the planer stops.
Step 4. Sanding

Sand all planed surfaces to remove any ridges left by the planer. Pay special attention to areas where the planner may have stood still, creating deeper sections.
Step 5. Preparing the Backing Boards

Cut MDF sheets to the correct width (600mm/2ft worked well in the example). Measure from skirting board to ceiling and trim the length if needed.
Step 6. Staining the Slats

Apply wood stain to all slats. Use oil-based stain for best results. After applying, wait a few minutes and wipe away excess to avoid streaking.
Step 7. Creating the Black Background

Stretch black fabric over each MDF board and staple it securely at the back. This creates a dark backdrop visible between slats.
Step 8. Attaching Slats to Backing

Start with the first slat overhanging the edge by 12mm. Pin it from the back. Use 18mm (3/4 inch) spacers between each slat. Clamp slats in place while pinning.
Step 9. Planning for Installation

Leave two slats unpinned on each board to allow space for wall fixings. These slats will be attached after the board is mounted.
Step 10. Wall Installation

Begin in a corner. Add a black MDF strip as a shadow gap if the adjacent wall isn’t perfectly vertical. Use a laser level to ensure the boards are straight.
Step 11. Mounting to Wall
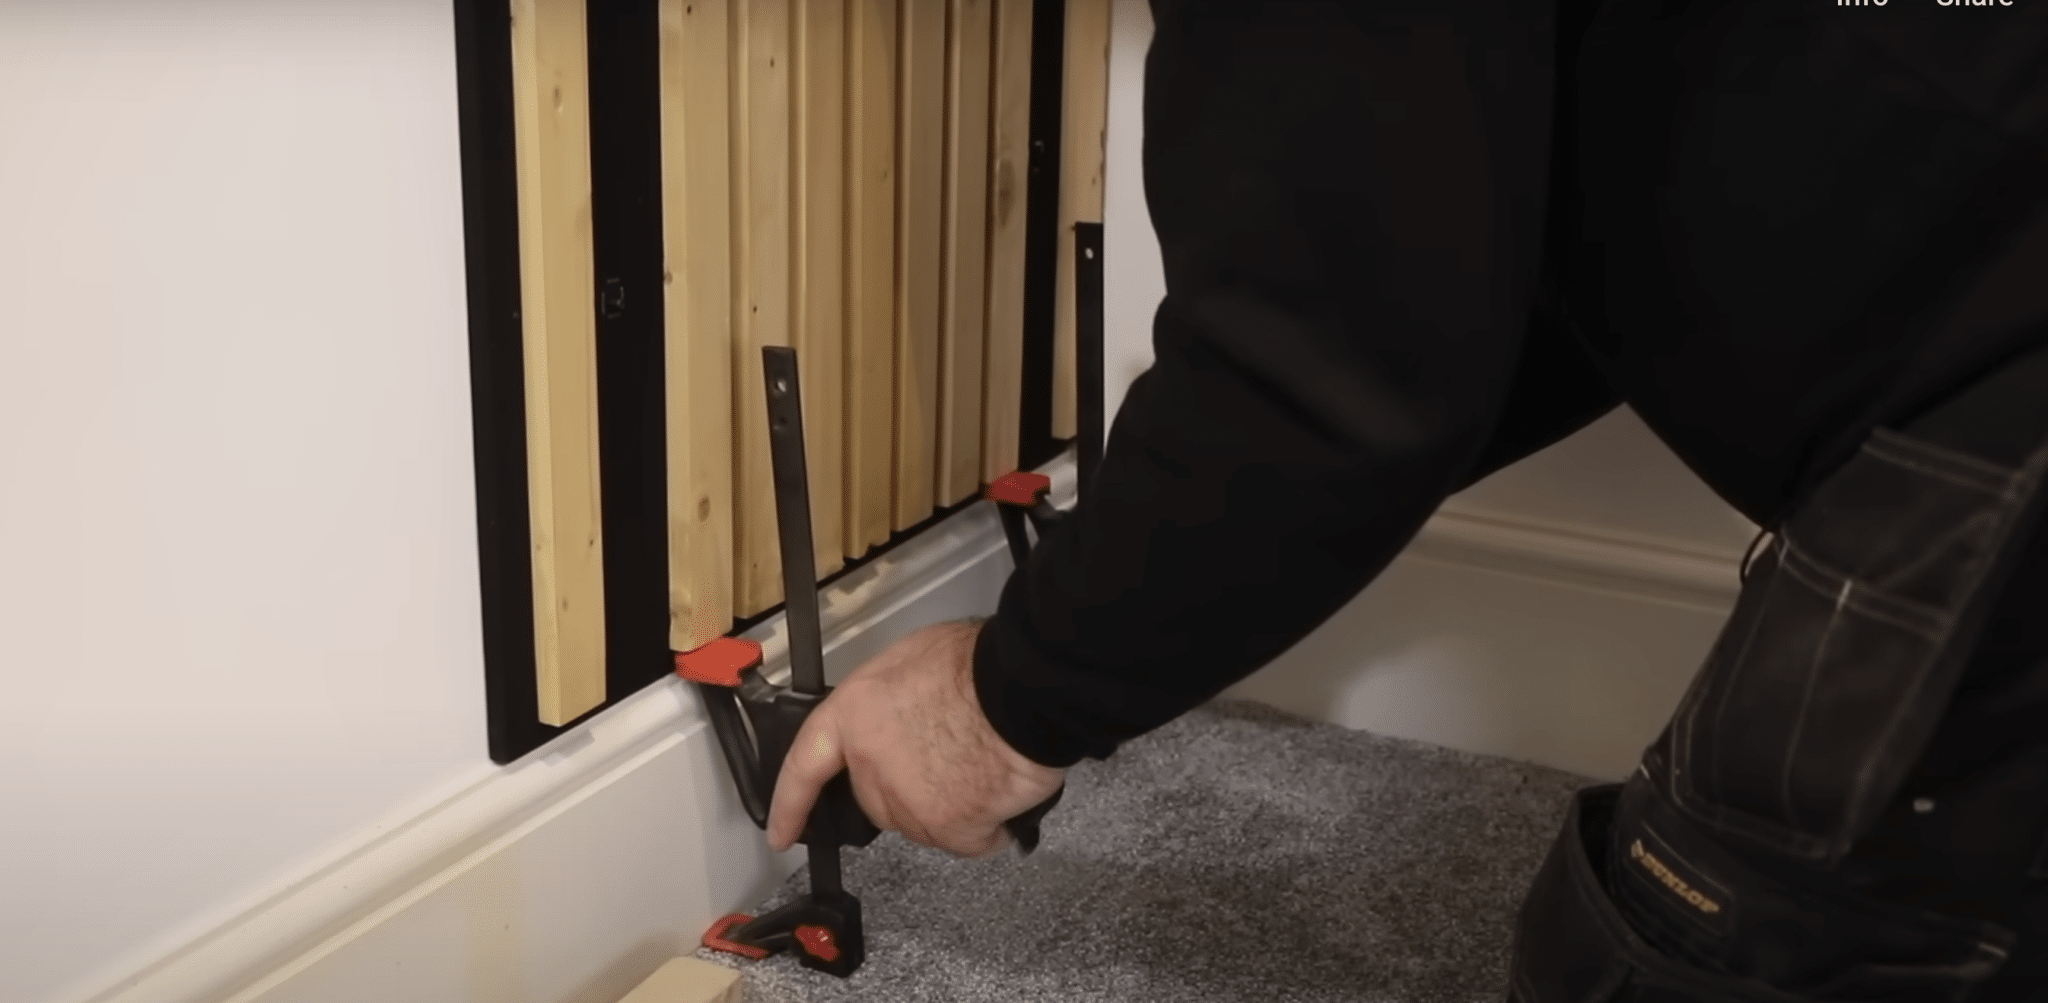
Rest boards on the skirting board initially. Use clamps to push tight against the ceiling. Mark and drill holes for wall plugs, then secure them with screws.
Step 12. Finishing Touches

Once all boards are secured, attach the remaining slats to hide the fixings. Use small oval nails and bury them just below the surface with a nail punch.
Video tutorial
Check out this YouTube video for detailed step-by-step guidance for creating a DIY Wooden Slat Wall
Tips and Tricks
- Check timber cuts regularly to ensure consistent width throughout the project.
- When using a hand planer, maintain steady movement to avoid creating uneven surfaces.
- The black fabric creates visual depth – make sure it’s pulled tight before stapling.
- Use precise spacers (18mm/3/4 inch worked well) for uniform gaps between slats.
- Create a shadow gap in corners where walls aren’t perfectly vertical to trick the eye.
- If you don’t own a table saw, consider investing in tools with the money saved on pre-made panels.
- Cut around obstacles like power sockets rather than trying to work around them.
DIY Slat Wall – Alternative Ideas
If the standard wooden slat wall doesn’t suit your needs, try these alternatives.
1. Paint the slats: Paint the slats in colors that match your room’s theme instead of using wood stain. This works well in modern spaces or children’s rooms.
2. Mixed-width pattern: Create a mixed-width pattern by cutting slats in different sizes. This adds visual interest and breaks up the uniform look. Try alternating between 25mm and 50mm widths for a striking effect.
3. Different wood types: Use different wood types for a multi-toned look without staining. Mix pine, oak, and walnut slats for natural color variation. This works especially well in rustic or natural-themed rooms.
4. Install slats horizontally: Install the slats horizontally instead of vertically. This can make a room feel wider and provides a fresh take on the typical slat wall design. It’s perfect for small spaces that need to feel larger.
5. Partial slat wall: Create a partial slat wall instead of covering the entire surface. Install slats on just the lower or upper half of the wall, or create a feature section behind key furniture.
Maintenance for Your Slat Wall
- Clean your slat wall regularly by dusting with a microfiber cloth or using a vacuum with a soft brush attachment. This prevents buildup in the gaps between slats.
- Apply a fresh coat of wood protector or oil every 1-2 years to maintain the finish. This is especially important in high-traffic areas or rooms with varying humidity.
- Check for loose slats periodically. The wood may contract or expand with temperature changes, potentially loosening the pins or nails. Secure any loose pieces promptly.
- Touch up any chips or scratches in the stain as they occur. Keep some of your original stain for these repairs to ensure color matching.
- If the black fabric backdrop gets dusty or faded, use a lint roller for quick cleaning. For stubborn dirt, you may need to remove the affected slats to clean or replace the fabric section.
Common Mistakes to Avoid
1. Rushing the planning stage leads to material wastage. Measure your wall multiple times and calculate the exact number of slats needed before cutting.
2. Using low-quality timber results in warping over time. Invest in properly dried, straight wood pieces even if they cost slightly more.
3. Skipping proper sanding leaves a rough finish that’s obvious once stained. Take time to sand all surfaces thoroughly for a professional look.
4. Applying stain unevenly creates blotchy areas. Use a consistent technique and wipe off excess stains after the same amount of time for each piece.
5. Failing to check wall straightness before installation causes alignment issues. Use a level throughout the process, not just at the beginning.
6. Not accounting for outlets or switches in your planning creates awkward cutouts. Map all wall features before cutting your backing boards.
7. Spacing slats inconsistently ruins the uniform appearance. Make proper spacers and use them diligently throughout the entire project.
Conclusion
So there you have it! Your own handmade wooden slat wall can change any room while saving you hundreds of dollars. This project might take a weekend of your time, but the results will last for years.
Remember the key steps: careful planning, precise cutting, thorough sanding, and patient installation.
Take your time with each phase for the best results.
What’s your next step? Perhaps try a small section in your home office before tackling a larger bedroom wall, or experiment with different stain colors to match your existing furniture.
Feel free to share photos of your finished slat wall in the comments below.
I’d love to see your unique spin on this project and answer any questions that come up during your build!