Feeling exposed in your own yard? A privacy fence can solve that problem fast. Most homeowners want space where they can relax without eyes watching from next door.
Building your own fence costs less than hiring help. Plus, you get to choose exactly how it looks and works for your home.
Your outdoor area becomes more useful with a good fence. Kids play freely, pets stay safe, and you gain peace of mind during family gatherings.
This guide shows you simple fence options you can build yourself. From wood panels to plant screens, these ideas work for any yard size or budget.
Ready to start your fence project? Keep reading for step-by-step plans anyone can follow.
Tools and Materials Required
Tools Required
| Tool | Purpose |
|---|---|
| Level | Ensuring posts are straight and plumb |
| Shovel/Post hole digger | Digging holes for fence posts |
| Rubber mallet | Attaching frame corners and channels |
| Drill | Creating holes in panels and securing frames |
| Screwdriver | Installing locking screws |
| Measuring tape | Accurate placement and alignment |
| Bucket | Mixing concrete for post installation |
Materials Required
| Material | Quantity | Notes |
|---|---|---|
| Design Views panels | Varies by fence length | Can use ModinX panels as alternative |
| OutDeco inground post system | 1 per panel end | Black powder-coated galvanized steel |
| Post top caps | 1 per post | Decorative finish for posts |
| Concrete mix | 1-2 bags per post | Can be cut in half for easier handling |
| Channel system components | 1 set per panel | Includes side and top/bottom channels |
| Corner connectors | 4 per panel | Connects channel pieces |
| Channel locking screws | 8 per panel | Secures frame corners |
| Support pins | 4 per panel | Provides additional wind resistance |
Step-By-Step Process on Making DIY Privacy Fence
Step 1: Gather Your Materials and Tools
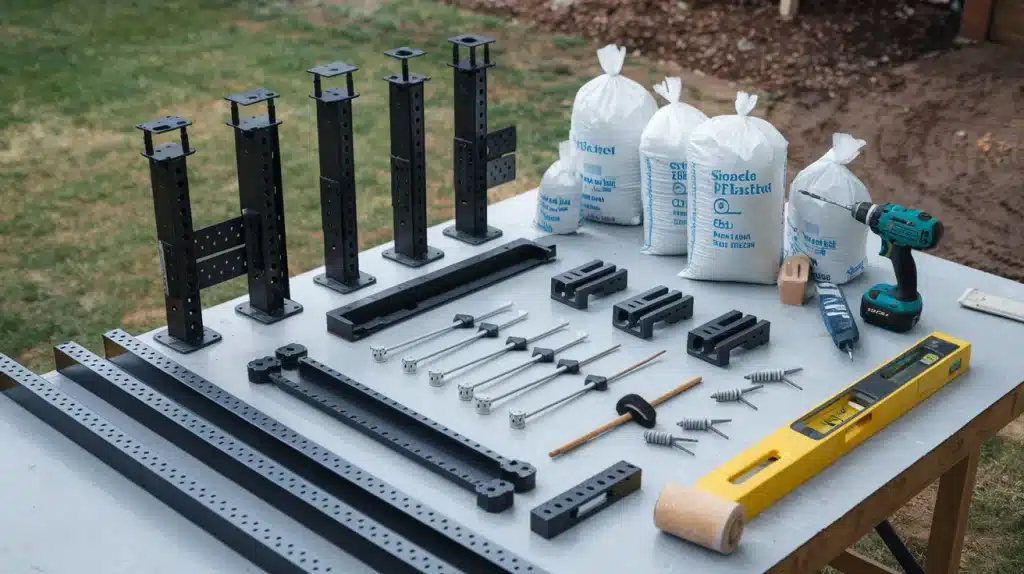
Before starting, collect all needed items. You’ll need Design View panels, black steel posts with pre-drilled holes, top caps, and concrete mix.
For the frame, gather corner connectors and side channels with slots. Tools include a drill with bit, pins, rubber mallet, screws, and a level. These materials create a fence that’s both strong and good-looking.
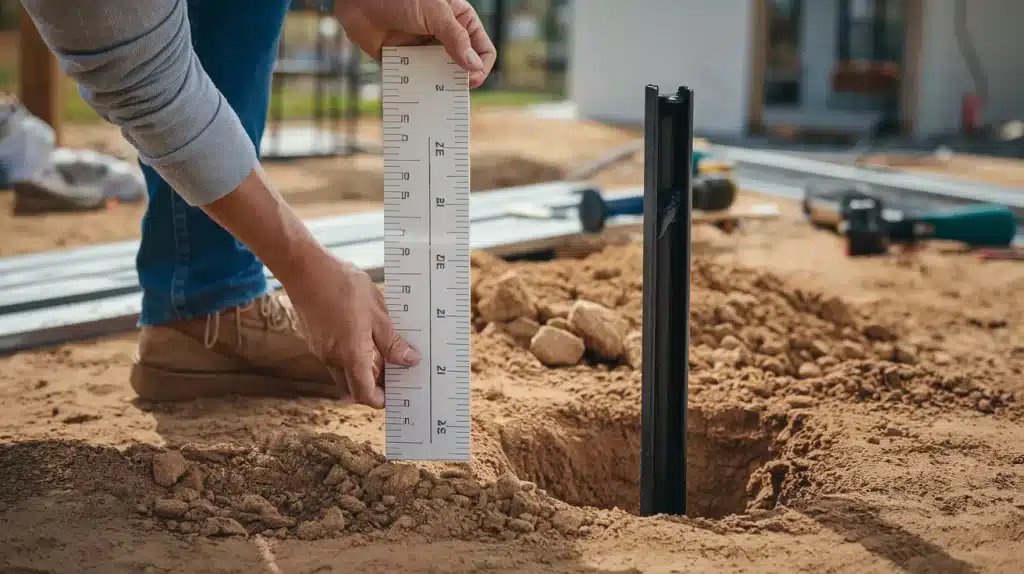
Step 2: Set up the First Post
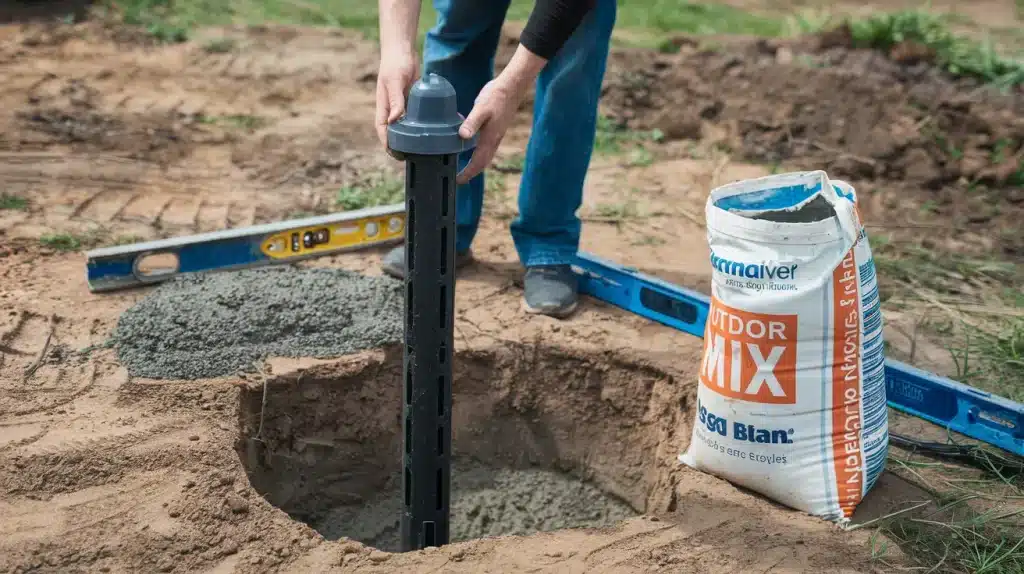
Place your first post with the flat side facing out. Put the top cap on before setting it. Dig a hole deep enough for the post.
Place it in and pour concrete around it. Check that the post stands 75 inches above ground. Make sure it’s level and straight while the concrete sets.
Step 3: Use the Panel to Space the Next Post
Use a panel as a guide for placing your second post. This ensures perfect spacing. Dig the second hole, place the post, and fill with concrete. Check again that it’s level and straight. This method works better than measuring and helps all panels fit right.
Step 4: Assemble the Channel System
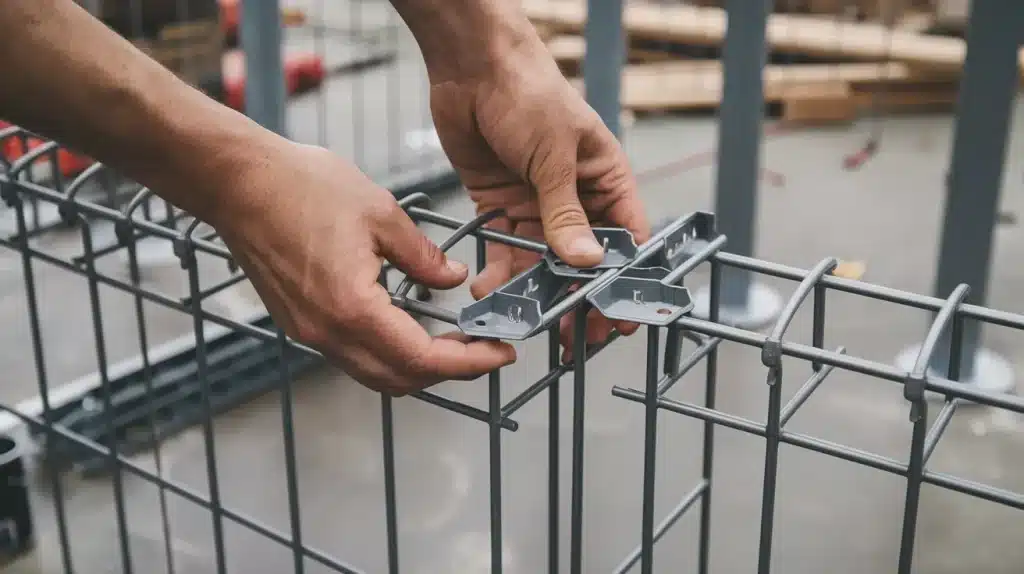
Connect two side channels and one bottom channel with corner connectors. The side channels have slots for height adjustments. Attach this frame to your first post. This partial frame helps set up the next post and keeps spacing correct throughout your fence line.
Step 5: Drill Holes in the Panels
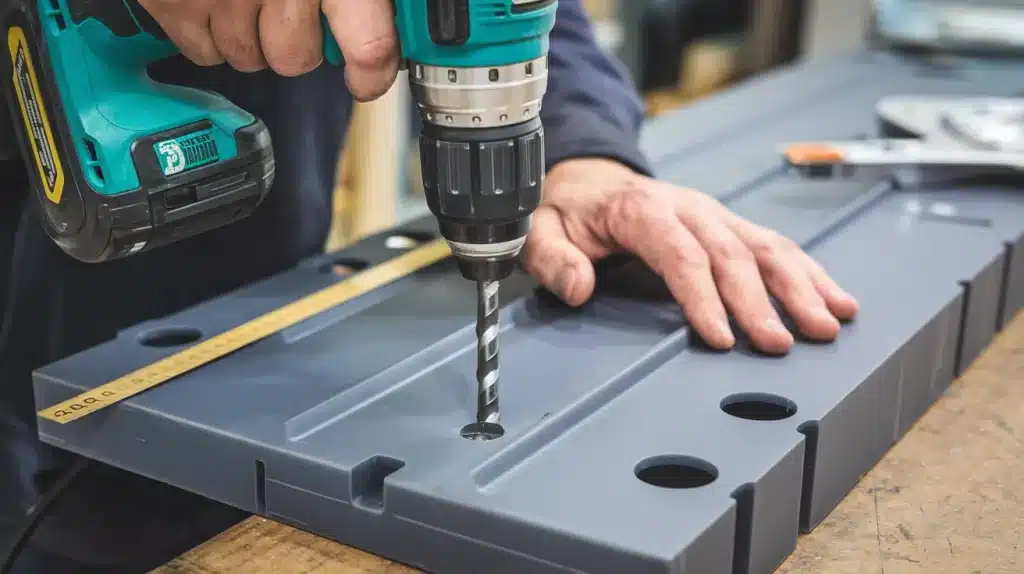
Drill holes in your panels with the provided bit. On each 72-inch side, make one hole 36 inches down. On each 36-inch side, drill two holes 8 inches from the edge. Keep all holes 1/4 inch from the panel edge for proper fitting.
Step 6: Insert the Panel Into the Frame
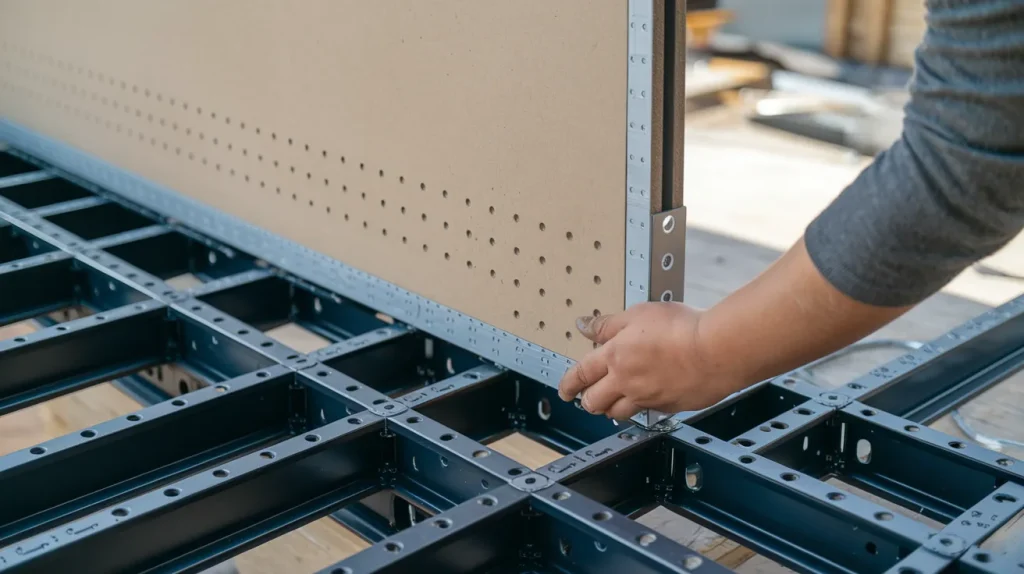
Put the panel into your channel system. Slide it halfway up to see the drilled holes. Push a pin into each hole to secure the panel. These pins prevent movement and add support against wind. The panels are flexible yet strong once installed properly.
Step 7: Attach the Top Channel
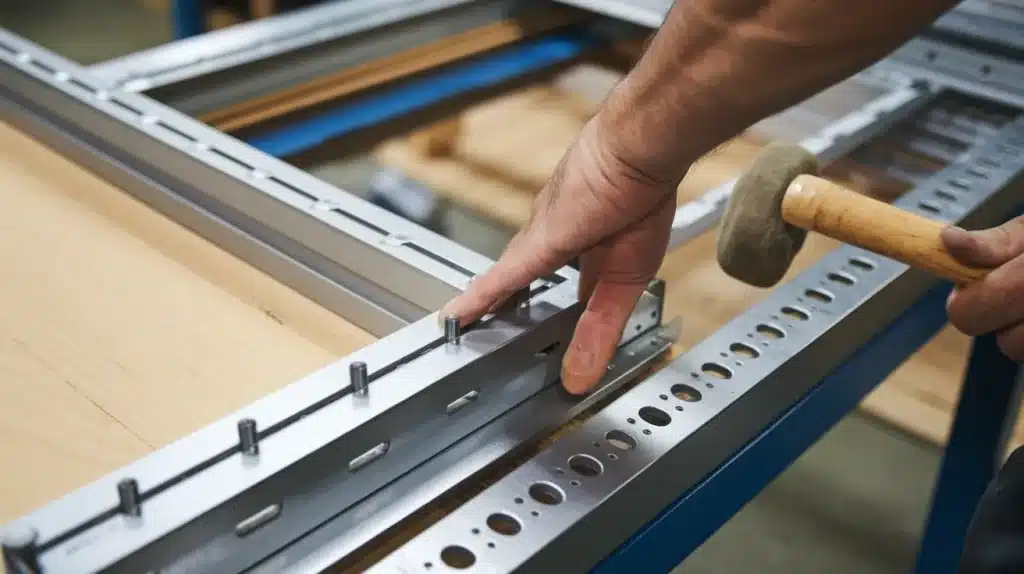
Connect one corner of the top channel to the frame. Slide it across over the pins. Use your rubber mallet to attach the other corner. Join the top channel to the side channels firmly. This completes the frame around your panel and adds strength to the section.
Step 8: Lock the Frame in Place
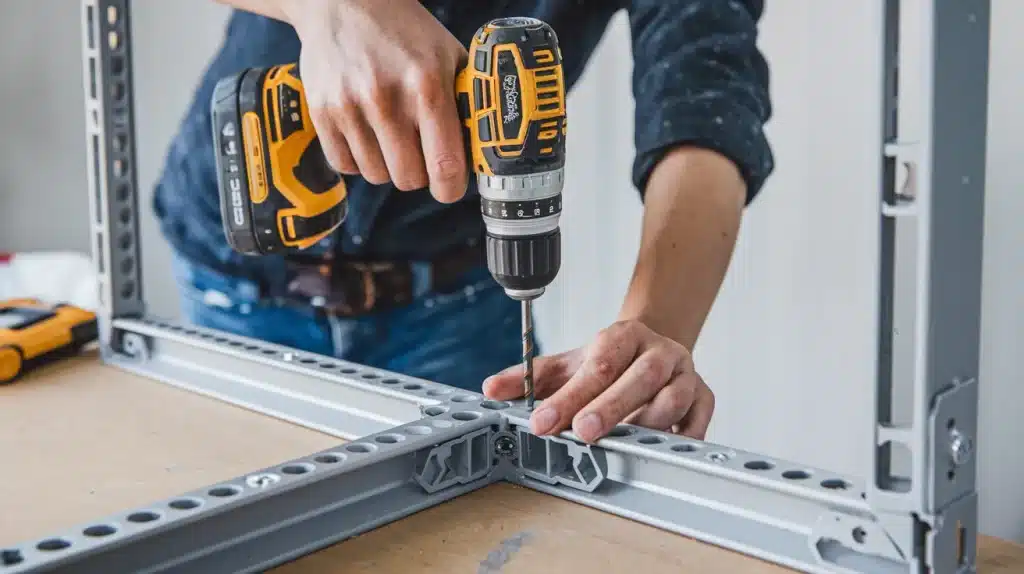
Use the drill bit to make holes through the metal sides, not through the plastic corners. Insert locking screws on both sides of the frame. This step prevents any movement over time and ensures your fence remains stable in all weather conditions.
Step 9: Continue Installing Additional Panels
For a longer fence, repeat all steps for each new section. Use installed panels to place the next post. Build the next frame and add the panel. Work section by section until your fence is complete. This method ensures even spacing and a uniform look.
Step 10: Enjoy Your New Fence
Your finished fence adds privacy and style to your yard. Made from recycled plastic, it needs little upkeep. You can set panels upright or sideways based on your preference. This fence enhances your outdoor space while providing the privacy you want.
For a visual tutorial, refer to this video by
5 Privacy Fence Ideas for Your Yard
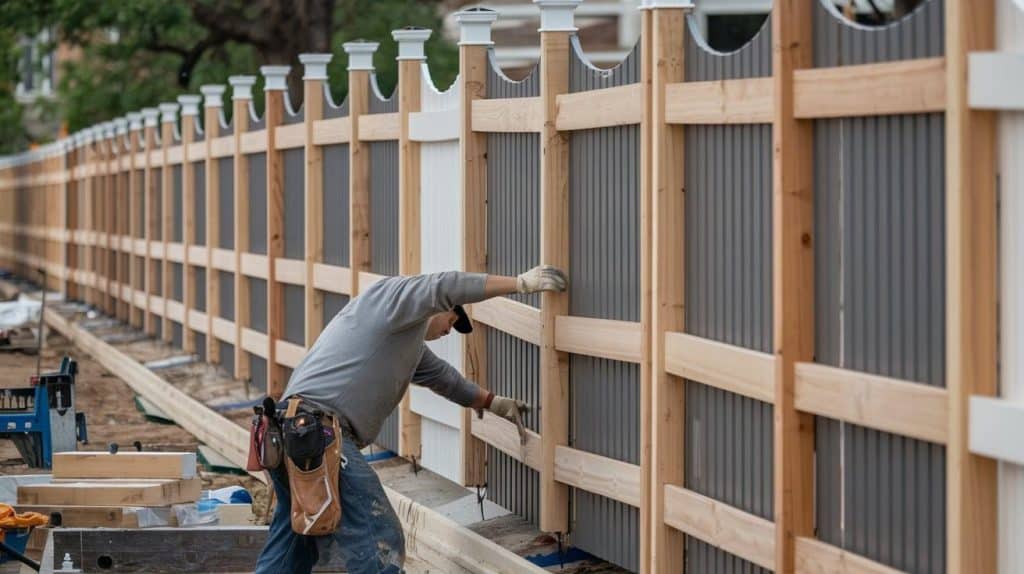
1. Recycled Plastic Panel Fence
Create a modern, low-maintenance privacy fence using recycled plastic panels with a metal frame system. These panels come in various styles and can be installed vertically or horizontally.
The panels are durable, weather-resistant, and won’t rot, warp, or need repainting. Installation involves setting posts in concrete and connecting panels with a channel system.
Best for: Homeowners looking for a long-lasting, eco-friendly option with minimal upkeep.
2. Natural Bamboo Screen Fence
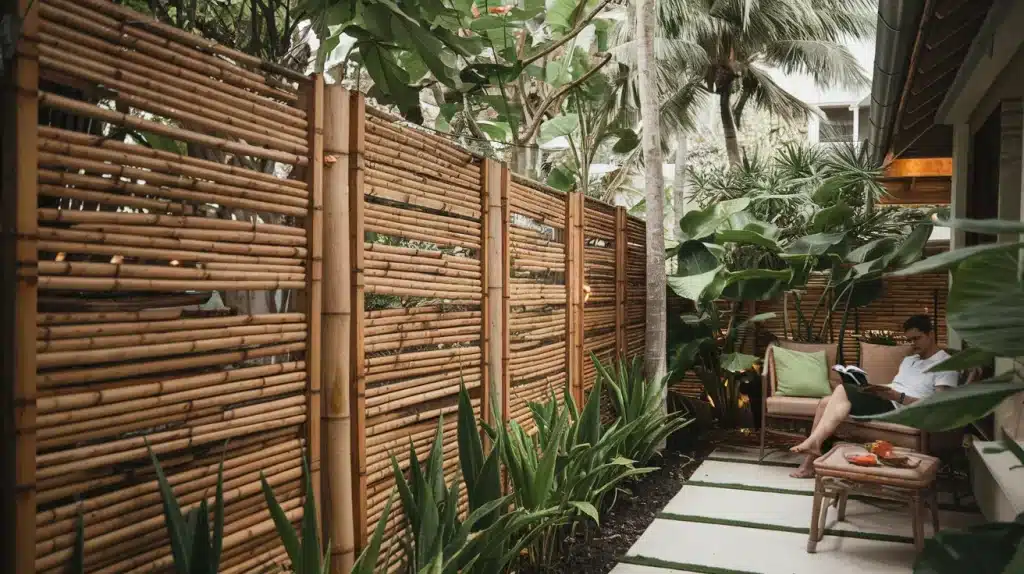
Install bamboo fencing for a natural, tropical look that offers excellent privacy. Bamboo screens can be attached to existing fence frameworks or mounted between posts.
This option provides a warm, natural texture while being relatively cost-effective and quick to install.
Best for: Creating a relaxed, organic feel while maintaining privacy. Works well in gardens with Asian-inspired design elements.
3. Living Green Wall Fence
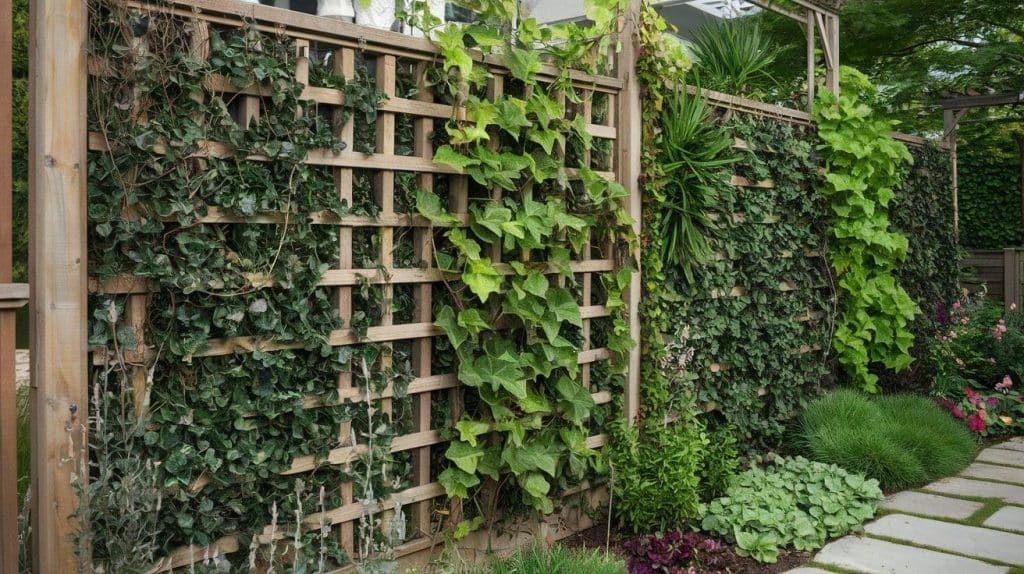
Combine wooden trellises or wire mesh panels with climbing plants to create a living privacy screen. Options like ivy, clematis, jasmine, or grape vines will grow to fill in gaps, providing both beauty and privacy. This approach takes time to mature but results in a fence that improves with age.
Best for: Gardeners who want to blend their privacy solution with their landscaping for a seamless, natural look.
4. Repurposed Wood Pallet Fence
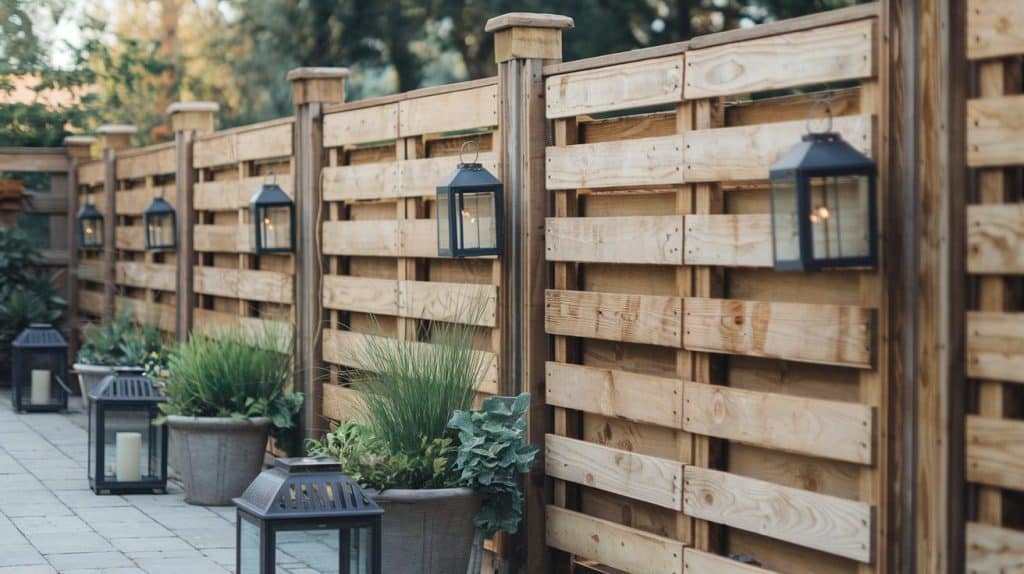
Transform wooden shipping pallets into a unique privacy fence. Pallets can be mounted between posts, either as-is or disassembled and rearranged for a more finished look.
Sand the wood smooth and apply a weather-resistant stain or paint to extend its life and add personal style.
Best for: Budget-conscious DIYers looking for an inexpensive option with rustic charm.
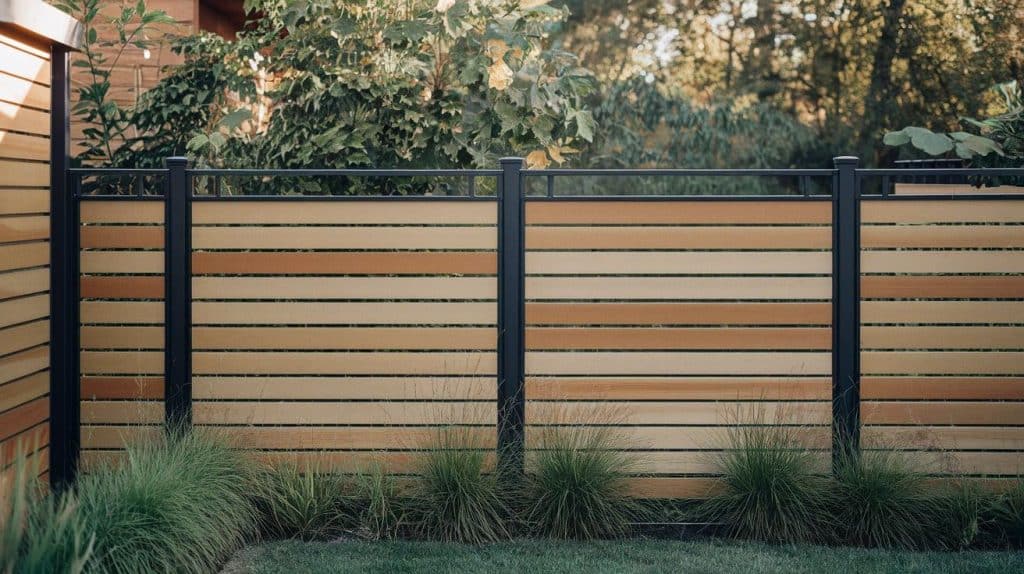
5. Composite Wood Panel Fence
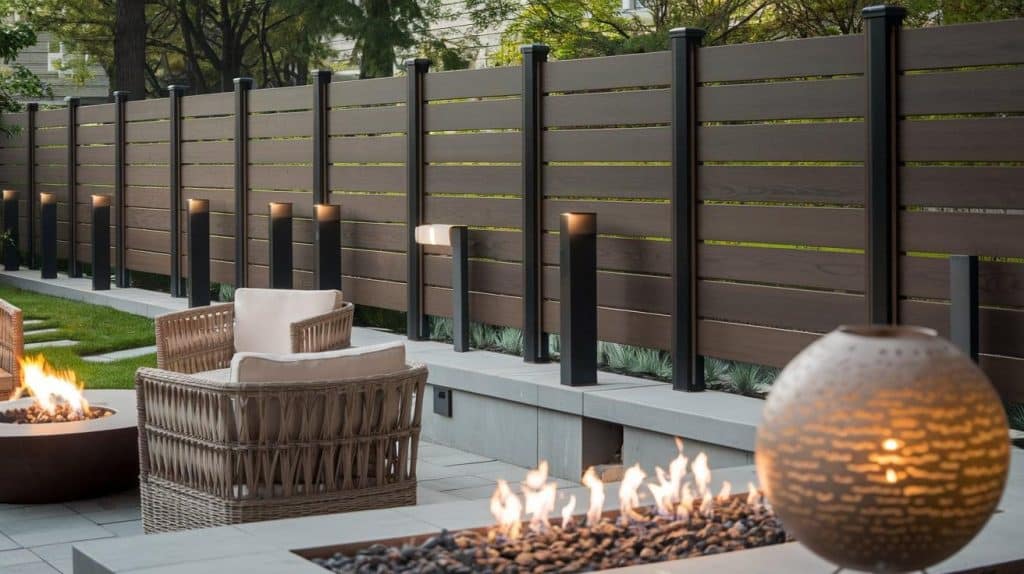
Install composite wood panels for the look of wood without maintenance. These panels resist rot, insects, and weather damage while providing complete privacy.
Many styles feature textured surfaces that mimic real wood grain. The panels connect to posts using brackets or channel systems similar to the plastic panel option.
Best for: Homeowners who want the traditional look of wood with modern durability and reduced maintenance requirements.
Note: Each of these fence ideas offers a different balance of cost, installation difficulty, maintenance needs, and visual appeal.
Consider your yard’s specific requirements, your budget, and how much time you want to spend on installation and upkeep when choosing the right privacy fence for your space.
Elements to Add to Enhance Your Privacy Fence
A plain privacy fence serves its basic purpose, but with a few additions and changes, you can turn it into a standout feature of your yard. Here are some ways to improve your existing privacy fence without starting from scratch.
1. Add Plants and Greenery
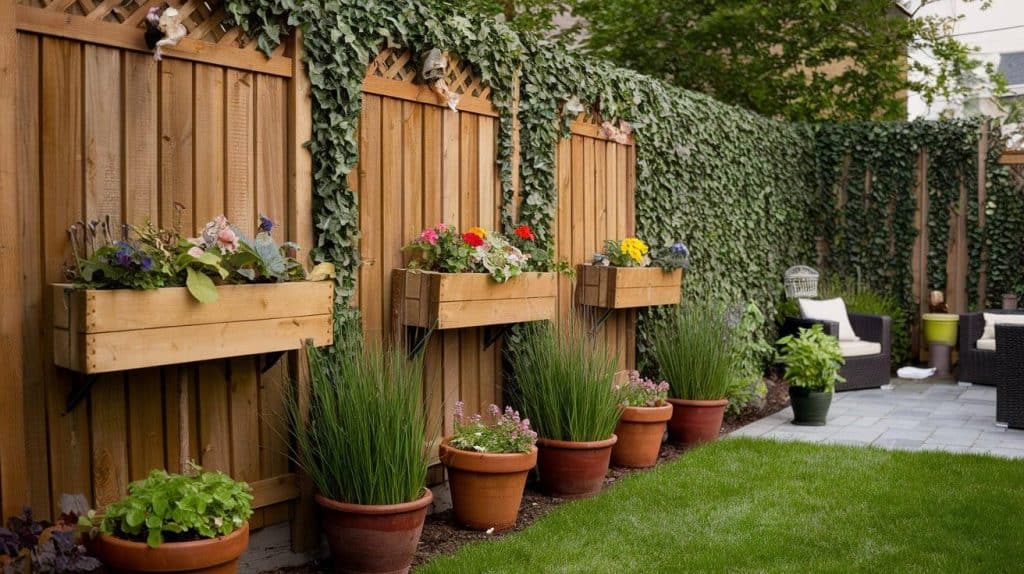
Bring life to your fence by adding plants. You can attach planter boxes directly to wooden fences or place tall potted plants along the base. Climbing plants like morning glories or ivy can soften hard fence lines and add color throughout the growing season.
For a more permanent solution, plant shrubs or ornamental grasses along the fence line. These not only add beauty but can also increase privacy by adding height and fullness to your boundary.
2. Incorporate Lighting
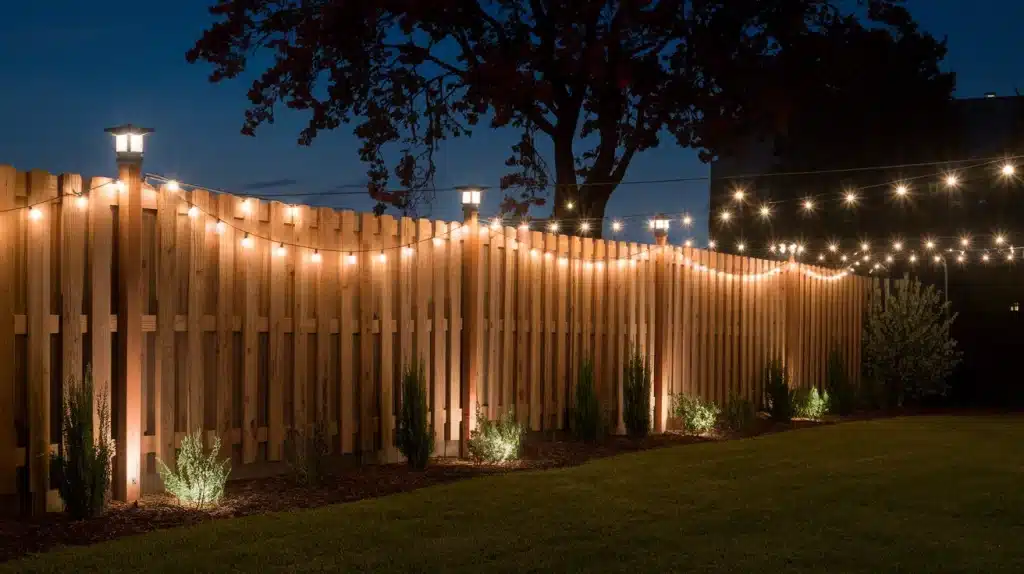
The right lighting can transform your fence after dark. Solar-powered post cap lights are simple to install and require no wiring. String lights hung along the fence create a warm, welcoming atmosphere for evening gatherings.
For a more dramatic effect, install uplights at the base of your fence to highlight its texture or spotlight specific decorative elements.
3. Personalize with Art and Decor
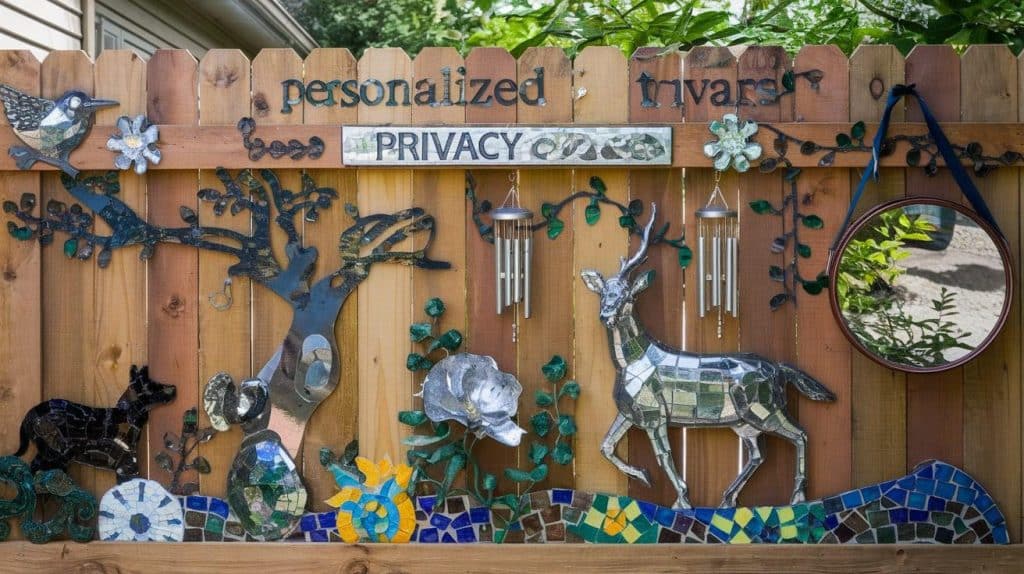
Make your fence uniquely yours by adding outdoor art pieces. Weather-resistant metal sculptures, mosaic tiles, or painted designs can all turn your fence into an expression of your personal style.
Hanging items like wind chimes, outdoor mirrors, or decorative birdhouses adds interest and can make your yard feel larger and more layered.
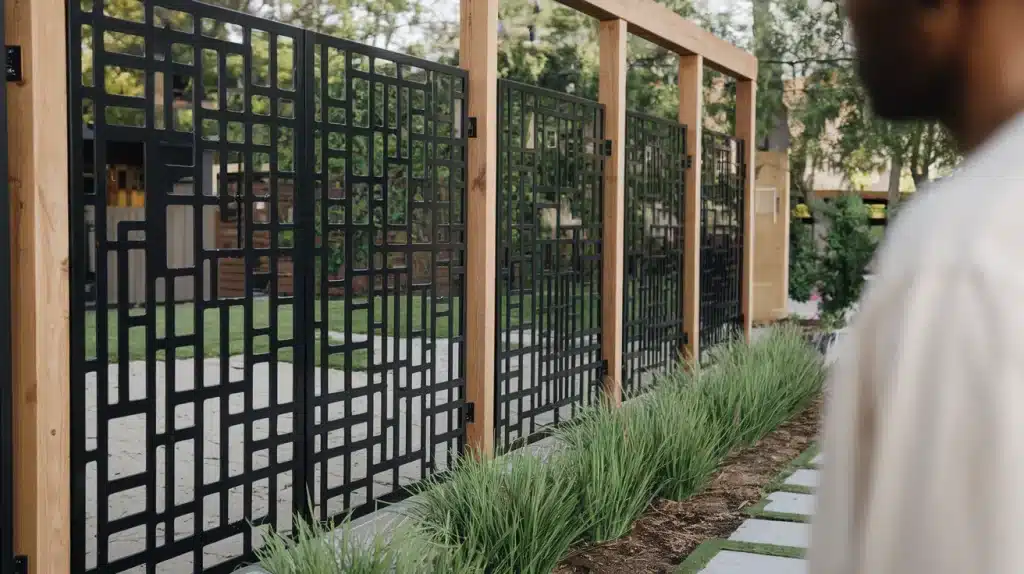
4. Create a Mixed Material Look
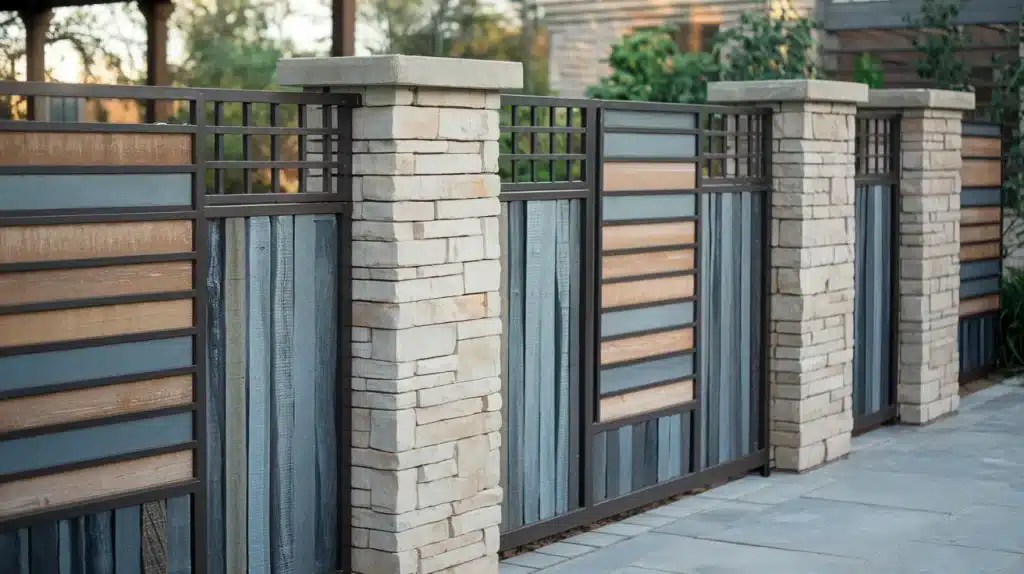
Update the look of your fence by combining materials. Add metal panels between wooden fence sections, or incorporate stone or brick columns between fence panels. This mixing of textures and materials adds visual interest and can improve the strength of your fence.
5. Build in Functional Elements
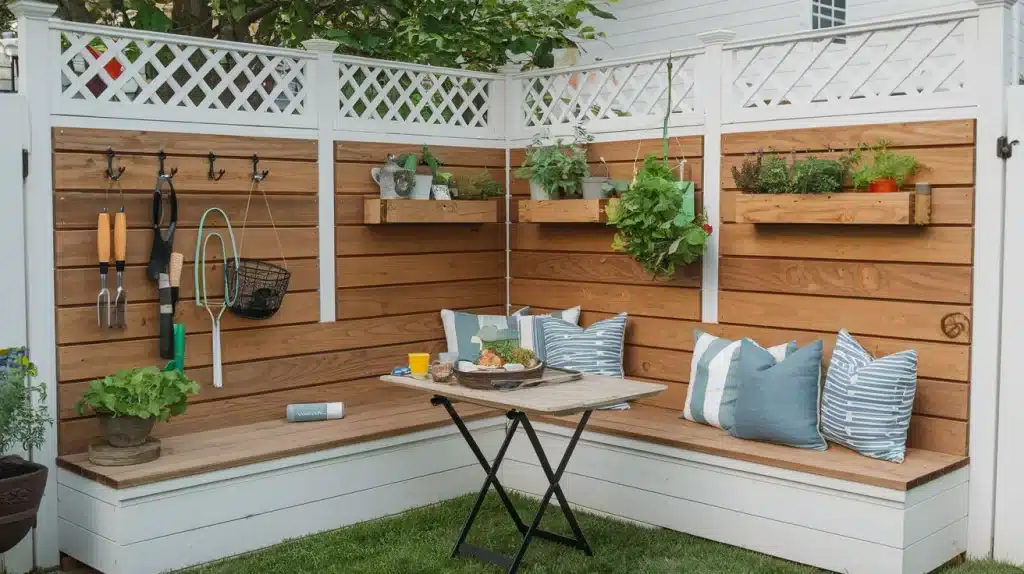
Make your fence work harder by adding built-in features. Consider integrating a bench seat, a fold-down table for outdoor dining, or storage nooks for garden tools. These additions save space in your yard while making your fence more useful.
You can also add small shelves or hooks for placing potted herbs, hanging garden tools, or displaying small decorative items.
By enhancing your existing privacy fence with these ideas, you can create a more beautiful yard space that better meets your needs while maintaining the privacy you want.
Common Mistakes to Avoid when Building a Privacy Fence
When creating your DIY privacy fence, steering clear of these common errors will save you time, money, and frustration:
- Not checking local rules – Many areas have specific height restrictions and permit requirements for fences
- Ignoring property lines – Building over your boundary can lead to disputes with neighbors and possible removal
- Setting posts too shallow – Posts need proper depth (typically 1/3 of their height) to stay stable in all weather
- Using untreated wood – Non-treated lumber will rot quickly when exposed to ground contact and weather
- Poor post spacing – Posts placed too far apart will cause sagging panels and structural weakness
- Not accounting for ground slope – Failing to step your fence on slopes leads to gaps at the bottom or uneven tops
- Skipping the measuring stage – Rushing into installation without proper measurements causes misalignment
- Mixing incompatible materials – Some metals corrode when in contact with certain woods or chemicals
- Not allowing for wood expansion – Wood expands and contracts with moisture; failing to account for this causes warping
- Forgetting about gate placement – Poor gate planning leads to awkward yard access and wasted fence materials
Maintenance Tips for Different Fence Materials
1. Wood Fence Maintenance: Regular inspection for loose boards, popped nails, and early signs of rot will extend your wood fence’s life. Apply a new coat of stain or sealant every 2-3 years, and replace damaged boards promptly to prevent further issues.
2. Vinyl Fence Maintenance: Clean vinyl fences once or twice yearly with mild soap and water to remove dirt and prevent staining. Check for cracks or warping after severe weather, and tighten any loose hardware to maintain structural integrity.
3. Metal Fence Maintenance: Inspect metal fences for rust spots and address them immediately by sanding and applying rust-resistant paint. Tighten loose screws and brackets yearly, and clean with a gentle cleaner to remove dirt and prevent corrosion.
4. Composite Fence Maintenance: While requiring less upkeep than wood, composite fences benefit from annual cleaning with soap and water. Remove any mold or mildew with a specialized cleaner, and check that posts remain solid and secure.
5. Living Fence Maintenance: Trim plant-based privacy screens regularly to maintain desired height and fullness. Water during dry periods, apply fertilizer according to plant type, and watch for pests or diseases that could affect your living fence.
Conclusion
A well-built privacy fence does more than just mark your property lines—it creates a personal retreat in your own yard.
By now, you understand the process of building a sturdy fence, ways to make it stand out, and how to keep it looking good for years to come.
Remember that a fence is both practical and personal. The design you choose and the extras you add reflect your home’s character. Whether you’ve opted for recycled plastic, natural bamboo, or a living green wall, each fence type brings its own benefits to your outdoor space.
With proper planning and regular care, your privacy fence will serve you well through changing seasons. The time and effort you invest today will pay off in years of enjoyment in your more private, secure yard.